Table of Contents
Advertisement
Available languages
Available languages
Quick Links
Advertisement
Chapters
Table of Contents

Related Manuals for AEG SKS51001S0


Summary of Contents for AEG SKS51001S0
- Page 1 NL Gebruiksaanwijzing SKS51001S0 EN User manual...
-
Page 2: Table Of Contents
10. MILIEUBESCHERMING ............17 VOOR PERFECTE RESULTATEN Bedankt dat u voor dit AEG product heeft gekozen. Dit apparaat is ontworpen om vele jaren uitstekend te presteren, met innovatieve technologieën die het leven gemakkelijker helpen maken –... -
Page 3: Veiligheidsinformatie
NEDERLANDS VEILIGHEIDSINFORMATIE In het belang van uw veiligheid en om • Als dit apparaat, dat voorzien is van een correct gebruik te kunnen waarbor- een magnetische deursluiting, een ou- gen is het van belang dat u, alvorens het der apparaat vervangt, dat voorzien is apparaat te installeren en in gebruik te van een veerslot (slot) op de deur of nemen, deze gebruiksaanwijzing, inclu-... - Page 4 WAARSCHUWING! 1.4 Onderhoud en reiniging Alle elektrische onderdelen (net- • Schakel het apparaat uit en trek de snoer, stekker, compressor) mo- stekker uit het stopcontact voordat u gen om gevaar te voorkomen onderhoudshandelingen verricht. uitsluitend worden vervangen door een erkende onderhouds- •...
-
Page 5: Bediening
NEDERLANDS 1.6 Onderhoud digen, niet in het koelcircuit en evenmin in de isolatiematerialen. • Alle elektrotechnische werkzaamhe- Het apparaat mag niet worden den die noodzakelijk zijn voor het uit- weggegooid bij het normale voeren van onderhoud aan het appa- huishoudelijke afval. Het isolatie- raat, dienen uitgevoerd te worden schuim bevat ontvlambare gas- door een gekwalificeerd elektricien of... -
Page 6: Dagelijks Gebruik
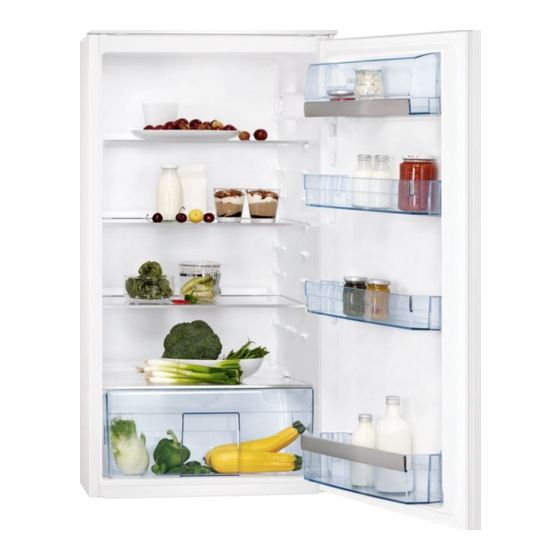
3. DAGELIJKS GEBRUIK 3.1 Voordat u het apparaat de typische geur van een nieuw product weg te nemen. Droog daarna grondig voor de eerste keer gebruikt Voordat u het apparaat voor de eerste Gebruik geen oplosmiddelen of keer gebruikt, wast u de binnenkant en schuurmiddelen. -
Page 7: Reiniging En Onderhoud
NEDERLANDS speciaal daarvoor bedoelde lade(n) ge- Melkflessen: deze moeten een afdekdop plaatst worden. hebben en opgeslagen worden in het Boter en kaas: dit moet in speciale lucht- flessenrek in de deur. dichte bakjes gelegd of in aluminiumfo- Bananen, aardappelen, uien en knof- lie of plastic zakjes gewikkeld worden look, indien niet verpakt, mogen niet in om zoveel mogelijk lucht buiten te slui-... -
Page 8: Problemen Oplossen
5.3 Het ontdooien van de koelkast Rijp wordt elke keer als de compressor- motor tijdens normale werking stopt, au- tomatisch van de verdamper van het koelvak verwijderd. Het dooiwater loopt via een gootje in een speciale opvang- bak aan de achterkant van het apparaat, boven de compressormotor, waar het verdampt. - Page 9 NEDERLANDS Probleem Mogelijke oorzaak Oplossing De deur is niet goed ge- Zie 'De deur sluiten'. sloten. De deur is te vaak open Laat de deur niet langer gedaan. open staan dan noodzake- lijk. De temperatuur van het Laat het product afkoelen product is te hoog.
-
Page 10: Montage
10 www.aeg.com 6.1 Het lampje vervangen Trek de stekker uit het stopcontact. Verwijder de schroef van de afdek- king van het lampje. Verwijder de afdekking van het lampje (raadpleeg de afbeelding). Vervang het kapotte lampje door een nieuw lampje met hetzelfde ver- mogen dat specifiek bedoeld is voor huishoudelijke apparaten. - Page 11 NEDERLANDS stemming met de geldende regels, ligheidsmaatregelen niet worden nage- raadpleeg hiervoor een gekwalificeerd leefd. elektricien. Dit apparaat voldoet aan de EU. richtlij- De fabrikant neemt geen verantwoorde- nen. lijkheid op zich als de bovenstaande vei- 7.3 Omkeerbaarheid van de deur De deur van het apparaat gaat naar rechts open.
- Page 12 12 www.aeg.com 7.5 De installatie van het Ga als volgt te werk: apparaat LET OP! Zorg ervoor dat het aansluitsnoer vrij kan bewegen. Knip indien nodig de zelfklevende af- dichtstrip op maat en bevestig het op het apparaat zoals aangegeven op de afbeelding.
- Page 13 NEDERLANDS Bevestig het apparaat met 4 schroeven in de nis. Verwijder het juiste onderdeel van het afdekplaatje van het scharnier (E). Verwij- der onderdeel DX als het scharnier rechts staat, of onderdeel SX als het scharnier links staat. Bevestig de afdekplaatjes (C, D) aan de uitsteeksels en de gaten van de schar- nieren.
- Page 14 14 www.aeg.com Maak de onderdelen (Ha), (Hb), (Hc) en (Hd) los. Monteer onderdeel (Ha) aan de binnen- ca. 50 mm kant van de keukenkastdeur. 90° 21 mm 90° ca. 50 mm 21 mm Duw onderdeel (Hc) op onderdeel (Ha). Zet de deur van het apparaat en de keu-...
-
Page 15: Geluiden
NEDERLANDS Verwijder de haken en markeer een af- stand van 8 mm vanaf de buitenrand van 8 mm de deur waar de spijker moet worden vastgemaakt (K). Plaats het kleine vierkantje terug op de geleider en bevestig het met de bijgele- verde schroeven. - Page 16 16 www.aeg.com HISSS! BRRR SSSRRR! SSSRRR! HISSS! HISSS! BLUBB! CRACK! CRACK! BLUBB!
-
Page 17: Technische Gegevens
NEDERLANDS 9. TECHNISCHE GEGEVENS Afmetingen van de uit- sparing Hoogte 1030 mm Breedte 560 mm Diepte 550 mm Voltage 230-240 V Frequentie 50 Hz De technische gegevens staan op het ty- peplaatje aan de linker binnenkant in het apparaat en op het energielabel. 10. - Page 18 10. ENVIRONMENT CONCERNS ..........32 FOR PERFECT RESULTS Thank you for choosing this AEG product. We have created it to give you impeccable performance for many years, with innovative technologies that help make life simpler –...
-
Page 19: Safety Information
ENGLISH SAFETY INFORMATION In the interest of your safety and to en- 1.2 General safety sure the correct use, before installing WARNING! and first using the appliance, read this user manual carefully, including its hints and warnings. To avoid unnecessary mis- Keep ventilation openings, in the appli- takes and accidents, it is important to ance enclosure or in the built-in struc-... - Page 20 20 www.aeg.com Make sure that the power plug is 1.5 Installation not squashed or damaged by the For electrical connection careful- back of the appliance. A squashed ly follow the instructions given in or damaged power plug may specific paragraphs.
-
Page 21: Operation
ENGLISH ble regulations to obtain from changer. The materials used on your local authorities. Avoid this appliance marked by the damaging the cooling unit, espe- symbol are recyclable. cially at the rear near the heat ex- 2. OPERATION A medium setting is generally 2.1 Switching on the most suitable. -
Page 22: Helpful Hints And Tips
22 www.aeg.com 3.3 Positioning the door shelves To permit storage of food packages of various sizes, the door shelves can be placed at different heights. 4. HELPFUL HINTS AND TIPS 4.1 Hints for energy saving 4.3 Hints for refrigeration • Do not open the door frequently or... -
Page 23: What To Do If
ENGLISH Do not pull, move or damage only cleaned with warm water with a little any pipes and/or cables inside washing-up liquid added. the cabinet. After cleaning, reconnect the equipment Never use detergents, abrasive to the mains supply. powders, highly perfumed clean- ing products or wax polishes to 5.2 Periods of non-operation clean the interior as this will dam-... - Page 24 24 www.aeg.com Problem Possible cause Solution The appliance does The appliance is switched Switch on the appliance. not operate. The off. lamp does not oper- ate. The mains plug is not Connect the mains plug to connected to the mains the mains socket correctly.
-
Page 25: Installation
ENGLISH Problem Possible cause Solution The temperature in The temperature regula- Set a lower temperature. the appliance is too tor is not set correctly. high. 6.1 Replacing the lamp Disconnect the mains plug from the mains socket. Remove the screw from the lamp cover. - Page 26 26 www.aeg.com The appliance must be earthed. The The manufacturer declines all responsi- power supply cable plug is provided bility if the above safety precautions are with a contact for this purpose. If the do- not observed. mestic power supply socket is not earth- This appliance complies with the E.E.C.
- Page 27 ENGLISH 7.5 Installing the appliance Do the following steps: CAUTION! Make sure that the mains cable can move freely. If necessary cut the adhesive sealing strip and apply it to the appliance as shown in figure. Install the appliance in the niche. Push the appliance in the direction of the arrow (1) until the upper gap cover stops against the kitchen furniture.
- Page 28 28 www.aeg.com Attach the appliance to the niche with 4 screws. Remove the correct part from the hinge cover (E). Make sure to remove the part DX, in the case of right hinge, SX in op- posite case. Attach the covers (C, D) to the lugs and the hinge holes.
- Page 29 ENGLISH Disconnect the parts (Ha), (Hb), (Hc) and (Hd). Install the part (Ha) on the inner side of ca. 50 mm the kitchen furniture door. 90° 21 mm 90° ca. 50 mm 21 mm Push the part (Hc) on the part (Ha). Open the appliance door and the kitch- en furniture door at an angle of 90°.
-
Page 30: Noises
30 www.aeg.com Remove the brackets and mark a dis- tance of 8 mm from the outer edge of 8 mm the door where the nail must be fitted (K). Place the small square on the guide again and fix it with the screws supplied. - Page 31 ENGLISH HISSS! BRRR SSSRRR! SSSRRR! HISSS! HISSS! BLUBB! CRACK! CRACK! BLUBB!
-
Page 32: Technical Data
32 www.aeg.com 9. TECHNICAL DATA Dimension of the recess Height 1030 mm Width 560 mm Depth 550 mm Voltage 230-240 V Frequency 50 Hz The technical information are situated in the rating plate on the internal left side of the appliance and in the energy label. - Page 33 ENGLISH...
- Page 34 34 www.aeg.com...
- Page 35 ENGLISH...
- Page 36 www.aeg.com/shop...
Need help?
Do you have a question about the SKS51001S0 and is the answer not in the manual?
Questions and answers