
Related Manuals for Sureguard Wireless Dog e-Fence


Summary of Contents for Sureguard Wireless Dog e-Fence
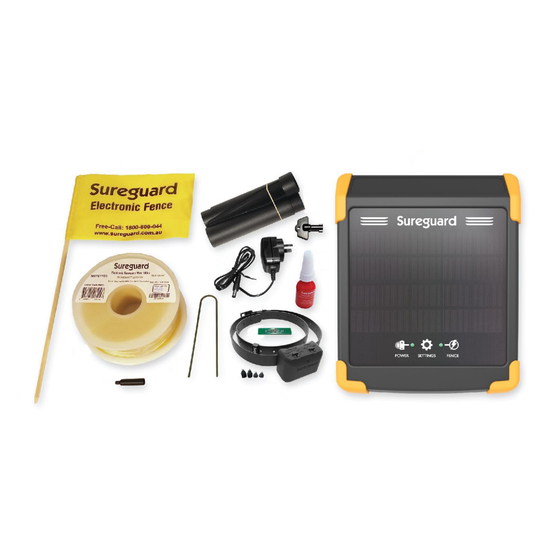
- Page 1 User Instructions Wireless Dog e-Fence - Starter Kit With Rechargeable Collar © Sureguard 2018 www.sureguard.com.au – Revision #5 - October 2018...
- Page 3 Dog Fencing Re-envisioned Sureguard's Latest Wireless Dog Fence. Combines recent innovations in solar panel and battery technologies. Prevent Your Dogs • Jumping, Climbing & Digging at fences. • Digging up your garden. • Escaping through an open driveway. • Running at speed to escape or chase other animals.
-
Page 4: Specification
Specification Energiser • Maximum Boundary Length: 1600m • Minimum Containment Area Width or Length: 10m Radio Collar • Wearing Duration: Maximum 12 hours in any 24-hour period. • Dimensions: 55.7mm x 41.6mm x 30.0mm • Weight: 53g • Ingress Protection Rating: IP57 (30 minutes water immersion at 1m) •... - Page 5 Tip: Do you have areas where you don't want the Boundary Wire to activate your dogs’ collars? Sureguard makes a Dual-Wire that creates a cancellation of the signal while still allowing the main signal to pass to other areas of your boundary. By deleting the signal,...
-
Page 6: Key Features
KEY Features: Yellow represents the Boundary Wire and Red the radio signal. This double Yellow represents the Dual- Wire with signal deleted. (1) Simple Boundary The most common installation is this simple boundary design consists of a single wire running around the whole property. - Page 7 (5) Cancel Boundary Use the Dual-Wire as illustrated to cancel the signal on a small section of the boundary. Your dog will have access to this area. (6) Incorrect Usage This example shows a common mistake when using Dual- Wire to cancel the signal.
-
Page 8: Wiring Techniques
Wiring Techniques • Try to keep the wire at about the same height above or below ground otherwise the Activation Distance will vary around the boundary. • The Activation Distance at corners can be greater than straight sections because the signal is detected from two directions at once and added together. - Page 9 Joining & Repairing Boundary Wire Wherever the Boundary Wires are joining, always use Sureguard heat shrink caps. Some are included in your kit and more can be ordered separately. DO NOT substitute: electrical tape, wire nuts, automotive connectors, solder splices or ordinary heat shrink.
-
Page 10: Mounting Location
Mounting Location The Energiser is solar powered so must have an uninterrupted view of the sky from east to west. The Energiser should face towards the equator; in Australia that means northward. In the northern hemisphere the equator is southward. The solar panel will charge quickly in full sunlight. - Page 11 Screw Mounting Insert a single M4 screw (4mm with head no more than 9mm) into timber, steel or plastic fencing or posts to hang the Energiser using the screw mounting option (see Point #3). Steel Post Anti-Theft Mounting You can mount the Energiser on top of most sizes of steel posts or “star pickets” (see Point #4 &...
- Page 12 Switch Energiser ON Using the Energiser is as simple as pressing the ON/OFF button on the underside of the case (see Point #7). When the Energiser is switched ON you will see two LED lights (POWER and FENCE) glow continuously Green. GREEN means you are good to go! The lights may also glow RED or BLUE depending on your fence or device Status.
- Page 13 How to Use the Touch Switch 1. Touch the cog icon for about 1 second until you see both LED lights glow BLUE. TIPS: Touch lightly, don’t press hard. If your finger is small, use your thumb. 2. As soon as you see both LEDs glow BLUE, remove your finger off the cog. 3.
- Page 14 Blue LED should flash briefly once per second. If it doesn’t, switch OFF for another 24 hours then try charging again. If the battery still does not come good, contact Sureguard for advice. After several hours, the Power LED will go GREEN and the fence commence working.
-
Page 15: Illustrated Features
Radio Collar Receiver Illustrated Features Collar Fabric Collar Receiver Correction Probes Charging Port Correction Control Status Light Distance Control Correction Control OFF is the position you should select when the collar is not in use. Rotate the Correction Control knob slightly clockwise to switch the collar ON. - Page 16 How to Set the Activation Distance: The radio antenna inside the collar “looks” for the radio signal through the front of the case, basically in the same direction your dog looks. To set the Activation Distance: • Rotate the Correction Control knob to position TRAIN. •...
-
Page 17: Status Light
Set Correction to MAX. b. Firmly hold the Collar Tester against the two Correction Probes (see above). c. Take the Radio Collar within 30cm of the Boundary Wire. d. The tester should flash for about 5 seconds. If it doesn’t, contact Sureguard. -
Page 18: Battery Charger
Correction Probes For your dog’s comfort, Sureguard Correction Probes come in three lengths and are made from low allergenic stainless steel. The probes sit next to your dog’s neck skin so it’s important to choose the right length according to the thickness of fur. Most dogs will use the short 10mm probes. -
Page 19: Collar Assembly
After a few days on your dog, check to ensure the fit and probe-length are comfortable. When you have the right collar position, we recommend you apply Sureguard Threadlocker to reduce the likelihood of the probes working loose. This is included in your Starter Kit. -
Page 20: Collar Maintenance
Collar Maintenance • The collar fabric is durable but eventually will need replacing. Use only Sureguard approved collar fabric. • If required, the collar may be cleaned. Only use mild soapy water. Never use cleaning solvents or chemicals. • The collar receiver is sealed for water tightness. DO NOT open it. Damage to the water seal may void your warranty. -
Page 21: Training Your Dog To The Warning Sound
Training Your Dog to the Warning Sound You will require two consecutive days for training. The aim of training is to achieve a reliable back-away response when your dog hears the warning sound. Training is performed before your dog ever feels a correction. Your dog must already be trained to walk on a leash, be at least 6-months old, and not be injured or sick. -
Page 22: General Training Principles And Procedures
c/ Take your dog from a holding area to the boundary so that the warning sound activates and with an inquisitive tone of voice say "LISTEN". Allow a few seconds for your dog to pay attention to the warning sound and then growl a loud "NO" while simultaneously pointing to the Training Flags (or whatever other visual marker eg. - Page 23 6/ Cross the boundary at the same spot every time you leave for walks and always on the lead. NEVER allow your dog to cross the boundary while off the lead. 7/ Follow the reverse procedure on the return and ensure other family members follow this routine. Full Terms and Conditions at www.sureguard.com.au/terms...
Need help?
Do you have a question about the Wireless Dog e-Fence and is the answer not in the manual?
Questions and answers