Table of Contents
Advertisement
Quick Links
Advertisement
Table of Contents

Related Manuals for X-POWER FT Series


Summary of Contents for X-POWER FT Series
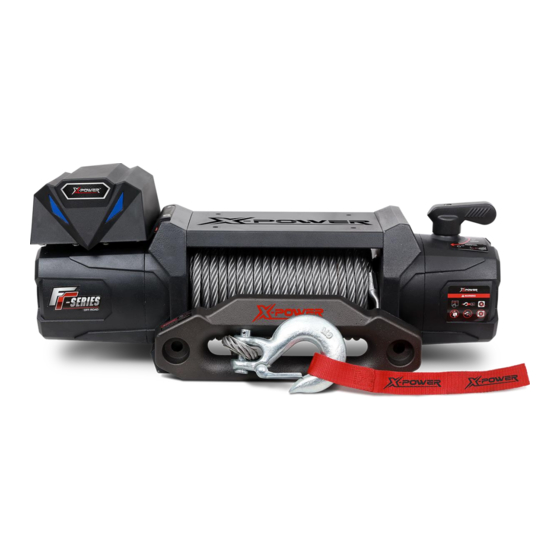
- Page 1 12,000 lb 12V-DC Electric Winch Owner’s Manual WARNING: Read carefully and understand all ASSEMBLY AND OPERATION INSTRUCTIONS before operating. Failure to follow the safety rules and other basic safety precautions may result in serious personal injury. SAVE THESE INSTRUCTIONS...
- Page 2 Thank you very much for choosing an X-power™ product! For future reference, please complete the owner’s record below: Serial Number/Lot Date Code: ________________________________ Purchase Date: ____________________________________________ Save the receipt, warranty, and this manual. It is important that you read the entire manual to become familiar with this product before you begin using it.
-
Page 3: Table Of Contents
⚠WARNING Read and understand all instructions. Failure to follow all instructions may result in fire, serious injury, and /or DEATH. The warnings and instructions, in this manual cannot cover all possible conditions or situations that could occur. Exercise common sense and caution when using this electric winch. Always be aware of the environment and ensure that the electric winch is used in a safe and responsible manner. -
Page 4: Intended Use
Intended Use The series-wound motor stays cooler during long pulls. The three-stage planetary gear system provides fast line speed. The automatic load-holding brake insures maximum safety. The free spooling provides a fast line-out while the 12’ ergonomic handheld remote control also, come with hawse fairlead and an aircraft-grade wire rope Technical Specifications Property... -
Page 5: Important Safety Information
First Layer of Rope Performance Line Pull Line Speed Amp Draw Max. Pull Length lb(kg) fpm(m/min) (DC12V) ft (m) 82’(25.0m) 0(0) 21(6.4) 3000(1361) 11(3.4) 20(6.1) 6000(2722) 8(2.4) 8(2.4) 9000(4082) 6(1.8) 3(1.0) 12000(5443) 5(1.5) 1(0.3) Important Safety Information ⚠WARNING WORK AREA SAFETY ... -
Page 6: Specific Operation Warnings
WINCH USE AND CARE Inspect before every use, do not use if damaged or parts loose. Examine the winch for structural cracks, bends, damage, frayed or kinked rope, and any other conditions that may affect the safe operation of the winch. Do not use the winch even if minor damage appears. A kink permanently weakens the rope, even after it is straightened out;... - Page 7 possible. Do not engage or disengage clutch while under load. Always ensure hook latch is closed and not supporting load. Never apply load to hook tip or latch. Apply load only to the center of hook. Never use a hook that has been bent, warped, or twisted.
-
Page 8: Assembly Instructions
Assembly Instructions ⚠WARNING Read the entire Important Safety Information section at the beginning of this manual including all text under subheadings before set up or use of this electric winch. Mounting the Winch: The mounting plate must be rated to at least the winch’ s capacity. It must be flat and strong enough to remain flat at maximum winch capacity. - Page 9 To prevent serious injury from leaking battery acid, do not use a dirty, corroded, or leaking battery. Only use a 12V automotive (or equivalent) battery that is in good condition. Plan a route for the wiring from the planned winch location to the battery. This route must be secured and out of the way of moving parts, road debris, or any location where parts may be damaged.
-
Page 10: Before Each Use
“IN” Winch will power in with the red indicated LED lid up “OUT” Winch will power out with the blue LED lid up Cored remote length:≥3.8m 5 way plug Function: Control the winch with “IN” to power in, the red LED will lid up. “Out” to power out, the blue LED will lid up. - Page 11 WARNING: Never shift winch to Freespool position with load on winch rope. To pull out the rope, move the clutch control to the released position (shown below). Slide the loop of the hook strap over the hook, then pull on the hook strap to pull the winch rope from winch drum.
- Page 12 11. Re-engage the clutch by moving the clutch handle to the engaged position (see image below) ⚠WARNING Do not allow anyone to stand near the rope or in line with the rope behind the winch while it is under power. If the rope should slip or break, it can suddenly whip back towards the winch, causing a hazard for anyone in the area.
- Page 13 ⚠WARNING Only operate the winch while the winch, line, and load are in view. Make sure that there are no bystanders nearby. 14. When it is safe to do so, use the power switch on the pendant controller to retract the rope, and winch the item as desired.
-
Page 14: After Each Use
Do not attempt to pull full rated load for more than 20 seconds. Release Power-In switch immediately when winch drum/rope stops. Allow winch to cool and change rigging as needed before continuing pull. After Each Use • Inspect Rope for Damage. Replace immediately if damaged. •... -
Page 15: Troubleshooting
Troubleshooting ⚠WARNING • Follow all safety precautions whenever diagnosing or servicing the tool. • Disconnect power supply before service. Use the table below to troubleshoot problems before contacting service personnel or your local dealer. If the problem continues after troubleshooting, call your local dealer for assistance. Failure Possible Cause Corrective Action... -
Page 16: Parts Diagram
Parts Diagram Parts List Item Number Description Quantity Set Number Motor Assembly Tie Bar Screw M8x30 Tie Bar Washer Ø8 Nylon Bearing Seal Kit Drum Assembly Support Plate Hex Socket Head Countersunk Screw M5 x10 Non-Integrated Control Pack Tie Bar Screw M6x50 Tie Bar Washer Ø6 Gear Box Base O Ring 125 x2... -
Page 17: Replacement Parts
Item Number Description Quantity Set Number Flat Washer Ø 12 Nut M12 Pendant Controller Red Strap Clevis Hook Wire rope Replacement Parts For replacement parts and technical questions, please contact contact your local distributor Not all product components are available for replacement. The illustrations provided are a convenient reference to the location and position of parts in the assembly sequence. -
Page 18: Warranty Information
Forcome (Shanghai)Co., Ltd ("We'' or '"Us'') warrants to the original purchaser only ("You'' or “Your”) that the X-power product purchased will be free from material defects in both materials and workmanship, normal wear and tear excepted, for a period of two year from date of purchase. The foregoing warranty is valid only if the installation and use of the product is strictly in accordance with product instructions. - Page 19 Distributed by: Forcome (Shanghai)Co., Ltd Building 109, No. 255 South Sizhuan road Shanghai 201612 China contactus@forcome.com +8602154885106 Made in China Page 19 of 19...
Need help?
Do you have a question about the FT Series and is the answer not in the manual?
Questions and answers