
Subscribe to Our Youtube Channel
Related Manuals for Fiio M11 Plus


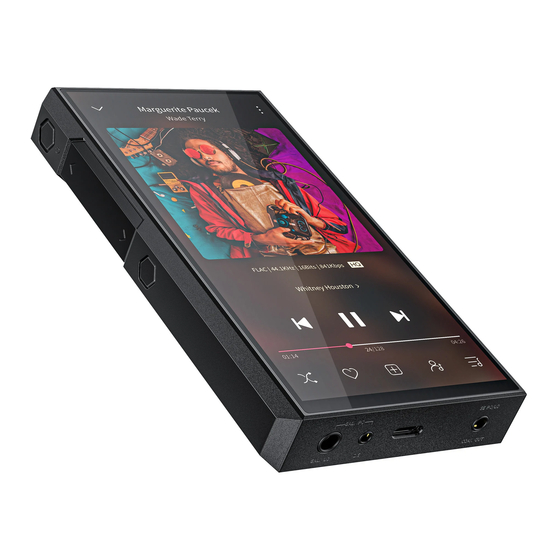
Summary of Contents for Fiio M11 Plus
- Page 1 All the pictures below are for illustrations only. Specifics are subject to the actual product. M11 Plus Complete User Manual...
- Page 2 Thank you so much for purchasing FiiO's portable high resolution lossless music player M11 Plus. We have prepared this complete user manual for you. We hope this manual can help you get the hang of the M11 Plus and unleash its full potential.
-
Page 3: Table Of Contents
7. How to enable the USB DAC function? ............. 15 8. How to use the M11 Plus as a Bluetooth transmitter? ......... 16 9. What power supply adapter is suggested to charge the M11 Plus? ..18 An introduction to system settings menu ..............18... - Page 4 1. WiFi ..........................19 Gain ........................... 21 2. Bluetooth ........................22 Bluetooth transmitting ..................22 Bluetooth receiving ....................27 3. Audio ........................... 28 Output selection ....................28 SPDIF out ......................... 29 Lowpass filter mode ..................... 30 Wireless playback quality ................... 31 Balance ........................
- Page 5 Display size ......................57 6. Languages & input ....................59 7. Reset options ......................62 FiiO Music and FiiO Control APP ..................63 1. Homepage ......................... 64 2. Quickly locate all songs ..................66 3. All songs menu ......................67 4.
- Page 6 4. FiiO Link Wifi control ....................78 5. AirPlay ......................... 80 Firmware upgrade, factory data reset and technical support ........ 87 1. Firmware upgrade ....................87 Online upgrade ....................88 Local upgrade ....................88 2. Force to reboot ......................92 3.
-
Page 7: An Introduction To The M11 Plus
64GB and up to 2TB Micro SD card, image zooming and multi-touch. In the M11 Plus, a variety of audio decoding architectures can be built, including local decoding/USB DAC. It supports outputs of LO/BAL_LO(4.4)/PO/BAL(2.5+4.4)/SPDIF/USB Audio/BT. -
Page 8: Foreword
2. Instructions for buttons and ports 1) 5.5-inch IPS hi-res full-touch incell screen (1440*720): menu and other information displayed, used with physical buttons to operate the device. 2) Power/Lockscreen: long press it for about 2 seconds when the device is off to turn it on;... -
Page 9: Contents
3) Play/Pause: short press it when music is playing to pause the music; short press it when music is paused to resume the playback. 4) Volume up/down: press the volume up button to increase the volume, press the volume down button to decrease the volume. 5) Volume touch panel: slide up on the touch panel to increase the volume;... -
Page 10: Status Bar And Display Page
1. Status bar The status bar on the top screen shows the working states of the M11 Plus. The following are the meanings of each icon on the UI page of the M11 Plus LTD. 1) Icons in Status Bar... - Page 11 2) Icons in Drop Down Menu 3) Icons of Working Modes...
-
Page 12: Homepage And Drop-Down Menu
4) Icons of Settings menu 2. Homepage and drop-down menu... -
Page 14: Instructions For Entry-Level Functions
Instructions for entry-level functions 1. Five working modes The M11 Plus supports five working modes, including Android mode, Pure Music mode, AirPlay, USB DAC mode and Bluetooth Receiving mode. It is defaulted to be Android mode when the device is powered on for the first time,... - Page 16 Third party applications will be available at will. It can be switched to other modes on the drop-down or settings menu. Pure Music mode Third party applications will be automatically disabled while FiiO Music app will be auto-enabled. It can be switched to other modes on the drop-down or settings menu.
-
Page 17: How To Connect The M11 Plus To A Computer
USB DAC/Amp. It can be switched to other modes on the drop-down or settings menu. Notes: when the M11 Plus is going to work in the USB DAC mode for the first time, FiiO's exclusive USB DAC driver is required. Please download it on our website and follow relevant instructions to install it. -
Page 18: How To Upgrade Firmware
3) Enter "Applications", and double click the "Android File Transfer". Then you can manage the files stored in the internal storage of the M11 Plus or the Micro SD card. Notes: The M11 Plus folder will directly pop up the next time it is being connected to the same computer. - Page 19 2) Local upgrade Also, the M11 Plus can be upgraded locally by a firmware package. Download the firmware package file from FiiO.com, and copy it to the internal storage of the M11 Plus or an SD card. Go to the "Technical Support->Firmware Upgrade->Local Upgrade"...
-
Page 20: How To Install Third-Party Apps
1) Method 1: After connecting the device to a valid WiFi, go to FiiO market, Google Play or other app markets to download and install the app directly. 2) Method 2 (Local installation): copy the APK file to the M11 Plus. Go to the file management menu to find the file and install it. -
Page 21: How To Enable The Usb Dac Function
Long or short pressing the volume+/- button can adjust the volume, or adjust it by touching the volume touch panel. 【How to make the settings】Go to the menu of Settings->Global->Volume touch panel settings. Here are the available settings. 1) Touch sounds: turn on or off the touch sound. 2) Slide and hold for auto-adjustment: slide up/down while holding your finger on the touch panel to continuously increase/decrease the volume. -
Page 22: How To Use The M11 Plus As A Bluetooth Transmitter
Settings->Mode choose menu to enter the USB DAC mode. 3) Connect the M11 Plus to the computer by the USB port. Select the M11 Plus as the audio input both in the computer and the music app, so it can work. - Page 23 What can be done if the volume is too low when the M11 Plus is connected to AirPods? Go to Settings->About phone, and continuously tap the "Build number" 7 times.
-
Page 24: What Power Supply Adapter Is Suggested To Charge The M11 Plus
Therefore, it is not suggested to use it. For non-quick charging adapters, it is recommended to use the 5V 1A/2A adapters. An introduction to system settings menu Here is the system settings menu of the M11 Plus. -
Page 25: Wifi
1. WiFi The M11 Plus supports a WiFi connection of 2.4/5G dual-band for music resources access. Here are the steps to connect the M11 Plus to a new WiFi device. 1) In the settings menu of the M11 Plus, tap "WiFi". - Page 26 3) Tap the intended WiFi device and connect them.
-
Page 27: Gain
Gain There are 3 gain levels, high, medium and low. For common situations, the low gain can help to achieve longer music experience. When using high-impedance headphones and other similar devices, high gain can help to achieve smoother music experience. -
Page 28: Bluetooth
2. Bluetooth The M11 Plus supports lots of Bluetooth codecs for both transmission and reception, allowing for rich wireless connections. Bluetooth transmitting... - Page 29 Bluetooth device first. Here are the steps. 1) Go to the Settings->Bluetooth menu. 2) Turn on Bluetooth. 3) Tap "Pair new device". The M11 Plus will automatically search for and list available Bluetooth devices nearby. 4) Tap the intended device to start the connection. Successfully connected devices will be displayed on the list of Available media devices with an "Active"...
- Page 31 Before connecting to a Bluetooth device, you can select the Bluetooth codec you like in the M11 Plus. Here are the steps. 1) Go to the Settings->Audio menu. 2) Tap Wireless playback quality-> choose the intended Bluetooth codec. Disconnect the current connection and reconnect the M11 Plus to the Bluetooth devices.
- Page 32 1) If you want to select other codecs when the Bluetooth is connecting, please disconnect the Bluetooth first, so to switch the codec successfully, and reconnect the M11 Plus to the Bluetooth device. The 3 LDAC-oriented connections: LDAC- Optimized for Audio Quality, LDAC-Balanced Audio and connection quality, and LDAC-Optimized for Connection Quality can be successfully switched without disconnecting.
-
Page 33: Bluetooth Receiving
Bluetooth devices. Bluetooth receiving When the M11 Plus is working as a Bluetooth receiver to connect to a new Bluetooth device, such as a mobile phone, turn on the Bluetooth, go to the Settings menu-> Mode choose, and select Bluetooth Receiving Mode. When it is... -
Page 34: Audio
3. Audio Output selection Both PO and LO are available for 3.5mm and 4.4mm. -
Page 35: Spdif Out
SPDIF out The SPDIF out (Coaxial Out) supports DoP and D2P modes. In D2P mode, PCM will be output originally while DSD will be converted to PCM signal. In DoP mode, both PCM and DSD signal will be output originally (Note that when outputting DSD signal, the latter decoding device is required to support DSD decoding for normal output.) -
Page 36: Lowpass Filter Mode
Lowpass filter mode There are 5 kinds of lowpass filter modes for your preference. (Tips: the sharp roll-off mode is more suitable for classical and absolute music while the slow roll-off mode is more suitable for pop music. It is for reference only.) -
Page 37: Wireless Playback Quality
Wireless playback quality If the receiver supports multiple Bluetooth codecs, such as the BTR5, you can select the intended codec for connection. -
Page 38: Balance
Balance You can adjust the balance between the left and right channels. There are up to 10 levels available. -
Page 39: All To Dsd
All To DSD When the ALL To DSD is selected, all PCM signals will be converted to DSD output with sound quality further upgraded. Notice: the All To DSD mode will heat up the device more seriously, and the battery life will be relatively shortened. -
Page 40: Adjustable Volume At Lo
Adjustable volume at LO When it is selected, the volume is adjustable at LO output. Otherwise, it is fixed at the maximum volume. -
Page 41: Global
4. Global The global menu contains options including System navigation, Power-off timer, Hold switch setting, Volume touch panel settings, Volume settings, In-vehicle mode, Auto-rotate screen, Double tap to wake up. The following are explanations for some of them. -
Page 42: System Navigation
System navigation There are 3 navigation ways for your preference and needs, including Gesture navigation, 2-button navigation and 3-button navigation. -
Page 43: Power-Off Timer
Power-off timer There are two types of the timer, Sleep and Idle poweroff. Sleep The device will automatically shut down when the time reaches the set value. It can be set to any integer value between 0 and 120 minutes. (Note that if it is turned OFF, the sleep shutdown function will be disabled.) -
Page 44: Idle Poweroff
Idle poweroff If the device is not working without any operation, it will automatically turn off once the timer reaches the set value. It can be set to any integer value between 0 and 50 minutes. (Note that if it is turned OFF, the idle shutdown function will be disabled.) Hold switch setting... -
Page 45: Volume Touch Panel Settings
If the HOLD switch is turned on, you can enable/disable any buttons or the volume touch panel. Volume touch panel settings Long or short press the volume+/- button can adjust the volume, or you can adjust it by sliding on the volume touch panel. 【How to make the settings】Go to the menu of Settings->Global->Volume... - Page 46 touch panel settings. Here are the available settings. a. Touch sounds: turn on or off the touch sound. integer b. Slide and hold for auto-adjustment: slide up/down while holding your finger on the touch panel to continuously increase/decrease the volume.
- Page 47 c. Auto-lock after inactivity: if there is no operation in a period, the touch panel will be locked to avoid misoperation. Tap it twice to unlock it.
- Page 48 d. Disable volume touch panel...
-
Page 49: Volume Settings
Notes: 1. If the "Auto-lock after inactivity" is turned on, the volume touch panel needs to be tapped twice each time to enable it before using. 2. If the volume touch panel is locked, the volume can still be adjusted by long or short pressing the volume +/- button without unlocking it. - Page 50 The volume of the system, touch panel, and power-up can be set to a fixed value to avoid over-high volume due to misoperation and so to protect your hearing. a. Max system volume- limit the adjustable volume of the volume button to a fixed value b.
-
Page 52: In-Vehicle Mode
In-vehicle mode 【Principle】After turning on the In-vehicle mode, you can connect the M11 Plus to the on-board USB port, and the M11 Plus will power on automatically and switch to the In-vehicle mode screen when the vehicle engine starts, and power off automatically when the vehicle engine stops. -
Page 53: Double Tap To Wakeup
Notes: Some onboard USB ports may encounter interruptions when connecting to the M11 Plus, in which case you can try to use FiiO's USB isolator, the LA-UA1, to fix the problem. Double tap to wakeup If the Double tap to wakeup function is enabled, the sleep device can be wake up... -
Page 54: Display
5. Display The display settings consist of Sample rate display, Dark theme, Brightness level, Indicator light control, Night light, Wallpaper, Screen timeout, Font size, Display size, Screen saver and lock screen display. The following are detailed descriptions of some common items. -
Page 55: Sample Rate Display
Sample rate display Settings->Display->Sample rate display With it turned on, the sample rate of the currently playing song will be displayed. -
Page 56: Indicator Light Control
Indicator light control Settings->Display->Indicator light control The brightness level of the side indicator light under working and charging status can be set in this menu. -
Page 58: Screen Timeout
Screen timeout This option is to set the time when the device will enter sleeping mode after inactivity. The device will enter low power consumption mode after 10 minutes of sleeping. Short press the Power/Lockscreen button to wake it up. -
Page 59: Night Light
Night light The color of the display screen will be adjusted in amber under Night light mode, e to enable the Night light mode at a custom time , or from sunset to sunrise. -
Page 61: Font Size
Font size There are four standards available, which respectively are small, default, large and largest. -
Page 63: Display Size
Display size The display size corresponds to the size of the icons and texts displayed on the screen. -
Page 65: Languages & Input
6. Languages & input The first time the device starts up, you can choose an appropriate language from the prompt. If you want to choose other languages, you can go to the Settings menu. Here are the instructions. - Page 66 1) Go to the menu of Settings-> System-> Languages & input-> Languages; 2) In the Languages page, tap Add a language; 3) Select a language; 4) After selecting the language, hold the “=” icon on the right side of the target language and drag it to the top, so to successfully select the language.
-
Page 68: Reset Options
7. Reset options "Reset WiFi, mobile & Bluetooth" will reset all network settings, including WiFi and Bluetooth. "Reset app preferences" will reset all preferences including the items shown in the following picture. -
Page 69: Fiio Music And Fiio Control App
"Erase all data", i.e. factory reset, will erase all data from your device's internal storage, and all settings will be reset to default. Please back up your important data before resetting. FiiO Music and FiiO Control APP... -
Page 70: Homepage
The M11 Plus has built in the FiiO Control app, a professional audio playing application specially developing for Android-based system and flagship-grade music players. 1. Homepage FiiO Music will enter the homepage once it starts up as shown below. 1) Settings icon: tap the icon to enter the settings page. - Page 71 4) Frequently played: the list of recently played songs will be presented based on playing frequencies. 5) Recently added: a list of recently added songs will be presented chronologically.
-
Page 72: Quickly Locate All Songs
2. Quickly locate all songs Slide the screen with your finger on the letter bar at the right side. A quick search icon will show up in the middle of the screen. Sliding to corresponding initials and relieving your finger, it will directly jump to the songs starting with the initial you have chosen. -
Page 73: All Songs Menu
3. All songs menu Tap the icon at the right corner of each track to wake up the hidden menu. Then tap the icon in the menu to perform corresponding operations. - Page 74 Tapping the hidden menu on the upper right corner of the screen, you can decide the way of songs sorted as Sort by date added, Sort by filename and Sort by the first letter. Bulk management: Play music, WiFi music transfer, Add to my favorites, Add to playlists, Delete selected, and Exit bulk management.
-
Page 76: Playing Page
4. Playing page... - Page 77 Switch page: by tapping the middle of the album cover, it will switch pages between album cover and lyrics circularly. Swipe left and right to switch songs. Adjust volume: slide up/down on the volume touch panel or press the physical button to increase/decrease the volume.
-
Page 78: Equalizer
5. Equalizer FiiO Music has a built-in equalizer, on which you can straightly choose the preset EQ for listening, or adjust it through the 10 frequency bands within 20Hz~20kHz from -12 to +12 dB, fully meeting personal music tastes. - Page 79 Choose preset EQ: swipe left or right on the bottom of the screen to switch equalizer. Customized EQ: drag the corresponding frequency band up and down to slightly adjust the EQ curve (on the bands page, switch left and right to change the option).
-
Page 80: Uv Meter
Notes: if the system is reset to factory mode, all EQ settings will be reset to default. 6. UV meter There is a newly added UV meter (audio meter) with a dB threshold and dynamic pointer displayed. Closing to the red threshold of 0dB means audio distortion. How to enable it: tap the song cover on the now playing page to enter the UV meter displaying page. -
Page 81: Frequency Spectrum Playing Page
3 built-in spectrum effects available. Besides, users can self-define Full screen display or Original display for the spectrum mode. How to enable it: go to the Settings menu in FiiO Music app->Theme->Now playing page. Choose Spectrum display. Square cover and large cover:... -
Page 82: Instructions For Commonly-Used Functions
FiiO Music app keeps upgrading and maintaining. For the newest instruction, please visit our official website:https://www.fiio.com/M11PlusLTD_FAQ or refer to the detailed introduction videos: https://www.bilibili.com/video/BV1VK4y1V7EH/ Instructions for commonly-used functions... -
Page 83: Screenshot
1) In FiiO Music app, turn on the USB output 2) Use an OTG adapter cable to connect the M11 Plus to the external decoder. 3) Starting up the FiiO Music app or any music app, the M11 Plus can work as a USB digital device. -
Page 84: Fiio Link Wifi Control
Bluetooth as the Server. 2) Connect the M11 Plus to the mobile phone through Bluetooth. 3) On the FiiO Music app of the mobile phone, Settings->FiiO Link->┆ (on the upper right corner of the display), choose Bluetooth as the Client. - Page 85 There are mainly 3 steps. 1.Make sure the M11 Plus and your mobile phone are connected to the same WiFi network. 2.On the FiiO Music app of the M11 Plus, Settings->FiiO Link->┆ (on the upper right corner of the display), choosing WiFi as the Server. Now an IP address will show up.
-
Page 86: Airplay
Notes: iPhones only support FiiO Link WiFi control but not Bluetooth. 5. AirPlay... - Page 90 Here is the video tutorial about the AirPlay function: https://www.youtube.com/watch?v=LDie2KrFoNY Specific operation steps:...
-
Page 93: Firmware Upgrade, Factory Data Reset And Technical Support
Firmware upgrade, factory data reset and technical support 1. Firmware upgrade... -
Page 94: Online Upgrade
Online upgrade If a new firmware is available and can be detected (with the M11 Plus connected to an available internet), an upgrade notification will show up in the notification center. Tap on it to enter the update menu for the online upgrade. If there's no upgrade notification showing up, you can go to the "Technical... - Page 97 3) After tapping the firmware file, any operation is not permitted. Wait for a while and then the M11 Plus will start to upgrade automatically. 4) Upon completion of the firmware upgrade, the M11 Plus will restart itself automatically. After restarting, it can be used as usual.
-
Page 98: Force To Reboot
3) Do not manipulate the device during the upgrade. 2. Force to reboot If something wrong that happened to the device (stuck in the Welcome page, no response, etc.), you can hold the Power and the Play button together for 10 seconds to force it to reboot. -
Page 99: Technical Support
4. Technical support 1) On the homepage, tap Technical Support to enter the menu. Here are several commonly-used functions and our contacts. 2) Firmware update: online and local upgrade are available. FAQ (frequently asked questions): parts of frequently asked questions and corresponding measures are listed. - Page 100 3) Quick start guide: tap to check out the internal quick start guide of the M11 Plus. 4) Contact us: here shows our email address, Facebook, Twitter, etc.
Need help?
Do you have a question about the M11 Plus and is the answer not in the manual?
Questions and answers
Не удерживаются гугл плей, браузер яндекс