Table of Contents
Advertisement
( Note: X3 Mark III will be called X3 for short in the below Instruction)
All the below illustrating pictures are for reference only.
X3 Complete User Manual
(Applies to FW1.0.0 and later)
Foreword:
Thank you for purchasing FiiO's X3, our 192 kHz/32 bit high resolution lossless
music player. To let you better utilize the X3 to enjoy high-quality music, we have
prepared this complete user manual and collected and answered some frequently
asked questions by users. We hope this manual will help you get to know the X3 and
unleash its full potential.
1
Advertisement
Table of Contents

Related Manuals for Fiio X3


Summary of Contents for Fiio X3
- Page 1 To let you better utilize the X3 to enjoy high-quality music, we have prepared this complete user manual and collected and answered some frequently asked questions by users. We hope this manual will help you get to know the X3 and unleash its full potential.
-
Page 2: Table Of Contents
Contents A. Introduction ....................3 B. Buttons and Ports ..................3 1. Buttons/Ports Diagram ................3 2. Buttons and ports introduced ..............4 C. Visual Guide to Menu Operation ............6 1. Main Menu ....................6 2. Key-Lock Settings ..................7 D. -
Page 3: Introduction
MP3, WAV, WMA, APE, FLAC, AAC and Ogg Vorbis. A maximum sample rate of 192kHz/32 bit is supported and other features include Bluetooth and CUE sheets. The X3 also can support headphone output, Lineout, digital coaxial output and 2.5mm balanced output. -
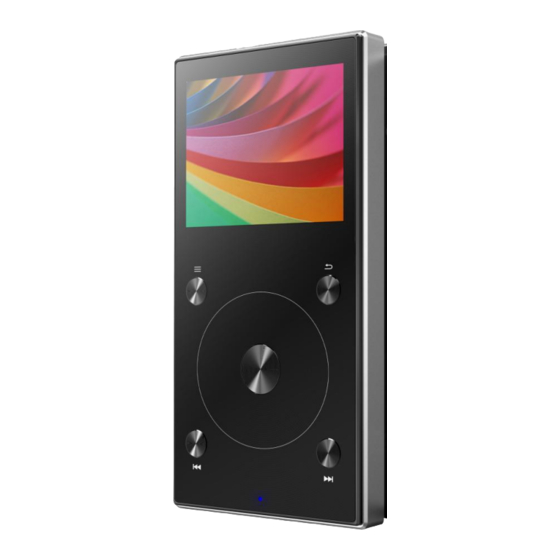
Page 4: Buttons And Ports Introduced
1) Power/Lock button: When the unit is powered off, hold the button for 2 seconds and release it and the X3 will power on (after a brief pause); when the unit is on, press the button briefly to lock / unlock the player, or hold the button for about 3 seconds to power off (hold for 10 seconds for a forced shutdown). - Page 5 Rewind:Quickly press the middle button 3 times, holding down the last press. Release the button to resume playing. 14) Micro USB port (11 pin): For data exchanging, battery charging and connection to docking FiiO devices 15) 2.5mm balanced headphone output: Supports 2.5mm TRRS balanced headphone...
-
Page 6: Visual Guide To Menu Operation
C. Visual Guide to Menu Operation 1. Main Menu Now Playing: The shortcuts key Buttons and Dials: shows/hides the shortcuts Scroll Wheel: Scrolls through menu menu. Use the scroll wheel to items, changes values of selected items navigate and the Enter key to Shortcuts: Shows/hides shortcuts select items in the shortcuts menu. -
Page 7: Key-Lock Settings
Cover Briefly press the shortcut key Lyrics Use the scroll wheel or the "Previous" and "Next" buttons to switch between shortcuts Add/remove from favorites Create or add to Playlist Select between loop all, loop single song, sequential, shuffle, and single play modes respectively Deletes the current song 2. -
Page 8: Menu Operation
1 .Turning On/Off When the X3 is powered off, press and hold the power button for 2 seconds to turn it on (you will see the language selection dialog the first time it is turned on). When the X3 is powered on, press and hold the power button to turn it off. -
Page 9: Browse Files
Single play. b) Resume Mode Choose from 3 different options: Off, Song, or Position. In Song mode, when turned on again the X3 will resume playing at the beginning of the song being last played before being turned off. In Position mode, when turned on again the X3 will resume playing from the exact position of the last song being played before being turned off. - Page 10 For the Default Volume setting, choose between the Memory and Custom options. With memory, when turned on the X3 will be set at the volume that it was at before being turned off. With Custom, you can choose a particular volume level to be set to when the X3 turns on in the Fixed Volume Setting option (press Enter on that option to enter the sub-menu to specify the desired volume with the scroll wheel).
-
Page 11: System Settings
Bluetooth devices will appear. Please put your Bluetooth device into pairing mode at this time. The X3 will then search for nearby Bluetooth devices and display a list of the devices it found. Select the device you want to connect to by highlighting and pressing Enter. If the X3 successfully connects, you will be taken back to the Bluetooth settings menu with your device showing up. - Page 12 Screen Timeout The X3's screen will be turned off and its buttons disabled (according to the key lock option) if the buttons have not been touched after the period of time specified here. You can choose between 30, 40, 50, 60, 90, and 120 seconds as well as ON (the screen and buttons are never turned off).
- Page 13 Note: this option only takes effect on Coaxial output. m) USB mode The X3 may be set to Storage or DAC mode when connected to the computer via USB. In Storage mode, the X3 acts as a standard USB storage device; any micro SD card inserted in the X3 will appear on the computer as a removable drive and you can then drag and drop e.g.
- Page 14 Supports In-line Headphone Control Either turn ON or OFF in-line controls on the X3. When set to ON, you can play, pause, and change tracks using a CTIA standard headset. When set to off, in-line controls are disabled.
- Page 15 w) Language This player supports multiple languages – Simplified Chinese, Traditional Chinese, English, Japanese, Korean, French, German, Spanish, Thai, and Russian. Press Enter to access this sub-menu, use the scroll wheel to highlight the desired language, and press Enter to confirm. x) Font Size Choose between displaying large (Big) or small font in the menus.
-
Page 16: Firmware Update
Summary of procedure for upgrading firmware using micro SD card: 1.Copy the X3_Mark_Ⅲ.fw file provided by FiiO into the root directory of a micro SD card in FAT32 format;... - Page 17 •If the update process fails repeatedly, please try putting the X3_Mark_Ⅲ.fw file in a micro SD card of 32GB or under, formatted using the X3's built in formatting function (System settings->Format). CAUTION: all data and music on a card will be erased by formatting.
-
Page 18: Tips On Usage
A: If you are listening to music as you fall asleep at night, you can set a sleep timer so that the X3 automatically enters deep sleep after a certain amount of time of playing music and not being operated. -
Page 19: Frequently Asked Questions
Q: Can the X3 play songs while charging? A: Yes; no harm will come to the X3 if you use it while charging, in which case it is normal for the X3 to get warm. The reason we recommend turning the X3 off for charging is so that charging completes more quickly. -
Page 20: Transferring Songs
Q: How to tell whether the X3 is fully charged or not? A: When X3 gets fully charged, the status indicator LED on the power button lights up green and the onscreen battery gauge (on the upper right corner while the player is on, or taking up the whole screen if the player is off) stops moving and holds steady at full. -
Page 21: Firmware Upgrades
A: Please refer to Section E. Firmware Update in this user manual. Q: Is it possible to brick the X3 while upgrading the firmware? What to do if my X3 is bricked? A: It should not be possible to brick the X3 in the normal course of upgrading its firmware. If you somehow manage to brick 4. - Page 22 SD cards of Class 6 or above. Q: What size of cards does the X3 support? A: The X3 is currently tested to support micro SD cards up to 128GB. It is recommended to format the card in FAT32 format.
- Page 23 Q: Why does X3 not show the cue file in the micro SD card when browsing files? A: Since it has been already been used by the X3 to split the cue'd file into multiple tracks (which are shown).
-
Page 24: Other Operations
A: Only ANSI, Unicode and UTF-8 (with and without BOM) encodings are supported for ID3 tags and .lrc files to be read by the X3. If the ID3 tags and / or lyrics files are encoded in an unsupported format, rubbish characters will be shown. -
Page 25: Connecting To Other Audio Devices
It is recommended to place files of different codecs and sample rates into separate folders and to play files of the same type in sequence from these folders, to prevent the X3 from having to switch between different decoders frequently.
Need help?
Do you have a question about the X3 and is the answer not in the manual?
Questions and answers