
Related Manuals for La Sommeliere CTP300


Summary of Contents for La Sommeliere CTP300
- Page 1 NOTICE DE VOTRE CAVE A VIN Cet appareil est uniquement réservé au stockage du vin et des boissons. This appliance is only for wine and beverage storage...
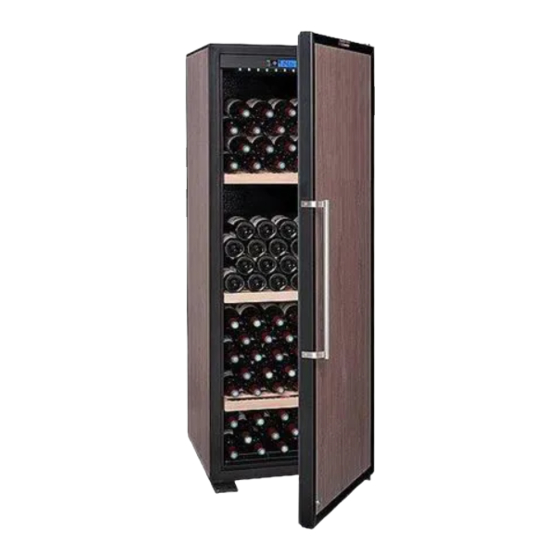
- Page 2 1.DESCRIPTION DE VOTRE CAVE A VIN 1. Carrosserie 2. Tableau de commande 3. Eclairage 4. Filtre à charbon 5. Clayette en bois 6. Fermeture 7. Clayette du bas 8. Entretoise 9. Pieds ajustables 10. Charnière 11. Porte 12. Sonde hygromètre 13.
- Page 3 DEPLACEMENT DE L’APPAREIL Lorsque vous déplacez votre cave, ne l’inclinez pas à plus de 45 et toujours sur la face latérale du côté du cordon d’alimentation. Pour réduire le temps de fonctionnement et économiser de l’énergie, installez votre cave dans un endroit adapté...
- Page 4 1. Bouchon 2. Vis 3. Charnière supérieure 4. Bouchon 5. Clip de fermeture 6. Vis cruciforme 7. Rondelle 8. Axe de porte 9. Rondelle 10. Ecrou de charnière 11. Pivot 12. Bouchon 13. Poignée de porte 14. Vis à tête fraisée 3.2 Installation du bac de récupération d’eau Veuillez installer le bac de récupération d’eau sur le support du compresseur, à...
- Page 5 3.4 Montage de la poignée de porte Vous trouverez la poignée et deux vis à tête fraisée dans le sac à accessoire qui se trouve à l’intérieur de la cave. Suivez le schéma suivant pour fixer la poignée sur la porte. 3.5 Réversibilité...
- Page 6 (4) Dévissez le clip de fermeture situé sur le côté gauche de la porte, puis fixez-le sur le côté droit de la porte. (5) Enlevez le bouchon situé à droite, devissez l’axe de porte avec la rondelle, puis revissez-le sur la même pièce sur le côté opposé (voir sur le schéma ci-dessus).
- Page 7 (6) Tournez la porte de 180 , soulevez légèrement la porte et déplacez vers le bas, replacez la porte sur son axe. (7) Remettez en place la charnière à l’aide des vis, de façon à ce que la porte soit bien parallèle à...
- Page 8 3.6 Montage des clayettes 3.6.1 Montage des supports de clayettes Le support de clayette doit être installé avant de placer les clayettes. Pour voir comment procéder, référez-vous au schéma ci-dessous. Placez le support de clayette dans le trou à l’intérieur de la carrosserie et pressez-le vers le bas de façon à...
- Page 9 Positionnement des clayettes en bois Positionnement du pivot en bois et du support de clayette arrière 3.7 Inverser les supports de la porte Une vis supporte la porte, si vous devez inversez le sens de la porte il faut aussi inverser les supports de la cave. Dévissez la vis de support et replacez la sur l’autre support.
- Page 10 4. MODE D’EMPLOI( Contrôle et réglage) 4. 1 Descriptif du tableau de commande 4.1.1 Détails des fonctionnalités 4.1.2 Réglage des températures Appuyez sur , la température clignote, appuyez ensuite sur pour régler la température. Appuyez sur pour valider la nouvelle consigne. Alarme de changement du filtre à...
- Page 11 Indication de l’hygrométrie Appuyez en même temps sur pendant 5 secondes pour voir s’afficher le taux d’humidité dans votre cave. Mise sous tension Appuyez sur pendant 5 secondes, toutes les fonctions seront désactivées y compris l’affichage et les LED. Appuyez sur doucement pour remettre en fonction.
- Page 12 5. AVERTISSEMENT (1) Après le déballage de votre cave, apportez les pièces d’emballage dans une déchetterie, elles seront pour la plupart recyclées. (2) N’essuyez pas l’arrière de la cave à vin avec une étoffe humide. (3) Ne placez pas d’appareil électrique ni d’aliment en haut de l’armoire. (4) N’utilisez pas l’appareil à...
- Page 13 6. ANALYSE DES PROBLEMES SIMPLES Problème Analyse du problème Mode de résolution Le compresseur ne L’alimentation électrique Vérifiez l’alimentation électrique fonctionne pas n’est pas branchée Le cordon d’alimentation est Vérifiez l’alimentation électrique endommagé Un fusible a grillé Contactez votre distributeur ou un technicien SAV Défaillance circuit...
-
Page 14: Description Of Your Wine Cabinet
1.DESCRIPTION OF YOUR WINE CABINET 1. Cabinet case 2. Control and adjustment panel 3. LED lights 4.Carbon filter 5.Wooden shelf 6. Closing clip 7. Steel wire shelf 8. Cabinet bracing bar 9. Bottom grid & Adjustable leveling feet 10. Hinge 11. -
Page 15: Installing Your Wine Cabinet
2.PLACE YOUR CABINET (1) When moving your wine cabinet, do not incline it more than 45 and always toward side where the power lead is located. (2) In order to reduce the working time and save power, place your cabinet at where the temperature is between 5 C~32 C, and there should be space to allow air to flow around the cabinet, so the heat... -
Page 16: Installing The Carbon Filter
1. Grommet 2. Screw 3. Top hinge 4.Grommet 5. Closing clip 6. Phillips screw 7. Washer 8. Door pivot guide 9. Washer 10. Hinge nut 11. Pivot 12. Grommet 13. Handle of door 14. Chamfer head screw 3.2 Installing the drip tray Install the drip tray on the compressor support at the back of the cabinet, locating it under the small pipe protruding from the housing, the lower part of the tank being placed under this pipe. - Page 17 Installing the handle of door 3.5Alternative hanging of the door (excepted door with lock) The door is set to be hinged right at purchase; you can change it to left. To do this, proceed as follows: (1) Close the door. (2) Remove the grommets gently using a fine blade, loosen the screws and remove the upper hinge.
- Page 18 (4) Unscrew the closing clip on the left, and then fix it on the right. (5) Remove the grommet on the right, unscrew the door pivot guide with the washer, and then tighten nit onto the same part on the opposite side.
- Page 19 (6) Turn the door 180 ,slightly lift the door and move down, replace the door on its pivot guide. (7) Relocate the hinge, using the screws in such a way so that the door is parallel with the case. Replace the grommets.
-
Page 20: Installing The Shelves
3.6 Installing the shelves 3.6.1 Installing the shelf bracing Shelf bracing should be installed before placing the shelves, the process see diagram below. Putting the shelf bracing hook in the hole inside the case and press down, this allow the shelf bracing to be hitched firmly inside the case. - Page 21 Wooden shelf installing direction Wooden shelf installing layout Position of wooden pin and back shelf bracing...
- Page 22 3.7 The installation of door base support When replacing the reversible door, should change the installation direction of the base support; rotating pull up at the same time the base support can be removed; spin down at the same time the base support can be fixed. 3.8 The installation of the wall separate screws When the back side of wine cellar placed against the wall, should need to install the wall separate screws.
- Page 23 4.1 Control and adjustment 4.1.1 Control panel description 4.1.2 Temperature settings (1)Press , the display start to flash, then press to adjust temperature. Press again when finsh setting. (2)The button is disabled without pressing . Press and hold down for 5 seconds to display the life of carbon filter (unit: day).
- Page 24 4.1.3 Alarm explanation “Door open” alarm: will flash when door is open for more then 15 minutes and your will hear the buzzer ring three times every 30 seconds. Buzzer will stop automatically after 3 minutes. “Invalidation of carbon filter” alarm: When the carbon filter is disabled, will flash and the buzzer will ring.
- Page 25 5. Attention (1) After unpacking your cabinet, take the discarded packaging, the majority of which is recyclable, to a refuse collection point. (2) Do not wipe the back of wine cabinet with wet cloth. (3) Do not place electric appliance or food on top of the cabinet. (4) Not for outdoor use.
- Page 26 6. Simple problem analyses Problem Problem analyses Resolve method Compressor not Power not connected Check the power working Power lead or wire damaged Contact distributor or service agent Fuse broken Change fuse Internal circuit fault Contact distributor or service agent Power supply off Check if power cut In heating process...
- Page 27 Refrigerator with a three-star compartment Réfrigérateur-congélateur Refrigerator-freezer Congélateur armoire Upright freezer Congélateur coffre Chest freezer 10.Appareils de réfrigération polyvalents et de type autre Multi-use and other refrigerating appliances Désignation LA SOMMELIERE Marque / Trade mark CTP175 CTV175 CTP140 CTV140 CTV80 CTP300/MC320 CTPE204/CTPE24 CTP205...
Need help?
Do you have a question about the CTP300 and is the answer not in the manual?
Questions and answers