Table of Contents
Advertisement
Available languages
Available languages
Quick Links
H-7100, H-7101
π
H-7102
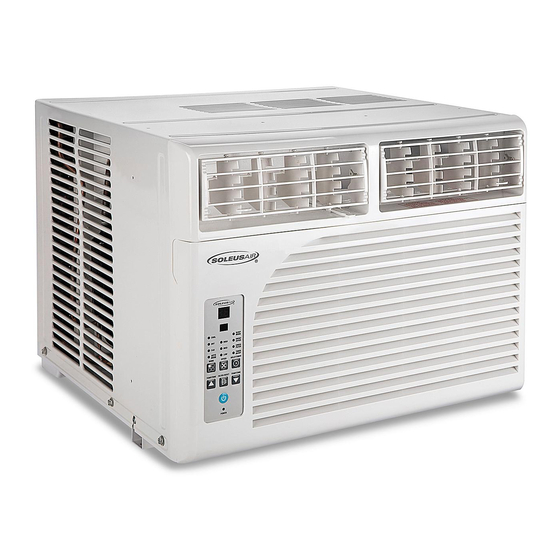
WINDOW AIR
CONDITIONER
Before installing and using air conditioner, read
instructions carefully. Store instructions in a safe place
for future reference. Pay attention to all safety warnings
outlined in instructions.
WARNING! To reduce the risk of fire, electrical
shock or injury when using air conditioner,
follow these safety precautions:
The air conditioner is equipped with an LCDI (Leakage
Current Detection and Interruption) power cord and
plug, as required by US National Electric Code 440.65.
This cord consists of a length of shielded flexible cord
with no termination on the load side and an LCDI
attachment plug on the line side.
The LCDI power cord and plug will remove the supply
source via electrical disconnect (circuit trip) if the
nominal current leakage between the cord shield and
either load conductor exceeds a predetermined value.
The cord will remain de-energized until the air
conditioner has been manually reset. This is intended to
reduce the risk of fire in the power cord or nearby
combustibles. The cord shields are not grounded and
are a shock hazard if exposed. The cord shield must not
be connected to ground or to any exposed metal.
To check the TEST and RESET buttons to ensure the plug
is functioning properly, perform the following:
1.
Plug power cord into outlet. LED light will turn on.
(See Figure 1)
2. Press TEST button. Circuit should cut power to air
conditioner. LED light will turn off. (See Figure 1)
3. Press RESET button to restore power. Once power is
restored LED light will turn on. (See Figure 1)
If TEST button is pressed and air conditioner can be
turned on, current leakage has been detected. Do not
use air conditioner or attempt to reset the LCDI plug.
Contact Uline Customer Service at 1-800-295-5510.
PAGE 1 OF 27
1-800-295-5510
uline.com
SAFETY
POWER CORD AND PLUG
Pour le français, consulter les pages 19-27.
• Plug into a grounded, three-prong outlet.
• Do not remove the ground prong.
• Do not use a plug adapter.
• Do not use an extension cord.
• Unplug the air conditioner before servicing.
• Use two or more people to move and install the air
conditioner.
Figure 1
LED
Light
NOTE: The power cord and plug included may
differ from the one shown in Figure 1.
WARNING! Do not press the TEST button while
the air conditioner is operating.
WARNING! The TEST and RESET buttons should
not be used as on and off switches.
WARNING! The cord and plug are not intended
to offer protection to externally connected
loads or supply circuits.
WARNING! The cord and plug are intended for
indoor use only.
Para Español, vea páginas 10-18.
Reset Button
Test Button
0218 IH-7100
Advertisement
Table of Contents

Related Manuals for U-Line H-7100


Summary of Contents for U-Line H-7100
- Page 1 Para Español, vea páginas 10-18. Pour le français, consulter les pages 19-27. H-7100, H-7101 π 1-800-295-5510 H-7102 uline.com WINDOW AIR CONDITIONER SAFETY Before installing and using air conditioner, read • Plug into a grounded, three-prong outlet. instructions carefully. Store instructions in a safe place •...
-
Page 2: Installation
Minimum hung window. Ensure window is in good shape and able to firmly hold the required screws. Make any necessary 1/2" repairs prior to installing the air conditioner. Minimum Model H-7100 H-7101 H-7102 Unit Height 12⁄" 14⁄" 14⁄" Unit Width 18⁄"... - Page 3 INSTALLATION CONTINUED STORM WINDOW REQUIREMENTS TOP RAIL INSTALLATION NOTE: Top rail and the side panels are offset to A storm window frame will not allow the air conditioner provide the proper pitch to the rear of 5/16". This to tilt properly, which in turn will keep it from draining is necessary for proper condensation utilization properly.
- Page 4 INSTALLATION CONTINUED 3. Using a sharp blade or scissors, slowly cut the 4. Place the curtain lock between the curtain weather insulation board to a size that will fit the extensions and the window sill, drive two long screws inside curtain rails and completely cover the curtain. through the lock and into the sill.
-
Page 5: Electronic Control Panel
CONTROL PANEL ELECTRONIC CONTROL PANEL 6. MODE BUTTON: Press the mode button to cycle through the various modes: auto, sleep, energy. NOTE: The control panel display always shows 7. AUTO-ON TIMER: When the air conditioner is off, it the room temperature in fan mode, except can be set to automatically turn on in 1 to 24 hours when setting the temperature and timer. -
Page 6: Remote Control
REMOTE CONTROL 1. ON/OFF 2. MODE SELECTION 3. TEMPERATURE SETTING Display 4. FAN 5. SLEEP MODE 6. ENERGY SAVER MODE SLEEP 7. TIMER ENERGY HIGH SAVER 8. °C/°F TIMER 9. MYTEMP MODE C°/F° 10. CHILD LOCK CHILD MYTEMP LOCK MODE NOTE: Remote control uses AAA batteries. -
Page 7: Using The Air Conditioner
USING THE AIR CONDITIONER FREEZING CONDITIONS: This is a cooling only air FAN ONLY MODE: Use fan only mode at high, medium, conditioner. It is not designed for freezing outdoor or low fan speed to provide air circulation and filtering conditions. -
Page 8: Maintenance
MAINTENANCE CARE AND CLEANING WEAR AND TEAR To minimize wear and tear on the air conditioner, always Clean your air conditioner to keep it looking new and to wait at least three minutes before changing modes. This minimize dust build up. will help prevent the compressor from overheating and AIR FILTER CLEANING the circuit breaker from tripping. -
Page 9: Troubleshooting
TROUBLESHOOTING OPERATING ISSUE POSSIBLE CAUSE RECOMMENDATIONS The air conditioner The air conditioner is unplugged. Make sure the electrical plug is pushed completely will not start. into the outlet. Check the main fuse/circuit breaker box and replace The fuse is blown/circuit breaker is the fuse or reset the breaker. - Page 10 H-7100, H-7101 π 800-295-5510 H-7102 uline.mx AIRE ACONDICIONADO DE VENTANA SEGURIDAD Antes de instalar y utilizar el aire acondicionado, lea las • Conéctelo en una toma de corriente con tres clavijas y instrucciones cuidadosamente. Guarde las instrucciones conexión a tierra.
-
Page 11: Preparación De La Ventana
Asegúrese de que la ventana esté en buena condición 0.80 cm y que sostenga firmemente los tornillos necesarios. (1/2") Mínimo Haga todas las reparaciones necesarias antes de instalar el aire acondicionado. Modelo H-7100 H-7101 H-7102 32.06 cm 36.51 cm 36.51 cm Altura de la Unidad (12⁄") - Page 12 CONTINUACIÓN DE INSTALACIÓN REQUERIMIENTOS PARA DOBLE VENTANA INSTALACIÓN DEL CARRIL SUPERIOR Un marco para doble ventana no permitirá que el aire NOTA: El carril superior y los paneles laterales se acondicionado se incline de forma adecuada, lo que compensan para proporcionar la inclinación ocasionará...
- Page 13 CONTINUACIÓN DE INSTALACIÓN 3. Con las tijeras o una navaja afilada, corte despacio 4. Coloque el seguro de la cortina entre las extensiones la placa aislante de intemperie a un tamaño que de la cortina y el alféizar de la ventana, ponga dos quepa dentro de los carriles de la cortina y cubra la tornillos largos a través del seguro y el alféizar.
-
Page 14: Panel De Control
PANEL DE CONTROL PANEL DE CONTROL ELECTRÓNICO 6. BOTÓN MODE (MODO): Presione el botón mode para cambiar entre los diferentes modos: automático, NOTA: La pantalla del panel de control siempre suspensión, energía. muestra la temperatura ambiente de la TEMPORIZADOR DE ENCENDIDO AUTOMÁTICO: Cuando habitación en el modo ventilador, excepto el aire acondicionado está... -
Page 15: Control Remoto
CONTROL REMOTO ENCENDIDO/APAGADO 2. SELECCIÓN DE MODO Pantalla 3. AJUSTE DE TEMPERATURA de LCD 4. VENTILADOR 5. MODO DE SUSPENSIÓN 6. AHORRO DE ENERGÍA MODE SLEEP 7. TEMPORIZADOR ENERGY HIGH SAVER 8. °C/°F TIMER 9. MODO MYTEMP (Mi Temperatura) C°/F° 10. -
Page 16: Uso Del Aire Acondicionado
USO DEL AIRE ACONDICIONADO CONDICIONES DE CONGELAMIENTO: Este es un aire MODO DE SOLO VENTILADOR: Use el modo de solo acondicionado de solo enfriamiento. No está diseñado ventilador en velocidad alta, media o baja para para condiciones de congelación en exteriores. No proporcionar una circulación de aire y filtrado sin debe ser usado en condiciones de congelación en enfriar. -
Page 17: Mantenimiento
MANTENIMIENTO CUIDADOS Y LIMPIEZA DESGASTE Para minimizar el desgaste en el aire acondicionado, Limpie su aire acondicionado para mantenerlo como siempre espere al menos tres minutos antes de cambiar nuevo y disminuir la acumulación de polvo. los modos. Esto ayudará a evitar que el compresor LIMPIEZA DE LOS FILTROS DE AIRE se sobrecaliente y que el interruptor automático se dispare. -
Page 18: Solución De Problemas
SOLUCIÓN DE PROBLEMAS PROBLEMA DE CAUSA POSIBLE RECOMENDACIONES OPERACIÓN No enciende el aire El aire acondicionado está Asegúrese de que el enchufe esté bien conectado a la acondicionado. desconectado. toma de corriente. El fusible está quemado/se botó el Verifique el fusible/la caja principal del interruptor y interruptor automático. - Page 19 H-7100, H-7101 π 1-800-295-5510 H-7102 uline.ca CLIMATISEUR DE FENÊTRE SÉCURITÉ Lire attentivement les instructions avant l'installation et • Brancher dans une prise à trois broches mise à la terre. l'utilisation du climatiseur. Conserver les instructions dans • Ne pas retirer la broche de mise à la terre.
-
Page 20: Préparation De La Fenêtre
Assurez-vous que la fenêtre est en bon état et peut fermement tenir les vis requises. Faites toutes les réparations Minimum nécessaires au préalable de l'installation du climatiseur. de 1/2 po Modèle H-7100 H-7101 H-7102 Hauteur de l'appareil 12 ⁄ po 14 ⁄ po 14 ⁄... - Page 21 INSTALLATION SUITE EXIGENCES CONCERNANT LA CONTRE-FENÊTRE INSTALLATION DE LA TRAVERSE SUPÉRIEURE REMARQUE : La traverse supérieure et les Le cadre de la contre-fenêtre ne permettra pas l'inclinaison panneaux latéraux sont désaxés pour permettre correcte du climatiseur et ainsi le drainage approprié. Pour l'inclinaison adéquate de 5/16 po à...
- Page 22 INSTALLATION SUITE 4. Placez le verrou à écran entre les allongements de 3. En vous servant d'une lame ou de ciseaux tranchants, découpez avec soin le panneau isolant l'écran et l'appui de fenêtre, vissez deux vis longues contre les intempéries d'après la grandeur intérieure dans l'appui à...
-
Page 23: Panneau De Commande Électronique
PANNEAU DE COMMANDE PANNEAU DE COMMANDE ÉLECTRONIQUE 6. TOUCHE DE MODE : Appuyer sur la touche MODE pour alterner entre divers modes : auto, veille et REMARQUE : L'affichage du panneau de énergie. commande indique toujours la température MINUTERIE EN MARCHE AUTO : Lorsque le climatiseur ambiante en mode ventilateur sauf lors du est éteint, il peut être programmé... - Page 24 TÉLÉCOMMANDE MARCHE/ARRÊT 2. SÉLECTION DES MODES Écran 3. RÉGLAGE DE TEMPÉRATURE 4. VENTILATEUR 5. MODE VEILLE 6. ÉCONOMIE D'ÉNERGIE MODE SLEEP MINUTERIE 8. °C/°F ENERGY HIGH SAVER 9. MODE MYTEMP TIMER 10. VERROU DE SÉCURITÉ-ENFANTS C°/F° REMARQUE : La télécommande fonctionne CHILD MYTEMP MODE...
- Page 25 USAGE DU CLIMATISEUR CONDITIONS EN TEMPS DE GEL : Ceci est uniquement « FAN ONLY MODE » (MODE VENTILATEUR UNIQUEMENT) : un climatiseur à air froid. Il n'a pas été conçu pour des Utilisez le mode ventilateur vitesse forte, moyenne ou conditions en temps de gel Il ne doit pas être utilisé...
-
Page 26: Entretien Et Nettoyage
ENTRETIEN ENTRETIEN ET NETTOYAGE USURE Pour minimiser l'usure, attendez toujours au moins trois Nettoyez votre climatiseur pour garder son aspect neuf minutes avant de changer de modes. Ceci évitera une et minimiser l'accumulation de poussière. surchauffe du compresseur et le déclenchement du NETTOYAGE DU FILTRE À... -
Page 27: Dépannage
DÉPANNAGE PROBLÈME CAUSES POSSIBLES RECOMMANDATIONS Le climatiseur ne se Le climatiseur est débranché. Assurez-vous que la fiche a été complètement insérée met pas en marche. dans la prise électrique. Le fusible a sauté/le disjoncteur est Vérifiez le fusible principal/le boîtier du disjoncteur et déclenché.
Need help?
Do you have a question about the H-7100 and is the answer not in the manual?
Questions and answers