Table of Contents
Advertisement
Quick Links
Advertisement
Table of Contents

Related Manuals for DMX DR1000


Summary of Contents for DMX DR1000
- Page 1 Digital Audio Satellite Receiver Change graphic to DR1000 DR1000 User Guide...
- Page 2 IMPORTANT SAFETY INSTRUCTIONS THIS IS AN ADDENDUM TO THE DR1000 USERS GUIDE AS REQUIRED BY UNDERWRITERS LABORATORIES INC, PER UL 1492. Dated April 30, 1996 • Read Instructions – Read all Safety Instructions before operating equipment. • Retain Instructions – Save these instructions for future reference.
- Page 3 • Servicing – Do not attempt to service this product yourself, there are no customer serviceable parts inside. Refer all servicing to qualified service personnel. • A product and cart combination should be moved with care. Quick stops, excessive force, and uneven surfaces may cause the product and cart combination to overturn.
- Page 4 ANY PERSONS PERSONS INSTALLING AND/OR OPERATIING THE SAME. DMX does not assume any liability arising out of the application or use of any products, component parts, circuits, software, or firmware described herein. DMX further does not convey any license under its patent, trademark, copy right, or common-law rights nor the similar rights of others.
- Page 5 Shock Hazard! Do Not Open The DR1000 Equipment! Service Only By DMX! The DR1000 contains no user-serviceable parts. Do not attempt to service this product yourself. Any attempt to do so will negate any and all warranties. To reduce the risk of fire or electric shock, do not expose this appliance to rain or moisture...
- Page 6 CAUTION: To Reduce The Risk Of Electric Shock, Do Not Remove Cover (Or Back). No User-Serviceable Parts Inside. Refer Servicing To Qualified Service Personnel. Précautions: Pour éviter toute décharge électrique, ne pas enlever le couvercle,. Les pieces a l’interieur ne sont pas reparables. Faire appel uniquement á...
-
Page 7: Table Of Contents
System Features ....... . What is DMX MUSIC?...... - Page 8 Section Topics ......... .3-1 Starting up the DR1000 ........3-2 Turning the DR1000 ON and OFF .
- Page 9 Clearing the Front Panel Lockout ....4-10 DMX MUSIC/DJ Functions ....... . 4-10 Checking the DR1000’s ID Number .
- Page 10 Maintenance ........5-1 Cleaning the DR1000 Receiver ....5-1 Troubleshooting Tips .
-
Page 11: Introduction
Introduction Welcome to the world of premier digital audio service provided by DMX MUSIC. This guide is your handbook for using the DR1000 Digital Audio Satellite Receiver and the DMR and DMR-28 DMX MUSIC/DJ remote control units. The sections in this guide provide step-by-step instructions for a... -
Page 12: Getting Started
• Section 1 for an overview of the DMX MUSIC/DBS system and equipment • Section 2 helps you get started and contains a full set of DR1000 connection procedures • Section 3 for DR1000 start-up and basic operations •... -
Page 13: Section 1: System Overview And Component Descriptions
S e c t i o n 1 System Overview and Component Descriptions Thank you for subscribing to DMX MUSIC! This section describes the Direct Broadcast Satellite (DBS) receiver and equipment that are used to deliver the best in CD quality music. The equipment includes: •... -
Page 14: System Features
System Features The DR1000 DBS Satellite Receiver is a multi-zone digital audio stereo decoder which easily integrates with most professional audio systems. Key system features include: • Full CD quality 20 kHz stereo • 120 stereo pairs available on one transponder •... - Page 15 DMX MUSIC/DBS service uses a highly sophisticated system that makes channel selection and local music programming easier and simpler than using a VCR. It also allows DMX MUSIC to deliver music of unprecedented linearity, sonic precision, and exceptional fidelity.
-
Page 16: Dr1000 System Components
30watt amplifiers. It can also be easily integrated with most stereo or monaural amplifier systems. DR1000 Digital Audio Satellite Receiver The DR1000 is the master receiver that connects to the satellite dish and your stereo or monaural amplifier system. -
Page 17: Dr1000 Front Panel
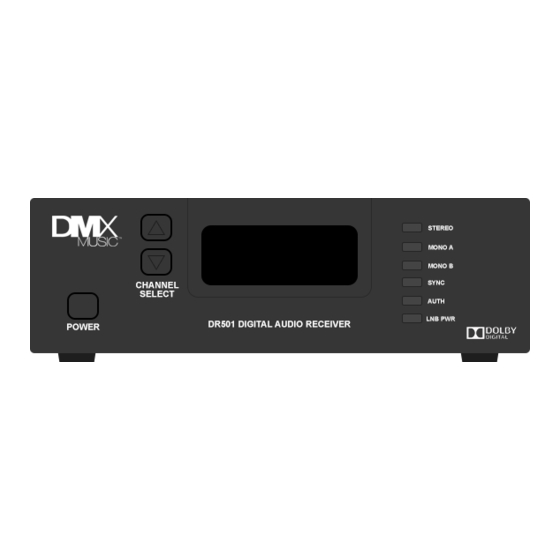
DR1000 Front Panel The front panel of the DR1000 is used to turn the DR1000 on and off and manually select music channels. The front panel consists of: • Power selector — turns the DR1000 on and off When the DR1000 is Off, a decimal point illuminates on... -
Page 18: Dr1000 Back Panel
DR1000 Back Panel The back panel of the DR1000 has a variety of connectors that are used to link the satellite dish to the DR1000 and your audio system to the DR1000. The back panel consists of: • RF IN connector — attaches the DR1000 Receiver to your local satellite dish. -
Page 19: Dmr Remote Control Units
Receiver and press the appropriate keys. The remote control units can be used at distances of up to 10 meters (32 feet) while you are directly in front of and in a straight line to the DR1000 Receiver. Communication between the remote control and DR1000 will be... -
Page 20: Dmr-22 Remote Control
DR1000. If the remote control fails to operate, refer to Section 5: Maintenance and Troubleshooting. DMR-22 Remote Control The DMR-22 remote control unit is described below. Only the keys indicated operate the DR1000 Receiver. The other... -
Page 21: Dmr28 Dmx Music/Dj Remote Control1-9
DMR28 DMX MUSIC/DJ Remote Control In addition to the basic features, the DMX MUSIC/DJ provides instant viewing of the following information for each music selection: • Title • Album • Composer • Artist • Record label • Album ID number The DMX MUSIC/DJ also displays DR1000 operation information, help messages, and low battery indication. -
Page 22: Additional Dr1000 Receivers
DR1000-associated functions. Additional DR1000 Receivers Additional DR1000 receivers can be added to your system at any time. Each receiver allows you to select and play as many as four different DMX MUSIC channels on a separate audio systems. This provides additional stereo music channels to cover other locations or zones. -
Page 23: Before You Begin
S e c t i o n 2 Installation and Connections This section helps you set up and connect your DR1000 system. It provides: • DR1000 shipment checklist • Tips on selecting the best location for your system • Step-by-step instructions for connecting the DR1000 Receiver to your audio system •... - Page 24 Keep the carton and original packaging to return a unit for repair, in the unlikely event of a failure. After the carton is opened, carefully remove the DR1000 and all system components and check the following items: Visually inspect the system to ensure that no physical damage has occurred during shipping.
-
Page 25: Choosing A Good Location
DR1000 is placed in a closed area, such as a bookcase or rack, ensure that proper ventilation is provided. Never place the DR1000 on a soft surface, such as a rug, sofa, or bed, that would obstruct the required air flow into the DR1000 ventilation... -
Page 26: Connecting The Dr1000 To Your Audio System
USE CORRECT POWER SOURCE Operate DR1000 from a 120 V, 60 Hz outlet only. Take care not to overload wall outlets or extension cords, as this increases the risk of fire or electrical shock. ROUTE POWER CORDS SAFELY Route power cords so they are not walked on or pinched. Pay... -
Page 27: Connecting The Dr1000 To Your Stereo System
AC power turned off. Connecting the DR1000 to Your Stereo System To connect the DR1000 to a stereo system, refer to the figure below and the following instructions. 1. Make sure the stereo amplifier is OFF and the volume is turned completely down. -
Page 28: Connecting The Dr1000 To Your Monaural System
Do not connect the RCA cables from the DR1000 to the PHONO input of audio equipment. Any line level input such as AUX, CD, DAT, TAPE, VIDEO, or VCR can be used for the DR1000 output. 4. Plug the DR1000 into an AC outlet. -
Page 29: If The Audio Equipment Has A Direct Digital Coaxial Input
If the Audio Equipment Has a Direct Digital Coaxial Input To connect the DR1000 to audio equipment with direct digital input, refer to the figure below and the following instructions. Connect a shielded (digital or video rated) RCA cable (not provided) -
Page 30: Connecting Multiple Receivers To One Antenna
7. Connect a 75 ohm coaxial cable (RG-6, typical) from the output of the LNB to the Receiver RF IN connector. 8. Connect 120 VAC DR1000 Receiver – do not turn it on. Improvise a temporary sun shade over the DR1000 front panel as the LED displays may be difficult to read in direct sunlight. -
Page 31: Recommended Equipment
All splitters and line amplifiers should be rated for satellite IF processing with a minimum bandwidth of 950 MHz to 1750 MHz. Since power is delivered to the LNB and line amplifier by the DR1000 Receiver (18 VDC via RF IN connector), splitters should have one DC power passing port. - Page 32 • Coaxial Cable Always use a high quality RG-6 or RG11 cable to minimize antenna signal loss and amplifier requirements.
-
Page 33: Section 3: Getting Started And Basic Operations
S e c t i o n 3 Getting Started and Basic Operations The DR1000 has many features that you can use to customize your DMX MUSIC program. These exciting and easy-to-use features, combined with up to 120 available channels delivering commercial- free, CD-quality music, allow you to design and implement a music program that meets your individual needs. - Page 34 Center at 1 (800) 700-4412 and inform them that you are ready to receive your service. They will ask for the receiver serial number on the back of the unit. Tell them that this is a DR1000 and the number of zones you want authorized (2 zones standard, 4 zones with option card) They will send an authorization signal to your receiver.
-
Page 35: Correcting Errors
To turn the DR1000 OFF, press the power selector once on either the DR1000 front panel or remote control. A small green decimal point light will appear on the front panel zone one display. This indicates that the... -
Page 36: Checking The Clock
24-hour mode. The time displays for approximately five seconds and then automatically displays the current channel. If the DR1000 clock has not been initialized by the Control Center, the front panel displays 99. Setting the Volume (Zone Specific) -
Page 37: Muting The Volume
L followed by a two-digit volume indicator on the currently selected zone. The DR1000 is shipped with the full volume (32) setting for each zone. Muting the Volume (Zone Specific) The DR1000 offers a mute function that is controlled through the remote control. -
Page 38: Recalling A Channel
When you enter a channel, leading zeros are displayed. However, once the channel is tuned, the leading zeros are eliminated. If you enter a three-digit number, the DR1000 tunes to that channel immediately. If you enter a one- or two-digit number, the DR1000 waits for approximately three seconds, verifying there is no other input, and then tunes to that channel. -
Page 39: Dmx Music/Dj Functions
Pressing MORE will redisplay the previously captured information. Viewing the Time and Date (Any Zone) You can view the time and date using the DMX MUSIC/DJ to check that the DR1000 clock is correctly set or to check that the remote control is functioning properly. 1. Press: The currently selected zone displays a flashing two-digit number that is the current hour in 24-hour mode. - Page 40 HH:MM:SS and current Day-Of-Week and date. DOW DD:MMM:YY If the DR1000 clock has not been initialized by the Control Center, the DMX MUSIC/DJ displays 9’s instead of the time and date (i.e. 99:99:99). Immediately after initial authorization, the time will be correct but the date may continue to indicate 99:999:99.
-
Page 41: Section 4: Advanced Operations
Advanced Operations The DR1000 advanced features give you the power and flexibility to create tailored musical programs. These advanced functions include: • Forced tune programming æ a channel is automatically selected and played at a specific time • Adding and deleting authorized channels •... -
Page 42: Setting Forced Tune Events
Setting Forced Tune Events (Dayparting) The DR1000 allows you to program and store up to 32 forced tune events per day. These forced tune events can be programmed for one channel or spread across a maximum of 32 channels. You can program forced tuned events by the minute, hour and day. -
Page 43: Checking Forced Tune Events
At the designated time, the DR1000 will automatically tune to the programmed channel. If you exceed the 6 forced tune events maximum, the DR1000 front panel displays FUL (full) indicating the memory is full. When FUL displays, the DR1000 memory must be cleared before any forced tune events can be entered. -
Page 44: Clearing Forced Tune Events
Clearing Forced Tune Events (Zone Specific) The DR1000 allows you to program and store up to 32 forced tune events per zone. These forced tune events can be programmed for one channel or spread across a maximum of 32 channels. -
Page 45: Adding Authorized Channels
DMX MUSIC affiliate. Setting the Dynamic Range (Zone Specific) The DR1000 Receiver is shipped with all 120 channels set at full CD-quality (90 dB dynamic range). Dynamic range compression is used to limit how much louder or softer the music is allowed vary from the average level set by the volume control. -
Page 46: Checking Dynamic Range Settings
Press STORE to save your selection. If there are less than 32 Dynamic Range settings programmed, the new setting will be stored in memory. The DR1000 will automatically implement the selected dynamic range when the specified channel is tuned. -
Page 47: Clearing The Dynamic Range
Clearing the Dynamic Range (Zone Specific) The DR1000 allows you to program and store up to 32 channels with specific dynamic range settings. If you have exceeded the 32-channel maximum, the DR1000 front panel displays FUL indicating the memory is full. -
Page 48: Checking The Transponder Frequency
Pressing PRESET while entering a Transponder Frequency code exits the procedure and returns to the current channel. Be careful to enter the correct frequency. The DR1000 will not operate if the Transponder Frequency is incorrect. Checking the Transponder Frequency (Any Zone) To check the current transponder frequency, press: The front panel flashes the current Transponder Frequency MHz code. - Page 49 The display is updated approximately twice per second. Your display may not change if the signal quality is constant. — If the DR1000 is not locked, nL displays on the front panel. Unlike most other DR1000 functions, the signal quality indicator does not automatically clear from the display.
-
Page 50: Front Panel Lockout
When the front panel has been locked, both the front panel and the remote control will be non-functional. The only command that will be accepted by the DR1000 is the command to clear the front panel lockout. Clearing the Front Panel Lockout (Any Zone) -
Page 51: Checking The Dr1000'S Status
Every DR1000 Receiver has a specific identification (ID) number which is located on the back of the DR1000. To check the DR1000’s ID number using the DMX MUSIC/DJ, press: The ten-digit ID number is 10 digits long and displays in the following format: •... - Page 52 8. Page Fade Level (Selects the amount of background music fade) The DR1000 will remember the last mode selected and start with that mode when the mode button is next pushed. When the desired mode is selected the four buttons above the Mode button are used to change the settings for that mode.
-
Page 53: Section 5: Maintenance And Troubleshooting
Cleaning the DR1000 Receiver Before cleaning the DR1000, unplug it from the wall outlet. Clean the cabinet, panel, and controls with a soft cloth lightly moistened with water. Do not use any type of abrasive pads, scouring powders, liquid cleaners, aerosol cleaners, or solvents such as alcohol or benzene. - Page 54 The AC outlet is not providing electrician check the outlet. the required power. (You may be experiencing a power Operate the DR1000 from a 120 V 60 brown out in your area.) Hz outlet only. Have a professional The DBS system is not electrician check the outlet.
- Page 55 DMX MUSIC affiliate. Poor satellite signal quality Ensure that the DR1000 is in an sometimes due to sunspots or appropriate location away from vibration inclement weather. or movement that may cause the music...
- Page 56 DR1000. Remote control is broken Ensure that the DMX MUSIC/DJ mode is set correctly. You will see DMX MUSIC appear on the DMX MUSIC/DJ display (refer to Section 1). Unlock the front panel (refer to Section 4).
-
Page 57: Section 6: Specifications
LNB is OFF. This may be normal for multiple receiver installations provided signal from a single LNB. Contact your DMX MUSIC affiliate before switching LNB to Volume control does not Volume control keys are Turn the volume control work keys on, use PRESET 975. -
Page 58: General Specifications
LNB Power: 250 milliamps max 18 VDC ±10% LNB Frequency Drift: ±5 MHz Audio Threshold: 5.1 dB Eb/No for 10-5 BER General Specifications* Power Supply: 100-130 VAC, 60 Hz Power Consumption: 175 Watts maximum Operating Temperature: 0∞ to 40∞ C Operating Humidity: 0 to 95% noncondensing Regulatory Certifications:... -
Page 59: Appendix A: Warranty And Repair Information
A p p e n d i x Warranty and Repair Information Warranty Statement DMX MUSIC warrants that its products are free from defects in material and workmanship at the time of shipment and that they conform to applicable specifications. In no event will DMX MUSIC be liable for consequential misuse or damages. -
Page 60: Return Procedures Dmx Music Commercial Subscribers
Quite often, equipment problems can be corrected over the phone, which keeps your equipment in service and avoids unnecessary and costly downtime. Any returns or repair of the DR1000 must be coordinated by the DMX MUSIC affiliate. -
Page 61: Return Procedures Dmx Music Affiliates
3. Should it be necessary to return a product to DMX MUSIC for any reason, the DMX MUSIC customer service representative will issue you a return material authorization (RMA) number. To issue an RMA number, the DMX MUSIC representative will need the product’s serial number and model number. - Page 62 All equipment upgrade and repair requests will be completely evaluated and the required work performed in an expedient and prompt manner. The equipment will then be thoroughly tested for compliance with appropriate specifications.
- Page 63 DR1000 General Functions and Commands Volume Adjust the volume using Channel The controls on your Recall Press LAST. Stereo system. Scan Press SCAN. Mute Press MUTE. To return to normal volume, press Select Enter the channel number using MUTE again.
- Page 64 800-700-4412 d m x m u s I c . c o m...
- Page 66 7. Mic/Page Level (Control the volume of the page source) 8. Page Fade Level (Selects the amount of background music fade) The DR1000 will remember the last mode selected and start with that mode when the mode button is next pushed.
- Page 67 2. Push-to-Talk: Input is received from a contact closure (switch) on a microphone or from a telephone system which tells the DR1000 when to start and stop a page. To set up page system for push-to-talk systems, follow these steps: 1.
Need help?
Do you have a question about the DR1000 and is the answer not in the manual?
Questions and answers