Advertisement
Quick Links
Thank you for purchasing a Sealey product. Manufactured to a high standard this product will, if used according to these instructions
and properly maintained, give you years of trouble free performance.
IMPORTANT: PLEASE READ THESE INSTRUCTIONS CAREFULLY. NOTE THE SAFE OPERATIONAL REQUIREMENTS, WARNINGS AND
CAUTIONS. USE THE PRODUCT CORRECTLY AND WITH CARE FOR THE PURPOSE FOR WHICH IT IS INTENDED. FAILURE TO DO SO MAY
CAUSE DAMAGE AND/OR PERSONAL INJURY AND WILL INVALIDATE THE WARRANTY. PLEASE KEEP INSTRUCTIONS SAFE FOR FUTURE USE.
WARNING! Ensure Health & Safety, local authority, and general workshop practice
regulations are adhered to when building this shed.
Keep the work area clean, uncluttered and ensure there is adequate lighting.
Keep children and unauthorised persons away from the working area.
DO NOT use the shed for any purpose other than that for which it is designed.
Use appropriate safety clothing including eye protection.
Note! The assembly of this product will require assistance.
Before commencing the assembly, we recommend that you read the instructions thoroughly. Your
new shed comes with all the holes pre drilled to make for fast easy assembly. We recommend
that you assemble the shed using a trestle table or sawhorses and planks. This will ensure that
you are working off the ground and make it easier for you. Assembly is a two person job and
should not be attempted in windy conditions.
Step 1: Check all parts against the component list.
Step 2: Assemble the rear wall panels.
Step 3: Assemble the side wall panels.
Step 4: Assemble the roof panels.
Step 5: Assemble the front wall panels.
Step 6: Assemble the front door.
Step 7: Fit the panels together.
Concrete Slab: It is recommended that your new shed is secured to a concrete slab as per the
specifications in this manual.
INSTRUCTIONS FOR:
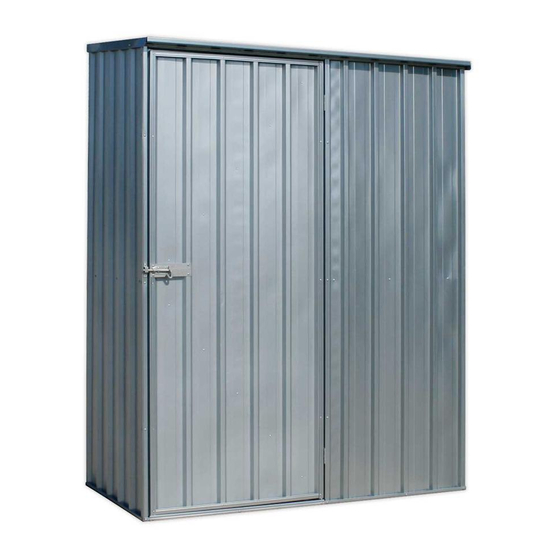
GALVANIZED STEEL SHED
MODEL No: GSS1508
Advertisement

Related Manuals for Sealey GSS1508


Summary of Contents for Sealey GSS1508
- Page 1 GALVANIZED STEEL SHED MODEL No: GSS1508 Thank you for purchasing a Sealey product. Manufactured to a high standard this product will, if used according to these instructions and properly maintained, give you years of trouble free performance. IMPORTANT: PLEASE READ THESE INSTRUCTIONS CAREFULLY. NOTE THE SAFE OPERATIONAL REQUIREMENTS, WARNINGS AND CAUTIONS.
- Page 2 Concrete slab: Please ensure that your site is level. It is recommended that your slab is 100mm thick and you use builders plastic and F52 reinforcing mesh. We recommend that you make your slab 100mm bigger than the base dimensions of your shed. This will allow for a 50mm edge around your shed.
- Page 3 Tools Required:...
- Page 4 Step 1. Check all parts against the component list. Lay out all parts with number facing outwards and check off against parts list. Part Picture Description Component Location Check Sheet 1980x770 cream- Sheet rear wall left Sheet Sheet 1980x770 cream- rear wall right Sheet 1900-1980x770...
- Page 5 M8*18m/m Hexagonal bolt M8 Hexagonal Nut Mid wall brace bracket Channel safety cover Self tapper safety cover (L type) Channel safety cover Rawlbolt (R type) In the unlikely event that you find you are missing a part, please contact your Sealey dealer.
- Page 6 Shed Overview...
- Page 7 Step 2: Assemble rear wall panels. You will find it easier to assemble your shed using sawhorses with timber studs attached ( timber needs to be the same length as the shed (1.5M) or alternatively, a trestle table. Place 1R and 1L on the sheeting your work table and join together with the self tapping screws per the diagram.
- Page 8 Now fit 20B top channel and 20C bottom channel to the sheeting by tapping it in (diagram A) or sliding it in. (diagram B) Be noted that the small lip of the channel is always facing out. This is to ensure that rain water can not build up inside your shed.
- Page 9 Now fit 31 mid wall channel to the sheeting and position it by the self tapping screws. Please note that the groove should face downwards. Fix the top and bottom channels using the self tapping screws.
- Page 10 Step 3: Assemble side wall panels Place 2L the sheeting on your work table and tap or slide in 21A top channel and 21B bottom channel. Fix and position the 32 mid wall channel by the self tapping screws. Fix 21B the bottom channel by the self tapping screws but not 21A the top channel in this stage.
- Page 11 Step 4: Assemble the roof panels. Place 3 and 3 sheeting on your work table and join together with the self tapping screws per the diagram. Now tap or slide in 20A and 20A the channels to the sheeting and fix them using the self tapping screws.
- Page 13 Step 5: Assemble the front wall panels. Place 4 the sheeting on the work table. Fit 20D the top channel, 20E the bottom channel, 41B the jamb (There are pre-drilled holes for next step on both 4 and 41B and must be aligned.) and 33R the mid wall channel to the sheeting and fix them using the self tapping screws.
- Page 14 Step 6: Assemble the front door. Fit 5R the pre-assembled door to the front wall panel per the diagram. Use riveter to fix the door into the pre-drilled holes. Fix the pad bolt (but NOT its keeper in this stage) to the pre-drilled holes using supplied rivets or self tapping screws.
- Page 15 Step 7: Fit the panels together. Attach the two side walls to the back wall, then the front wall, then the roof. Fix all the components by the self tapping screws. Fix the pad bolt keep with rivets or screws. FOR GREATER SECURITY RIVET AS BELOW...
- Page 16 Now fit the bolt down kit using the supplied Rawl Bolts as per the diagram. Strengthen your mid wall brace by applying 72 the mid wall brace bracket on each corner if necessary. RAWL BOLT...
- Page 17 Sealey sheds are weatherproof; however, heavy winds with driving rain could cause your shed to leak. Condensation will also occur in some weather conditions such as extreme heat or cold. We would recommend the use of a waterproof sealant to help seal around all joins and wherever you feel that water may get in under these extreme conditions.
- Page 18 If required, the door can be assembled on the opposite side. Align the door with the edge and drill new holes. Remove the pin from the hinge and reverse it before assembling the door. Fill the old pre-drilled holes with rivets if required. Perform the same procedure for the pad lock. NOTE: It is our policy to continually improve products and as such we reserve the right to alter data, specifications and component parts without prior notice.
Need help?
Do you have a question about the GSS1508 and is the answer not in the manual?
Questions and answers