Summary of Contents for Fermax FERMVISION
- Page 1 2 WIRE SYSTEM FVQ‐1050CCTV IP CCTV INTERFACE INSTALLER MANUAL To activate module type in Code 8880 + Okay in the monitor settings FVQ‐1050CCTV Only compatible with Fermvision 8MP cameras With latest firmware 1 ...
-
Page 2: Table Of Contents
Contents Monitor Description .............................. 3 Step 1 – Add a User to the NVR ............................ 4 Step 2 – Wire the System .............................. 7 Step 3 ‐ Monitor Configurations ........................... 9 Appendix: Add a user to your existing NVR using Mobile Device ................ 11 2 ... -
Page 3: Monitor Description
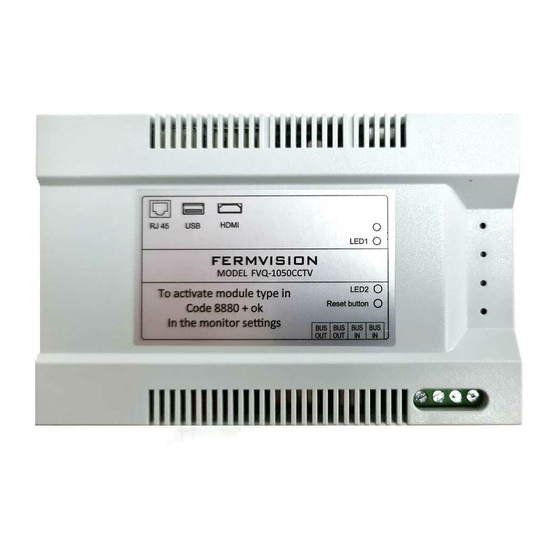
Monitor Description Must be set to left position. NO Name Description 1 RJ 45 Network Connection 2 USB Connector USB Mouse 3 HDMI HDMI Output 4 Power Connector 12 VDC Input – Do Not Use 5 DIP Switches Disabled 6 Micro SD Card Disabled 7 Toggle Switch Set to left position 8 Bus Connection BUS1&BUS2 – System connection bus Connected on Door Station BUS 9 Button Disabled 10 Reset Button Reset Button – Hold for 3 Seconds to default all settings 11 ... -
Page 4: Step 1 - Add A User To The Nvr
Step 1 – Add a User to the NVR If you do not have a monitor connected to the NVR please use the Appendix to add a user using your mobile device. Log into the menu on the NVR 1. Click System 2. Click on User 4 ... - Page 5 3. Click Add 4. Enter the following details Username: fermvision Password: fermvision123Q@ Un‐tick all basic permissions. 5 ...
- Page 6 5. Click OK and make sure the new user is now added. 6 ...
-
Page 7: Step 2 - Wire The System
Step 2 – Wire the System The device is pre‐programmed for Fermvision NVR’s using the plug and play method. This means all Fermvision cameras plugged into a Fermvision plug and play ports of the NVR. The FVQ‐1050CCTV module will also be plugged into the last port on the Fermvision plug and play ports. 7 ... - Page 8 With Multiple Door Stations 8 ...
-
Page 9: Step 3 - Monitor Configurations
Step 3 ‐ Monitor Configurations To enable the FVQ‐1050CCTV module on the monitor follow the below steps Touch the button to access the Settings menu. Type in Code – 8880 + OK 9 ... - Page 10 On the Main Screen by pressing you will now see a new Icon Click on the camera you would like to see. 10 ...
-
Page 11: Appendix: Add A User To Your Existing Nvr Using Mobile Device
Appendix: Add a user to your existing NVR using Mobile Device 1 Open the Fermvision Viewer app on your smart phone while on the same network 2 Click on the Menu button 3 Click on Devices 11 ... - Page 12 4 Click Add Device 5 Click on Auto Search in LAN 12 ...
- Page 13 6 Find the device that says NVR and write down the IP address example 192.168.1.106 13 ...
- Page 14 7 Open up Chrome on your Mobile device. Type in the IP address that you found on step 6. A screen below should appear. 8 Log in using your username and password provided to you from your installer. 9 Click on Setup 14 ...
- Page 15 10 Click on user on the left menu 11 Click on User 15 ...
- Page 16 12 Click on Add 13 Enter the following details Username: fermvision Password: fermvision123Q@ Un‐tick all basic permissions. 16 ...
- Page 17 14 Save the new user 15 Check you have a new User 17 ...


Need help?
Do you have a question about the FERMVISION and is the answer not in the manual?
Questions and answers