Table of Contents
Advertisement
Quick Links
Operating Manual
p 551.10
p 551.15
p 551.19
Serial number:
Year of manufac-
turing:
Keep this manual for a later use.
© SEF Systec GmbH, December 2015
Translation of original instruction.
Subject to technical changes.
4
5
heating zones
8
heating zones
heating zones
1
2
3
4
5
6
7
8
9
10
11
12
Preface
Safety instructions
Warranty
Technical data
Transport and
installation
Operation and
start-up
System settings
Maintenance and
service
Schematic diagram
Options and
spare parts
Notes
Profile administration
Advertisement
Table of Contents

Related Manuals for SEF 551.10


Summary of Contents for SEF 551.10
- Page 1 Serial number: System settings Year of manufac- turing: Maintenance and service Keep this manual for a later use. Schematic diagram Options and spare parts Notes Profile administration © SEF Systec GmbH, December 2015 Translation of original instruction. Subject to technical changes.
-
Page 3: Table Of Contents
Table of content 1.0 Preface 2.0 Safety instructions Preface ....................... 1.1 Safety signs ....................2.2 General instructions................... 2.3 Safety notes....................2.3 Used norms ....................2.4 Intended use ....................2.5 Remaining risks ..................2.5 Responsibility of operator and operating staff ........... 2.6 Owner .................... - Page 4 Table of content 4.0 Technical data Dimensions of the soldering system 551.10 / 551.15 ........ 4.2 Technical data 551.10 / 551.15..............4.3 Dimensions ..................... 4.3 Electrical connection values ..............4.3 Allowed climatic demands ..............4.3 Allowed component sizes ............... 4.3 Characteristics ..................
- Page 5 Unpacking....................5.5 Checking scope of delivery..............5.5 Transport on pallet .................. 5.5 Dimensions and data of the soldering system 551.10 / 551.15 ....5.6 System 551.10 / 551.15 setup and alignment ........... 5.7 Working table ..................5.7 Dimensions and data of the soldering system 551.19 ....... 5.8 System 551.19 setup and alignment ............
- Page 6 Table of content Turn the soldering system on/off ............6.11 Main switch ..................6.11 Turn soldering system on ..............6.11 The system screen .................. 6.11 Basic structure of screen ..............6.12 System display ..................6.13 Operating modes of soldering systems series 551 ......6.13 Menu structure Load program ..............
- Page 7 Start system ..................7.22 Heat-up phase ..................7.22 Fill the oven ..................7.24 Start soldering or curing process ............7.24 Cooling down phase 551.10 ............... 7.25 Cooling down phase 551.19 ............... 7.25 Cooling down phase 551.15 ............... 7.25 Finish process ..................7.25 Profile measurement ................
- Page 8 Cleaning of the mesh belt ..............9.19 Error diagnosis ..................9.20 Check and exchange fuses ..............9.23 Check and exchange fuses 551.10 / .15 ..........9.23 Exchange damaged fuse ............... 9.23 Check and exchange fuses 551.19 ............ 9.25 Exchange damaged fuse ............... 9.25 ...
- Page 9 Operating mode of the soldering system series 551 ......11.21 MESY 570.77 A Temperature profiler ........... 11.23 MESY 570.77 Insulating box ..............11.23 MESY 570.80 A Profiler set ..............11.23 Thermocouples ..................11.23 12.0 Notes Spare part list soldering system 551.10 / 551.15 / 551.19 ....11.24 Page 0.9...
- Page 10 Table of content Page 0.10...
-
Page 11: 1.0 Preface
SEF series 551. You have now a modern and efficient device available for your reflow process. how to operate your reflow system properly and safely. - Page 12 1.0 Preface Designations in the text For an easier reading and searching inside this manual we have marked some text parts especially: To be found before important informations or explana- tions regarding better handling of the system. To be found before general listings. To be found before working or operating steps to be conducted in the described order.
- Page 13 2.0 Safety instructions Table of content Safety signs ....................2.2 General instructions................... 2.3 Safety notes....................2.3 Used norms ....................2.4 Intended use ....................2.5 Remaining risks ..................2.5 Responsibility of operator and operating staff ........... 2.6 Owner ....................2.6 Operator ....................2.6 Skilled and qualified operating staff ............
-
Page 14: Safety Signs
2.0 Safety instructions Safety signs At and inside the device you will find different warning and additional signs. Warning of electrical voltage Warning of high temperatures Warning of entanglement hazard at the inlet and outlet IT IS FORBIDDEN, to remove warning notes, safety symbols and designation labels or to interfere their clear recognizability. -
Page 15: General Instructions
Keep this manual always nearby the soldering system. The SEF Systec GmbH indicates to assume no liability for damages or breakdowns which are caused by the non-observance of this manual. No completeness is claimed with these safety instructions. -
Page 16: Used Norms
2.0 Safety instructions Used norms Basic for the mechanical and electrical construction and design of the following described controller, mechanics and electrics are: EC machinery directive 2006/42/EC with its addenda and related norms. For the electrical part of the system is additionally valid: EC low voltage directive 2004/108/EG Directive of electromagnetic compatibility 2006/95/EG. -
Page 17: Intended Use
2.0 Safety instructions Intended use This soldering system from series 551 has been designed and con- structed according to the latest technology. However, there is a risk of danger if the system is used improperly or not according to the instruc- tions. -
Page 18: Responsibility Of Operator And Operating Staff
2.0 Safety instructions Responsibility of operator and operating staff Owner Operator Owner is each natural person or legal entity who has purchased the system. Operator is each natural person or legal entity who is using the system on his own or by whose order the system is used. The operator respectively his safety representative must assure, that all relevant regulations, instructions and laws are ob- served,... -
Page 19: Responsibility Of Operator And Operating Staff
Reference to other suppliers Read also the manuals of external devices or compo- nents Operate the system only with accessories and add-on parts men- which are not allowed by SEF explicitly. Spare parts Use only original spare parts. Page 2.7 ... - Page 20 2.0 Safety instructions Working areas Overview of working areas: Charging zone Emergency-stop switch Operating switch On/Off Operating and programming via touch panel Lamp pole Discharging zone Page 2.8...
-
Page 21: Safety Notes For Installation And Initial Start-Up
Risk of breakage because of high weight The soldering oven 551.19 with base cabinet has a weight of about 450 kg. The soldering system 551.10 / 551.15 has a weight of approx. 175 kg. Make sure that the working table is covering at least the... - Page 22 2.0 Safety instructions Working areas Overview of working areas: Charging zone Emergency-stop switch Operating switch On/Off Operating and programming via touch panel Lamp pole Discharging zone Page 2.10...
-
Page 23: Safety Notes For Daily Start Of Operation And Automatic Operation
2.0 Safety instructions Safety notes for daily start of operation and automatic op- eration Before starting the system for daily operation, check all protective devices and other protective measures for func- tion and completeness. Check all system elements for foreign bodies. During operation always observe the safety provisions. - Page 24 2.0 Safety instructions Working areas Overview of working areas: Charging zone Emergency-stop switch Operating switch On/Off Operating and programming via touch panel Lamp pole Discharging zone Page 2.12...
-
Page 25: Failures
2.0 Safety instructions Safety notes for daily start of operation and automatic op- eration Failures If a failure appears which can cause a risk for persons, system or environment the complete system must be stopped by using the emergency-stop switch. The users are obliged to inform the operator or owner about appearing changes at the system which might affect the safety of persons or of the soldering system. -
Page 26: Safety Notes For Maintenance And Service
2.0 Safety instructions Safety notes for maintenance and service Five safety rules During maintenance and service work at the system observe always the following "five safety rules". Disconnect Secure against restart Check if system is volt-free Ground and shorting CAUTION Cover nearby parts which are not volt-free Heat accumulation / emission of harmful vapours by switching off to early... -
Page 27: Dismounting Of Safety Devices
WARNING Risk of injuries due to high weight The soldering oven 551.10 / .15 has a weight of approx. 175 kg. The soldering oven 551.19 with base cabinet has a weight of CAUTION about 450 kg. -
Page 28: Disposal Notes
2.0 Safety instructions Disposal notes The system contains materials and operating supplies that might harm the environment when disposed of. The operator is responsible that these materials and substances are disposed of in compliance with the relevant legal regulations. The following applies to Germany: How these substances and materials must be disposed, is regulated by federal and provincial law. -
Page 29: 3.0 Warranty
3.0 Warranty Table of content Warranty ....................3.2 Rights of use..................3.2 Assignment of the rights of use ............. 3.2 Liability....................3.2 Reshipment ................... 3.2 Modifications or improvements of the product ........3.3 Special restrictions ................3.3 Caveat emptor ..................3.3 Page 3.1... -
Page 30: Rights Of Use
3.0 Warranty The APT GmbH Automation und Produktionstechnik hereby grants the customer the right to non-exclusive, non-transferable utilization of the hardware and software (in the following referred to as the “product”) Rights of use supplied to the customer in accordance with the following provisions: The utilization rights entitle the customer to use the prod- uct and the documents which are necessary for its use. -
Page 31: Special Restrictions
3.0 Warranty improvements of the product The APT GmbH Automation und Produktionstechnik re- the product at its sole discretion. However the APT GmbH Automation und Produktionstechnik is not obliged to make Special and free of charge. restrictions It is prohibited to copy or otherwise reproduce the product and the written documents either in whole or in part in their General ered product or parts of it. - Page 32 3.0 Warranty Page 3.4...
- Page 33 4.0 Technical data Table of content Dimensions of the soldering system 551.10 / 551.15 ........ 4.2 Technical data 551.10 / 551.15..............4.3 Dimensions ..................... 4.3 Electrical connection values ..............4.3 Allowed climatic demands ..............4.3 Allowed component sizes ............... 4.3 Characteristics ..................
-
Page 34: 4.0 Technical Data
4.0 Technical data Dimensions of the soldering system 551.10 / 551.15 Dimensions of the soldering system with opened hood Page 4.2 All dimensions in millimetre (mm). -
Page 35: Dimensions
4.0 Technical data Soldering system 551.10 / 551.15 Dimensions Depth: 785 mm Width: 2006 mm Height: 554 mm Depth opened: 1050 mm Depth opened (with option lamp pole): 1170 mm Height opened (without base cabinet): approx. 1000 mm Weight (without base cabinet):... -
Page 36: Dimensions Of The Soldering System 551.10 / 551.15 With Power Supply 220V Triangle Circuit
4.0 Technical data Dimensions of the soldering system 551.10 / .15 with power supply 220V triangle circuit Dimensions of the solde- ring system with opened hood Page 4.4 All dimensions in millimeter (mm) -
Page 37: Option Power Supply 220V In Triangle Circuit
Continuous sound pressure level: 60dB(A) Electrical connection: 3~ 220VAC 60Hz In standard the reflow ovens 551.10 / .15 are equipped with a 16A CEECON Rated current: allowable tolerance mains power +6% / -10% Max. heating power: 11 kW Optionally the reflow ovens 551.10 and 551.15... - Page 38 4.0 Technical data Dimensions of the soldering system 551.19 Dimensions of the soldering system with opened hood Page 4.6 All dimensions in millimetre (mm).
-
Page 39: Dimensions
4.0 Technical data Soldering system 551.19 Dimensions Depth: 845 mm Width: 3110 mm Height: 1440 mm Depth opened (with lamp pole): 1190 mm Height opened (with base cabinet): approx. 1750 mm Weight (with base cabinet): 450 kg Colour: RAL 9010 pure white RAL 3001 signal red Electrical connec- Safety class... -
Page 40: Functional Scheme 551.10 - 4 Heating Zones
Soldering ovens of the series 551.1X are designed as a desktop unit and modular. The heat- zone. Structure of the heating chamber 551.10 - 4 heating zones + 1 cooling zone Structure of the heating chamber 551.15 - 5 heating zones [with external cooling zone] Functional scheme 551.15 - 5 heating zones... -
Page 41: Functional Scheme
The temperatures of all heating areas can be set individu- ally. The maximum power consumption of soldering ovens 551.10 / 551.15 is limited by the controller to 11 kW, the power consumption of sol- dering oven 551.19 at 22 kW to avoid overloading the mains supply Cooling zones during the heating phase. - Page 42 4.0 Technical data Page 4.10...
-
Page 43: Operating Panel 7'' Touch Screen
4.0 Technical data Operating panel touch screen 7'' Operating and programming of soldering ovens from series 551 take parameters will be displayed on the panel. The system can be equipped with an additional lamp pole on request. All entries will be done with the help of a virtual keyboard which will be activated on the touch panel. - Page 44 4.0 Technical data touch panel 4/5 wire touch- screen inter- face Battery holder 24V power supply Ethernet (optional) USB 2.0 CAN-Bus CR2032 (LAN / WLAN) (leaded to outside) communication Page 4.12 (leaded to outside) electronics...
- Page 45 4.0 Technical data Controller The reflow oven 551.1X will be operated with a touch screen control- ler. The touch screen controller with integrated SBCC-processor works as master and provides all control and monitoring tasks. The com- munication between SBCC processor and electronics takes place via CAN-bus.
-
Page 46: Central Electrics 551.10 / 551.15
4.0 Technical data Central electrics 551.10 / 551.15 Central electrics with controller RO-R2R Central electrics 551.19 with two controllers RO-R2R Input fuses and Controller Line contactor Controller power supply T0 RO-R2R Slave K1+K2 RO-R2R Master Page 4.14... -
Page 47: Central Electrics
(short drive of all heaters for error diagnosis) (Recognition of thermocouples / check for break/damage) second controller In the soldering ovens 551.10 and 551.15 the complete machine elec- for 551.19 tronics will be found on the mounting plate below the inlet zone. -
Page 48: Controller Ro-R2R
4.0 Technical data Version 3~ 400VAC Y 16A CEECON 24V power sup- Pre-fuse F1 Terminals 2x Load contactor Controller exhaust box board RO-R2R (safe cut-off in case of error) Version 3~ 220VAC 60Hz Load contactor Pre-fuse F3, F4 24V power Pre-fuse F1 Terminals Controller... - Page 49 4.0 Technical data Controller RO-R2R Controller RO-R2R Connected modules / assembly groups: Touch screen controller based on SBCC (CAN-Bus) Load contactor (safe cut-off in case of error) External power supply 24V/10A (5A?) 24V motor with rotary encoder (drive of mesh belt) 4 / 5 upper heating zones a 2kW / 3kW 4 / 5...
- Page 50 4.0 Technical data Allocation of the signals for the soldering 551.19 X2 X3 X4 X5 X6 X7 X8 X9 X10 X11 X12 X13 X14 X15 X16 X1 CAN connection to master X38 X17 Fans heating zone 1 n.c. X39 X18 Fans heating zone 2 X19 Fans heating zone 3 X20 Fans heating zone 4 X21 Fans cooling zone 1 X22 Exhaustion RO‐R2 Controllerboard Slave X24 Fan cooling machine X26 24V supply X27 n.c.
- Page 51 4.0 Technical data Controller RO-R2R 551.19 In the soldering ovens 551.19 two controllers RO-R2R are required. The controller below the inlet zone operates as a slave and essentially controls the heating coils and fans of the heating zones 1-4. He also Controller RO-R2R zones.
- Page 52 4.0 Technical data Handwheel 1 adjustable transfer bar Page 4.20...
-
Page 53: Component Sizes Pin Chain Conveyor
4.0 Technical data Option pin chain conveyor for ovens Series 551 Reflow ovens of the series 551 are basically equiped with a mesh belt con- veyor. Optional the conveyor system of the series 551 can be equiped with a pin chain conveyor instead. In this model the rear transfer bar can be adjusted with the help of a hand wheel to the required working width. - Page 54 4.0 Technical data Page 4.22...
-
Page 55: Base Cabinet 551.10.1
4.0 Technical data Base cabinet 551.10.1 The reflow ovens from series 551 are designed for desktop use. Included is a separately supplied stable cabinet for safe placement the sol- dering oven. The cabinet has behind its two front doors plenty of storage space for your soldering equipment. - Page 56 4.0 Technical data Page 4.24...
-
Page 57: Option Exhaust Box 551.10.2
4.0 Technical data Option exhaust box 551.10.2 CAUTION Danger of toxication On a continuous base the arising solder or adhesive vapours are harmful to health. The machine must necessarily be connected to an exhaust system or an air washing unit. The exhaust system must have a minimum capacity of 270m³/h. - Page 58 4.0 Technical data Page 4.26...
-
Page 59: 5.0 Transport And Setting Up
Unpacking....................5.5 Checking scope of delivery..............5.5 Transport on pallet .................. 5.5 Dimensions and data of the soldering system 551.10 / 551.15 ....5.6 System 551.10 / 551.15 setup and alignment ........... 5.7 Working table ..................5.7 Dimensions and data of the soldering system 551.19 ....... 5.8 System 551.19 setup and alignment ............ -
Page 60: Transport Notes
5.0 Transport and setting up Transport notes Transport notes on the packaging The system is delivered by a forwarding agent in assembled condi- tions in a special packaging. Please note the instructions on the packaging: Indication of center of gravity of packaging. Attention, do not use hand hooks. -
Page 61: Safety Instructions For Mounting And Dismounting
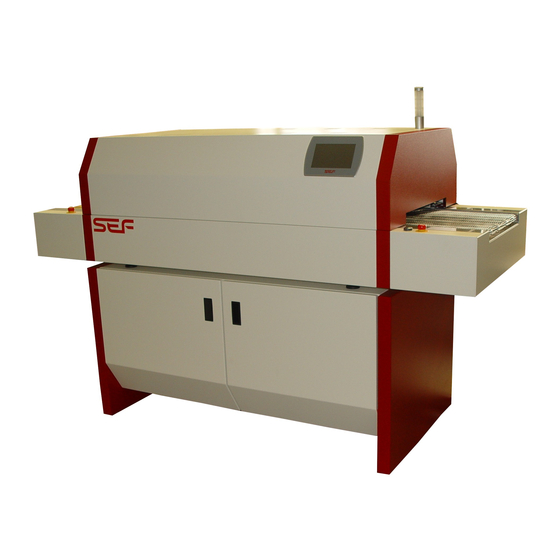
The mounting of additional installations is only allowed after written Page 5.3 approval of the manufacturer. SEF Systec GmbH won't take any liability for damages to persons... - Page 62 (8) extern cooling- module (4) IR-sensor PCB recognition (551.15) (3) Operating switch On/Off (9) USB-interface (2) Soldering system 551.10 (1) Base cabinet (optional) (10) internal (11) SMEMA inlet (12) Mains connection (17) SMEMA outlet (14) mains line (15) Exhaust socket exhaust box Page 5.4...
-
Page 63: Unpacking
Carefully remove the lid and sides the transport box. Risk of injuries due to high weight The soldering oven 551.10 / .15 has a weight of approx. 175 kg. The soldering oven 551.19 with base cabinet has a weight of Checking scope about 450 kg. - Page 64 5.0 Transport and setting up Dimensions and data of the soldering system series 551.10 / .15 All dimensions in millimetre (mm). System data Dimensions 785 x 2006 x 554 mm DxWxH Dimensions (opened) 1050 x 2006 x 1000 mm DxWxH...
-
Page 65: System 551.10 / 551.15 Setup And Alignment
The working table must be stable and capable of the soldering sys- tems weight. We recommend to use the special designed base cabinet 551.10.1 with a lot of stowage for the safe set up of the soldering system. Page 5.7 desk stands firm as does not jiggle. - Page 66 5.0 Transport and setting up Dimensions and data of the soldering system series 551.19 Alle Maßangaben in Millimeter (mm) System data Dimensions 845 x 3110 x 1440mm DxWxH Dimensions (opened) 1190 x 3110 x 1000mm DxWxH Weight 450 kg Min. PCB size 15 x 10 mm working width mesh belt 405 mm...
-
Page 67: System 551.19 Setup And Alignment
5.0 Transport and setting up System 551.19 setup and alignment Move the soldering system 551.19 on the transport pallet of transport, such as hand lift or fork truck. Remove the four securing screws M10x70, which are screwed from underneath through the transport pallet. Place the transport pallet with the soldering oven on the Lift the soldering system with suitable lifting gear (eg hand lift or fork truck) from the pallet. -
Page 68: Align Soldering System Horizontally
400V-CEECON-connector at a 5m power line. Provide the mains connection 400VAC/N/PE 50 Hz with the 16A or 32A CEECON connector. WARNING [551.10/.15] [551.19] again and check the firm fit. Page 5.10 The in-house power supply must be fused with 3x16A separately for the soldering system. -
Page 69: Name Plate 220Vac D
5.0 Transport and setting up Name plate 220VAC Power supply 220VAC triangle circuit will be supplied with a 5m power line and ring terminals. WARNING 220V/60Hz triangle circuit. Danger of injuries due to electricity connecting point is voltage free. Observe the "5 safety rules"... - Page 70 5.0 Transport and setting up heat resistant exhaust hose 230VAC SEF exhaust box Page 5.12...
-
Page 71: Exhaust Connection
Observance of the safety and processing instructions of the soldering paste manufacturer is required. f you don't have an in-house exhaust-air system you can use the exhaust box 551.10.2 to exhaust the sol- der vapours which was especially designed for this purpose. -
Page 72: Interfaces
veyor speed separately. an optimal adjustment of the Integrated temper- The soldering system 551.10 has an integrated 1-channel temperature With the help of the supplied thermocouple you can meas- display it on the production screen. This allows an optimal Page 5.14... -
Page 73: Final Check
5.0 Transport and setting up Final checkup Before turning the system on and starting operation, you should questions with “YES”: Did you read and understand the chapter "2.0 Safety in- structions" in this operating manual? Did you remove the packaging material from the system completely? Did you place the system on a table capable of the sys- tems weight and dimensions? -
Page 74: Dismounting, Storage And Preservation
Danger of injuries by high weight location. The soldering oven 551.10 /.15 has a weight of approx. 175 kg, the optional base cabinet has a weight of approx. 90 kg The soldering oven 551.19 with base cabinet has a weight of about 450 kg. - Page 75 6.0 Function and start-up Table of content Functional description................6.3 Heating chamber .................. 6.3 Thermocouples ..................6.3 Cooling zone ..................6.3 Exhaustion .................... 6.3 Mesh belt ....................6.5 Operating the system ................6.5 Machine status ..................6.5 Temperature profiler ................6.7 Emergency-stop ..................
- Page 76 6.0 Function and start-up 551.10 - 4 heating zones (5) Lamp pole (4) Emergency-stop switch (Optional) (6) Operating panel (3) IR-sensor 551.15 - 5 heating zones PCB recogni- tion (7) USB-interface (3) Operating switch On/Off (2) Soldering system 551.10 (1) Base cabinet...
-
Page 77: Functional Description
Cooling zone In the embodiment 551.10 zone 5 is designed as a cooling zone in the upper part of the heating chamber. In the version 551.15, this zone is used as an additional heating zone. - Page 78 6.0 Function and start-up Page 6.4...
-
Page 79: Mesh Belt
The working width of the pin chain conveyor can be set between 50 - 400 mm. Operating As in proven SEF tradition the controlling and operating takes place by the system own developed and manufactured electronics. - Page 80 6.0 Function and start-up Page 6.6...
-
Page 81: Emergency-Stop
6.0 Function and start-up Temperature the delivery range. In case of danger the soldering system can be stopped by the emer- Emergency-stop gency-stop switches which are mounted at the inlet and outlet. When pressing the emergency-stop the heating will be switched off and the conveyor will be stopped. - Page 82 6.0 Function and start-up Touch screen system screen info line menu selection Page 6.8 loaded profile status message START/STOP...
-
Page 83: The Operating Panel
6.0 Function and start-up The operating panel Touch screen controller based on SBCC controller. This operating panel is assembled user-friendly at the front of the oven. The touch screen controller with integrated SBCC- processor works as master and provides all control and monitoring tasks. - Page 84 6.0 Function and start-up Main switch Operating switch On/Off Page 6.10...
-
Page 85: Turn The Soldering System On/Off
6.0 Function and start-up Turn the soldering system on/off Main switch The main switch for turning the soldering system on/off is situated on the rear side of the machine at the inlet area. Turn soldering system on Turn the main switch to position <ON>. Turn the system on with the operating switch. -
Page 86: Basic Structure Of Screen
6.0 Function and start-up Basic structure of screen 551.10 4 heating zones Display of selected Lamp pole Status Error message soldering program message System screen Start / Stop Comment in info line Comment in info line Display of Comment in info... -
Page 87: System Display
6.0 Function and start-up System display The operating of the soldering system takes place via the touch panel. All relevant informations will be shown on the display. The screen was separated in different areas to achieve an easy use and a clear design. This basic structure is kept in all menu points. The system screen is separated in the following areas: The system screen which contains information about sol- Display of the selected soldering program... -
Page 88: Menu Structure Load Program
6.0 Function and start-up Menu structure load program SBCC panel controller 551.10 USB mass storage Page 6.14 Ethernet / WLAN connection... -
Page 89: Load Program
6.0 Function and start-up Load program The soldering system will be equipped with two standard soldering- as a basic for your own parameter settings. Tip on the function key <Load program> in the system screen. mass storage or network (option): Select program Press function key <Select medium>... -
Page 90: Menu Structure Edit Program
6.0 Function and start-up Menu structure Edit program Page 6.16... -
Page 91: Edit Program
6.0 Function and start-up Edit program Create soldering ting. You can load these programs and adapt them to your own re- quirements or use them immediately for production because they are We recommend to create your own parameter settings because the because there are only 9 parameters to set. -
Page 92: Menu Structure Save Program
6.0 Function and start-up Menu structure Save program Page 6.18... -
Page 93: Save Program
6.0 Function and start-up Save program Save program You can save a soldering program on the internal storage, a USB mass storage or optionally via Ethernet/WLAN on an external data storage. Thereby the number of storable programs is nearly unlimited. A soldering program contains the set temperatures of all eight heating areas as well as the conveyor speed. - Page 94 6.0 Function and start-up In case that you want to overwrite an existing soldering shown in the top line. The virtual keyboard will be activated. Page 6.20 program, mark it on the touch screen. The file name will be In case that you want to save a new file tip on the top line.
- Page 95 6.0 Function and start-up Finish the entry by tipping again on the function key <Save program>. The soldering program will be saved and the display turns back to the system screen automatically. By pressing <Back> you can abort this menu at any time. Page 6.21 Enter the required file name.
- Page 96 6.0 Function and start-up Temperature display Thermocouple Measurement socket Page 6.22...
-
Page 97: Profile Measurement
6.0 Function and start-up Temperature couple is included in the delivery. Under <Profile measurement> the software offers the possibility to Place the thermocouple on the required position on your PCB and connect it with the measurement socket at the inlet. The measured temperature will be shown in the system screen. - Page 98 6.0 Function and start-up Menu structure Page 6.24 Profile measurement...
- Page 99 6.0 Function and start-up After the sensor has passed the heating chamber and the cooling zone and has reached the outlet, the measurement must be stopped by tipping on the function key <Stop measurement>. The recorded measurement can be printed directly or saved as a graphic as well as a table.
-
Page 100: Menu Structure Setup
6.0 Function and start-up Menu structure Setup Page 6.26... -
Page 101: Setup
6.0 Function and start-up Setup ers in the manufacturing department: Language selection Colour scheme Temperature display °C / F / % Password protection Standby time Standby temperature From this menu you will also attain the service mode * SMEMA-interface activate/deactivate * Administration/parametrisation CAN-BUS * Administration/parametrisation LAN * Administration/parametrisation WLAN... - Page 102 6.0 Function and start-up Page 6.28...
- Page 103 Start system ..................7.22 Heat-up phase ..................7.22 Fill the oven ..................7.24 Start soldering or curing process ............7.24 Cooling down phase 551.10 ............... 7.25 Cooling down phase 551.19 ............... 7.25 Cooling down phase 551.15 ............... 7.25 Finish process ..................7.25 Profile measurement ................
- Page 104 7.0 Soldering profile management and production Reflow soldering profiles Page 7.2...
-
Page 105: Parameter Adjustment
Parameter adjustment the prerequisite for an optimal soldering result. Temperatures of the single process phases Dwell times Assembly of the PCB The manufacturers of the solder pastes provide very detailed information about the temperature-time regime. The component industry mostly gives information about the short-term or long term temperature limits which a component can resist. - Page 106 Critical profile parameters Example component thickness < 1,6 mm (small components) 7.0 Soldering profile management and production IPC/JEDEC J-STD-020C IPC/JEDEC J-STD-020C Sn-Pb Eutectic Assembly Pb-Free Assembly Average Ramp-Up Rate < 3K/s < 3K/s to Tp) Preheat 100°C 150°C Temperature Min ( 150°C 200°C Temperature Max (...
-
Page 107: Time Above Liquidus
entry of the PCB in the peak zone (melting zone). However next solvents, thixotropy agents and so on, which boiling points are in the range between 125°C and 250°C. These agents are not nec- essary for the soldering process itself and must be vaporised be- errors like solder balls or voids. -
Page 108: Example Component Thickness 1,6 Mm - 2,5 Mm(Small Components)
Critical profile parameters Example component thickness 1,6 mm - 2,5 mm (small components) IPC/JEDEC J-STD-020C IPC/JEDEC J-STD-020C Criteria Leaded Lead free Increase gradient in the preheating zone < 3K/s < 3K/s Temperature in the preheating zone and 100-150°C 150-200°C soaking time 60-120 s 60-180 s Time above melting... -
Page 109: Peaktemperature
a higher temperature level and so decrease the stress for all com- ponents. Maximum temperature The maximum temperature T Peaktemperature temperature. Higher temperatures decrease the surface tension in the praxis have shown, that an overheating of 5-10% above the melting point is advantageously. For SnAgCu with T = 217 °C and an overheating of 5% a T = 241,5 °C is advisable. - Page 110 551.10 4 heating zones 551.15 5 heating zones 7.0 Soldering profile management and production 551.19 9 heating zones Page 7.8...
- Page 111 storage) will blast the plastic case. Too low heating-up gradients are also not advisable, because they process. By this way the manufacturing cycle times will be elongat- ed as well as the long-term stress situation of the assembly. During the cooling down the temperature gradient should be limited, too, even if a quicker cooling is less critical regarding possible process errors.
-
Page 112: Load Program
Load program Tip on the function key <Load program> in the system screen. 7.0 Soldering profile management and production disk. In case that you want to load solder programs from a USB mass storage or network (option): Press function key <Select medium>. Page 7.10 A file window opens showing all solder programs stored on the hard... -
Page 113: Select Program
Change to the required drive and select the required name will be shown in the top line. 7.0 Soldering profile management and production Select program In case that the directory contains more solder programs as can be shown in the window you can use the scroll bar Scroll bar automatic search function Load program... - Page 114 551.10 4 heating zones Display of the selected solder program System screen System overview: Actual/set temperatures heating areas Conveyor speed 7.0 Soldering profile management and production 551.15 - 5 heating zones 551.19 - 9 heating zones Combination display / Actual temperature...
-
Page 115: Edit Program
PCBs of category 2 can usually soldered or cured with the already stored programs supplied by SEF. For category 1 you will probably zones can be set lower. For category 3 you will need higher tempera- tures because the big components will need more heat energy. - Page 116 In case the system is password protected. Press the function key <Edit program> and unlock the system screen by entering the password. 7.0 Soldering profile management and production When tipping on the selected nominal value its display will change to Enter the required nominal value via the keypad and con- If you want to abort the entry, Tip on a free area in the system screen.
-
Page 117: Adjust Conveyor Speed
90 cm/min ca. 1:33 min ca. 2:47 min 60 cm/min ca. 2:20 min ca. 4:10 min Conveyor speed: Process time 551.10/.15: Process time 551.19 50 cm/min ca. 2:48 min ca. 5:00 min 40 cm/min ca. 3:30 min ca. 6:15 min 30 cm/min ca. - Page 118 If you want to change the conveyor speed, tip on the nomi- nal value shown in the system screen. The display of the nominal conveyor speed will change to an input 7.0 Soldering profile management and production the return sign. If you want to abort the entry, Tip on a free area in the system screen.
-
Page 119: Save Program
Save program Save program After setting all required parameters you can save the new soldering program on the internal storage. If requested you can also save the program on a USB mass storage or optionally via Ethernet/WLAN nearly unlimited. The soldering program contains the nominal temper- atures of all heating zones as well as the conveyor speed. -
Page 120: Overwrite Program
Overwrite program If you want to overwrite a soldering program mark in on line. 7.0 Soldering profile management and production activate the virtual keyboard. Page 7.18 the touch screen. The file name will be shown in the top If you want to save a new file tip on the top line. This will... -
Page 121: Save Program
Save program Finish the entry by pressing again the function key <Save program>. The soldering program will be saved and the display changes back to the system screen automatically. 7.0 Soldering profile management and production with <Yes>. When tipping on <No> you can enter a new By pressing <Back>... - Page 122 Hand wheel 1 7.0 Soldering profile management and production adjustable transfer bar Light sensor (Recognition of solder pieces) Page 7.20...
-
Page 123: Option Pin Chain Conveyor
Option pin chain conveyor If the transport system of your soldering system is equiped with a pin chain conveyor, the adjsutable rear transfer bar must be set to the re- quired working with with the hand wheel (1) before starting the produc- tion. -
Page 124: Start Production
Start production the production. The working width of the pin chain conveyor is adjusted (option) the system has heated up, the ready status is shown on the display. Turn on the soldering system with the main switch. After turning on the system will load the last used soldering pro- then load another stored program. - Page 125 The soldering system will need approx. 15 - 20 min heat-up phase to heat-up the oven from room temperature to operating temperature for the soldering process and to reach ready state. You should place no PCBs on the conveyor during heat-up 7.0 Soldering profile management and production scanner the conveyor will stop until ready state is reached.
-
Page 126: Fill The Oven
Start production When reaching all of the operating temperatures given in the will change from HEATING to READY. This will be shown in the status message on the panel and the signal light will change to green. Now you can start the soldering or curing process: Place your PCB at the inlet of the oven approx. -
Page 127: Cooling Down Phase 551.10
Two into the cooling zone integrated fans cool the material to be soldered. After Cooling down exiting the chamber the soldering process in the versions 551.10 and phase 551.10 (551.10) (551.19) 551.19 is nearly completed. - Page 128 7.0 Soldering profile management and production Temperature display Thermocouple Measurement socket Page 7.26...
-
Page 129: Profile Measurement
Temperature part of the delivery. With the help of this sensor the software offers the possibility to record measurement>. Place the thermocouple on the required position on the PCB and connect it with the measurement socket at the inlet. The measured temperature will be shown in the system screen. Change to the measurement menu by pressing the function key <Profile measurement>. -
Page 130: Stop Measurement
Stop measurement After the thermocouple has passed the heating zones, the cooling zone and has reached the outlet the measurement must stopped by pressing the function key < Stop measurement>. agraphic as well as a table. 7.0 Soldering profile management and production allows the storage of measurement data as a graphic or a table under Proceeding is the same as „Save program“. -
Page 131: Stop Or Change Production
Stop or change production Change production After you have soldered or cured the PCBs with your program you can load a new program and go on with the production of different PCBs. If you have loaded a new program, wait as long as the system was adjusted to the new parameters. -
Page 132: Switch System Off
CAUTION Heat accumulation / emission of harmful vapours by switching off to early mains supply during the cooling phase. This will switch off the fans, the conveyor and the exhaust box (optional). This could cause the emission of harmful solder- or adhe- sive vapours, a heat accumulation in the heating chamber and thereby damages at the system. - Page 133 8.0 System settings Table of content Language selection ................. 8.3 Set language ................8.3 Colour scheme ................8.5 Select colour scheme ..............8.5 Temperature display ................ 8.7 Select temperature display ............8.7 Activate password protection for programs ........8.9 Activate password protection ............8.8 Standby parameters ..............
- Page 134 8.0 System settings Page 8.2...
-
Page 135: Language Selection
8.0 System settings Language selection Set language In the menu "Set up" the system offers the possibility to select differ- ent, already implemented languages. Further languages can be implemented on request. Additional to the original language German the languages English and Polish are already implemented. -
Page 136: Colour Scheme
8.0 System settings Colour scheme white Colour scheme black Page 8.4... -
Page 137: Select Colour Scheme
8.0 System settings Colour scheme Select colour scheme In the menu "Set up" the system offers the possibility to select be- tween three different colour schemes. The colour scheme <System colours> uses the settings of the Linux operating system. This offers various adjustments. Tip on the function key <Set up>... - Page 138 8.0 System settings Temperature dis- play °C Temperature dis- play °F Temperature dis- play % Page 8.6...
-
Page 139: Temperature Display
8.0 System settings Temperature display Select temperature display The system offers the option to select between 3 different temperature displays. With selected temperature display in percent the set temperatures must be entered in °C. Tip on the function key <Set up> in the system screen. Under <Temperature display>... - Page 140 8.0 System settings Activate password protection Save program with password protec- tion Edit program with password protec- tion Page 8.8...
-
Page 141: Activate Password Protection For Programs
8.0 System settings Activate password protection for programs The adjusted soldering programs can be protected with a password. If the password protection is activated with <Yes> in the system set- tings, an individual password is required when saving a program. The protected program can be only edited after entering the password again. - Page 142 8.0 System settings Page 8.10...
-
Page 143: Standby Parameters
8.0 System settings Standby parameters "Power Save Package" Soldering systems with activated function "Power Save Package" no PCB at the inlet. In standby mode the system cools down to the de- As soon as the sensor recognises a new PCB the conveyor stops until Set standby time again the production goes on automatically. - Page 144 8.0 System settings Page 8.12...
-
Page 145: Install Update
8.0 System settings Software-Update Install update Via the USB interface at the front of the machine a software update of the user and controller software can be made. The update can be supplied on a USB-stick or sent as an e-mail. If you have received the update for the soldering system ware_rev_XX.YY.tar.gz in the root directory of an USB data medium. - Page 146 8.0 System settings If there are several update revisions on the USB data medium, all available revisions will be offered for selection. The newest revision is preselected. Select the requested revision and confirm with <OK> to install the revision. The system starts with the installation of the new software.
- Page 147 8.0 System settings As soon as the update was installed successfully the sys- tem reports the completion of the work. <OK> The soldering oven starts and will show the system screen. Page 8.15 Now remove the USB data medium and confirm with...
- Page 148 8.0 System settings You can view the actual installed revision. Tip on the function key <Set up> in the system screen. Select <Info>, to receive mor information about the in- stalled software revision. Page 8.16 Confirm with <Yes> and with <Back> you can change back to the system screen.
- Page 149 Cleaning of the chamber floor ..................9.19 Cleaning of the mesh belt ....................9.19 Error diagnosis ........................9.20 Check and exchange fuses ....................9.23 Check and exchange fuses 551.10 / .15 ................9.23 Exchange damaged fuse ..................9.23 Check and exchange fuses 551.19 ................9.25 Exchange damaged fuse ..................9.25 ...
-
Page 150: General Safety Instructions
9.0 Maintenance and service General safety instructions Service and maintenance work disassemble and maintain the soldering system. For all work con- cerning assembly, disassembly, initial operation, movement, main- tenance and adjustment the "5 safety rules" and the instructions of this manual must be observed. Only staff specialised in electronics is allowed to work at the con- troller. -
Page 151: Safety Instructions For Opening And Closing The Hood
Risk of injuries due to high weight Don't switch off the soldering system with the main switch The soldering oven 551.10 / .15 has a weight of approx. 175 kg. and don't disconnect it from the mains supply during the The soldering oven 551.19 with base cabinet has a weight of... -
Page 152: Opening The Hood
9.0 Maintenance and service Opening the hood Loosen the hexagon socket screws (inlet and outlet) with a 5mm socket wrench to open the hood. Lift the hood slowly and carefully and open it completely until you feel the limit stop of both hood rests. The locking against unintended lowering is activated automatically. -
Page 153: Closing The Hood
9.0 Maintenance and service WARNING Risk of burns due to high temperatures Some parts inside the soldering system can reach temperatures up to 500°C during operation. Conduct cleaning work only with cooled down heating chamber. Closing the hood Wear heat resistant gloves. The locking of the hood rests must be loosened to close the hood. -
Page 154: Cleaning And Maintenance Intervals
9.0 Maintenance and service Cleaning and maintenance intervals Cleaning What Whereby When Operating panel humid cloth as necessary Machine body Soap water / as necessary spiritus Reflected-light barrier Cotton bud with as necessary spiritus / brush Blower for heating Brush / vacuum as necessary chamber / exhaustion cleaner... -
Page 155: Lubrication
9.0 Maintenance and service Lubrication What Whereby When Optical control for Check min. 1x per Pin chain of the friction and wear week transport system (optional) The pin chain conveyor is maintenance-free. But you need to check the drive pinion and transport rails regularly for wear. - Page 156 9.0 Maintenance and service Lamp pole (optional) Operating panel barrier for PCB recognition Soldering system 551.10 Base cabinet (optional) Reflected-light Page 9.8...
-
Page 157: Cleaning Work
9.0 Maintenance and service Cleaning work WARNING Risk of injuries due to electricity / rotating fans For service and maintenance work you have to switch off the oven according to the instructions and to disconnect the mains plug. WARNING Then you can open the machine hood. Risk of burns due to high temperatures Some parts inside the soldering system can reach temperatures up to 500°C during operation. - Page 158 9.0 Maintenance and service Blower upper part Motor shaft Outer blower wheel Page 9.10...
-
Page 159: Cleaning Of The Blowers
9.0 Maintenance and service Cleaning work at blowers WARNING Risk of injuries due to electricity / rotating fans For service and maintenance work you have to switch off the oven according to the instructions and to disconnect the mains plug. CAUTION Then you can open the machine hood. - Page 160 9.0 Maintenance and service Cleaning work at fans inside the oven to avoid heat accumulation. Check these fans regularly for dust and dirt and clean them as necessary. tray. In the bottom tray you will find the fans which generate air circulation The fans are mounted on flange plates which are fixed in the bottom Page 9.12 Mounting screws - flange plate - fan...
-
Page 161: Cleaning Of The Fans
9.0 Maintenance and service Cleaning work at fans Cleaning of the fans In case of breakdown or rough contamination the fans can be dis- WARNING plate and connecting cable. Risk of injuries due to electricity / rotating fans For service and maintenance work you have to switch off the oven according to the instructions and to disconnect the mains plug. - Page 162 9.0 Maintenance and service Cleaning work at the heating modules heating chamber. These contaminations must be removed regularly. Due to the modular assembly the components can be cleaned one after another. Exhaust hood heating module 1-4 cooling module Exhaust hood WARNING inlet outlet...
-
Page 163: Cleaning Of The Exhaust Hood "Inlet
9.0 Maintenance and service Cleaning work at the heating modules Cleaning of the ex- haust hood "inlet" Holding screw terminal holder exhaust hood Loosen the hexagon socket screw at the exhaust hood "inlet with a M3 socket wrench. Release the exhaust hood by strong pulling at the terminal holder and lift the exhaust hood carefully. -
Page 164: Cleaning Of Heating Module
9.0 Maintenance and service Cleaning work at the heating modules electrical connection of the modules. Before working at the modules you must loosen the plug-in connection. Pull the connector angle out of the plug connector. Thereto lean above the heating chamber and look behind the mod- ule (possibly use a step). -
Page 165: Cleaning Of The Exhaust Hood "Outlet
9.0 Maintenance and service Cleaning work at the heating modules Cleaning of the ex- haust hood "outlet" Holding screw terminal holder exhaust hood Loosen the hexagon socket screw at the exhaust hood "outlet with a M3 socket wrench. Release the exhaust hood by strong pulling at the terminal holder and lift the exhaust hood carefully. - Page 166 9.0 Maintenance and service (underneath mesh belt) Page 9.18 Guiding rails Chamber floor Mesh belt...
-
Page 167: Cleaning Of The Guiding Rails
9.0 Maintenance and service WARNING Risk of injuries due to electricity / rotating fans For service and maintenance work you have to switch off the oven according to the instructions and to disconnect the mains plug. Then you can open the machine hood. WARNING Risk of burns due to high temperatures Some parts inside the soldering system can reach temperatures... -
Page 168: Error Diagnosis
Exchange of the heating temperature sensor. temperature "0" or "557"? Not repairable. y Call SEF-Service. Service SEF Systec GmbH: doesn't heat or Tel.: +49 (0) 4136 / 909-0 doesn't heat correctly. Fax: +49 (0) 4136 / 909-22 Mail: service@sef.de Page 9.20... - Page 169 USB mass y Connect and check possible. storage has been USB device. recognised? Not repairable. y Call SEF-Service. Service SEF Systec GmbH: Tel.: +49 (0) 4136 / 909-0 Fax: +49 (0) 4136 / 909-22 Mail: service@sef.de Page 9.21...
-
Page 170: Check And Exchange Fuses
9.0 Maintenance and service Check and exchange fuses The engine electronics with power supply, power conditioning and controller RO-R2R is easily accessible for service mounted on a mounting plate below the inlet zone. In case of breakdown of a component the mounting plate can be WARNING opened by removing the 3 holding screws. -
Page 171: Exchange Damaged Fuse
9.0 Maintenance and service Check and exchange fuses 551.10 / .15 Mounting plate inlet Version 551.10 /.15 F1 micro-fuse 5x20 1AT Power socket exhaust box F10 micro-fuse 5x20 1AT Exchange dam- Option WLAN aged fuse Unscrew the related screw from the holder. - Page 172 9.0 Maintenance and service Check and exchange fuses 551.19 The engine electronics with power supply, power conditioning and controller RO-R2R for heating zones 1-4 is easily accessible for serv- ice mounted on a mounting plate below the inlet zone. In case of breakdown of a component the mounting plate can be opened by removing the 3 holding screws.
-
Page 173: Exchange Damaged Fuse
9.0 Maintenance and service Check and exchange fuses 551.19 Mounting plate inlet Version 551.19 power supply 400V controller ROR2 Master power supply 400V controller ROR2 Master power supply 400V controller ROR2 Master power supply 400V controller ROR2 Slave power supply 400V controller ROR2 Slave power supply 400V controller ROR2 Slave... -
Page 174: Option Power Supply 220V In Triangle Circuit
9.0 Maintenance and service Check and exchange fuses Option power supply 220V in triangle circuit As well as in standard revision with power supply 400VAC/N/PE the oven electronics with power feed, voltage preparation and controller RO-R2 are mounted on a mounting plate underneath the inlet zone, easy accessible for service purposes. -
Page 175: Mounting Plate Inlet
9.0 Maintenance and service Check and exchange fuses Option power supply 220V in triangle circuit Mounting plate inlet Revision 3~ 220VAC 60Hz 32A Pre-fuse B16 F3, F4 F1 microfuse Exchange dama- (24V power supply 5x20 1AT ged fuse / socket WLAN) exhaust box Remove the fuse F1 from the fuse holder. -
Page 176: Exchange Blower
9.0 Maintenance and service Exchange blower 4 x holding screws M4x12 Page 9.28... - Page 177 9.0 Maintenance and service Exchange blower WARNING Risk of injuries due to electricity / rotating fans For service and maintenance work you have to switch off the oven according to the instructions and to disconnect the mains plug. CAUTION Then you can open the machine hood. Crushing hazard When working with opened hood make sure that the hood rest is snapped and so the hood is protected against unin-...
-
Page 178: Exchange Fan
9.0 Maintenance and service Exchange fan fans which generate air circulation (only 551.19) cable. 4 holding screws ISO 7380 M4x10 In the bottom tray you will find 4 to 8 inside the oven to avoid heat accumulation. The fans are mounted on flange plates which are fixed in the bottom tray. -
Page 179: Dismount Fan
9.0 Maintenance and service Exchange fan WARNING Risk of injuries due to electricity / rotating fans For service and maintenance work you have to switch off the oven according to the instructions and to disconnect WARNING the mains plug. Risk of burns due to high temperatures Some parts inside the soldering system can reach temperatures up to 500°C during operation. - Page 180 9.0 Maintenance and service 551.10 4 heating zones 551.15 5 heating zones 551.19 8 heating zones Heating element upper heating zones Finned tubular heaters 2000W oder 3000W (identical design) Page 9.32 Coil plate Coil cover plate...
-
Page 181: Exchange Heating Elements Of The Upper Heating Modules
9.0 Maintenance and service Exchange heating elements of the upper heating modules tubular heaters with 1000W as well as 1500W heating power. In the with 2 coil cover plates. In the lower heating zones the heaters are used single. Spare parts will be supplied pre-assembled. For the exchange of a heating element in a upper heating module this module must be dismounted. - Page 182 9.0 Maintenance and service In the middle of the heating modules the temperature switches are placed. The green cables of the temperature sensors are guided from the front over the modules. Additionally the brown wires of the safety circuit are With the help of distance bolts the wires are kept away from the hot surface.
- Page 183 9.0 Maintenance and service Exchange heating elements of the upper heating modules Heating- Terminal holder Heating- module 1 module 2 Release the related heating module by strong pulling at the terminal holder and lift the module carefully. Pay atten- tion to the green cable of the temperature sensor. Place the heating module on a working surface in front of the oven so that you can access the connections and screws on the coil plate easily.
-
Page 184: Exchange Upper Heating Element
9.0 Maintenance and service Exchange upper heating element First loosen and remove the screw with washer of the temperature sensor and pull out the small tube incl. sensor from the module. Disconnect both PE-cables with the 6,3mm connectors from the connection at the coil plate. Loosen the M4 nuts of the connecting cables with a 8mm ring spanner and remove the ring terminals. -
Page 185: Mount Upper Heating Module
9.0 Maintenance and service Exchange heating elements of the upper heating modules Connect the PE-cables with the 6,3mm connectors and Mount upper heat- the connection cables of the heating coils with the M4 nuts ing module again. Place the module again and make sure that the terminal holder snapped in. - Page 186 9.0 Maintenance and service 551.10 4 heating zones 551.15 5 heating zones 551.19 8 heating zones Finned tubular heater Heating element lower heating zones 1000W or 1500W (identical design) Page 9.38 Coil plate Coil cover plate...
-
Page 187: Exchange Heating Elements Of Lower Heating Zones
9.0 Maintenance and service Exchange heating elements of lower heating zones tubular heaters with 1000W as well as 1500W heating power. The heating elements will be supplied pre-assembled on a coil plate with WARNING coil cover plate. Risk of injuries due to electricity / rotating fans For service and maintenance work you have to switch off the oven according to the instructions and to disconnect the mains plug. -
Page 188: Mount Lower Heating Element
9.0 Maintenance and service Screw DIN 912 M4x10 Exchange lower Screw with washer Temperature sensor heating element First loosen and remove the screw with washer of the tem- perature sensor and pull out the small tube incl. sensor out of the chamber. Disconnect both PE cables with the 6,3mm connectors from the connections on the coil plate. - Page 189 9.0 Maintenance and service Exchange heating elements of lower heating zones Connect the connection cables with the ring terminals Connect the PE cable with the 6,3mm connector again. N coil P coil the screw M4x10 and washer. again and fix the M4 nuts with a 8mm ring spanner. Therefore loosen the locking of the hood rests by opening the hood completely again.
- Page 190 9.0 Maintenance and service Temperature- Cable Cable - Screw with washer Temperature sensor switch safety circuit temperature sensor Connectors tem- perature sensors Page 9.42...
-
Page 191: Exchange Temperature Sensors In The Upper Heating Modules
9.0 Maintenance and service Exchange temperature sensors in the upper heating modules In the soldering system 551.1X NiCr-Ni temperature sensors type K are used for the temperature control. For the exchange of a temperature sensor in a upper heating module WARNING this module must be dismounted. -
Page 192: Dismount Upper Heating Module
9.0 Maintenance and service the heating chamber. Pull the connector angle out of the plug connector. Thereto lean above the heating chamber and look behind the mod- Dismount upper ule (possibly use a step). heating module In the middle of the heating modules the temperature switches are placed. - Page 193 9.0 Maintenance and service Exchange temperature sensors in the upper heating modules Disconnect both brown wires with the 6,3mm connectors from the temperature switches. Heating- Terminal holder Heating- module 1 module 2 Release the related heating module by strong pulling at the terminal holder and lift the module carefully.
-
Page 194: Exchange Upper Temperature Sensor
9.0 Maintenance and service Exchange upper temperature sensor Loosen the holding screw with washer of the temperature sensor. Pull out the sensor of the small tube. Loosen all cable clips of the sensor cable on the heating module and remove the clips from the cable. Now follow the cable till the controller board RO-R2, remove possible cable straps carefully and pull out the connector from the board. - Page 195 9.0 Maintenance and service Exchange temperature sensors in the upper heating modules Connect the brown wires with the 6,3mm connectors with the temperature switches again. Fix possibly loosen cables with cable straps in the correct position. The wires must not touch the case of the heating modules.
- Page 196 9.0 Maintenance and service Screw DIN 912 M4x10 Screw with washer Temperature sensor Sensor cable Connectors tem- perature sensors Page 9.48...
-
Page 197: Exchange Temperature Sensor In Lower Heating Zone
9.0 Maintenance and service Exchange temperature sensor in lower heating zone In the soldering systems series 551 NiCr-Ni temperature sensors type K are used for the temperature control. For the exchange of a temperature sensor in a lower heating zone the related cover plate must be opened on the rear side of the oven. -
Page 198: Exchange Lower Temperature Sensor
9.0 Maintenance and service Exchange lower Cover plate Screw DIN 912 M4x10 temperature sensor First loosen the screw M4x10 of the related cover plate with a 3mm socket wrench. Remove the cover plate with screw and washer. Open also all cover plates to the right side of the damaged sensor to get access to the sensor cable. - Page 199 9.0 Maintenance and service Exchange temperature sensor in lower heating zone Insert a new temperature sensor in the small tube inside sensor. Run the green sensor cable in the bottom tray to the controller board RO-R2R and plug-in the connector in the board.
-
Page 200: Dismount Operating Panel
9.0 Maintenance and service The operating panel in the machine front is a unit out of touch paneI and SBCC-micro controller. In case of breakdown the complete unit can be exchanged easily. WARNING Risk of injuries due to electricity / rotating fans For service and maintenance work you have to switch off the oven according to the instructions and to disconnect the mains plug. -
Page 201: Exchange Operating Panel
9.0 Maintenance and service Exchange operating panel Clip with screw M4x10 Pull relief Distance bolt Ethernet CAN-Bus 24V-supply Mount operating panel Lift the damaged panel out of the oven from the front side. taining clips with distance bolts and pull relief again. Connect the cables with the panel again. -
Page 202: Dismount Controller Ro-R2R
9.0 Maintenance and service The engine electronics with power supply, power conditioning and Controller RO-R2R is easily accessible for the service mounted on a mounting plate below the inlet zone, in the version 551.19 a second (master) below the outlet zone. In case of breakdown of a component the mounting plate can be WARNING opened by removing the 3 holding screws. -
Page 203: Exchange Controller Board Ro-R2R
9.0 Maintenance and service Exchange controller board RO-R2R Screw DIN 912 M4x10 Disconnect all connectors from controller RO-R2R. Loosen and remove the 6 M4-nuts with a 7mm socket wrench and remove the washers. Remove the damaged controller from the holding bolts and place a new controller. - Page 204 9.0 Maintenance and service The drive of the conveyor is mounted underneath the outlet zone, cov- ered with a mounting plate and easily accessible for service purposes. In case of breakdown of the motor or drive belt the mounting plate can be opened by loosening and removing the 3 holding screws.
-
Page 205: Exchange Motor / Drive Belt
9.0 Maintenance and service Exchange motor / drive belt Dismount motor Disconnect both connectors for power supply end encoder from the motor. Page 9.57... -
Page 206: Dismount Drive Belt
9.0 Maintenance and service compression of approx. 5mm must be possible Loosen the 3 M6 screws DIN 912 with a 5mm socket wrench as far as it is possible to relief the belt when sliding Dismount drive completely. belt Remove the drive belt. Drive shaft Clamp hub Screw DIN912 M2... -
Page 207: Tension Drive Belt
9.0 Maintenance and service Exchange motor / drive belt Loosen the screw of the clamp hub with a 1,5mm socket wrench as far as you can remove the pinion gear from the motor. Now unscrew and remove the 3 M6 screws from the motor completely and pull the motor from the motor carrier. - Page 208 9.0 Maintenance and service Page 9.60...
- Page 209 Operating mode of the soldering system series 551 ......11.21 MESY 570.77 A Temperature profiler ........... 11.23 MESY 570.77 Insulating box ..............11.23 MESY 570.80 A Profiler set ..............11.23 Thermocouples ..................11.23 Spare part list soldering system 551.10 / 551.15 / 551.19 ....11.24 Page 11.1...
-
Page 210: Hardware For The Network Connection
11.0 Options and spare parts Hardware for the network connection WLAN antenna LAN (RJ45 socket) Mains connection POE-adapter Gateway RJ45 adapter Page 11.2... -
Page 211: Option Communication Package
11.0 Options and spare parts Option Communication Package The additional upgrade of a soldering oven 551.xx with the option Commu- nication Package allows a network connection of the soldering system via WLAN and LAN. The necessary hardware is mounted on the mounting plate at the outlet and consists of: Socket for mains connection Power supply for router (POE-adapter) - Page 212 11.0 Options and spare parts Network structure of SEF soldering system 551.xx Page 11.4...
- Page 213 11.0 Options and spare parts Option Communication Package Main part of the option Communication Package is an Indoor Access Point with external WLAN-antenna from Ubiquitti Networks. The operating panel of the soldering system with integrated micro-controller is connected via a network cable with the router. Via the RJ45-socket at the rear side of the machine a connection with a host (Laptop, external server) can be established with the help of a server soft- ware to save and load soldering programs.
- Page 214 11.0 Options and spare parts IP address of the soldering system IP address of the host computer Network Mask Network path on the host computer Name and password of the shared folder on the host computer Default settings of network configuration at delivery Page 11.6...
- Page 215 11.0 Options and spare parts Option Communication Package Default settings tion system 551.xx at delivery: Soldering system IP: 192.168.2.101 Host (Server IP): 192.168.1.100 Network mask: 255.255.255.0 Gateway IP: 192.168.1.1 Default settings of the network configuration for soldering network configura- Netzwork configuration Router configuration Page 11.7...
-
Page 216: Network Setup
11.0 Options and spare parts Network setup Server (Host) Soldering System Router Panel Windows control panel - network IP 192.168.1.100 IP: 192.168.2.101 Mask: 255.255.255.0 Mask: 255.255.255.0 Gateway 192.168.1.1 Gateway IP 192.168.1.1 Gateway IP 192.168.2.1 Soldering system software RO-R2 - settings Network configuration Page 11.8... -
Page 217: Option Communication Package - Network Setup
11.0 Options and spare parts Option Communication Package - network setup Required equipment: Windows computer (with operating system Windows 7 or higher and ethernet network interface card, further named as network computer) 1 Patch cable Server software e.g. Filezilla Server tion Establish a network connection connection between soldering system and network computer with the help of a... -
Page 218: Create Directories
11.0 Options and spare parts Create directories Server computer - directories Soldering system software RO-R2 - settings Page 11.10... - Page 219 11.0 Options and spare parts Option Communication Package - network setup Create directories It is necessary to create special directories on the server computer to get access to the data on the server computer. Create a special home directory for the data of the solder- ing system 551.xx on your server computer.
-
Page 220: Server Software Setup
11.0 Options and spare parts Server software setup Page 11.12... -
Page 221: Port Setup
11.0 Options and spare parts Option Communication Package - network setup Setup of the server software Following the server setup is shown with the software Filezilla Server pliers. Server software port setup The soldering system software is using Port 21 for the data exchange with the server. -
Page 222: Create User
11.0 Options and spare parts Create user Page 11.14... -
Page 223: Assign Directory
11.0 Options and spare parts Option Communication Package - network setup Create user You have to create a user with password in the server software. Create a User and enter the required Password in the server software under Account settings. In this example it is the user root with password 123456 Assign directory Afterwards the created home directory with the sub-directories pro-... - Page 224 11.0 Options and spare parts Page 11.16...
- Page 225 11.0 Options and spare parts Option Communication Package - Network setup The server is now set and can be used. Via the soldering system software RO-R2 soldering programs or soldering At the server computer you can view the interactions between soldering system and server computer.
-
Page 226: Set Up External Operation
11.0 Options and spare parts Set up external operation Page 11.18... -
Page 227: Option Communication Package - External Operation
11.0 Options and spare parts Option Communication Package - external operation Necessary equipment: external operating device with LAN / WLAN function (Smartphone, PC, Server,..) VNC-Software e.g. UltraVNC Viewer - 1.2.0.4 Establish a network connection between soldering system and server computer with the help of a patch cable or via WLAN. - Page 228 11.0 Options and spare parts Lamp pole ( optionally) Lamp pole Status Error message message Description in info line Display of Description in operating modes info line click on message Page 11.20 Confirmation by double...
-
Page 229: Operating Mode Of The Soldering System Series
11.0 Options and spare parts Option lamp pole for soldering systems 551.10/15/20 The system screen informs about all process relevant values of the system. These are the machine status, error messages, set and actual temperatures of all heating areas, the actual tem- speed. - Page 230 11.0 Options and spare parts Page 11.22...
-
Page 231: Thermocouples
11.0 Options and spare parts 570.77 A Temperature profiler (MESY) MESY 570.77 A The measurement takes place in Temperature pro- storage mode. Part no. 95.170.079 571.77 MESY Thermo insulating box MESY 570.77 With the optional thermo insulat- Insulating box ing box the MESY can be used Part no 95.170.078 570.80 A MESY Profiler set MESY 570.80 A... - Page 232 Drive elements 99 148 530 Gear motor type DCK31 24V 99 148 531 Mesh belt 440mm width / 4,1m length / 551.10 and 551.15 99 148 551 Roller chain ( for option pin chain conveyor) for 551.10 and 551.15 99 148 550 Bellows coupling (...
-
Page 233: 12.0 Notes
12.0 Notes Page 12.1... - Page 234 12.0 Notes Page 12.2...
- Page 235 12.0 Notes Page 12.3...
- Page 236 12.0 Notes Page 12.4...
- Page 237 12.0 Notes Page 12.5...
- Page 238 12.0 Notes Page 12.6...
Need help?
Do you have a question about the 551.10 and is the answer not in the manual?
Questions and answers