Table of Contents
Advertisement
Quick Links
Advertisement
Chapters
Table of Contents

Related Manuals for SEF 548.10


Summary of Contents for SEF 548.10
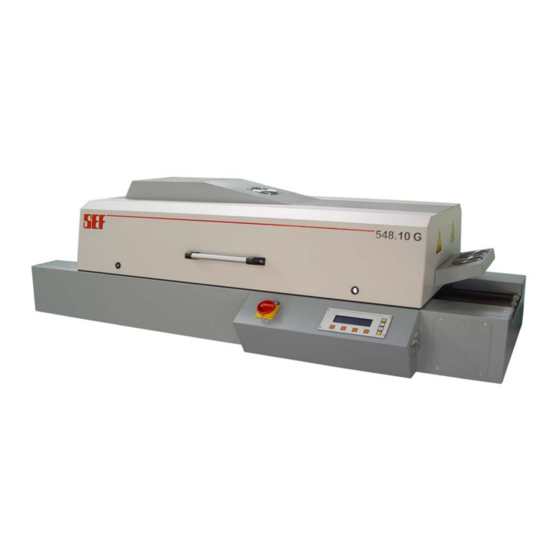
- Page 1 548.10 IR-Force-Convection-Soldering-System Operating manual Year of con struc tion: Published by the manufacturer: SEF Roboter GmbH Serialnumber: Kringelsburg D-21379 Scharnebeck Phone: +49 (0)4136-909-0 Telefax: +49 (0)4136-909-22 You should keep this operation manual for a later using.
- Page 2 Preface Safety Instructions Quick Reference Guide Prior to Operation Operating the System Production Measurement System Settings Cleaning and Maintenance Technical Appendix Accessories Notes...
-
Page 3: Table Of Contents
Table of contents 1.0 Preface Introduction ................1.3 Proper use................1.4 Utilization rights..............1.5 Subject of the agreement........... 1.5 Protection of the product............ 1.5 Warranty ................1.5 Warranty claim processing..........1.5 Liability ................1.6 Product modifi cations or improvements......1.6 Particular restrictions ............ - Page 4 Table of contents EMERGENCY SHUT-OFF..........2.11 Danger of burns ..............2.11 Accident hazard ..............2.11 EMC instructions..............2.11 Hazardous soldering vapors ..........2.11 Instructions from other suppliers........2.11 Acoustically indications ............2.11 Disposal instructions .............. 2.12 General remarks ..............2.12 3.0 Quick Reference Guide Installation ................
- Page 5 Table of contents Select contrast ..............3.17 Immediate printout ............. 3.18 Protocol printout..............3.18 Interval printing ..............3.18 Select printer type .............. 3.19 Set date and time............... 3.20 4.0 Prior to Operations Transportation ................ 4.3 Transportation instructions at the packaging ..... 4.3 Unpacking and controlling the parts of delivery .....
- Page 6 Table of contents LCD Display ............... 5.4 < > and < >-Keys ............5.4 Function Keys ..............5.4 <Enter>-Key............... 5.4 <Esc>-Key ................. 5.4 Menu Structure............... 5.5 System Screen..............5.6 System Service Screen............5.6 Measurement Screen............5.6 Program Screen..............5.6 Parameter Screen.............. 5.6 Turn the System on and off............
- Page 7 Table of contents Important informations for the production ......6.6 Turn the System off............6.6 The circuit board remained inside the system......6.7 Open Covers..............6.7 Close Covers ..............6.7 7.0 Measurement Table of contents..............7.1 Recording a Process Curve ........... 7.3 Load a Process Curve ............
- Page 8 Table of contents Change thetemperature sensor in the heating chamber..9.15 Change the blower............. 9.16 Dismounting and mounting the grid belt transport ..... 9.18 Change the power unit............9.19 Dismounting and mounting of the transport control ... 9.20 Dismounting and mounting of the mains fi lter....9.21 Change the power supply ..........
- Page 9 Index Symbols <Enter>-Key ..........5.4 Danger of burns.........2.11 <Esc>-Key ...........5.4 Date and Time ..........8.8 < > and < >-Keys........5.4 Date and time ..........3.20 Defi nitions............2.5 Delete a Program ......3.11, 5.17 Dimensions of theSoldering-System ...4.6 Accident hazard.........2.11 Dismounting ..........2.10 Accident Prevention Rules ......2.6 Dismounting and mounting......9.18 Acoustically indications ......2.11 of the mains fi...
- Page 10 Index General..........2.3, 2.9 Mains fi lter ..........10.7 General provisions ........1.6 Mains Switch ........3.5, 4.9 General remarks........2.12 Maintenance ..........2.10 Main Switch ..........5.4 Mandatory sign ..........2.4 Manual............1.7 Hazardous soldering vapors......2.11 Measurement Screen ........5.6 Heating Process On and Off .......5.8 Measurement System .......11.3 MESY 570.70 ..........11.3 MESY 570.77 ..........11.3 Identifi...
- Page 11 Index Preservation and storage of the system ..4.12 Printer Interface ...........4.9 Safety instructions ........2.7 Printer Type ..........8.7 Save a Process Curve......3.15, 7.7 Printer type ..........3.19 Save a Program .......3.10, 5.14 Print a Process Curve ......3.16, 7.9 Scale the system to a horizontally level ..4.7 Process Curve ........3.13, 7.3 Screen ............5.6 Analyze a Process Curve....3.14, 7.6...
- Page 12 Index Technical Data ..........1.10 Technical description........5.3 Text symbols ..........2.4 Thermocouple sensor........11.3 Thermo measuring modul 236.02 .....10.4 Transfer Protocol ........10.3 Transportation ..........4.3 Transportation instructions at the packaging.....4.3 Turn the heating system on ......6.6 Turn the System on and off ....3.7, 5.7 Unpacking ...........3.3 Unpacking and controlling the parts of delivery....4.4...
-
Page 13: 1.0 Preface
1.0 Preface Table of contents Introduction .........1.3 Proper use . -
Page 14: Introduction
1.0 Preface Introduction Dear User This operating and maintenance manual (further just referred to as operating manual) has been written for the authorized user. Basic knowledge in SMD soldering methods are assumed. This operating manual contains important information on how to ope- rate your Refl... -
Page 15: Proper Use
1.0 Preface Proper use The Refl ow-System is intended and designed only for gluing chips and for soldering circuit boards with SMD components. Any other use is considered to be not ac cor ding to the intention and therefore improper. All con se quences arising from im pro per use are the responsibility of the user. -
Page 16: Utilization Rights
For greater systems you can order a service from SEF. Please use the fax page in the chapter "9.0 Trouble Shooting". Page 1.5... -
Page 17: Liability
1.0 Preface Liability SEF GmbH does not assume any liability for fault- free functioning of the product or the accuracy of the measuring data. Product SEF GmbH reserves the right to make modifi cations modifi cations or or improvements to the product at its discretion. SEF... -
Page 18: Informations About This Operating Manual
1.0 Preface Informations about this operating manual This operating manual should explaine the erecting, pro-gram- ming, using and maintenance of the system. It should be usefull in you work with the system. The manual is devided in different chapters: Chapter 1: Introduction This chapter informs you on intended use and utilization rights and technical data. - Page 19 1.0 Preface Chapter 7: Measurement How to connect the sensors to the circuit board and how to analyis, store, load and print a process curve. Chapter 8, System Settings In this chapter we explain how to change the basic setting. Chapter 9, Maintenance This chapter gives answers for possible problems by the work and mainteance informations of the system.
-
Page 20: Important Symbols Contained In The Operating Manual
1.0 Preface Important symbols contained in the operating manual For an easy reading and fi nding in this operating manual we have identifi cated some importent text parts for you. To be found before explanations, information regar- ding better handling or the system, or before cross- references referring to other text passages in this operating manual. -
Page 21: Technical Data
16 A CEECON plug Operation capacity: approx. 6,8 KW Air circulation capacity: approx. 900 m Air extraction capacity: ap prox. 180 m Controler: SEF 68070 µP-con tro ler Memory: battery buffered RAM Capacity: 120 Soldering/Gluing programs Output: LCD display or... -
Page 22: 2.0 Safety Instructions
2.0 Safety Instructions Table of contents General ..........2.3 Important symbols contained in the operation manual . -
Page 23: General
2.0 Safety Instructions General This system has been designed and constructed according to the latest technology. However, there is a risk of danger if the system is used improperly or not according to the instructions. The operation manual serves to ensure proper and secure ope- ra ti on with and at the system. -
Page 24: Important Symbols Contained In The Operation Manual
2.0 Safety Instructions Important symbols contained in the operation manual The section „Pictograms at the system“ in this chapter deals with the explanation of warning signs fi xed at the system. The fol lo - wing warning and information symbols shall draw your attention the the safety instruction texts. -
Page 25: Defi Nitions
2.0 Safety Instructions Defi nitions Remaining risks are not obvious risks caused by the system . Remaining risks Even though the system has been designed and constructed according to the latest technology and the generally recognized rules regarding technical safety, remaining risks can not be com- pletely excluded, even if the system is used properly. -
Page 26: Accident Prevention Rules
2.0 Safety Instructions Accident Prevention Rules Accident prevention rules are to be followed. Familiarize yourself with the accident prevention rules and other international safety regulations valid in your country. Especially follow the safety instructions regarding fi rst aid, handling of elec- trical equipment, soldering methods and handling nitrogen. -
Page 27: Operation Of System
2.0 Safety Instructions Operation of system The system has to be operated by authorized and trained per- General safety son nel only. The personnel must be healthy and must not have instructions taken any medication or other agents decreasing the reaction time. -
Page 28: Operator Position
2.0 Safety Instructions Operator position Regarding the safety distances and working areas, the system corresponds to the relevant German accident prevention regulations. The working areas of the system are defi ned as follows: Feeding zone Opening and closing the hood Turning on the system, programming area Discharge zone Attention, risk of injury... -
Page 29: Symbols At The System
2.0 Safety Instructions Symbols at the system When handling and operating this system always keep your own General safety in mind. Note and follow the information and instructions in this operation manual and especially those in these chap ter. Inform all other operators about the safety instructions and other relevant instructions. -
Page 30: Mounting, Dismounting, And Maintenance
2.0 Safety Instructions Mounting, dismounting, and maintenance Mounting, dismounting and maintenance of the system is only allowed to be conducted by qualifi ed, authorized, and trained personnel. For any work regarding mounting, dismounting, remounting, starting operation, changeover and adjustment, the instructions as provided in this operation manual are to be fol- lo wed. -
Page 31: You Should Know And Observe The Following
2.0 Safety Instructions You should know and observe the following In case of emergency the soldering system will be shut off im- EMERGENCY me dia te ly with the mains switch. SHUT-OFF Additional for indication of a fault function an acoustic indication Acoustically sounds: indications... -
Page 32: Disposal Instructions
2.0 Safety Instructions Disposal instructions The system contains and processes materials and operating supplies that might harm the environment when disposed of. The owner is responsible that these materials and substances are disposed of in compliance with the relevant legal re gu - la ti ons. -
Page 33: 3.0 Quick Reference Guide
3.0 Quick Reference Guide Table of contents Installation ......... .3.3 Unpacking . -
Page 34: Installation
3.0 Quick Reference Guide Installation This quick reference guide is for the skilled user and shows in very short steps how to erect, install and operate the system. You will fi nd the detailed description in the respect chap ters of this operating manual. -
Page 35: Exhaust Air Connection
3.0 Quick Reference Guide Exhaust Air Attention, danger Connection Soldering vapors are hazardous to your health. Therefore, observance of the safety and processing instructions of the soldering paste manufacturer is required. Connect your system to your internal exhaust air system or to an airwasher station. -
Page 36: Mains Switch
3.0 Quick Reference Guide The system is designed with a serial and an parallel interface. Interface Please note, that you are using an correct ESD-cable and that you are only connecting the interface plug while the system is tur ned off. In the chap ter "10.0 Tech ni cal Ap pen dix, Pin con nec tion"... -
Page 37: Final Checkup
3.0 Quick Reference Guide Final checkup Prior to turning the system on and to start ope ra ti on, you should conduct all following fi nal checkups and to ans wer all questions with “yes”: Did you read and understand the chapter "2.0 Safety instructions”... -
Page 38: Turn The System On And Off
Turn the System on switch beside the operating panel. Turn the main switch to <ON>. On the LCD-Display you will get the system information. SEF GmbH Refl ow-System 548.10 (c) SEF GmbH 204 Rev. 2.02 The system screen appears. The System Screen Not Ready 548.10... -
Page 39: Enter New Process Parameters
3.0 Quick Reference Guide Enter new Process Parameters The setting of the parameters is realized in the menu for the set tings. Create a Soldering Press <Settings> for parameter setting in the system or Gluing Profi le screen. Since the program last used is stored in the battery buf- fe red RAM, there will always be values displayed for all for temperature. -
Page 40: Enter Blower Value
3.0 Quick Reference Guide The soldering system offers the possibility to change the blower Enter blower value speed. You can adjust the value of the blower between 50 and 100%. Press the function-key <Blower>. The cursor jumps to the fi eld for the value of the blo- wer. -
Page 41: Save A Program
3.0 Quick Reference Guide Save a Program The program can be stored in the battery buffered RAM and loaded every time back. The places 1 and 2 are examples for programs which can be used and overwritten. You can scroll the directory with < > and < >. Select the right place. -
Page 42: Load A Program
3.0 Quick Reference Guide The parameters for a soldering or glueing process can be loa- Load a Program ded. Press in the system screen <Program> for program handling. You can scroll the directory with < > and < >. Select the program. Confi... -
Page 43: Program Printout
3.0 Quick Reference Guide Program The current parameters could be prin ted out for documentation. Printout Please note, that you are using an ESD capable cable and that you are only connecting the interface plug while the system is tur ned off. In the chap ter "10.0 Tech ni cal Ap pen dix, Pin con nec tion"... -
Page 44: Recording A Process Curve
3.0 Quick Reference Guide Recording a Process Curve For fi nding optimal temperature profi les and for documentation for quality assurance, the Refl ow System offers you the pos si - bi li ty of recording process curves. The process curves can be printed out with a printer. -
Page 45: Load A Process Curve
3.0 Quick Reference Guide Load a Process You can analyse a process curve with the function display. Be- Curve fore analysing the process curve you must load it. Press in system screen the function key <Measure> for measurement. Select the right process curve with <s> and <t>. Confi... -
Page 46: Save A Process Curve
3.0 Quick Reference Guide The last recorded process curve is saved on the place "0" with Save a Process the name "Actual". For a later analysing or using you must save Curve the process curve on another place. You can scroll the directory with < > and < >. Select the request place. -
Page 47: Print A Process Curve
3.0 Quick Reference Guide Print a Process Just recorded or loaded process curves can be printed out. Curve Take care that the printer is ready and supplied with paper. The pin-connection of the plug and the interface protocol you will fi nd in the chap ter "10.0 Tech ni cal Appendix, Pin Connection". -
Page 48: System Settings
3.0 Quick Reference Guide System settings The System is available with a German and your special language text version. You have the possibility to read the text in your special language. Press in the system screen <System> for system Select Language setting. -
Page 49: Immediate Printout
3.0 Quick Reference Guide Protocol printout The current machine conditions and parameters could be printed out for documentation on a printer. You have the following possibilities for printing out: Immediate print Interval print The interval time could be entered. Please note, that you are using an correct ESD-cable and that you are only connecting the interface plug while the system is tur ned off. -
Page 50: Select Printer Type
3.0 Quick Reference Guide The print out of process parameters, process curves and Select printer type program data can be printed on different printers via the parallel port. You can select the following printers in the system: • HP colour printer •... -
Page 51: Set Date And Time
3.0 Quick Reference Guide Set date and time The microprocessor includes a real-time-system-clock. The time and the date can be set in this menu. Press in the main menu <System> for system set- ting. Press the function-key <Service>. Press the function-key <Clock>. Press the function key <Set>. -
Page 52: Prior To Operations
4.0 Prior to Operation Table of contents Transportation ........4.3 Transportation instructions at the packaging . -
Page 53: Transportation
4.0 Prior to Operation Transportation The system is delivered by a forwarding agent in partly assemb- Transportation led conditions in a special packaging. in struc tions at the pac kaging Please note the instructions at the packaging. Point to fi x a chain or a rope at the packaging Indication of center of gravity of packaging Caution, fragile. -
Page 54: Unpacking And Controlling The Parts Of Delivery
4.0 Prior to Operation Unpacking and controlling the parts of delivery Parts of de li ve ry You have received a soldering system. For all additional deliveries please refer to the delivery note. Unpacking the Unpacking the system securely. system Attention, accident hazard The system weights is approx. -
Page 55: Connecting The System
4.0 Prior to Operation Connecting the System The soldering system is designed as a table system. The table must must be designed for the weight. We recommend to take a lon ger table for a fi lling area next to the soldering system. Attention, risk of breakage The system weighs is approx. -
Page 56: Dimensions Of Thesoldering-System
4.0 Prior to Operation Dimensions of the Soldering-System All dimensions in millimeter (mm) Page 4.6... -
Page 57: Scale The System To A Horizontally Level
4.0 Prior to Operation The soldering system must be organized horizontally on the Scale the system desk for an error free work. You can adjust the system with the to a horizontally four feets. level Unscrew the nuts with a 14er mouth-code. Contort the feet with a 10er mouth-code. -
Page 58: Electrical Connection
4.0 Prior to Operation Connections at the Sy stem Electrical The System has a 400V/16A CEECON-plug. This connection Connection cable has a length of 2 m. Attention, Danger Before switching on the system, take care that the elec- tri cal ly power and fuses are aggreing with the connection values. -
Page 59: Interface
4.0 Prior to Operation The system is designed with a serial and a parallel interface. Interface Please note, that you are using an ESD capable cable and that you are only connecting the interface plug while the system is tur ned off. In the chap ter "10.0 Tech ni cal Ap pen dix, Pin con nec tion"... -
Page 60: Final Checkup
4.0 Prior to Operation Final checkup Prior to turning the system on and to start ope ra ti on, you should conduct all following fi nal checkups and to ans wer all questions with “yes”: Did you read and understand the chapter 2 “Safety instructions”... -
Page 61: Dismounting The System
4.0 Prior to Operation Dismounting the System For a possible dismounting of the system, e.g. if it has to be Electrical mo ved to another location or prepared for disposal, please note connection and observe the following steps. Turn the main switch to “OFF”. Disconnect the power supply from the system. - Page 62 4.0 Prior to Operation Preservation and storage of the system System preparati- To prepare the system for vacation time or for prolonged out- on for vacation of-operation period please observe the following: Turn the system off with the main switch. Clean the system as described in the chapter "9.0 Maintenance”.
- Page 63 5.0 Operation of System Table of contents Technical description ........5.3 The Soldering System .
-
Page 64: Technical Description
5.0 Operation of System Technical description The soldering system is designed as an table system. Operati- on and programming are conducted centrally via the operating panel. The operating panel is including an function-key-block. All pa ra me ters are dis play ed on the LCD. In case of emer gen cy, the system can be shut off com ple te ly with the main switch. -
Page 65: The Operating Panel
5.0 Operation of System The Operating Panel The Elements for The operating panel is fi tted into the systems front area. Operating LCD-Display Selection block Function keys Operating panel On the operating panel you will fi nd the LC-Display for the gra- phi cal display of the programming and the system parameters, function keys and cursor keys for the entry of the pa ra me ters. -
Page 66: Menu Structure
5.0 Operation of System Menu Structure The opertion of the soldering system will be done with the operating panel. All ope ra ting-re le vant in for ma ti on is dis play ed on the LC-display. In order to op ti mal ly utilize the dis play po ten - ti al, without making operation un ne ces sa ri ly dif fi... -
Page 67: Parameter Screen
5.0 Operation of System System Screen Not Ready 548.10 40°C 40°C 210°C HEATER 1 V = 35 cm/min. Prg.: 03 Settings Program Measuring Sy stem Parameter Screen SETTINGS Air temp: Blower: 100% IR 1: 40°C IR 1: 40°C Conveyer: 25 cm/min. -
Page 68: Turn The System On And Off
Turn the System switch beside the operating panel. Turn the main switch to <ON>. On the LCD-Display you will get the system information. SEF GmbH Refl ow-System 548.10 (c) SEF GmbH 2004 Rev. 2.02 The system screen appears. The System Screen Not Ready 548.10... -
Page 69: Information Of The System Screen
5.0 Operation of System Information of the System status Value of the Temperature in System Screen IR-Radiators the peak zone Not Ready 548.10 40°C 40°C 210°C HEATER 1 V = 35 cm/min. Prg.: 03 Settings Program Measuring Sy stem Status of... -
Page 70: Parameter Setting
The setting of the parameters is realized in the menu for the settings. Press <Settings> for parameter setting in the Create a Soldering system screen. or Glueing Profi l Not Ready 548.10 40°C 40°C 210°C HEATER 1 V = 35 cm/min. Prg.: 03... -
Page 71: Enter The Values
5.0 Operation of System You can change the temperature of the air, the value of the IR radiators, the blower value and the transport speed. SETTINGS Air temp: Blower: 100% IR 1: 40°C IR 1: 40°C Conveyer: 25 cm/min. Temp Conveyer Blower Print... -
Page 72: Enter Blower Value
5.0 Operation of System The soldering system offers the possibility to change the blower Enter blower value speed. You can adjust the value of the blower between 50 and 100%. SETTINGS Air temp: Blower: 100% IR 1: 40°C IR 1: 40°C Conveyer: 25 cm/min. -
Page 73: Enter The Speed
5.0 Operation of System You can change the conveyor speed. In the following table you will fi nd the recommended speeds for the different process times: Process time: speed: approx. 3 min. 40 cm/min. approx. 3,5 min. 35 cm/min. approx. 4 min. 30 cm/min. -
Page 74: Parameter Printout
5.0 Operation of System Parameter Prin tout The current parameters could be prin ted out for documentation via a parallel printer. SETTINGS Air temp: Blower: 100% IR 1: 40°C IR 1: 40°C Conveyer: 25 cm/min. Temp Conveyer Blower Print Please note, that you are using an correct ESD-cable and that you are only connecting the interface plug while the system is tur ned off. -
Page 75: Save A Program
The current parameters of the systems could be saved as a com ple te program. Save a Program Press in the system screen <Program> for program handling. Not Ready 548.10 40°C 40°C 210°C HEATER 1 V = 35 cm/min. Prg.: 03... -
Page 76: Select A Place
5.0 Operation of System The program can be stored in the battery buffered RAM and loaded back every time. The places 1 and 2 are examples for programs which can be used and overwritten. PROGRAM >> 01 CO001a << CO001 Load Save Delete... - Page 77 RAM. 8 Pro grams can be loaded. Load a Program Press in the system screen <Program> for program handling. Not Ready 548.10 40°C 40°C 210°C HEATER 1 V = 35 cm/min.
- Page 78 5.0 Operation of System Any program stored can be deleted, if no longer needed. Delete a Pro gram Press in the system screen <Program> for program handling. Not Ready 548.10 40°C 40°C 210°C HEATER 1 V = 35 cm/min. Prg.: 03...
-
Page 79: Program Printout
5.0 Operation of System All programs could be prin ted out for documentation on a paral- lel printer. Program Printout Press in the system screen <Program> for program handling. Not Ready 548.10 40°C 40°C 210°C HEATER 1 V = 35 cm/min. Prg.: 03... - Page 80 6.0 Production Table of contents Start the Production ........6.3 Turn the System on .
- Page 81 Turn the main switch to <ON>. Turn the System on On the LC-Display you will see the system information. SEF GmbH Refl ow-System 548.10 (c) SEF GmbH 2004 Rev. 2.02 The system screen appears. Not Ready 548.10...
-
Page 82: Program Selection
If you do not want to use that program you have to load another one. 8 programs can be loaded: Load a Program Press in the system screen <Program> for program handling. Not Ready 548.10 40°C 40°C 210°C HEATER 1 V = 35 cm/min. -
Page 83: Process Documentation
6.0 Production Process Documentation The process documentation can be done with this system on two dif fe rent ways. You can printout the parameters and the pro- cess curves via a printer or you can download the actual parameters via the serial interface in your PC. The data can loa- ded into a normal calculation programm. - Page 84 6.0 Production Stop or change the Production After the circuit board have been soldered or glued in the system and the production run is completed, you can end the production either and turn the system off or you can load a new pro gram and start producing again.
-
Page 85: The Circuit Board Remained Inside The System
6.0 Production The circuit board remained inside the system If a circuit board remained inside the system, e.g. got stuck in the conveying system, you can open and close the system cover and the cover of the heating chamber. Attention, danger of burns During the production process, the heating chamber is very hot due up to 525°C (980 °F). - Page 86 7.0 Measurement Table of contents Table of contents ........7.1 Recording a Process Curve .
-
Page 87: Recording A Process Curve
As standard the Refl ow System is equipped with thermo couple socket on the feeding side of the system. Press in system screen the function key <Measure> for measurement. Not Ready 548.10 40°C 40°C 210°C HEATER 1 V = 35 cm/min. -
Page 88: Record A Process Curve
7.0 Measurement Record a Process Mount the sensor on the PCB. Curve Place the PCB and the measuring sensor adapter on the transport system. Connect the plug of the sensor with the socket (3) on the feeding side of the system. After the PCB moved into the heating chamber press <Measure>, to start the recording. -
Page 89: Load A Process Curve
With this function you can a analyze a process curve. Before Load a Process using the process curve you must load it. Curve Press in system screen the function key <Measure> for measurement. Not Ready 548.10 40°C 40°C 210°C HEATER 1 V = 35 cm/min. Prg.: 03... -
Page 90: Analyze A Process Curve
7.0 Measurement A recorded process curve can be analyzed. The software will add a vertical line additionaly to the process curve. Infofi eld vertical line Analyze a Process You can move this vertical line in the recorded procress curve. Curve In the Infofi... -
Page 91: Save A Process
Curve curve you must be saved on another place. Up to 6 process curves can be stored. Press in system screen the function key <Measure> for the measurement. Not Ready 548.10 40°C 40°C 210°C HEATER 1 V = 35 cm/min. -
Page 92: Identifi Cation
7.0 Measurement Select a Place You can scroll the directory with < > and < >. Select the desired place. The arrows >> << are mar- king the place. Confi rm the place with the function key <Save>. Overwrite a With <Enter>... -
Page 93: Print A Process Curve
Connect the printer with the interface socket at the side of the system. Press in system screen the function key <Measure> for measurement. Not Ready 548.10 40°C 40°C 210°C HEATER 1 V = 35 cm/min. - Page 94 8.0 System Settings Table of contents Language Selection ........8.3 Protocol printout .
-
Page 95: Language Selection
You have the possibility to get the text in your special language. Select Language Press in the system screen <System> for system settings. Not Ready 548.10 40°C 40°C 210°C HEATER 1 V = 35 cm/min. Prg.: 03... -
Page 96: Protocol Printout
Connect the printer with the interface socket of the Immediate Printout system. Press in the system screen <System> for system setting. Im me dia te Not Ready 548.10 40°C 40°C 210°C HEATER 1 V = 35 cm/min. Prg.: 03 Settings... - Page 97 8.0 System Settings In the protocol printout you can select an interval time between 0 and 999 minutes. SYSTEM SETTINGS Language: English Con trast + Operating Hour: 11:50:32 Protocoll printout: 1min Contrast - Printer type: Epson Language Report Printer Service Press <Report>...
-
Page 98: Select Contrast
The contrast of the system display can be changed. Depending on dif fe rent viewing angles it is useful to change the contrast of the display Press in the main screen <System> for system set- ting. Not Ready 548.10 40°C 40°C 210°C HEATER 1 V = 35 cm/min. -
Page 99: Select Printer Type
You can select the following printers in the system: • HP colour printer • Epson Printer (FX-80 compatible) Press in the main menu <System> for system set- ting. Not Ready 548.10 40°C 40°C 210°C HEATER 1 V = 35 cm/min. Prg.: 03 Settings... -
Page 100: Set Date And Time
Set Date and Time The microprocessor includes a real-time-system-clock. The time and the date can be set in in this menu. Press in the main menu <System> for system set- tings. Not Ready 548.10 40°C 40°C 210°C HEATER 1 V = 35 cm/min. -
Page 101: System Service
System Service In the system service menu special system settings could be changed. The changing of this settings can only be done through the SEF service. This menu is secured with a pass- word. Press <System> for system setting. Not Ready 548.10... - Page 102 9.0 Maintenance Table of contents Cleaning intervals ........9.3 Relieved cleaning work .
-
Page 103: Cleaning Intervals
9.0 Maintenance Cleaning intervals Cleaning what with what when operating panel water and washing if required up liquide cover fans brush if required maschine body water and washing if required up liquide / spirit slide bars of the screwdriver / if required transport system scraber... -
Page 104: Relieved Cleaning Work
9.0 Maintenance Relieved cleaning work Cleanings with For the following cleaning works do not use rough cle aning water and washing agents. Use only warm water with washing up li qui de. up liquide or spirit Clean the operating panel with cloth and water with washing up liquide. - Page 105 9.0 Maintenance For cleaning works the machine hood and the heating chamber Open covers could be open and closed by hand. Attention, danger of burns During the production process, the heating chamber is very hot due to the radiator temperatures of up to 525°C (980 °F). In case of burns contact a physician immediately.
-
Page 106: Plan Of Diagnosis
Not repairiable. Call SEF service. Acoustic signal of Close the covers Cover is open? the system. and press the <Enter>-key. Not repairiable. Call SEF service. Service station of the SEF Roboter GmbH: Tel.: 0049 (0)4136/909-99 Fax: 0049 (0)4136/909-22 Page 9.6... - Page 107 Call SEF-Service. The printer does Printer con nec ted and Connect and swit ched on? switch on the prin- not work. ter. Call SEF-Service. Not repairiable. Service station of the SEF Roboter GmbH: Tel.: 0049 (0)4136/909-99 Fax: 0049 (0)4136/909-22 Page 9.7...
-
Page 108: The Electronic Of The Soldering System
9.0 Maintenance The electronic of the soldering system The electronic of the system is mounted very serviceable and is separated as following: Mains fi lter Operating panel Power unit Measuring input Th operating panel is mounted at the front side. All other parts are accessible at the rear side. - Page 109 9.0 Maintenance Caution, Danger for your life In the system there are some parts with mains power. By mainte nance and ser vice pro ce du res turn the entire system off, shut off from mains by re mo ving the mains plug.
- Page 110 9.0 Maintenance 10. Fasten and fi xe the radiator carefully again in the me- tal clasp. Attention: Do not mechanically overload the radiator. 11. Place the temperature sensor on the radiator. 12. Connect the sensor in the mounting clamp. The sensor should be mounted with a distance of 3 cm to the end of the radiator.
-
Page 111: Change The Temperature Sensor On A Radiator
9.0 Maintenance Caution, Danger for your life In the system there are some parts with mains power. By mainte nance and ser vice pro ce du res turn the entire system off, shut off from mains by re mo ving the mains plug. - Page 112 9.0 Maintenance 10. Place the temperature sensor on the radiator. 11. Connect the sensor in the mounting clamp. The sensor should be mounted with a distance of 3 cm to the end of the radiator. Take care that the sensor has a good contact to the radiator. 12.
- Page 113 9.0 Maintenance Caution, Danger for your life In the system there are some parts with mains power. By mainte nance and ser vice pro ce du res turn the entire system off, shut off from mains by re mo ving the mains plug.
- Page 114 9.0 Maintenance 10. Place the new heating elements in the heating cham- ber. 11. Connect the lustre terminal of the heating elements in the plugs on the power unit. 12. Fixed the heating elements with a plate in the heating chamber.
-
Page 115: Change Thetemperature Sensor In The Heating Chamber
9.0 Maintenance Caution, Danger for your life In the system there are some parts with mains power. By mainte nance and ser vice pro ce du res turn the entire system off, shut off from mains by re mo ving the mains plug. -
Page 116: Change The Blower
9.0 Maintenance Caution, Danger for your life In the system there are some parts with mains power. By mainte nance and ser vice pro ce du res turn the entire system off, shut off from mains by re mo ving the mains plug. - Page 117 9.0 Maintenance 11. Dismount the blower from the plate. 12. Fixe the new blower on the plate. Adjust the shaft of the blower to a free rotation. 13. Fixe the ventilator wheel in the blower with the hexagonal screw. 14. Place the new blower in the heating chamber. 15.
-
Page 118: Dismounting And Mounting The Grid Belt Transport
9.0 Maintenance Caution, Danger for your life In the system there are some parts with mains power. By mainte nance and ser vice pro ce du res turn the entire sys- tem off, shut off from mains by re mo ving the mains plug. There is danger for your life. -
Page 119: Change The Power Unit
9.0 Maintenance Caution, Danger for your life In the system there are some parts with mains power. By mainte nance and ser vice pro ce du res turn the entire system off, shut off from mains by re mo ving the mains plug. -
Page 120: Dismounting And Mounting Of The Transport Control
9.0 Maintenance Caution, Danger for your life In the system there are some parts with mains power. By mainte nance and ser vice pro ce du res turn the entire system off, shut off from mains by re mo ving the mains plug. -
Page 121: Dismounting And Mounting Of The Mains Fi Lter
9.0 Maintenance Caution, Danger for your life In the system there are some parts with mains power. By mainte nance and ser vice pro ce du res turn the entire system off, shut off from mains by re mo ving the mains plug. -
Page 122: Change The Power Supply
9.0 Maintenance Caution, Danger for your life In the system there are some parts with mains power. By mainte nance and ser vice pro ce du res turn the entire sys- tem off, shut off from mains by re mo ving the mains plug. There is danger for your life. - Page 123 9.0 Maintenance Caution, Danger for your life In the system there are some parts with mains power. By mainte nance and ser vice pro ce du res turn the entire system off, shut off from mains by re mo ving the mains plug.
-
Page 124: Software Update
9.0 Maintenance Caution, Danger for your life In the system there are some parts with mains power. By mainte nance and ser vice pro ce du res turn the entire sys- tem off, shut off from mains by re mo ving the mains plug. There is danger for your life. - Page 125 Order for service or spare parts Please complete it and send it back to the SEF Roboter GmbH by fax SEF Roboter GmbH technical support Fax-Nr. 0049-4136-909-22 We order: an action of the serviceengineer date: possible times: delivery of the following spare parts: Informations about the defect machine: 548.10...
- Page 126 10.0 Technical Appendix Table of contents Pin Configuration Parallel Interface ..........10.3 Over View of the Electronic ............10.4 Thermo measuring modul 236.02 A0 ...........10.4 Operating panel 236.01 B1 ............10.4 Power unit 271-02 A9 ..............10.5 Mains filter 271-01 A9 ..............10.6 Power board 238-01 A1 ...............10.7 Page 10.1...
-
Page 127: Pin Configuration Parallel Interface
10.0 Technical Appendix The System has a parallel interface for a printer. The interface is located at the side of the operating panel. The interface plug is secured with a special ESD cap. Please note, that you only use special ESD-cable. That the system is switched off before connecting the interface plug. -
Page 128: Over View Of The Electronic
10.0 Technical Appendix Over View of the Electronic Operating panel 236.01 B1 Thermo measuring modul 236.02 A0 Page 10.4... -
Page 129: Power Unit 271-02 A9
10.0 Technical Appendix Power unit 271-02 A9 Page 10.5... - Page 130 10.0 Technical Appendix Mains filter Page 10.6...
-
Page 131: Power Board 238-01 A1
10.0 Technical Appendix Power board 238-01 A1 Page 10.7... - Page 132 11.0 Accessories Table of contents MESY 570.70 ........11.3 MESY 570.77 .
- Page 133 11.0 Accessories 570.70 Temperature measurement system MESY 570.70 (MESY) Measurement Save and real time temperature System measurement system with 3 thermo- couples and USB-interface. Article no. 95.170.070 570.77 Temprature measurement system MESY 570.77 (MESY) Measurement A continuos futher development System of 570.70.
- Page 134 12.0 Notes Page 12.1...
- Page 135 12.0 Notes Page 12.5...
Need help?
Do you have a question about the 548.10 and is the answer not in the manual?
Questions and answers