AVANT A36621 Operator's Manual For Attachment
Edge trimmer
Hide thumbs
Also See for A36621:
- Operator's manual for attachment (28 pages) ,
- Operator's manual (30 pages)

Related Manuals for AVANT A36621


Summary of Contents for AVANT A36621
- Page 1 English Edge Trimmer 2016 1 Operator's Manual for Attachment Edge Trimmer Product number A36621 www.avanttecno.com...
- Page 2 Edge Trimmer 2016 1...
-
Page 3: Table Of Contents
Edge Trimmer 2016 1 CONTENTS 1. FOREWORD ............................4 2. DESIGNED PURPOSE OF USE......................5 3. SAFETY INSTRUCTIONS FOR USING THE EDGE TRIMMER ............. 6 4. TECHNICAL SPECIFICATIONS ....................... 8 Safety labels and main components of the attachment ..................8 5. -
Page 4: Foreword
If you sell or transfer the equipment, be sure to hand over this manual to the new owner. If the manual is lost or damaged, you can request a new one from your Avant dealer or from the manufacturer. -
Page 5: Designed Purpose Of Use
The AVANT Edge Trimmer is an attachment suitable for use with AVANT multi purpose loaders shown in Table 1. Avant edge trimmer is the perfect attachment for trimming the edges of lawns, hedges, flower beds etc. It consists of a hydraulically operated trimmer mounted next to a cutting disc. Cutting disc cuts lawn precisely where you want and hydraulic trimmer breaks up any soil or lawn that is left to the side of the cutting disc. -
Page 6: Safety Instructions For Using The Edge Trimmer
6 (22) 3. Safety instructions for using the edge trimmer Please bear in mind that safety is the result of several factors. The loader-attachment combination is highly powerful and improper or careless use or maintenance may cause serious personal injury or property damage. - Page 7 7 (22) Shut down the loader and place the attachment to a safe position as shown in Safe stopping procedure before any cleaning, maintenance, or adjustments. Pay attention to the surroundings and any other persons and machines moving in the vicinity.
-
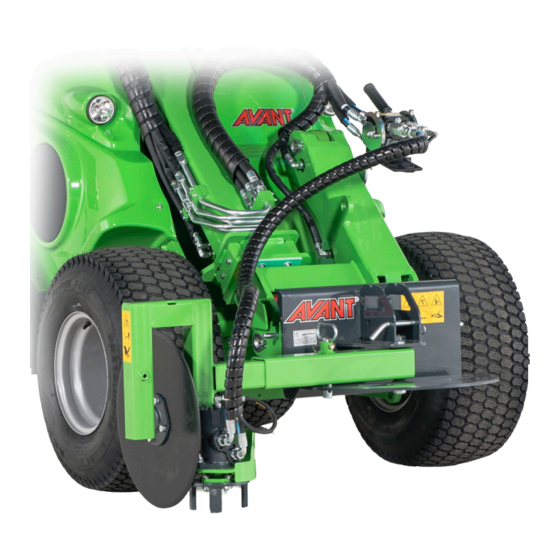
Page 8: Technical Specifications
22,5 MPa (225 bar) Support wheel Available options: A36699 Suitable AVANT loaders: See Table 1 4.1 Safety labels and main components of the attachment Listed below are the labels and markings, which must be visible on the equipment. Replace the warning labels, if they have become unclear or if they have detached completely. - Page 9 9 (22) Attachment identification plate A420014 Table 3 - Decal locations and warning messages Decal Warning message A46771 Read instructions before use. A46772 Crushing hazard - Do not go under a raised attachment; stay away from raised equipment. A46803 Pinching and cutting hazard, keep clear of moving parts, do not leave the equipment running.
-
Page 10: Assembling The Attachment
Mount the attachment only on level surface. Never move or lift an attachment that has not been locked. Avant quick coupling system: Step 1: Lift the quick attach plate locking pins up and turn them backwards into the slot so that they are locked in the upper position. -
Page 11: Connecting And Disconnecting The Hydraulic Hoses
On the 200 series 2 and 400-700 series loaders the hydraulic hoses are connected using the multi connector system. If you have an Avant 300-700 series loader with the conventional quick couplers and wish to change to the multi connector system, contact your Avant dealer or service point for instructions or installation services. - Page 12 12 (22) The lever should move easily all the way to its locking position. If the lever does not slide smoothly, check the alignment and position of the connector and clean the connectors. Also shut down the loader and release the residual hydraulic pressure.
-
Page 13: Operating The Attachment
13 (22) 6. Operating the attachment Check the attachment and the operating environment once more before starting to work, and that all obstacles have been removed from the operating area. Quick inspection of the equipment and the operating area before use are parts of ensuring safety and the best performance of the equipment. -
Page 14: Checks Before Use
14 (22) 6.1 Checks before use Check that the trimmer and the cutting disc can rotate freely and that there is no string or other foreign material around them. Use only when all pins are locked and secured in place. ... -
Page 15: Use
15 (22) 6.3 Use Before starting the trimmer: Set and adjust the brush to working position. See following chapters about adjustments. Using the trimmer: Cut the surface of the soil by pushing the cutting disc against the ground. Move the loader a little in forward or reverse to make the first cut easier. -
Page 16: Adjustments
16 (22) 6.4 Adjustments The trimmer can be adjusted in many ways, as shown in the following chapters. Best way to operate the trimmer depends on the surfaces the trimmer is operated, and the direction of travel. During use, the attachment should be kept in near upright position. 6.4.1 Orientation The trimmer arm can can be locked on either side, for easier use in different operating areas. -
Page 17: Operating Without Mixer
The adapter allows the attachment to be tilted sideways for efficient levelling or grading work. Read the instructions provided with the tilt adapter. More information about the tilt adapter is available from your AVANT dealer or from the AVANT web pages at www.avanttecno.com. -
Page 18: Maintenance And Service
Finding any fault means that the hydraulic hose or component must be replaced and the equipment must not be used until it is repaired. Spare parts are available from your nearest AVANT retailer or authorised service point. Leave the repair work to professional service technicians, if you don’t have adequate knowledge and experience about hydraulic assemblies and how to perform the repairing safely. -
Page 19: Checking Metal Structures
19 (22) 7.3 Checking metal structures Also the metal structures of the attachment must be inspected regularly. Check visually for damages and inspect the quick attach brackets and their surrounding area carefully. The attachment must not be used if it is deformed, cracked, or torn. -
Page 20: Warranty Terms
20 (22) 8. Warranty terms Avant Tecno Oy grants a warranty of one year (12 months) from the date of purchase for the attachment it manufactures. The warranty covers repair costs as follows: Work costs are covered, if the repair is not performed at the factory. - Page 21 Mallit / Modeller / Modeller / Modeller / Models / Modellen: Avant Hydraulitoiminen reunaleikkuri; Avant-kuormaajan työlaite Hydraulisk kanttrimmare; arbetsredskap för Avant lastare Hydraulisk kant trimmer ; redskap for Avant minilastere Hydraulisk kantskærer; redskab til Avant Minilæssere A36621 Hydraulic edge trimmer; attachment for Avant loaders Hydraulische Kantentrimmer-Trimmer;...
Need help?
Do you have a question about the A36621 and is the answer not in the manual?
Questions and answers