Table of Contents
Advertisement
Quick Links
Advertisement
Table of Contents

Related Manuals for SightCare CLOVER 6


Summary of Contents for SightCare CLOVER 6
- Page 1 CLOVER 6 Handheld Video Magnifier User Guide Rev C...
-
Page 2: Table Of Contents
Contents Precaution Quick Start Overview.................. 3 Compositions................5 Accessories................8 Stand..................12 Handle..................13 Operation Power Button................ 15... - Page 3 Setting Menu................. 17 Magnification................. 19 Brightness................20 Color Mode................20 Lighting...................22 Freeze..................22 Image Storage..............23 Playback................26 Multi-Selection..............30 Line and Mask..............32 Live Panning................. 35...
- Page 4 Focus Control................36 HDMI Output................. 36 USB Transfer................ 36 Power Frequency..............38 Memory.................. 39 Auto power saving............... 39 Restore...................40 Hardware Reset..............40 Troubleshooting The unit does not turn on............41 Black screen or White screen..........41...
- Page 5 The image does not change..........42 Smudges or blemishes on the screen......43 Specifications...
-
Page 6: Precaution
Precaution Before using Clover 6 for the first time, you must charge its battery. Refer to Battery and Charging section for more details. Always operate the unit in a place where the temperature is between 10°and 35°C(50°and 95°F). - Page 7 Keep the unit away from wet areas, rain, and other sources of liquids. Do not submerge the unit. Do not attempt to repair the unit. Any unauthorized attempt will void the product warranty. Contact your distributor to service. Use the supplied power adapter and battery.
-
Page 8: Quick Start
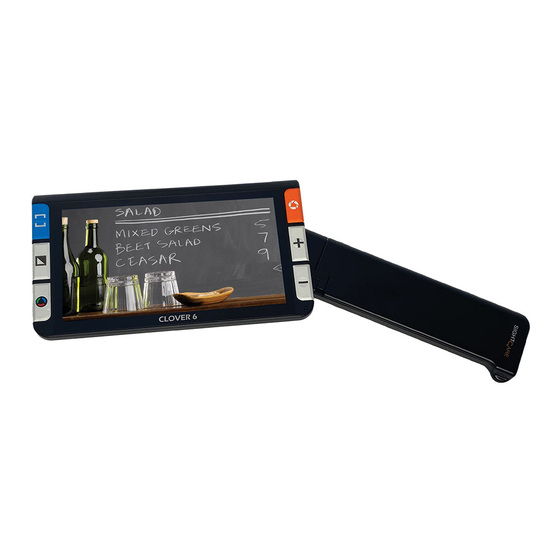
Quick Start Overview Thank you for purchasing CLOVER 6. CLOVER 6 is a handheld video magnifier, and all operations are supported by the high contrast tactile buttons. Equipped with the 1080P FHD touch screen, hand gesture provides easier and more natural way... - Page 9 Dual 13M cameras and fast switch mechanism to fulfill the full-range distance viewing requirement. When stand on the table, amazing details reveal with 2-35 times lossless magnification. The handle is flexible enough to be rotated to any angles and satisfy all holding requirements, which is also friendly for left hand user.
-
Page 10: Compositions
Compositions 1. LCD screen 2. Zoom In 3. Zoom Out 4. Freeze 5. Enhanced Color 6. True Color 7. Locate... - Page 11 8. Near View Camera 9. Distance Camera 10. Handle 11. LED Lights...
- Page 12 12. Power Button 13. Charging Port 14. Micro SD Card Slot 15. USB Port 16. HDMI Port...
-
Page 13: Accessories
Accessories User Manual Power Adapter Cleaning Cloth Strap Pouch HDMI Cable... - Page 14 Charging the battery Connect the supplied power cable to the unit’s charging port, and connect the power adapter into an AC outlet to start charging.
- Page 15 Power LED Charging when the unit is off, the power LED will be green, and then auto turn off when fully charged. A fully Charging will take about 2.5 hours, and will support the unit working continuously for about 3 hours ...
- Page 16 low. When the red light starts to flash, you will need to charge the battery. When in the Sleeping Mode, the LED light will be yellow. You can also check the battery status by pressing the power button.
-
Page 17: Stand
Stand Unfold the stand as the following figure shows. -
Page 18: Handle
Handle Rotate the handle as the picture shows and hold it at your most comfortable position. - Page 19 When the handle is open as picture shows, the device will switch automatically from distance camera to near view camera.
-
Page 20: Operation
Operation Power Button Press and hold the Power button for 2 seconds to turn on the unit when it is off. Press and hold the Power button for 2 seconds when it is on to get into choosing page: Sleeping Mode or Turn Off . - Page 21 Mode. When in Sleeping Mode, long press Power button for 3 seconds to wake up the unit. When the unit is on, press the Power button enter the Setting Menu. Press other buttons when holding the Power button will make combo function, refer to the following instructions for more details...
-
Page 22: Setting Menu
Setting Menu Slide the corresponding control bar to adjust volume/brightness. Volume Control Bar Brightness Control Bar Use tap gesture on the specific icon to activate/inactivate the setting. - Page 23 Auto Focus LED Light Vibration Power saving No operations for 8 seconds or short press the Power Button to exit.
-
Page 24: Magnification
Magnification Press the Zoom In button / Zoom Out button to increase/decrease magnification, and hold the button for continuous increasing/decreasing. In addition to the Zoom button, use the pinch and zoom gesture on the touchscreen to adjust the zoom level. -
Page 25: Brightness
Brightness addition control bar, hold Power button and press the Zoom In button /Zoom Out button to increase/decrease the screen brightness. Color Mode A color mode is a pre-defined color combination. Full color mode is suitable for picture, map viewing, and enhanced contrast mode is combined with different foreground and background colors and can help to read clearly. - Page 26 Press the Enhanced Color button to cycle through the color combination list Press and hold the Enhanced Color button for 3 seconds to enter the Customized Color Page, use the tap gesture to activate/inactivate the enhanced color combination. ...
-
Page 27: Lighting
Press the True Color button to quickly return to the full color mode. Lighting In addition to the setting menu, hold the Power button and press the Freeze button to turn on/off the LED lights. Freeze Freezing an image on the LCD screen can be useful for further reading, and also further zooming in or... -
Page 28: Image Storage
zooming out or changing the color mode for a better view. The brightness adjusting is not allowed when freezing. Press Freeze button to lock/unlock the image. For the locked image with increased magnification, you can use the gesture to navigate around freely. Image Storage ... - Page 29 The Voice Record icon will appear after the storage. Tap and hold the Mic icon to begin the recording and release the icon to finish (or press the Locate button to record). You can replay the recorded voice by pressing the Play Icon (or pressing the Freeze button...
- Page 30 You can repeat recording the voice but only the latest record will be saved with the image. No operations for 5 seconds or tap other inactive area or press the Power button to close. For a better recording quality, please approach to the Mic as the picture shows and speak aloud.
-
Page 31: Playback
Note: When the saved images reach to the maximum capacity (2 GB, Memory Full icon appears), you will need to delete some pictures first in Playback mode before the next successful saving. Playback Press the True Color button for 2 seconds to enter the picture gallery. - Page 32 recorded voice by tapping the Voice icon on the top-right side. Tap again (or press the Freeze button ) to playback the picture. You can view and navigate the image with the same operations described in the Image Freeze. Press the Freeze button to return to the gallery.
- Page 33 icon again (or press the Locate button again to delete or Power button /any other places on the screen to cancel. When in the galley, tap the trash icon (or hold the Locate button ) for 5 seconds to delete all the images.
- Page 34 Pictures can be transferred to the external SD card when it is inserted. Choose the specific picture first and then tap the Transfer icon to start. Long tap the Transfer icon for 3 seconds, all the pictures will be chosen and transferred to the external SD card.
-
Page 35: Multi-Selection
Multi-Selection When in the gallery, long tap on the specific picture(or long press the Freeze button ) to activate/inactivate the Multi-selection. With Multi-selection enabled,a small box will appear at the lower right corner of each picture. Tap (or use Zoom button and Freeze button ) to choose all the target pictures. - Page 36 Tap the corresponding the Trash icon /Transfer icon to to pop up the choose box. Tap the icon in the choose box to delete/transfer all the chosen pictures. Tap the Exit icon or press the Power button to back to the multi-selection. ...
-
Page 37: Line And Mask
Line and Mask Press the Locate button to switch among different Reading Line & Mask modes. The Live-panning function is still available. One horizontal line Press and hold the Locate button and use finger slide up/down on the screen to change the position of horizontal reading line. - Page 38 One vertical line Press and hold the Locate button and slide left/right to change the position of vertical reading line. Press and hold the Locate button and slide up/down to increase/decrease the width of the line. Horizontal mask ...
- Page 39 Press and hold the Locate button and slide left/right to narrow/enlarge the distance between the masks. Vertical mask Press and hold the Locate button and slide left/right to change the position of the masks. Press and hold the Locate button and slide up/down to enlarge/narrow the distance between the masks.
-
Page 40: Live Panning
Live Panning In the higher zoom level, use slide gesture to navigate the image for seeing more without moving the paper. Quickly tap the image center twice to re-center the image. Quickly tap the image edge twice to jump to the start/end point. -
Page 41: Focus Control
Focus Control The autofocus system works well in the most situations. In addition, some methods are provided to control the focus. Tap on the screen for 2 seconds to trigger the focus manually. In addition to the setting menu, press the Power button and Locate button to enable/disable the... -
Page 42: Hdmi Output
HDMI Output Connect to the external screen for a better and larger viewing. -
Page 43: Usb Transfer
USB Transfer Connect the device to the PC via USB cable. The pictures can be transferred from the device to the Power Frequency Power Frequency provides the options of 50HZ and 60HZ power frequency according to customer region. Long press the Power button + Enhanced color button for 3 seconds can adjust the frequency. -
Page 44: Memory
Memory The unit will memorize automatically the most recent settings such as color mode, magnification, beep when power off normally and use them in the next power on Auto power saving If no operation and no moving for over 5 minutes, the unit will get into Sleeping Mode automatically and will turn off in 10 minutes with no further operation. -
Page 45: Restore
Restore Hold the Freeze button and the Locate button at the same time for 3 seconds to reset to the default factory settings. Auto power off when resetting is done. Hardware Reset When the unit is hung(can’t be turned off), press the Power +Freeze button +Zoom Out button... -
Page 46: Troubleshooting
Troubleshooting The unit does not turn on Connect to the power adapter Charge the battery Black screen or White screen If the unit is sitting on a flat pure surface, the screen may be black or white, Lift the unit off to ensure change happens. - Page 47 Adjust the color mode When the unit is connected to TV, the screen is black Restart the unit The image does not change If the unit enter the freeze mode, the image will not change Press power button to check the current status ...
- Page 48 Smudges or blemishes on the screen Adjust brightness Clean the LCD screen and camera Please contact your local distributor if problem is not solved...
- Page 49 Specifications 5.5 inch IPS touch screen, anti-glare Display: Screen Resolution: 1920*1080 Dual 13M auto-focus Camera Camera: Video Resolution: 1920*1080 Magnification: Approximately 2x ~ 35x Nature color Color Mode: Up to16 user-defined Enhanced Colors LCD brightness adjustable ...
- Page 50 Near-view, Distance-view Video Mode: Screen vibration feedback On/Off control Vibration: Image Storage and Playback Snapshot: Storage capacity: approximately 2GB Reading Line/Mask function Locate: <= 160*91*21mm (Device folded) Size: <265 grams (Battery included) Weight: Nearly 3 hours continuous use ...
Need help?
Do you have a question about the CLOVER 6 and is the answer not in the manual?
Questions and answers