
Related Manuals for Insportline KAWASAKI Juniso 12


Summary of Contents for Insportline KAWASAKI Juniso 12
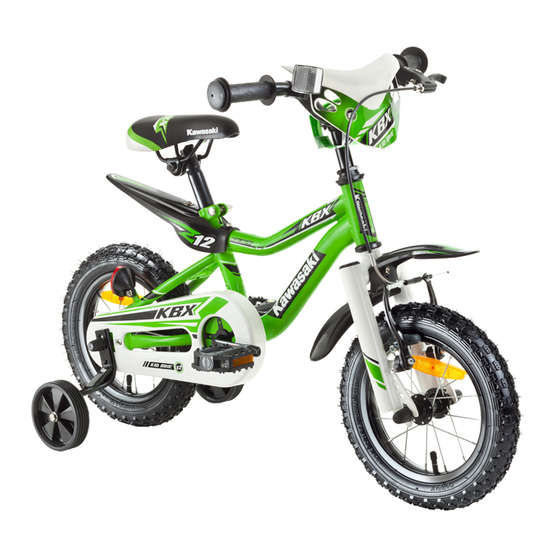
- Page 1 USER MANUAL – EN IN 16920 Kids Bike KAWASAKI Juniso 12" IN 16921 Kids Bike KAWASAKI Juroku 16" IN 16922 Junior Bike KAWASAKI Nijumo 20" ay not be exactly as illustrated...
-
Page 2: Table Of Contents
CONTENTS SAFETY EQUIPMENT ..........................4 MECHANICAL SAFETY CHECK ......................5 RIDING SAFETY AND RESPONSIBILITY ....................6 THE OWNER’S RESPONSIBILITY ..................... 6 AN IMPORTANT NOTE TO PARENTS ....................6 THE BASICS ............................8 RULES OF THE ROAD ........................8 RULES OF THE TRAIL ........................9 WET WEATHER RIDING ........................ - Page 3 This manual contains important safety, performance and maintenance information. Please read this manual before taking your first ride on your new bicycle, and keep this manual handy for future reference. CHOOSING THE CORRECT SIZE: The bicycle must be chosen to fit the rider. Straddle the assembled bicycle with feet shoulder width apart and flat on the ground.
-
Page 4: Safety Equipment
SAFETY EQUIPMENT WARNING: Many states require specific safety devices. It is your responsibility to familiarize yourself with the laws of the state where you ride and to comply with all applicable laws, including properly equipping yourself and your bike as the law requires. 1. -
Page 5: Mechanical Safety Check
Some higher performance model bicycles come equipped with pedals that have sharp and potentially dangerous surfaces. These surfaces are designed to add safety by increasing adhesion between the rider’s shoe and the bicycle pedal. If your bicycle has this type of high-performance pedal, you must take extra care to avoid serious injury from the pedals sharp surfaces. -
Page 6: Riding Safety And Responsibility
WARNING: Loose or damaged handlebar grips can cause you to lose control and fall. Unplugged handlebars can act like a cookie cutter on your body, and cause serious injury in an otherwise minor accident. RIDING SAFETY AND RESPONSIBILITY NOTE: Like any sport, bicycling involves risk of injury and damage. By choosing to ride a bicycle, you assume the responsibility for that risk. - Page 7 • Ride on the right of traffic. 2. LESSONS The lessons that follow relate to some of the most common real situations that children encounter when riding their bikes. Go over these situations with your child and make sure the lesson objective is accomplished.
-
Page 8: The Basics
Night Time Riding: Most car/bicycle accidents happen at night where an overtaking car hits a bike. (An overtaking car is one that comes up from behind and passes the cyclist on the left.) These overtaking accidents can be very serious. What can you do? First, you should keep your youngster from riding at night. -
Page 9: Rules Of The Trail
• Vehicles slowing or turning in front of you, entering the road or your lane ahead of you, or coming up behind. • Parked car doors opening in front of you. • Pedestrians stepping out in front of you. • Children playing near the road. -
Page 10: Wet Weather Riding
6. You may be riding in sensitive habitat, so stay on the designated trail. Don’t contribute to erosion by riding in mud or with unnecessary sliding. Don’t disturb wildlife or livestock; and don’t disturb the ecosystem by cutting your own trail through vegetation or streams. 7. -
Page 11: Bicycling In Traffic
• Avoid areas of heavy traffic, dark areas, and roads with speed limits over 35mph. • Avoid road hazards. BICYCLING IN TRAFFIC Don’t pass on the Obey traffic signs Never ride against Choose best way Go slow on and signals – traffic –... -
Page 12: Assembly, Maintenance And Adjustment
Watch for cars Scan the road Avoid road Keep both hands Watch for chasing pulling out – make behind – learn to hazards – watch ready to brake – dogs – ignore eye contact with look back over out for parallel you may not stop them or try a firm driver. -
Page 13: Reflectors
REFLECTORS Your bicycle is supplied with one front (white), one rear (red), two wheel (white), and two pedal (orange) reflectors. These are an important safety and legal requirement, and should remain securely fitted and in good, clean conditions at all times. Periodically, inspect all reflectors, brackets and mounting hardware for signs of wear or damage. -
Page 14: Pedals Installation
PEDALS INSTALLATION All pedals have L or R stamped on the threaded spindle of each pedal. 1. Thread the pedal marked R clockwise into the right or chain wheel side of the crank arm. 2. Thread the pedal marked L counter-clockwise into the left side of the crank arm. -
Page 15: Brake And Brake Cable Installation
FORWARDS AND BACKWARDS 1. Position crank arm parallel to the ground. 2. Place ball of foot on pedal with foot parallel to the ground. 3. Position the saddle so that an imaginary line drawn from the center of your knee to the pedal spindle is vertical. Some riders move the saddle slightly forward of this positon. -
Page 16: Adjusting The Handlebar Stem And Headset
ADJUSTING THE HANDLEBAR STEM AND HEADSET NOTE: The handlebar stem and headset are an integrated system. Both must be adjusted at the same time. 1. To adjust the headset or stem, first loosen the two stem binder bolts, then the adjuster bolt in the top cap. 2. -
Page 17: Front Wheel Assembly
3. Assemble the brake lever to the handlebar: Loosen the clamp screw of each brake lever. If necessary, move the handlebar to each side to install the brake levers put the brake levers on the handlebar with the brake lever for the rear brake on the right side of handlebar. Do not tighten the clamp screw of the brake levers at this time. -
Page 18: Brakes
BRAKES BRAKE SYSTEM ADJUSTMENTS WARNING: You must adjust the front brakes as written before you ride the bicycle. 1. Put the brake shoes in the correct position: Loosen the nut (1) of each brake shoe. Adjust each brake shoe so it is flat against the rim and aligned with the curve of the rim. - Page 19 WARNING: Do not overtighten the cable clamp. Overtightening the cable clamp may cut the cable and cause injury to the rider or to others. Do step 3 until the brake shoes are the correct distance from the rim. Turn the locknut(s) against the brake lever and the caliper brake.
-
Page 20: Rear Derailleur Adjustment
If the rims are wet, start to brake earlier than normal because a longer distance to stop the bicycle will be necessary. Be careful when riding downhill or at a high speed because as your speed increases, a longer distance to stop the bicycle will be necessary. Slow for curves because too much speed can force you to make a turn too wide. -
Page 21: Repair And Service
The Schraeder (Shown) is like the valve on a car tire. To inflate a Schroeder Schraeder Valve valve tube, just remove the valve cap and push the air hose or pump fitting onto the end of the valve stem. To let air out of a Schraeder valve, depress the pin in the end of the valve stem with the end of a key or other appropriate object. - Page 22 the bicycle. Have the frame inspected by a qualified professional at a bicycle service shop before riding the bicycle again. NOTE: Have a bicycle service shop make any repairs or adjustments for which you do not have the correct tools or if the instructions in this manual or any "Special Instructions" are not sufficient for you. REAR WHEEL/CHAIN ADJUSTMENT Maintenance: The chain must be at the correct tightness.
-
Page 23: Lubrication / Maintenance
Axle nuts: Check that these are tight before each ride. INSPECTION OF BEARINGS Maintenance: Frequently check the bearings of the bicycle. Have a bicycle service shop lubricate the bearings once a year or any time they do not pass the following tests. Head Tube Bearings: The fork should turn freely and smoothly at all times. -
Page 24: Serial Number
ONE PIECE CRANKS To adjust the free play in a one-piece type bottom bracket, loosen the locknut on the left side by turning it clockwise and tighten the adjusting cone counter-clockwise using a screwdriver in the slot. When correctly adjusted, re-tighten the locknut counter-clockwise. 1) Remove the chain from the chain wheel. - Page 25 “The Buyer who is not the End Customer” is a Businessman that buys Goods or uses services for the purpose of using the Goods or services for his own business activities. The Buyer conforms to the General Purchase Agreement and business conditions. These Conditions of Warranty and Warranty Claims are an integral part of every Purchase Agreement made between the Seller and the Buyer.
- Page 26 26847264 VAT ID: CZ26847264 Phone: +420 556 300 970 E-mail: eshop@insportline.cz reklamace@insportline.cz servis@insportline.cz Web: www.inSPORTline.cz inSPORTline s.r.o. Headquaters, warranty & service center: Električná 6471, Trenčín 911 01, SK CRN: 36311723 VAT ID: SK2020177082 Phone: +421(0)326 526 701 E-mail: objednavky@insportline.sk reklamacie@insportline.sk servis@insportline.sk...
Need help?
Do you have a question about the KAWASAKI Juniso 12 and is the answer not in the manual?
Questions and answers