Table of Contents
Advertisement
Advertisement
Table of Contents

Related Manuals for Insportline DEVRON


Summary of Contents for Insportline DEVRON
- Page 1 USER MANUAL – EN Electric Bicycles DEVRON...
-
Page 2: Table Of Contents
CONTENTS BICYCLE PARTS ............................ 4 PANEL ..............................5 INFORMATION ON THE SCREEN ..................... 5 FUNCTIONS & BUTTONS ........................5 INSTALLATION ........................... 6 ON/OFF ..............................6 WALK ASSIST ............................. 6 BACKLIGHT ............................7 POWER LEVEL ........................... 7 BATTERY CAPACITY ......................... 7 DISTANCE (TRIP / TOTAL) ......................... - Page 3 CLEANING ............................15 LUBRICATION ........................... 15 RECOMMENDED PERIODIC REVISIONS ..................15 REGULAR CONTROL ........................16 TRANSPORT ............................. 16 WARNINGS ............................16 LIMITED WARRANTY ........................... 17 TERMS AND CONDITIONS OF WARRANTY, WARRANTY CLAIMS ..........25 Thank you for your confidence in our bike. According to its type it meets the norms EN 15194, EN 14764, EN 14765 and EN 14766.
-
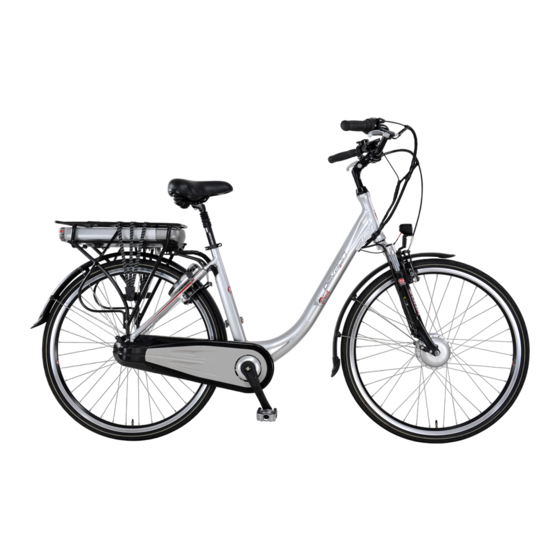
Page 4: Bicycle Parts
Congratulations! You are the owner of a DEVRON electric bike. This bike is equipped an electric pedal assistance which offer a whole new way practicing cycling. The pedal assist makes driving more lightweight and comfortable than ever. Whether you use your bike for trip between home and work, for heavy shopping or just for pleasure, you will always have the wind at your back. -
Page 5: Panel
PANEL INFORMATION ON THE SCREEN Make sure that the battery has to be lit. Activate the control panel using the (Fig.3). START / STOP Adjustment assistance/Display & backlight lighting* Battery indicator Mileage* Assistance level Travel speed* Adjustment assistance/walk assist** Motor Power* * Optional depending on the model control panel ** Functions activate/deactivate holding the button press for 2 seconds Display specification –... -
Page 6: Installation
Caution: Do not plug in or unplug this display when the power to the unit is on! Avoid collisions. Protect the display’s membrane to provide water resistant performance. Do not attempt to reset parameters if the display is not working. Call for service if the C965 display is not working. -
Page 7: Backlight
BACKLIGHT Press and hold to turn on the C965’s backlight screen. If a front/back light is configured as well, this will switch it on as well if front light available. Press and hold again to switch off. Note: The automatic backlight is available only if the controller (or built-in controller) offers this function. -
Page 8: Battery
BATTERY PRECAUTIONS Precautions charger: Only for indoor use. Do not throw the charger in inappropriate containers. Danger of electrocution. Do not disassemble the charger. Double insulation. Precautions battery: Do not incinerate the battery. Do not expose the battery to temperatures above 50°C. Do not expose the battery to water. -
Page 9: Battery Removal From The Bike
BATTERY REMOVAL FROM THE BIKE Insert the key into the lock and turn the key 180° to the left to unlock the battery. Carefully pull the battery from the holder. BATTERY CHARGING The electric bicycle is equipped with a Lithium-Ion battery that powers the motor. Unlike other batteries, lithium-ion batteries are not subject to a "memory effect"... -
Page 10: Battery Information
On the side of the battery is an indicator of the state of battery charge. By pressing the red button (POWER) you can check the battery charge. LEDs indicate battery charge status as follows: 5 LED = the battery is 100% charged 3 = LED load is between 70 and 40% 1 LED = battery is charged between 0% and 40% If no LED is lit, the battery is empty and must be recharged. -
Page 11: You Still Need To Know About Pedaling Assistance
YOU STILL NEED TO KNOW ABOUT PEDALING ASSISTANCE When the electric power steering is enabled, start the bike is different than a normal bike. You will leave more easily. Do not let yourself surprised by the operation of the bike and before use in high traffic areas acclimate yourself with it. -
Page 12: Adjusting The Saddle
ADJUSTING THE SADDLE You can adjust the seat height by loosening screws (or by operating the "Quick Release", where the model of bicycle is equipped with this system) on the stem clamp to the saddle, using a hexagonal key. You also have the option to switch the saddle and adjust as forward to the rear. To do this, loosen using the spanner nut on the carriage seat. -
Page 13: Brakes
BRAKES INFORMATION ABOUT THE BRAKE ADJUSTMENT The brakes must be adjusted so that when you squeeze the handle to the half of the stroke (Fig. 1), the whole braking surface of the brake pads bear against the rim (Fig.2). BRAKE ADJUSTMENT If you feel that your brakes are not to your taste, you can adjust your brakes with screw cable tension. -
Page 14: Tires
To replace the brake pads, you must first turn the screw inward cable so that the cable brake relaxes. Then, push the brake levers using the thumb and forefinger and pull the brake cable (Fig. 5). You have enough space to loosen the bolts brake pads (Fig. 6). Do not forget to have correct brake adjustment after replacing the pads. -
Page 15: Maintenance
MAINTENANCE REVISIONS We recommend that you make regular checks of the bike to your dealer or an authorized service facility. It is recommended to do a review after 3 months of use, and regularly up to 1 year. A regular maintenance can prevent long-term damage and unnecessary costs. -
Page 16: Regular Control
REGULAR CONTROL Be sure to check the following: • Is the battery charged? • The brakes work properly? Brake pads, bolts and nuts are tight? Cables they are not damaged? The braking surfaces are kept clean and grease? There is the not-ti brake pads worn? •... -
Page 17: Limited Warranty
Claims under this warranty must be made through an authorized Trek dealer. Proof of purchase is required. The subject item must be registered with DEVRON, either through on-line registration or by the receipt of a warranty registration card by DEVRON, before a warranty claim may be processed. - Page 18 IDENTIFIERS BARCODE Frame Series BARCODE Engine Series BARCODE Battery Series BARCODE Controller Series...
- Page 19 WARRANTY CERTIFICATE - ELECTRICAL BICYCLE – For, Electric bicycles, name ______________________________________ recommended age group minimum 16 years. Model _____________________________, color _____________________, sold by shop ______________________________, town __________________________, address __________ _______________________________________________________________________________ Product purchase invoice _______________________, date _______________________________ voucher / receipt _____________________, date ________________________________________. Shop stamp Signature seller Commissioning was performed, I was handed manual and showed me how to use, I agree the terms...
- Page 20 SC Eurosport DHS SA offers a warranty of 24 months from the date of purchase bicycle in accordance with the rules provided by Law 449/2003 amended Ordinance 21/1992 republished on durable goods. The average use of the bicycle is 5 years. Ensuring security is a bicycle repair or replace it - if applicable - no later than 15 calendar days from the date the complaint was lodged by the purchaser to the selling unit, according to the law 449/2003 as amended.
- Page 21 • Freewheels - change if it breaks or one pawl teeth, does not change if tampered with or if it's because it was not properly maintained. • Brake levers - change if manufacturing defects, no dents, no changes if it finds breakage due lock brake cables.
- Page 22 battery charge level: min. 25% efficient operation of brakes tyre air pressure proper tightening of handlebar and saddle tightening the mounting nuts correction wheel tightness of the nut / screw fixation, in particular suspensions and handlebar equipment with headlight, stop, wheel reflectors for nighttime traffic verify the operation of the electrical system (engine, display controller, brake sensors) equipment with buzzer Commissioning is free at the time of purchase.
- Page 24 NOTES:...
-
Page 25: Terms And Conditions Of Warranty, Warranty Claims
TERMS AND CONDITIONS OF WARRANTY, WARRANTY CLAIMS General Conditions of Warranty and Definition of Terms All Warranty Conditions stated hereunder determine Warranty Coverage and Warranty Claim Procedure. Conditions of Warranty and Warranty Claims are governed by Act No. 40/1964 Coll. Civil Code, Act No. - Page 26 VAT ID: CZ26847264 Phone: +420 556 300 970 E-mail: eshop@insportline.cz reklamace@insportline.cz servis@insportline.cz Web: www.insportline.cz INSPORTLINE s.r.o. Headquarters, Warranty & Service centre: Elektricna 6471, 911 01 Trencin, Slovakia CRN: 36311723 VAT ID: SK2020177082 Phone: +421(0)326 526 701 E-mail: objednavky@insportline.sk reklamacie@insportline.sk servis@insportline.sk Web: www.insportline.sk...
Need help?
Do you have a question about the DEVRON and is the answer not in the manual?
Questions and answers