Table of Contents
Advertisement
Advertisement
Table of Contents

Related Manuals for Juplink EC3-750


Summary of Contents for Juplink EC3-750
-
Page 2: Table Of Contents
About This Manual ........................3 Chapter 1 Get to Know About Your Wi-Fi Range Extender ............4 1.1. Product Overview ......................5 1.2. Panel Layout ........................5 Chapter 2 Connect the Hardware....................7 2.1. Connect Your Extender ....................8 2.2. Position Your Extender ....................9 Chapter 3 Log In to Your Extender .................. -
Page 3: About This Manual
More Info The latest software, management app and utility can be found at Download Center at https://www.juplink.com/ The Quick Start Guide can be found where you find this manual or inside the package of the Extender. -
Page 4: Chapter 1 Get To Know About Your Wi-Fi Range Extender
Chapter Get to Know About Your Wi-Fi Range Extender This chapter introduces what the Extender can do and shows its appearance. It contains the following sections: - Product Overview - Panel Layout... -
Page 5: Product Overview
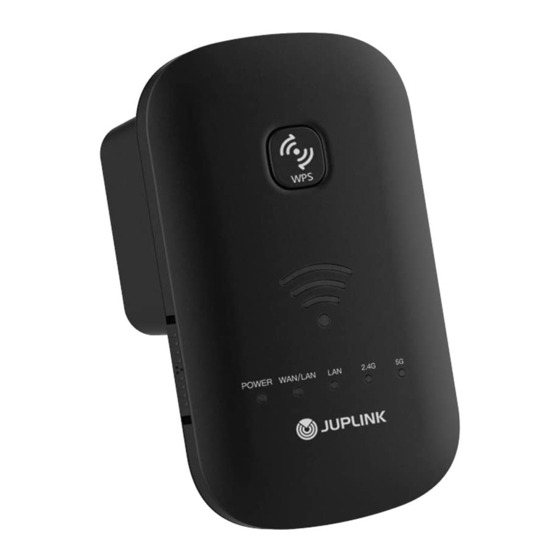
1.1. Product Overview The Juplink EC3-750 Range Extender (hereinafter referred to as the “Extender”) is designed to fully meet the need of Small Office/Home Office (SOHO) networks and users demanding higher networking performance. Three powerful internal antennas ensure continuous Wi-Fi signal to all your devices while boosting coverage throughout your home, and the built-in Ethernet ports supply high-speed wired connection to your devices. - Page 6 LED Indicators...
-
Page 7: Chapter 2 Connect The Hardware
Chapter Connect the Hardware This chapter contains the following sections: - Connect Your Extender - Position Your Extender... -
Page 8: Connect Your Extender
2.1. Connect Your Extender Before you start, please ensure the Power ON/OFF switch is turned to “ON”. How to connect to the Extender: • Method 1: Wired Connect your computer to the Extender’s LAN port with an Ethernet cable. • Method 2: Wirelessly 1) Find the SSID (Wi-Fi network name) printed on the label on the rear housing of the Extender . -
Page 9: Position Your Extender
2.2. Position Your Extender 1. For better performance, plug the extender into an outlet about halfway between the uplink router and the Wi-Fi dead zone. The location you choose must be within the range of your existing Wi-Fi network. 2. Wait until the 2.4G or 5G signal LED turns solid green, or the Wi-Fi Signal Strength Indicator shows at least Two LEDs on. -
Page 10: Chapter 3 Log In To Your Extender
Chapter Log In to Your Extender... - Page 11 2) Open a browser and visit 192.168.3.1 router.juplink.com 3) Enter the default username and password admin in the corresponding fields. 4) Click the Login button to enter the settings page. Note: If the Login window does not appear, please refer to the FAQ Section.
-
Page 12: Chapter 4 Set Up Internet Connection
Chapter Set Up Internet Connection This chapter introduces how to connect your Extender to the internet. The Wi-Fi signal indicator can help quickly determine whether the setup is successful. It contains the following sections: - Set up the Extender as a Repeater/Client (default) - Set up the Extender as an Access Point - Set up the Extender as a Router... -
Page 13: Set Up The Extender As An Repeater/Client (Default)
4.1. Set up the Extender as a Repeater/Client (default) In this part, you can check your current internet connection settings, and modify the settings according to the service information provided by your ISP. Follow the steps below to check or modify your internet connection settings. You don't know how to choose the way to connect, please check with your ISP for the internet access method before setting. - Page 14 ③ Select a Wi-Fi network to be extended in the pop-up box and enter the Wi-Fi password in the Key field, and click Save to complete the settings. Note: Default password is automatically copied from your original router’s Wi-Fi network. Default SSID is [SSID of your original router] + suffix of [2.
-
Page 15: Set Up The Extender As An Access Point
Note: Before completing setting up as AP, do NOT connect an Ethernet cable to the Ethernet port located at the bottom of the Extender; otherwise, you can only use router.juplink.com to log in to the Extender’s settigs page, and will not be able to access using the default IP address 192.168.3.1 any more. - Page 16 ③ Set your 2.4G/5G Wi-Fi name in the WIFI SSID field, change the Encrypted mode and enter your Wi-Fi password in the Key field. Then, click Save to complete the settings. Note: It is recommended to keep the default channel settings. Do not change the Wi-Fi channels unless you have relevant knowledge and think it necessary.
-
Page 17: Set Up The Extender As A Router
4.3. Set up the Extender as a Router ① Connect your mobile device to the Extender’s LAN port with an Ethernet cable or wirelessly and log in to the Extender. Note: Before setting, make sure that the left Mode switch is in “Router” mode. Note: - Before setting, please use an Ethernet cable to connect the WAN port on the Extender and LAN port of a modem. - Page 18 4.3.1. Router Mode - DHCP - Select DHCP in Connection Type. - Set your Wi-Fi names in 2.4G WIFI SSID and 5G WIFI SSID fields. - Select Encrypted from Encrypted drop-down list and set your Wi-Fi password in the Wi-Fi key filed, then click Save to complete the settings.
- Page 19 4.3.3. Router Mode - Static IP - Select Static IP in Connection Type. - Fill in the IP Address, Subnet Mask, Gateway and DNS fields according to the information provided by your ISP. - Set your Wi-Fi name and password, then click Save to complete the settings. Note: - You can take a screenshot to keep the information for the next time or for others to use.
-
Page 20: Chapter 5 Maintaining The Extender
Chapter Maintaining the Extender This chapter guides you how to configure common settings: - Change User Name and Password of the Extender - Save/Import Your Settings - Upgrade Firmware - Change LAN IP Address - View Connected Devices... -
Page 21: Changing The User Name And Password Of The Range Extender
5.1. Change User Name and Password of the Extender You can change the user name and password to log in to the Extender. ① After logging in to the Extender, Click Password Settings. ② Change the user name and password, and then click Save. Your settings are now applied. Note: After the setting is completed, the Extender will restart, and then you can log in with the new username and password and manage the router. -
Page 22: Upgrade Firmware
5.3. Upgrade Firmware ① After logging in to the Extender, click Upgrade Firmware. ② Click the Select files button and go to the folder where the firmware is saved and select the firmware. The firmware is usually a file with the extension of .img. ③... -
Page 23: Change Lan Ip Address
5.5. View Connected Devices ① After logging in to the Extender, click 2.4G Wi-Fi Clients or 5 G Wi-Fi Clients. ② You can view the information of devices connected to this EC3-750 Extender. -
Page 24: Faq
(see names of the wireless networks on the product label). • Check if the login address entered in the address bar is correct (router.juplink.com). • If you are unable to log in, please close the browser (not just return to the previous page) and open a new page to try again. - Page 25 page of the Extender. Q5: Why can l find someone else's Wi-Fi network, but not mine? • Please check if your mobile device can be connected wirelessly to the Extender in the same place, as the signal in the place may be poor. •...
- Page 26 Q9: Why is the extended signal poor? A9: After network extension, do not put the Extender too close to the router. Put the Extender in the middle of the router and the farthest place where you want to be connected. If you want to extend the wireless network horizontally, ensure that the Extender’s antennas are positioned upwards, and in parallel to those of the router.
- Page 27 ① Log in to your Comcast or Verizon router and enter the wireless settings page. ② Change the wireless encryption method to WPA/WPA2 or WPA-PSK/WPA2-PSK. ③ Confirm the settings and use EC3-750 Wi-Fi Range Extender to search the router’s network.
-
Page 28: Fcc Statement
FCC statement FCC compliance information statement Product Name: Juplink EC3-750 Wi-Fi Range Extender Responsible party: This equipment has been tested and found to comply with the limits for a Class B digital device, pursuant to part 15 of the FCC Rules. These limits are designed to provide reasonable protection against harmful interference in a residential installation.
Need help?
Do you have a question about the EC3-750 and is the answer not in the manual?
Questions and answers