Table of Contents
Advertisement
Quick Links
Advertisement
Table of Contents

Related Manuals for JUKI MO-735N


Summary of Contents for JUKI MO-735N
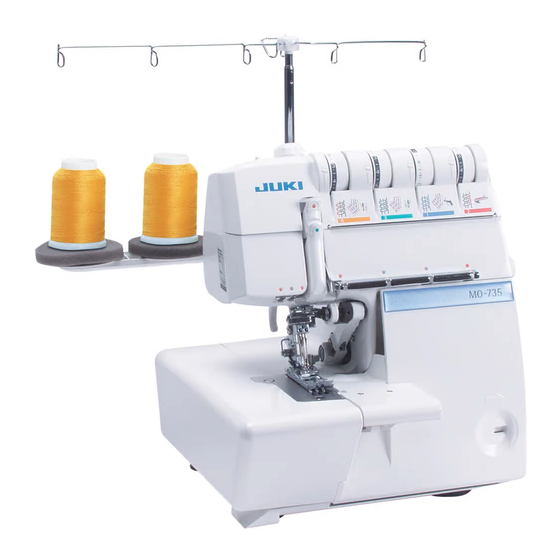
- Page 1 2-Needle,2/3/4/5-Thread Overlock + Cover Stitch Sewing Machine MO-735N INSTRUCTION MANUAL IMPORTANT: Read all safety regulations carefully and under-stand them before using your sewing machine. Retain this in- struction manual for future reference.
-
Page 2: Safety Instructions
“IMPORTANT SAFETY INSTRUCTIONS” When using an electrical appliance, basic safety precautions should always be followed, including the following: Read all instructions before using this sewing machine. “DANGER To reduce the risk of electric shock:” ____ 1. The appliance should never be left unattended when plugged in. 2. - Page 3 Congratulations on your purchase of a JUKI sewing machine. Please be sure to read safety precautions in “To use the sewing machine safely” in the Instruction Manual before use to fully understand the functions and operating procedures of the sewing machine so as to use the sewing machine for a long time.
- Page 4 WARNING For the combination of the material and the thread and needle, in particular, refer to the explanation table in “Replacement of the needle”. If the needle or thread does not match the material used such as in the case that an extra heavy- weight material (e.g., denim) is sewn with a thin needle (#11 or higher), the needle can break result- ing in an unexpected personal injury.
-
Page 5: Table Of Contents
Contents Safety instructions ········································ 1-3 Trial sewing, thread tension ····························· 29 Contents························································4 Thread tension ········································ 29-30 Details of the machine ··································· 5-6 Cover/chain stitch functions ····························· 31 • Accessories ·················································6 Cover/chain stitch functions and Preparing the machine / Using the machine ······· 7-8 general operating instructions ·····················... -
Page 6: Details Of The Machine
Details of the machine Details of the machine Thread guide support Open thread guide Lower looper thread tension dial Upper looper thread tension dial Retractable support rod Right needle thread tension dial Left needle thread tension dial Presser foot pressure regulating knob Foam pad Spool holder pin Thread take-up cover... -
Page 7: Accessories
Details of the machine View with cloth plate open Chain-looper thread tension dial Threading diagram for chain-looper thread Chain-looper auto-threader Accessories Upper looper converter Needle set 130/705H (SCHMETZ) Needle threader Tweezers Small screwdriver Brush/needle inserter Oiler Large screwdriver Lower knife Electronic foot control Dust cover Nets... -
Page 8: Preparing The Machine / Using The Machine
Preparing the machine / Using the machine Attaching the foot control Plug foot control into the machine socket (A) and then into main socket (B). The foot control regulates the sewing speed. The sewing speed can be adjusted by increasing or decreasing the pressure on the foot control. -
Page 9: Thread Stand
Preparing the machine / Using the machine Thread stand Push the support rod firmly into the socket on the back of the ma- chine. Raise the support rod (C) fully, turning slightly until the position catches engage. Position the thread guide (D) on the thread stand so that the arrow is to the front. -
Page 10: Thread / Cones / Spools
Preparing the machine / Using the machine Thread / cones / spools Large spools The anti-vibration cone should be If large industrial spools are used, used with the wider edge at the position the anti-vibration cone bottom on the spool holder pin upside down on the spool holder when sewing with cones. -
Page 11: Two Step Presser Foot Lifter With Integrated Front
Using the machine Two step presser foot lifter with integrated front foot lift To raise the presser foot, lift the presser foot lever on the rear of the machine, until it engages (A). It can be raised again to the maximum height and held in this position to provide more space between presser foot and stitch plate (B). -
Page 12: Looper Cover
Using the machine Looper cover To open, press to the right with your thumb in the indent provided and tilt the cover towards you. To close push it up and press lightly to the right. The cover engages automatically. Safety switch: The machine does not run when the looper cover is opened. -
Page 13: Inserting The Needles
Using the machine Inserting the needles Needles can be inserted quickly and easily with the practical needle inserter (A). Switch the machine off (power switch ”O”) Disconnect machine from electricity supply. Turn handwheel towards you until needles are fully raised. Match the matching up marks on handwheel and side cover. -
Page 14: Needle And Thread
Needle and thread Needles Needles must be in perfect condition. Problems can occur if needles: A are bent. B are damaged or blunt. C have hooked points. Needle and thread The needle size used depends on the thread. The needles should be in accordance with thread used. When sewing, the thread is fed through the long groove in the needle. -
Page 15: Adjustments And Settings
Adjustments and settings Stitch length It can be adjusted while sewing. The stitch length is infinitely variable from 1-4mm. Most overlock work is done with a basic setting of 2.5mm. Cutting width Switch the machine off (power switch ”O”) Disconnect machine from electricity supply. •... -
Page 16: Differential Feed
Adjustments and settings Differential feed There are two feed dogs one front (C) and one rear (D). The two feed dogs move independently and the distance each feed dog travels during one complete movement can be adjusted. The differential feed prevents fluting or waving in knitted or stretch fabrics and movements between the layers of fabric. -
Page 17: Gathering
Adjustments and settings Gathering Using the differential feed, a single layer of fabric can be gathered before sewing it to the garment. For example, sleeve heads and lower edges,yokes, lace edging or frills. Adjustment: • Stitch: 4-thread overlock • Differential feed: 2 •... -
Page 18: Roll Hemming
Adjustments and settings Roll hemming • Turn the handwheel towards you until the needles are fully raised. • For roll hemming, pull the selection lever to the front marking on the stitch plate, furthest from the presser foot (C). • For overlocking, push the selection lever to the rear marking on the stitch plate, nearest to the presser foot (D). -
Page 19: Sewing In Tape
Settings, practical sewing Sewing in tape The standard presser foot is equipped with a tape guide. A tape can be sewn into the shoulder or side seams of garments made from knits or stretch fabrics to prevent stretching. • Turn handwheel towards you until needles are fully raised. Match the matching up marks on handwheel and side cover. -
Page 20: Threading Preparations / Tips
Threading preparations / tips Switch the machine off (power switch ”O”) • Support rod with thread guide must be fully raised. • Open the looper cover. • Turn the handwheel towards you until the needles are fully raised. Match the matching up marks on handwheel and side cover. •... -
Page 21: Stitch Chart
Stitch chart Stitch Stitch width Thread tension Basic settings 4-Thread overlock with integrat- Left needle (yellow) 3-5 ed safety seam Stitch length: 2.5 Right needle (green) 3-5 Cutting width: 3 7-9 mm, right and left needle Differential: N-2 (knits) Upper looper (blue) 3-5 0.7-N (wovens) Lower looper (red) 3-5 3-Thread super stretch... - Page 22 Stitch chart Stitch Stitch width Thread tension Basic settings 2-Thread chain stitch Right needle (brown) 3-5 Stitch length: 2.5 7-9 mm, right needle Chain looper M Differential: N-2 (knits) 3-Thread overlock (left needle) + Left needle (brown) 3-5 chain stitch Right needle (green) 3-5 Stitch length: 2.5 7-9 mm, right and left needle...
-
Page 23: Threading 4/3 Thread Ol
Threading 4/3 Thread OL 1. Upper looper thread, blue markings Place the spool on the spool holder pin as illustrated. (1) Bring the thread up from the spool and lay it from the back to the front into the guide. (2) Thread the first machine guide. -
Page 24: Lower Looper
Threading 4/3 Thread OL 2. Lower looper thread, red markings Place the spool on the spool holder pin as illustrated. (1) Bring the thread up from spool and lay it from the back to the front into the guide. (2) Thread the first machine guide. (3) Slip the thread through the groove. -
Page 25: Right-Hand Needle
Threading 4/3 Thread OL 3. Right-hand needle, green markings Place the spool on the spool holder pin as illustrated. (1) Bring the thread up from the spool and lay it from the back to the front into the guide. (2) Thread the first machine guide. (3) Slip the thread through the groove. -
Page 26: Left-Hand Needle
Threading 4/3 Thread OL 4. Left-hand needle, yellow markings Place the spool on the spool holder pin as illustrated. (1) Bring the thread up from the spool and lay it from the back to the front into the guide. (2) Thread the first machine guide. (3) Slip the thread through the groove. -
Page 27: Threading, Chain Stitch And Ol
Threading, Chain stitch and OL 1. Threading chain stitch looper (purple) Place the spool on the spool holder pin as illustrated. (1,2) Bring the thread up from the spool and lay it from the front to the back into the guide. (3,4) Thread the guides. - Page 28 Threading, Chain stitch and OL 2. Chain-needle, brown markings (use yellow tension) Place the spool on the spool holder pin as illustrated. (1) Bring the thread up from the spool and lay it from the back to the front into the guide. (2) Thread the first machine guide.
- Page 29 Threading, Chain stitch and OL Threading, Chain stitch 1. Threading chain looper (purple): see page 26 2. Chain-needle, brown markings (use yellow tension): see page 27 3-thread overlock (left needle)+Chain stitch 1. Upper looper thread, blue markings: see page 22 2.
-
Page 30: Trial Sewing, Thread Tension
Trial sewing, thread tension Sewing test After threading make a trial run. Always use a double layer of fabric to check the stitch formation and thread tension properly. • Switch the machine on (“ I “).). • Set all tensions to 4. •... -
Page 31: Thread Tension
Thread tension Thread tension Thread tension should be properly adjusted to suit the various types of work. The ideal tension setting for most fabrics and threads is between 3 and 5. How- ever this can vary quite considerably when special threads such as filament, woolly nylon, buttonhole twist (cordonnet), pearl yarn or decorative threads are used. -
Page 32: Cover/Chain Stitch Functions
Cover/chain stitch functions Cover stitch The 5 mm wide cover stitch is formed with two or three needle threads and one looper thread. The needle threads appear as two or three parallel lines on the right side. The 2.5 mm cover stitch is sewn with one looper thread and two needle threads. -
Page 33: Cover/Chain Stitch Functions And General Operating Instructions
Cover/chain stitch functions and general operating instructions Switch the machine off (power switch ”O”) Upper looper releaseIf If the cover stitch and chain stitch without overlock are sewn, the upper looper must first be lowered. - Turn the handwheel to bring the needles and upper looper into the lowest po- sition. - Page 34 Cover/chain stitch functions and general operating instructions Knife guard / cover and chain stitch extension plate When the machine is converted to cover/chain stitch, the knife guard in the looper cover is replaced by cover stitch extension plate. The extension plate covers the released upper looper and extends the stitch plate to the right of the presser foot.
-
Page 35: Threading 4 Thread Cover Stitch
Threading 4 thread cover stitch 1. Threading cover stitch looper (purple) Place the spool on the spool holder pin as illustrated. (1,2) Bring the thread up from the spool and lay it from the back to the front into the guide. (3,4) Thread the guides. -
Page 36: Cover Stitch R Needle
Threading 4 thread cover stitch 2. Cover stitch R needle (pink) markings Place the spool on the spool holder pin as illustrated. (1) Bring the thread up from the spool and lay it from the back to the front into the guide. (2) Thread the first machine guide. -
Page 37: Cover Stitch C Needle
Threading 4 thread cover stitch 3. Cover stitch C needle (pink) markings Place the spool on the spool holder pin as illustrated. (1) Bring the thread up from the spool and lay it from the back to the front into the guide. (2) Thread the first machine guide. -
Page 38: Cover Stitch L Needle
Threading 4 thread cover stitch 4. Cover stitch L needle (pink) markings Place the spool on the spool holder pin as illustrated. (1) Bring the thread up from the spool and lay it from the back to the front into the guide. (2) Thread the first machine guide. -
Page 39: Threading 3 Thread Cover Stitch (Wide)
Threading 3 thread cover stitch (wide) Preparation 3 thread cover stitch (wide) Cover stitch needle R (pink) Cover stitch needle L (pink) -
Page 40: Threading 3 Thread Cover Stitch (Narrow)
Threading 3 thread cover stitch (narrow) Preparation 3 thread cover stitch (narrow) Cover stitch needle C (pink) Cover stitch needle L or R (pink) L or C C or R Needle L, C Needle C, R... -
Page 41: Threading Chain Stitch
Threading chain stitch Preparation chain stitch Chain stitch needle R (brown) -
Page 42: Sewing Test And Tension Adjustment
Sewing test and tension adjustment Sewing Test After threading make a sewing test on a double layer of fabric to check the stitch formation and the thread tension. Cover stitch sewing test - Plug the machine in and switch it on (power switch to “I”) - Set the tensions to 3-5. -
Page 43: Tension Adjustments
Tension adjustments Tension adjustments Cover stitch The right needle thread forms loops on the underside: Tighten the right needle (upper looper) tension (pink, R) The center needle thread forms loops on the underside: Tighten the right needle tension (pink, C). The left needle thread forms loops on the underside: Tighten the left needle tension (pink, L). -
Page 44: Practical Sewing-Cover Stitch
Practical Sewing-Cover stitch Securing the seam end, cover stitch After removing your work turn it over to the wrong side. Secure the seam by pulling the loop (1) towards the left. If the looper thread is subsequently pulled to the upper side, the needle thread loops (2) are visible in the stitch formation and can also be pulled through to the wrong side and knotted. -
Page 45: Simple Hem
Practical Sewing-Cover stitch Simple hem Stitch length: 3-4Differential: N-2 (depending on fabric) - Mark hem depth and fold or press. - Place fabric under the foot and guide the folded edge along a line on the stitch plate. The hem is sewn and the raw edge on the wrong side is neatened simul- taneously. -
Page 46: Edges With Elastic
Practical Sewing-Cover stitch Edges with elastic Stitch length: 3-4 Differential: 0.7-N - Sew on elastic with 4-thread overlock. - Turn the raw edge to the width of the elastic and top stitch from the right side. Guide the fold along the right section of the foot or use one of the lines on the stitch plate as a guide. -
Page 47: Top Stitching Seams /Ribbing/Yokes
Practical Sewing-Cover stitch Top stitching seams /ribbing/yokes Stitch length :3-4 Differential: 0.7-N - Fold or press seam to one side. - Edge stitch (or at distance desired) from the right. - Guide the edge of the fabric along the side sections of the foot. Cover stitch is perfect for top and edge stitching overlock seams in all stretch fabrics to give a professional, durable and decorative finish. -
Page 48: Maintenance
Maintenance WARNING : Please refer to the safety instructions. Changing the upper knife The upper knife (moving knife) is made from special hardened ma- terial. Replace the upper knife only when the knife blade tip is damaged. For a replacement, contact your local dealer. Changing the lower knife Main switch on “O”. -
Page 49: Trouble Shooting Guide
Trouble shooting guide Problem Cause Solution Page The machine does • Looper or cloth plate cover is open. • Close the looper or the cloth plate cover. not sew: • The main switch is not on. • Switch machine on. (Main switch to “I”) •... -
Page 50: Technical Data
Technical data Stitch choice Cover stitch 3 needles, 1 looper: 5 mm 2 needles, 1 looper: 5 mm 2 needles, 1 looper: 2.5 mm Chain stitch 1 needle, 1 looper: 2 thread chain stitch 1 needles, 1 loopers: chain stitch + 2 thread overlock Over lock 2 needles, 2 loopers: 4 thread overlock with integrated safety seam 1 needle, 2 loopers: 3 thread overlock, flatlock roll hem... -
Page 51: Optional Accessories
Optional Accessories • Blind stitch presser foot • Gathering presser foot A9810 634 0A0A A9860 655 0A0C • Elasticator • Piping presser foot A9815 655 0A0A A9865 655 0A0A Cording presser foot • Beading presser foot A9820 655 0A0A A9870 634 0A0A •... - Page 52 2-11-1, TSURUMAKI, TAMA-SHI, TOKYO, 206-8551, JAPAN PHONE : (81)42-357-2341 FAX : (81)42-357-2379 Copyright © 2020 JUKI CORPORATION All rights reserved throughout the world. 40239276 002003...
Need help?
Do you have a question about the MO-735N and is the answer not in the manual?
Questions and answers