GRASS VALLEY K2 Media Client Quick Start Manual
For sda-00 models
Hide thumbs
Also See for K2 Media Client:
- Instruction manual (394 pages) ,
- Installation and service manual (366 pages) ,
- Service manual (142 pages)
Advertisement
Quick Links
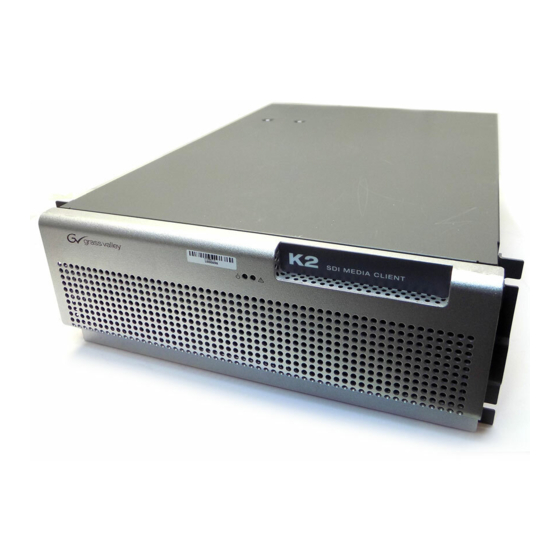
K2 Media Client
Quick Start Guide
For SDA-00 models
071-8576-00
July 3, 2007
Before you begin, unpack the following items...
SDI
K2
MEDIA CLIENT
!
Licenses and
K2 Media Client
Warranties
Rack slides
Power cords
Release Notes
System Software CD
Documentation CD
Recovery CD
...and locate the documentation you need.
Documentation path to install
K2 Media Clients with internal storage
Release
Quick Start
System
Notes
Guide
Guide
Documentation path to install
K2 Media Clients with (external) K2 Storage System
*Release
Storage System
*Cabling
System
Quick Start
Notes
Guide
Instruction Manual
Guide
Guide
*Storage Release Notes and Cabling Guide packed with RAID primary chassis
2. Power on
1
1
Press both bezel-release buttons and flip down front bezel.
K2-01AA00015
2
2
Identify
the following:
Power
Service
Serial
LED
LED
number
3
3
Press the standby switch to power on.
At first startup, End User License Agreements appear
on the screen. Accept the agreements to continue.
Normal startup sequence
Power LED goes on and stays on.
Service LED stays off. Startup
processes complete in approximately
two minutes and the K2 Media Client is
ready for remote connection and
operation.
Note: Add external storage models to a K2 Storage
System before proceeding.
1. Make cable connections and, if necessary, configure network
Quick Start networking options
Use default settings – DHCP is
enabled and the chassis serial
number is the hostname. If
supported by your network, you
can use these defaults.
Configure network settings – If
necessary, power up the K2 Media
Client and do the following:
Access the Windows logon dialog.
Use a locally connected keyboard,
mouse, and monitor. If not locally
connected, use Windows Remote
Desktop Connection with default
settings as above.
Logon with the default Windows
administrator account:
Username: administrator
Password: adminK2
In Network Connections, for
internal storage models configure
Control Connection #1. For
external storage models,
configure Control Team.
3. Install control point software
Note: You can skip ahead if you are:
Using the Grass Valley control point PC. Skip to step 4.
Accessing the K2 Media Client locally only. Skip to step 5.
1
Choose a network-connected
PC as your control point.
Control point PC
Standby
K2 System
switch
Software CD
2
Insert CD, open the Control
Point folder and run setup.exe.
3
Follow on-screen instructions,
clicking Next, Install, and
Finish.
Analog/SDI channels
Input channels (R1, R2)
Make connections for
record either analog or SDI.
channels R1 and P1:
Output channels (P1, P2) can
Video inputs
Audio inputs
play both analog and SDI.
and outputs
and outputs
Make connections accordingly.
(AES/EBU)
CMPST R1 & P1
SDI R1 & P1
AES/EBU R1 & P1
AUD MON OUT
R1 IN
P1 OUT
L
R1 IN
P1 OUT
R1 IN
P1 OUT 1
P1 OUT 2
CH 1/2
CH 3/4
CH 1/2
CH 3/4
P1 LTC
P1 CH1
Analog
R1 LTC
R1 CH1
PS2 USB
Connect power cords
Keyboard/Mouse
If using LTC, connect
If using analog audio,
inputs and outputs as
connect inputs and outputs
needed per channel
as needed per channel
4. Make remote connection
Control point PC
A
PC System requirements
pC en te
A pp C en
Microsoft Windows XP
Professional, Service Pack 2
(U.S. version)
Pentium 4 or higher class
processor, 2 GHz or greater
Minimum 512 MB RAM,
1 GB recommended
400 MB hard disk space
Graphics acceleration with at
least 128 MB memory
Microsoft .NET Framework
1.1 (available on K2 System
Software CD)
MS XML 4, Service Pack 2
(available on K2 System
Software CD)
Make connections for
channels R2 and P2:
Video inputs
Audio inputs
and outputs
and outputs
(AES/EBU)
CMPST R2 & P2
SDI R2 & P2
AES/EBU R2 & P2
REF
R2 IN
P2 OUT
COMPOSITE LOOP
R
R2 IN
P2 OUT
R2 IN
P2 OUT 1 P2 OUT 2
CH 1/2
CH 3/4
CH 1/2
CH 3/4
THRU
P1 CH2
P2 LTC
P2 CH1
P2 CH2
OUT
Analog
Audio
Audio
R1 CH2
R2 LTC
R2 CH1
R2 CH2
IN
RS-422
RS-422
Port 3
Port 1
Port 4
SCSI
Port 2
VGA monitor
Refer to K2 Media Client
Connect other cables as needed.
System Guide for RS-422
Refer to the K2 Media Client
connections.
System Guide for complete cabling
and network instructions.
Open the AppCenter shortcut.
1
Logon to AppCenter with the
2
default K2 administrator account.
- Username: K2admin
te r
te r
er
e r
te
- Password: K2admin
3
External storage
External storage K2 Media Clients
must be added to a K2 Storage
System. Refer to the K2 Storage
System Instruction Manual and the
K2 Media Client System Guide for
complete procedures.
GPI
!
GigE Port 1
GigE Port 2
GigE Port 3
GigE Port 4
GigE connections
Internal storage models:
Port 1 - Control network
Port 2 - FTP/Streaming
10Bt
100Bt
Ports 3 & 4 - Not used
1000Bt
External storage models:
Levels 2 and 3 (non-redundant):
-Port 1 - Control network
-Port 2 - Media (iSCSI) network
Levels 2R and 3R (redundant):
-Port 1 & 3 - Control network
-Port 2 - Media (iSCSI) network A
-Port 4 - Media (iSCSI) network B
Click
Add.
Enter the K2 Media Client hostname or IP
4
address. The default hostname is the chassis
serial number (e.g. K2-01AA00015). Refer to
step 2. Power on to locate the serial number.
5
Click OK.
6
Select the channels to control
from this control point PC.
7
Click OK and OK to save
settings and close.
Continue with Quick Start procedures on the reverse side.
Advertisement

Related Manuals for GRASS VALLEY K2 Media Client


Summary of Contents for GRASS VALLEY K2 Media Client
- Page 1 Press both bezel-release buttons and flip down front bezel. Control point PC Using the Grass Valley control point PC. Skip to step 4. Accessing the K2 Media Client locally only. Skip to step 5. Logon to AppCenter with the default K2 administrator account.
- Page 2 5. Configure channels 6. Record a clip Open AppCenter and logon with the K2 administrator account (K2admin/K2admin). If a licensing message appears, refer to K2 Media Client Release Notes. Click System | Configuration. Adjust audio Select the Recorder application Select a channel...
Need help?
Do you have a question about the K2 Media Client and is the answer not in the manual?
Questions and answers