Table of Contents
Advertisement
Advertisement
Table of Contents

Summary of Contents for Akai A61019
- Page 1 INSTRUCTION MANUAL CLOCK RADIO WITH JUMBO LED DISPLAY MODEL: A61019...
-
Page 2: Technical Data
TECHNICAL DATA MODEL NO: A61019 POWER: AC Adaptor 9V 400mA DC: 3V (1 X CR2025 BATTERY) NOT SUPPLIED DECLARATION OF CONFORMITY We declare that this product conforms to the following product legislation in accordance with the following directive(s): 2004/108/EC. Electromagnetic Compatibility Directive. -
Page 3: Safety Information
IMPORTANT INFORMATION - RETAIN FOR FUTURE USE SAFETY INFORMATION Important safety instructions – read carefully before use. It is important that this instruction manual should be retained with the appliance for future reference. These warnings have been provided in the interest of safety. You MUST read them carefully before installation or use. - Page 4 IMPORTANT INFORMATION - RETAIN FOR FUTURE USE • Do not place anything containing • Ensure correct fit of batteries, liquid on top of the unit observing the plus and minus marks on both the battery and the • Do not spill liquid onto the compartment.
-
Page 5: Package Contents
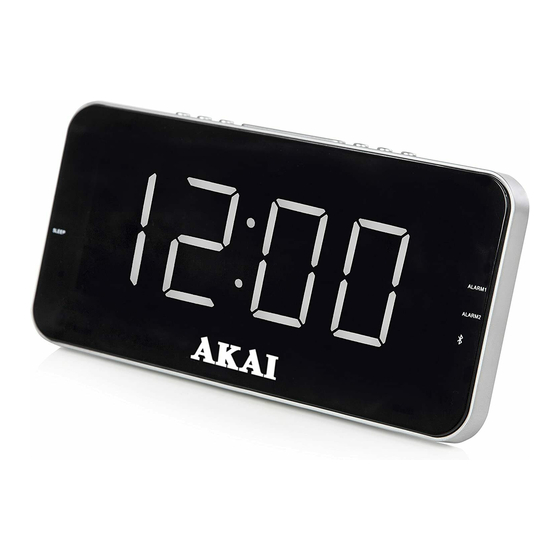
PACKAGE CONTENTS INSTRUCTION MANUAL CLOCK RADIO AC ADAPTER FEATURES AND CONTROLS M Button LED Display Left Button Sleep Indicator Right Button 10. Alarm 1 Indicator Snooze/Sleep 11. Alarm 2 Indicator - Button 12. Speaker (not shown) + Button 13. DC Power Inout Jack (not shown) Power 14. -
Page 6: Using Your Appliance
USING YOUR APPLIANCE BEFORE FIRST USE • In the event of a power outage, the time will not appear on the clocks Remove the product from the box. display, however the clock will continue to operate and the correct Remove any packaging from the time will be maintained until mains product. -
Page 7: Setting The Alarm
The ‘Minute’ digits will now being SETTING THE ALARM to blink. Press either the The Jumbo Alarm Clock Radio features button to adjust the ‘Minute’ digits. 2 separate alarms to allow you flexibility Once the correct ‘Hour’ and ‘Minutes’ to set different alarms for different days, are displayed press the M Button to such as weekdays and weekends. -
Page 8: Turning The Alarm On / Off
4: Set on Thursday only TO SET THE ALARM TO BUZZER 5: Set on Friday only The ‘-’ button is the Alarm 1 button. To activate Alarm 1, press the 6: Set on Saturday only ‘-’ button repeatedly until ‘bb’ is 7: Set on Sunday only displayed on screen. -
Page 9: Using The Snooze Function
To turn the Alarm OFF you need to TURNING THE ALARM OFF EACH DAY first determine which alarm you want To turn the Alarm OFF each day, simply to turn OFF (Alarm 1 or Alarm 2) and press the Power button. The alarm will ensure that the Jumbo Alarm Clock stop sounding and will not sound again Radio is in normal mode (i.e. -
Page 10: Searching For Radio Stations
SEARCHING FOR RADIO STATIONS Press either the buttons to select the preset you would like to save this • To search for radio stations, firstly ensure to (from 1 – 20). Once you have reached that the radio function is turned ON and is your desired preset press the M Button set to your desired band (AM or FM). - Page 11 Once you have reached the desired amount on minutes simply wait a few seconds until the time is displayed on screen. You will notice the sleep LED indicator on the left hand side of the screen is illuminated and your Jumbo Alarm Clock Radio will automatically turn off the radio according to your selected time.
-
Page 12: Troubleshooting The Appliance
TROUBLESHOOTING THE APPLIANCE PROBLEM POSSIBLE SOLOUTION The Jumbo Alarm Check the power adaptor is correctly connected at both ends. Clock Radio is not turning on. There is no sound Check that the volume has been correctly adjusted. whilst in Radio Check that the Clock is correctly set to Radio Mode. -
Page 13: Cleaning And Care
CLEANING AND CARE IMPORTANT: Always disconnect the Clock Radio from the power supply and/or remove the batteries before cleaning. Clean the Retro Radio with a soft, damp, lint free cloth. Do not use abrasives or harsh cleaners. -
Page 14: Electrical Safety
ELECTRICAL SAFETY IMPORTANT As the colours in the Non-Rewireable Mains Plug mains lead of this If your appliance is supplied with a appliance may not non-rewireable plug fitted to the mains correspond with the lead and should the fuse need replacing, coloured markings you must use an ASTA approved one identifying the terminals... -
Page 15: Disposal Of The Unit
RECYCLING DISPOSAL OF THE UNIT Appliances bearing the symbol shown here may not be disposed of in domestic rubbish. You are required to dispose of old electrical and electronic appliances like this separately. Please visit www.recycle-more.co.uk or www.recyclenow.co.uk for access to information about the recycling of electrical items. - Page 16 *REGISTER YOUR PRODUCT ONLINE AT WWW.AKAIONLINE.CO AND ENJOY 3 YEARS PEACE OF MIND. GUARANTEE ONLY VALID WITH PROOF OF PURCHASE AKAI CUSTOMER SERVICES +44 (0) 333 220 6042 0916.V1...


Need help?
Do you have a question about the A61019 and is the answer not in the manual?
Questions and answers