Avaya 2410 User Manual
Digital telephone
Hide thumbs
Also See for 2410:
- User manual (70 pages) ,
- End user manual (22 pages) ,
- Quick reference training manual (9 pages)
Table of Contents
Advertisement
Advertisement
Table of Contents

Subscribe to Our Youtube Channel
Related Manuals for Avaya 2410


Summary of Contents for Avaya 2410
- Page 1 2410 Digital Telephone User’s Guide 16-300133 Issue 1 June 2004...
- Page 2 However, information is subject to change. Warranty Avaya Inc. provides a limited warranty on this product. Refer to your sales agreement to establish the terms of the limited warranty. In addition, Avaya’s standard warranty language as well as information regarding support for this product, while under warranty, is available through the following Web site: http://www.avaya.com/support.
- Page 3 Avaya Inc. The correction of interference caused by such unauthorized modifications, substitution or attachment will be the responsibility of the user. Pursuant to Part 15 of the Federal Communications Commission (FCC) Rules, the user is cautioned that changes or modifications not expressly approved by Avaya Inc.
- Page 4 Product Safety Standards This product complies with and conforms to the following international Product Safety standards as applicable: Safety of Information Technology Equipment, IEC 60950, 3rd Edition, or IEC 60950-1, 1st Edition, including all relevant national deviations as listed in Compliance with IEC for Electrical Equipment (IECEE) CB-96A.
- Page 5 Web site: http://www.avaya.com/support. All Avaya media servers and media gateways are compliant with FCC Part 68, but many have been registered with the FCC before the SDoC process was available. A list of all Avaya registered products may be found at: http://www.part68.org...
- Page 6 European Union Declarations of Conformity Avaya Inc. declares that the equipment specified in this document bearing the “CE” (Conformité Europeénne) mark conforms to the European Union Radio and Telecommunications Terminal Equipment Directive (1999/5/EC), including the Electromagnetic Compatibility Directive (89/336/ EEC) and Low Voltage Directive (73/23/EEC).
-
Page 7: Table Of Contents
Safety Information ......10 2410 Telephone Components ..... 11 2410 Telephone User Checklist . - Page 8 Selecting Personalized Options ....42 Using Selected Voice Features ....47 Using Display Features .
-
Page 9: Overview
(or headset), another person can use the speaker to listen to the conversation. See “Speakerphone” on page 12 for details. As soon as you install the 2410 telephone, you can take advantage of these powerful features because your telephone is instantly recognized by your call processing system. -
Page 10: Headset Compatibility
— LKA 10 Cord Free Headset (900 MHz RF) Safety Information Your 2410 telephone has been manufactured according to industry standards for quality and safety assurance. When using your telephone, follow recommended safety precautions to reduce the risk of fire, electric shock, and personal injury. -
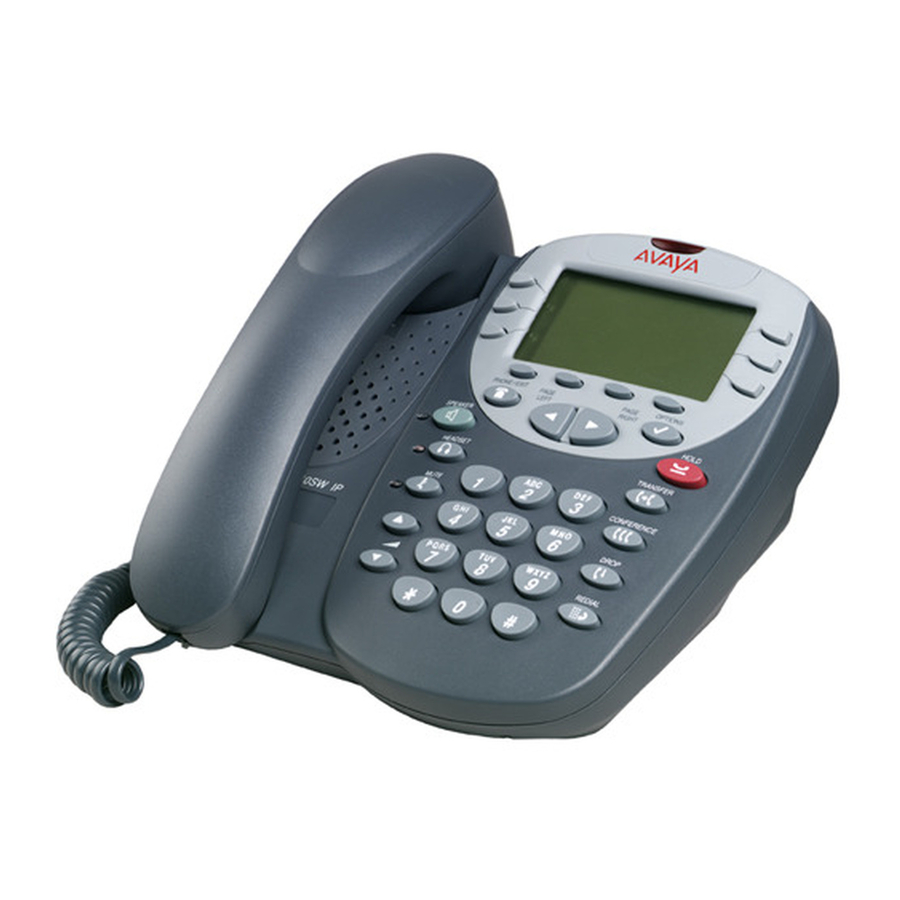
Page 11: 2410 Telephone Components
2410 Telephone Components Refer to Figure 1 below to familiarize yourself with your 2410 telephone screen display, buttons, and programmable features. FIGURE 1 2410 Telephone Components Table 1 describes the 2410 telephone components presented in Figure... - Page 12 TABLE 1 The 2410 Telephone Components The following items correspond to the numbers in 1) Call appearance/feature buttons — For accessing incoming/outgoing lines and programmed features. An underscore indicates the currently selected call appearance. 2) Display — This area shows status...
-
Page 13: 2410 Telephone User Checklist
2410 Telephone User Checklist The remainder of this guide contains procedures for using specific screens, features, and keys on the 2410 telephone. The following table directs you to sections explaining specific activities you may want to perform. Understand call appearance/... -
Page 14: The Home Screen
Note: After initially plugging in a 2410 telephone or after a power outage, it may take several minutes before the time and date appear on the screen. -
Page 15: Navigating In The Home Screen Pages
Call Appearance and Call Identification Displays The 2410 telephone has six call appearance/feature buttons per screen page. Beginning with the first button in the upper left corner of the 2410 telephone and going down, the display identifies the buttons in the left column. These buttons are considered call appearance/feature buttons 1 through 3. -
Page 16: Status Icons
(if available), “OUTSIDE CALL,” or a trunk identifier is shown. One call appearance is usually underlined. When a call arrives at the 2410 telephone, the bell icon blinks on the corresponding call appearance (see “Status Icons”... -
Page 17: Status Icons For Feature-Specific Applications
In addition, the following icons are displayed in certain feature-specific applications. Status Icons for Feature-Specific Applications Icon Feature status Feature status Feature status Definition Feature specific status. Feature specific status. Feature specific status. -
Page 18: Call-Handling Features
Communication Manager Software (555-233-767) for alternate procedures. Answer a call When a call arrives at your 2410 telephone, you hear a ringing tone and a blinking bell icon appears on the associated call appearance. In addition, call identification information is displayed (see Identification Displays”... -
Page 19: Speed Dial
Speed Dial The Speed Dial feature allows you to have the 2410 telephone automatically dial calls to telephone numbers stored in your personal directory. See the procedures in “Managing Your Speed Dial List” on page 25 maintaining your personal 2410 telephone directory. - Page 20 Speakerphone The two-way built-in speakerphone allows you to make and answer calls without lifting your handset. Keep in mind that two-way speakerphones may not operate satisfactorily in every environment (such as in very noisy locations). To make or answer a call without lifting the handset, or to use the speakerphone with any feature 1.
- Page 21 Transfer The Transfer feature allows you to transfer a call from your telephone to another extension or outside number. To transfer the current call to another extension 1. While on a call, press 2. When you hear dial tone, dial the number to which the call is to be transferred.
-
Page 22: Getting Messages
Message button. Please see your system manager if the Message button is not working properly. See Chapter 21, “Features and Technical Reference,” of the Administrator’s Guide for Avaya Communications Manager Software, Document No. 555-233-506 for Message button programming information. -
Page 23: The Speed Dial Screen
Using the Speed Dial screen, you can store up to 48 speed dial entries in the personal directory of your 2410 telephone. You can access this screen by pressing the SpDial softkey at the Home screen. (You may have to press any one of the softkeys to display the softkey labels.) -
Page 24: Working In The Speed Dial Screen
Note: Keep in mind that whenever you are working in the Speed Dial screens (adding, editing, and deleting speed dial entries), you cannot use the telephone dialpad for dialing. Press The button associated with the entry Press 1 on the dialpad to move directly to the beginning of the speed dial list. -
Page 25: Managing Your Speed Dial List
Managing Your Speed Dial List Using the Speed Dial screen, you can store up to 48 speed dial entries in your personal 2410 telephone directory. You can access this screen by pressing the SpDial softkey at the Home screen. When you have created a speed dial list, the Speed Dial screen displays the saved entries in alphabetical order. -
Page 26: Dialing Conventions
Adding Speed Dial Entries You can store up to 48 personal speed dial entries in the 2410 telephone. When the maximum number of entries is stored, you must delete existing entries before the 2410 telephone allows you to enter new ones. -
Page 27: Editing Speed Dial Entries
4. When you are done entering a name, press the feature button to the left of the Number field (Edit Number screen) to advance to that field. 5. Using the dialpad, enter the telephone number for this speed dial entry. You can enter numbers up to 20 characters long, including special characters. -
Page 28: Deleting Speed Dial Entries
8. Repeat Steps 3 through 7 to edit more entries. Deleting Speed Dial Entries You can delete any of the speed dial entries saved in your personal 2410 telephone directory. To delete stored speed dial entries 1. From the Home screen, press the SpDial softkey. -
Page 29: The Call Log Screens
The Call Log Screens The 2410 telephone can store up to 48 entries in the Call Log. By default, all types of calls are logged, and the number of new unanswered calls is displayed below the date and time on your 2410 telephone (see Screen”... -
Page 30: Working In The Call Log Summary Screen
View the previous page of call log entries Use the index feature to locate a specific entry quickly Note: The telephone must be on-hook when you use the index feature. Return to the Home screen in which you were working... -
Page 31: Call Log Detail Screen
Call Log Detail Screen The Call Log Detail screen, which is accessed from the Call Log Summary screen, allows you to: • View additional information, such as call type and the date and time that the call was processed. • Make a call to the entry displayed directly from this screen (see Call Log”... -
Page 32: Working In The Call Log Detail Screen
View the next call log entry View the previous call log entry Use the index feature to locate a specific entry quickly Note: The telephone must be on-hook when you use the index feature. Remove the selected entry Save the selected entry as a... -
Page 33: Using The Call Log
Using the Call Log The Call Log feature is factory set to record answered, unanswered, and outgoing calls. For information on disabling the Call Log or changing the call types you want logged, see Personalized Options.” Viewing the Call Log To view the list of all calls recorded in the Call Log 1. -
Page 34: Saving A Call Log Entry To Your Speed Dial List
• To save the entry to your Speed Dial List as shown on the current screen, press the Save softkey. • To edit the telephone number to include a code required to access an outside line (for example, “9”), press the feature button to the left of the Number field twice. -
Page 35: The Label Action Screen
The Label Action Screen The Label Action screen, which is accessed by pressing the Label softkey at the Home screen, allows you to: • customize the labels for the call appearance/feature buttons programmed on the call processing system • view the system labels for the call appearance/feature buttons programmed on the call processing system •... -
Page 36: Working In The Label Action Screen
Note: Keep in mind that whenever you are changing the labels of call appearance/feature buttons in the Label Select screen, you cannot use the telephone dialpad for dialing. Press The Edit softkey... -
Page 37: Managing Your Call Appearance/Feature Button Labels
Feature Button Labels Using the Label Action screen, you can customize the labels of the call appearance/feature buttons on the 2410 telephone, view the labels of the call appearance/feature buttons on the call processing system, and restore the system labels of all the call appearance/feature buttons. You can access this screen by pressing the Label softkey at the Home screen. -
Page 38: Viewing The System Labels
The Label Inspect screen is displayed showing the system labels for the 2410 telephone. 3. Use the 2410 telephone. 4. Do one of the following: • To return to the Label Action screen, press the Done softkey. • To return to Page 1 of the Home screen, press... -
Page 39: Restoring The System Labels
Restoring the System Labels You can delete the custom labels you created for the call appearance/feature buttons and restore the system labels from the call processing system. Note: This procedure restores the system labels for all of the call appearances/feature buttons. If you want to restore the system label for one call appearance/feature button, delete the label for that button. -
Page 40: The Options Screen
Japanese (Katakana) • erase all personal settings (except contrast level), stored Call Log, speed dial entries, and customized labels, and return the 2410 telephone to its default settings A sample Options screen is shown in FIGURE 8 Sample Options Screen... -
Page 41: Working In The Options Screen
Note: If you press all of the personalized settings and reset the 2410 telephone to its default settings. This option erases your customized call appearance/ feature button labels and all entries saved in your Call Log and Speed Dial List. -
Page 42: Selecting Personalized Options
Ring Pattern The Ring Pattern option on the Options screen allows you to choose a personalized ringing pattern for your telephone. You can choose from among eight different patterns. Note: If you receive an incoming call while you are working in the Ring Pattern option screen, you are automatically returned to the Home screen to facilitate call handling. -
Page 43: Display Contrast
Display Contrast The Contrast option on the Options screen allows you to choose a contrast level for your telephone display. You can choose from among fifteen levels of contrast. To select a contrast level 1. From the Home screen, press the Option softkey. -
Page 44: Visual Ring
The Visual Ring option on the Options screen allows you to choose a visual alert for incoming calls. When you enable this option, the telephone rings and the lamp above the 2410 display area flashes when an incoming call arrives. By default, the Visual Ring option is disabled. -
Page 45: Erase All
Erase All The Erase All option on the third Options screen allows you to erase all of the personalized settings and reset the 2410 telephone to its default settings. This option erases your customized call appearance/feature button labels and all entries saved in your Call Log and Speed Dial List. - Page 46 • If you want to return to Page 1 of the Home screen without erasing any settings, press Language When the 2410 telephone is first installed, it is set to display screen text in English. The Language option on the Options screen allows you to choose another language, including: •...
-
Page 47: Using Selected Voice Features
Using Selected Voice Features The following features are available only if your system manager has administered them as feature buttons on your 2410 telephone or has supplied you with the required feature access codes. Abbreviated Dialing/Automatic Dialing (AD) The Abbreviated Dialing (AD) feature allows you to store selected telephone numbers for quick and easy dialing. -
Page 48: Call Forwarding All Calls
(while off-hook). Call Park The Call Park feature allows you to put a call on hold at your telephone for retrieval at any extension. To park a call at your extension (for retrieval at any extension) when a Call Park button is administered 1. -
Page 49: Call Pickup And Directed Call Pickup
Call Pickup and Directed Call Pickup The Call Pickup feature lets you answer a call at your telephone for another extension in your pickup group. If you can use the Directed Call Pickup feature, you can pick up a call ringing at a specific extension without the extension being a member of your pickup group. -
Page 50: Send All Calls
(while off-hook). 2. When you hear dial tone, dial the extension and listen for the confirmation tone. Message lamp goes on at the called telephone (if so equipped). 3. Hang up. To cancel a Leave Word Calling message Note: You cannot cancel a message left for an AUDIX subscriber. -
Page 51: Whisper Page
Whisper Page, that person can press the button. WhisperAnbk Note: If the person whom you have called is not using the telephone at the time you activate Whisper Page, the call is converted to a normal call. -
Page 52: Using Display Features
Using Display Features The following features are available only if your system manager has administered them as feature buttons on your 2410 telephone. Call Timer and Timer The Call Timer and the Timer features are used to measure elapsed time on a call. - Page 53 To place a call to the name shown on the display 1. Pick up the handset. 2. While the name is shown, press the or, if you do not have a then dial the number using the dial pad. Note: You can also leave your handset on-hook. The speakerphone will turn on automatically when you press system feature is enabled.
-
Page 54: Tones And Their Meaning
A priority call from another extension, or from an Automatic Callback call you placed. A call redirected from your telephone to another because Send All Calls or Call Forwarding All Calls is active. Meaning A low-pitched tone repeated 60 times a minute;... - Page 55 Feedback Tones (continued) Tones coverage dial intercept/ time-out recall dial reorder ringback Meaning One short burst of tone; indicates your call will be sent to another extension to be answered by a covering user. A continuous tone; indicates dialing can begin. An alternating high and low tone;...
-
Page 57: Index
Index Numerics 2410 telephone display features feedback tones personal directory ringing tones supported languages 2410 telephone components 2410 telephone display Abbreviated Dialing AD button adding Speed Dial entries AGC feature arrow keys Automatic Dialing Automatic Gain Control feature buttons call appearance displays... - Page 58 feature feedback tones Group Listen feature Headset button headsets headsets supported Hold feature Home screen navigating pages index feature Insert Mode Inspect Label Action screen navigating Label softkey Labels Language feature button Language option Last Number Dialed feature Leave Word Calling Log Setup feature button Log Setup option Log softkey...
- Page 59 safety information saving Call Log entries screen Self Test feature button Self Test option self-test mode Send All Calls softkeys Speaker button speakerphone calls speakerphone feature Speed Dial List adding entries editing entries index feature saving entries from Call Log Speed Dial screen navigating status icons...
Need help?
Do you have a question about the 2410 and is the answer not in the manual?
Questions and answers