Avaya IP Office 2410 User Manual
Hide thumbs
Also See for IP Office 2410:
- User manual (70 pages) ,
- End user manual (22 pages) ,
- Quick reference training manual (9 pages)
Table of Contents
Advertisement
Quick Links
Advertisement
Table of Contents

Subscribe to Our Youtube Channel
Related Manuals for Avaya IP Office 2410


Summary of Contents for Avaya IP Office 2410
- Page 1 IP Office 5410/2410 Phone User Guide Issue 3d (22nd July 2005)
-
Page 2: Table Of Contents
Table of Contents The 2410 Telephone........................4 Overview..............................4 Call Appearance Keys ..........................6 System Features............................ 7 Call Appearance/Function Key Icons..................... 7 Basic Call Handling Features....................8 Answer a Call ............................. 8 Make a Call..............................8 Clearing a Call ............................9 Headset Working ............................ - Page 3 Table Of Contents Diverting Calls ............................30 Do Not Disturb ............................30 Voicemail ..............................31 Default Feature Codes ..........................32 Index............................33 5410/2410 Phone User Guide Page iii IP Office Issue 3d (22nd July 2005)
-
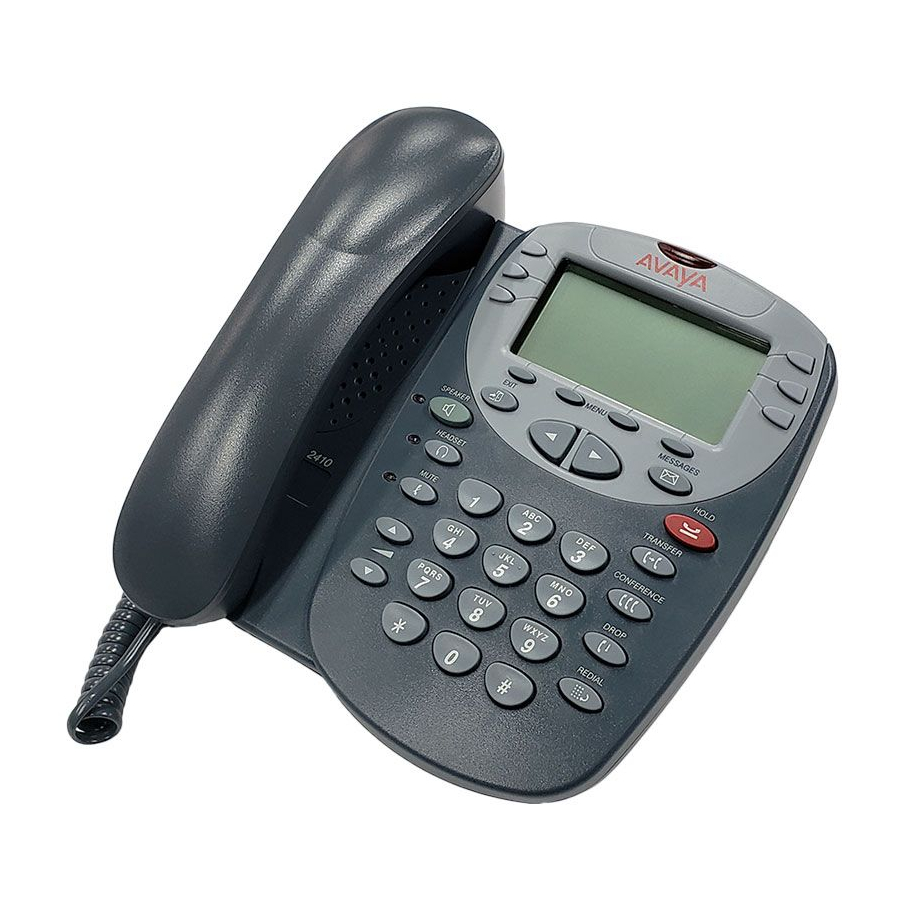
Page 4: The 2410 Telephone
The 2410 Telephone Overview This guide covers the use of the Avaya 2410 and 5410 phones, on Avaya IP Office. Both phones are similar, however the 5410 is only supported on the IP Office whereas the 2410 is supported on a range of Avaya phone systems. - Page 5 13. Softkeys: Used to navigate to or initiate certain features, such as Speed Dial or Call Log, as well as control certain actions within the features. These keys correspond to the text prompts in the display screen immediately above them. 5410/2410 Phone User Guide Page 5 IP Office...
-
Page 6: Call Appearance Keys
2. Although the System Administrator can replace the Call Appearance Keys with other functions, this would severely restrict the use of features such as conference and transfer. For this reason it is strongly recommended that all Call Appearance keys remain at their default settings. 5410/2410 Phone User Guide Page 6 IP Office... -
Page 7: System Features
• Function Active: The button to the left or right of the function key is active. 5410/2410 Phone User Guide Page 7 IP Office Issue 3d (22nd July 2005) -
Page 8: Basic Call Handling Features
Access the Speed Dial List in your personal directory and initiate a call to a specific entry. See Dialing a Speed Dial Number. • When the call is answered, either speak or pick up the handset and speak to the called party. 5410/2410 Phone User Guide Page 8 IP Office Issue 3d (22nd July 2005) -
Page 9: Clearing A Call
Access the Speed Dial List in your personal directory and initiate a call to a specific entry. See Dialing a Speed Dial Number. • When the call is answered, speak to the called party. 5410/2410 Phone User Guide Page 9 IP Office Issue 3d (22nd July 2005) -
Page 10: Speakerphone
Key the first letter of the required name to jump to the page with a matching entry. 4. The phone dials the number for you. 5410/2410 Phone User Guide Page 10 IP Office Issue 3d (22nd July 2005) -
Page 11: Redial
( ) by pressing the second call’s Call Appearance button ( ). If AutoHold is off, then pressing the second call’s Call Appearance button ( ) will drop the first call. 3. To transfer a held call see Transfer. 5410/2410 Phone User Guide Page 11 IP Office... -
Page 12: Transfer
2. To transfer the new call to the held call, press Transfer and dial the number of the held call 3. Press Transfer again to complete the transfer. 5410/2410 Phone User Guide Page 12 IP Office Issue 3d (22nd July 2005) -
Page 13: Conference
Message Your Message lamp turns on when a caller has left a message for you. Press the Message button to retrieve your messages, and follow the prompts. 5410/2410 Phone User Guide Page 13 IP Office Issue 3d (22nd July 2005) -
Page 14: Using Speed Dials
3. When the required entry is displayed, press the adjacent key. 5410/2410 Phone User Guide Page 14 IP Office Issue 3d (22nd July 2005) -
Page 15: Adding A New Speed Dial
To return to the speed dial list without saving the changes press Cancel. • To return to the call handling screen without saving the changes press Exit . 5410/2410 Phone User Guide Page 15 IP Office Issue 3d (22nd July 2005) -
Page 16: Deleting A Speed Dial
You can create a new speed dial from a call log entry. See Saving a Call Log Entry to Your Speed Dial List. This process will start the normal speed entry screen but pre-filled with the name and number from the call log entry. 5410/2410 Phone User Guide Page 16 IP Office... -
Page 17: Using The Call Log
The number of the called or calling party is shown. • The date and time of the call. • Press to display the previous or next logged call. • keys provide a number of actions. 5410/2410 Phone User Guide Page 17 IP Office Issue 3d (22nd July 2005) -
Page 18: Using The Call Log
5. Press Save. The speed dial editing screen appears, pre-filled with the details from the call log entry. See Adding a New Speed Dial. 5410/2410 Phone User Guide Page 18 IP Office Issue 3d (22nd July 2005) -
Page 19: Deleting A Call Log Entry
• To return to the Options menu without saving any changes, press Cancel. • To return to the call handling screen without saving any changes, press Exit. 5410/2410 Phone User Guide Page 19 IP Office Issue 3d (22nd July 2005) -
Page 20: Changing Options
Ring Options and set Show Phone Screen to Yes or No. If set to Yes then, when you are setting up/using Speed Dial, Call Log, etc, you are automatically returned to the call handling screen when you receive a call. 5410/2410 Phone User Guide Page 20 IP Office... -
Page 21: Adjusting The Display Contrast
5. Release Test and do one of the following: • To return to the options menu, press Done. • To return to the call handling screen, press 5410/2410 Phone User Guide Page 21 IP Office Issue 3d (22nd July 2005) -
Page 22: Language
• To return to the options menu without saving any changes, press Cancel. • To return to the call handling screen without saving any changes, press 5410/2410 Phone User Guide Page 22 IP Office Issue 3d (22nd July 2005) -
Page 23: Default Phone/Erase All Settings
Options: Any for erasure or defaulting all other phone options. • All: Selects for erasure or defaulting all of the above. 5. Press Erase or Cancel. 6. Press Done. 5410/2410 Phone User Guide Page 23 IP Office Issue 3d (22nd July 2005) -
Page 24: Function Keys
Changing the labels of the Function Keys: You can personalize the text labels shown next to the function keys, including those programmed by the System Administrator. See Changing Function Key Labels. 5410/2410 Phone User Guide Page 24 IP Office Issue 3d (22nd July 2005) -
Page 25: Function Key Programming
Programming Mode and Longhand Programming respectively. Admin1: The programmable functions available via an Admin1 key. Name Description Toggles Data Park Park <User> User <Group> Group <Number> Dial Flash Hook Flash 5410/2410 Phone User Guide Page 25 IP Office Issue 3d (22nd July 2005) -
Page 26: Shorthand Programming Mode
Press Keep to keep the existing function and forget the function just programmed. • Press Delete to delete the existing function and forget the function just programmed. 5410/2410 Phone User Guide Page 26 IP Office Issue 3d (22nd July 2005) -
Page 27: Longhand Programming
Press Keep to keep the existing function and forget the function just programmed. • Press Delete to delete the existing function and forget the function just programmed. 5410/2410 Phone User Guide Page 27 IP Office Issue 3d (22nd July 2005) -
Page 28: Changing Function Key Labels
6. When the new name is set as required, press Save. To return to the label options screen without saving the changes, press Cancel. 7. Select another button to re-label or press Done. 5410/2410 Phone User Guide Page 28 IP Office Issue 3d (22nd July 2005) -
Page 29: System Features
Note: If your phone rings for any longer than a specified period (15 seconds in default), any re-direction feature that you have activated, such as voicemail or call forwarding, will come into effect. 5410/2410 Phone User Guide Page 29 IP Office... -
Page 30: Call Forwarding
• *11*N# to delete a number from the exception list. Note: Your callers, other than your exceptions, either hear busy tone or are re-directed to your voicemail. 5410/2410 Phone User Guide Page 30 IP Office Issue 3d (22nd July 2005) -
Page 31: Voicemail
1 to retrieve your mail. The System Administrator also specifies the reception number, to which the call is diverted if the caller dials 0, and your email address if your voicemail and email are integrated. 5410/2410 Phone User Guide Page 31 IP Office... -
Page 32: Default Feature Codes
Toggle Calls *57*N# Forward on busy number Call Pick Up Any *70*N# Dial Physical Extn by Number Call Pick Up Group *71*N# Dial Physical Extn by ID 5410/2410 Phone User Guide Page 32 IP Office Issue 3d (22nd July 2005) -
Page 33: Index
Speed Dial 16 button Call Pickup Members Adjust speakerphone Deleting 16 pressing 11 Deleting 19 Call Appearance Call Queue 32 Adjusting Deutsch 22 button 11 Call Steal 32 5410/2410 Phone User Guide Page 33 IP Office Issue 3d (22nd July 2005) - Page 34 Press Exit 19, 20, 21, New Label Call 6 FEATURE ON 22, 23, 27, 28 entering 28 Incoming 6 BUTTON 26, 27 Press EXIT 26 New Label 28 5410/2410 Phone User Guide Page 34 IP Office Issue 3d (22nd July 2005)
- Page 35 IP Office Key 6 Yes 20 Speed Dial List 9 Voicemail Lite 31 Set 19 Refer 6 Speed Dial Number Voicemail Off 32 REL 21 Set 20 5410/2410 Phone User Guide Page 35 IP Office Issue 3d (22nd July 2005)
- Page 36 Screen 20 Your Speed Dial List Which Calls 19 Off 32 Yes 19 Voicemail Ringback Yes 20 On 32 Yes 22 Volume Controls 4 Yes/No 19, 22 5410/2410 Phone User Guide Page 36 IP Office Issue 3d (22nd July 2005)
-
Page 38: Ip Office Issue 3D (22Nd July
Performance figures and data quoted in this document are typical, and must be specifically confirmed in writing by Avaya before they become applicable to any particular order or contract. The company reserves the right to make alterations or amendments to the detailed specifications at its discretion.
Need help?
Do you have a question about the IP Office 2410 and is the answer not in the manual?
Questions and answers