Table of Contents
Advertisement
Quick Links
caleidos
Scheda di preinstallazione
Manuale d'installazione
Uso & Manutenzione
CONSERVARE CON CURA
Instructions for preinstallation
Installation Manual
Use & Maintenance
KEEP CAREFULLY
Fiche tecnique de pre-installation
Manuel d'installation
Utilisation & Entretien
CONSERVER AVEC SOIN
Vorinstallationsblatt
Montageanweisung
Bedienung und Wartung
SORGFÄLTIG AUFBEWAHREN
Ficha técnica de preinstalación
Manual de instalación
Uso & Mantenimiento
CONSERVAR CON CUIDADO
Схема предварительной установки
Эксплуатации и обслуживанию
ХРАНИТЬ БЕРЕЖНО
22
25X45
35
35X35
45X45
45X60
60
60X60
Advertisement
Table of Contents

Related Manuals for Jacuzzi Caleidos


Summary of Contents for Jacuzzi Caleidos
- Page 1 25X45 35X35 45X45 45X60 60X60 caleidos Scheda di preinstallazione Manuale d’installazione Uso & Manutenzione CONSERVARE CON CURA Instructions for preinstallation Installation Manual Use & Maintenance KEEP CAREFULLY Fiche tecnique de pre-installation Manuel d’installation Utilisation & Entretien CONSERVER AVEC SOIN Vorinstallationsblatt...
-
Page 2: Table Of Contents
Indice Caratteristiche tecniche ..............4 - 5 Predisposizioni - Miscelatore ad incasso e getti a parete Jacuzzi (optional) ..5 - Info & sicurezza elettrica ................ 6 - Simboli relativi alla predisposizione ..........12 - Predisposizione Caleidos 22 ...............12 - Predisposizione Caleidos 35, 35x35 ..........13 - Predisposizione Caleidos 45x45, 25x45 .........14... - Page 3 Technische Merkmale ..............4 - 5 Pré-installation Vorbereitungen - Mitigeur à encastrement et jets muraux Jacuzzi (en option) ... 5 - Einbau-Mischbatterie und Wanddüsen von Jacuzzi (Option) .. 5 - Info & sécurité électrique ..............8 - Info & elektrische Sicherheit ..............9 - Symboles correspondants à...
-
Page 4: Caratteristiche Tecniche
AVVERTENZE I disegni riportati non sono in scala WARNING The show drawings are not scaled AVERTISSEMENTS Les dessins reportés ne sont pas à l’échelle. WARNUNG Die Zeichnungen sind nicht im Maßstab ADVERTENCIAS Los dibujos representados no son en escala. ПРЕДУПРЕЖДЕНИЯ Рисунки приведены не в масштабе •... -
Page 5: Miscelatore Ad Incasso E Getti A Parete Jacuzzi (Optional)
• Für die Installation der Mischerbatterie und der Seitendüsen von Jacuzzi die in der Verpackung enthaltenen Anleitungen beachten • Para la instalación del mezclador y de los chorros de pared Jacuzzi, consultar las instrucciones contenidas en el embalaje • Для установки смесителя и настенных форсунок Jacuzzi см.инструкции, содержащиеся в упаковке... -
Page 6: Info & Sicurezza Elettrica
60 cm ed una altezza di 225 cm. Sicurezza elettrica 0,6 m I soffioni doccia Caleidos Jacuzzi® sono apparecchi sicuri costru- EN 60335-1, EN 60335-2-105, EN iti nel rispetto delle norme 61000, EN 55014-1, EN 55014-2 . -
Page 7: Information And Electrical Safety
The positioning of the mixer, side jets and the shower slider holder dition of the network to which the appliance will be con- (all available as Jacuzzi® optionals) must be requested from the in- nected and its capability to ensure safety. - Page 8 électrique n’est admise autour de l’appareil dans un rayon de 60 cm et sur une hauteur de 225 cm. Sécurité électrique Les pommes de douche Caleidos Jacuzzi® sont des appareils sûrs, fabriqués conformément aux normes EN 60335-1, EN 60335-2-...
- Page 9 Decke einhalten. Die Platzierung der Mischerbatterie, der Wanddü- das Gerät angeschlossen wird, auf ihre Effizienz und Eignung sen und der Duschstange (alle als Option von Jacuzzi® erhältlich) zu prüfen, um damit die Betriebssicherheit zu garantieren. hängt von den Anforderungen des Kunden ab und obliegt dem In- stallateur.
- Page 10 600 de 60 cm y una altura de 225 cm. kPa (6 bar). Seguridad eléctrica Los rociadores de ducha Caleidos Jacuzzi® son aparatos seguros fa- 0,6 m EN 60335-1, EN 60335-2-105, bricados conforme a las normas EN 61000, EN 55014-1, EN 55014-2 .
- Page 11 стемы, к которой подсоединяется устройство, и его пригод- Позиционирование смесителя, настенных форсунок и штанги для душа ность в целях гарантии безопасности использования. (все представлены в качестве опций Jacuzzi®) осуществляется монтажни- ком в соответствии с требованиями Клиента. Электрическая и заземляющая система помещения должны быть...
-
Page 12: Simboli Relativi Alla Predisposizione
(type 504 E) • boîte à encastrement pour clavier (type 504 E) • Unterputzgehäuse für Tastenfeld (Typ 504 E) • caja de empo- soffitto • ceiling • plafond • Decke • techo • потолок caleidos 22 L= 3 m 110-240V ~... -
Page 13: Predisposizione Caleidos 35, 35X35
35 caleidos 35x35 min 0,3 min 0,3 MAX 3 MAX 3 L= 3 m L= 3 m 110-240V ~ 110-240V ~ TOP: C (3/4” F) TOP: C (3/4” F) BASE: C + C1 (1/2”F+1/2”F) BASE: C + C1 (1/2”F+1/2”F) -
Page 14: Predisposizione Caleidos 45X45, 25X45
45x45 caleidos 25x45 min 1,2 min 0,3 MAX 3 MAX 3 L= 3 m L= 3 m 110-240V ~ 110-240V ~ TOP: C (3/4” F) TOP: C (3/4” F) BASE: C + C1 (1/2”F+1/2”F) BASE: C + C1 (1/2”F+1/2”F) -
Page 15: Predisposizione Caleidos 60, 60X60
60 caleidos 60x60 min 1,2 min 1,2 MAX 3 MAX 3 C C1 C2 L= 3 m L= 3 m 110-240V ~ 110-240V ~ TOP: C (3/4” F) BASE: C + C1+C2 TOP: C (3/4” F) (1/2”F+1/2”F+1/2”F) BASE: C + C1 (1/2”F+1/2”F) -
Page 16: Predisposizione Caleidos 45X60
45x60 min 1,2 MAX 3 L= 3 m 110-240V ~ TOP: C (3/4” F) BASE: C + C1 (1/2”F+1/2”F) -
Page 17: Installation - Caleidos 22
Avvicinare la piastra (1) allineandola al foro di alimentazione del caleidos 22 soffione (2) e al tubo corrugato (3). Segnare e forare per posizionare i tasselli in dotazione. Align the plate (1) with the feed hole of the shower head (2) and the cor- rugated tube (3). -
Page 18: Caleidos 22
Ultimare l’avvitamento facendo combaciare uno dei tre fori della flan- caleidos 22 gia in corrispondenza al foro per l’impianto elettrico (7). Finish screwing by making one of the three holes of the flange corre- spond with the hole for the electrical installation (7). - Page 19 22 Infilare tutto il cavo rimanente. Avvitare il soffione (12) alla testa del braccio. Insert all the remaining cable. Screw the shower head (12) to the head of the fitting. Introduire tout le câble qui reste. Visser la douchette (12) à la tête du bras.
-
Page 20: Caleidos 35, 35X35, 25X45
35, 35x35, 25x45 H 2 O Infilare il/i cavo/i nel tubo predisposto a muro, facendolo fuoriuscire dalla Ruotare il supporto di fissaggio di ogni vite (A) verso l’interno del scatola (D). Collegare quindi il/i tubo/i di alimentazione dell’acqua. soffione. Inserire il soffione nello spacco e sostenerlo a riscontro. - Page 21 35, 35x35, 25x45 2,5 mm 180° Ultimare il serraggio di tutte le viti. Inserire le placchette coprivite. Fully tighten all the screws. Insert the screw-cover caps. Pour finir, resserer toutes les vis. Insérer les plaquettes couvre-vis. Ziehen Sie alle Schrauben fest. Setzen Sie die Zierdeckel auf.
-
Page 22: Caleidos 45X45, 45X60, 60, 60X60
45x45, 45x60, 60, 60x60 Ø 8 mm TSP 4,5x50 mm 45x45 ............X = 36x36 cm 45x60 ............X = 36x54 cm 60 ............... X = 36x36 cm 60x60 ............X = 54x54 cm Praticare nel soffitto 4 fori in corrispondenza dello spacco nel Bohren Sie in die Decke 4 Löcher mit einem Abstand von jeweils... - Page 23 45x45, 45x60, 60, 60x60 Inserire nella spaccatura la piastra di fissaggio del soffione come Führen Sie die Klemmplatte der Kopfbrause in den Spalt, wie in mostrato in figura. der Abbildung dargestellt. ATTENZIONE! Le due fresate interne alla piastra vanno posi- ACHTUNG! Die zwei internen Fräsungen der Platte müssen...
- Page 24 45x45, 45x60, 60, 60x60 Inserire la cordina nel foro sulla piastra e infilarlo nel tenditore (1). Inserire il tenditore nel nottolino (2) precedentemente fissato e avvitarlo fino al completo serraggio (3). Per regolare la lunghezza della cordina tirarla (4) fino alla misura desiderata.
- Page 25 45x45, 45x60, 60, 60x60 H 2 O H 2 O H 2 O Lo spacco sulla piastra di fissaggio permette il passaggio Beachten Sie auch die Positionierung der vormontierten dell’elettrovalvola (1) del soffione, determinandone la posizione Stromkabel und des Wasserzulaufschlauchs.
- Page 26 45x45, 45x60, 60, 60x60 12 V H 2 O Procedere con il collegamento del tubo di alimentazione dell’ac- Fahren Sie mit dem Anschluss des Wasserzulaufschlauchs fort. qua. Vergewissern Sie sich, dass die Stromkabel aus den zugehörigen Accertarsi che i cavi elettrici fuoriescano dalle rispettive scatole Abzweigdosen führen.
- Page 27 45x45, 45x60, 60, 60x60 Il montaggio del soffione è completato. The fitting of the shower head is now complete. 12 mm Le montage du plafond de douche est terminé. Die Montage der Kopfbrause ist damit abgeschlossen. El montaje de la ducha ha sido completado.
-
Page 28: Caleidos 22
22 Avvitare la flangia (1) alla scatola di derivazione. Screw the flange (1) to the connector block. Visser la bride (1) à la boîte de dérivation. Den Flansch (1) auf den Abzweigkasten aufschrauben. Coloque la brida (1) en la caja de derivación. -
Page 29: Caleidos 35, 35X35, 25X45, 45X45, 45X60, 60, 60X60
35, 35x35, 25x45, 45x45, 45x60, 60, 60x60 Collegare le piastre allla tastiera di controllo e all’aromaterapia (optio- nal). Avvitare le flangie alle scatole ed estrarre i cavi compreso quello di alimentazione. Fit the plates for the control keypad and for the aromatherapy unit (op- tional). - Page 30 35, 35x35, 25x45, 45x45, 45x60, 60, 60x60 (BASE/TOP) 6 - Giallo/Verde-Jellow/Green-Jaune/Vert Gelb/Grün-Amarillo/Verde - Желтый/Зеленый 5 - (+) Rosso - Red- Rouge Rot - Rojo - Красный 4 - Marrone - Brown - Maron Braun - Marrón - Коричневый 3 - Bianco - White - Blanc Weiß...
- Page 31 35, 35x35, 25x45, 45x45, 45x60, 60, 60x60 (TOP) 10 - (+) Rosso - Red- Rouge Rot - Rojo - Красный 11 - Nero - Black - Noir Schwarz - Negro - Черный ANSCHLUSS AROMATHERAPIE COLLEGAMENTO AROMATERAPIA Procedere al collegamento sulla morsettiera prestando attenzione agli Fahren Sie mit dem Anschluss auf der Klemmleiste fort, und beachten schemi riportati.
- Page 32 35, 35x35, 25x45, 45x45, 45x60, 60, 60x60 Agganciare la tastiera alla rispettiva placca della scatola di derivazione premendo fino a sentire il CLACK di aggancio. Attach the unit to the respective plate on the electrical connection box pressing until you hear the CLICK as it locks in place.
-
Page 33: Funzioni
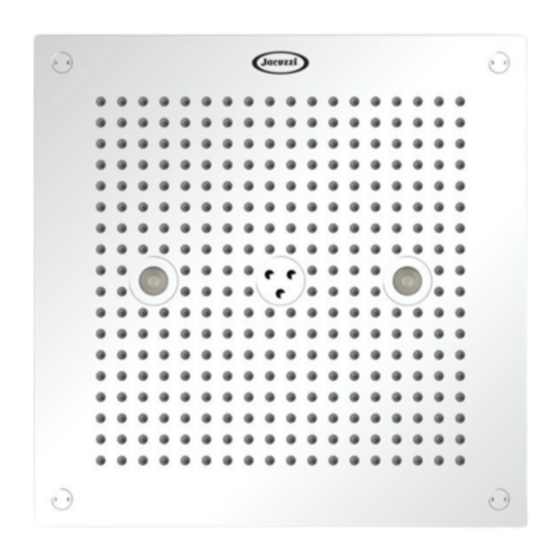
22 (TOP) Tirare il pomello posto sotto il soffione per cambiare tipo di getto. Pull the knob located under the shower head to change the jet type. Tirer le pommeau situé sous la pomme de douche pour changer le type de jet. - Page 34 funzioni - functions - les fonctions Tastaturfunktionen - funciones - функции solo modelli TOP solo modelli TOP only with TOP models only with TOP models uniquement modèles TOP uniquement modèles TOP nur Modelle TOP nur Modelle TOP solo modelos TOP solo modelos TOP только...
-
Page 35: Pulizia E Manutenzione
pulizia e manutenzione - cleaning and maintenance - nettoyage et entretien Reinigung und Wartung - limpieza y mantenimiento - очистка и техобслуживание head using soap and water or water and vinegar. CAREFUL! Abrasive and/or alcohol-based products could ruin the control display and the spotlight lenses. -
Page 36: Avvertenze
Jacuzzi® pena nents, Jacuzzi® original spare parts must be used; the Man- la decadenza della responsabilità del Costruttore per danni ufacturer will not be responsible for any damage resulting derivanti dall’intervento eseguito. - Page 37 Wartungsarbeiten ausführen. Bei Wartungsarbeiten und/ nécessitant le remplacement de composants, utiliser des oder Reparaturen dürfen ausschließlich Original-Ersatzteile pièces détachées originales Jacuzzi® ; en cas contraire, le von Jacuzzi® verwendet werden. Der Hersteller haftet nicht fabricant décline toute responsabilité pour tout dommage für Schäden, die auf die Nichtbeachtung dieser Vorschrift...
- Page 38 Se prohíbe terminantemente usar el equipo para fines di- борам/устройствам, находясь внутри оборудования. stintos de los previstos expresamente. Jacuzzi no se hace responsable de posibles daños derivados Категорически запрещается использовать оборудова- de usos impropios. ние в целях, отличных от предусмотренных.
- Page 40 I dati e le caratteristiche non impegnano la Jacuzzi Europe S.p.A., che si riserva il diritto di apportare tutte le modifiche ritenute opportune senza obbligo di preavviso o di sostituzione The data and characteristics indicated do not oblige Jacuzzi Europe, who reserves the right to make the necessary changes they feel opportune without forewarning or substitution Les caractéristiques indiquées, n’engagent pas la Jacuzzi Europe, qui se réserve le droit d’apporter...
Need help?
Do you have a question about the Caleidos and is the answer not in the manual?
Questions and answers