Table of Contents
Advertisement
WARNING
For Outdoor Use Only (outside any enclosure)
WARNING
1. Improper installation, adjustment, alteration,
service or maintenance can cause injury or property
damage.
2. Read this instruction manual thoroughly before
installing or servicing this equipment.
3. Failure to follow these instructions could result in
fire or explosion, which could cause property
damage, personal injury or death.
4. This instruction manual contains important
information necessary for proper assembly and safe
use this appliance.
WARNING
1. Do not store or use gasoline or other flammable
vapors and liquids in the vicinity of this or any
other appliance.
2. An LP tank not connected for use should not be
stored in the vicinity of this or any other
appliance.
DANGER
If you smell gas:
1. Shut off gas to the appliance.
2. Extinguish any open flames.
3. Open the lid.
4. If the odor continues, keep away from the
appliance and immediately call your gas supplier
or fire department.
DANGER
Never operate this appliance unattended.
Save these instructions for future reference.
If you are assembling this unit for someone else,
give this manual to him or her to read save for
future reference.
DO NOT RETURN YOUR GRILL TO THE STORE
Question, Problems, Missing parts? Before running to your retailer, call our customer service department at
1‐855‐CHANT‐US (1‐855‐242‐6887) from 8:00am to 5:00pm Eastern time, Monday through Friday.
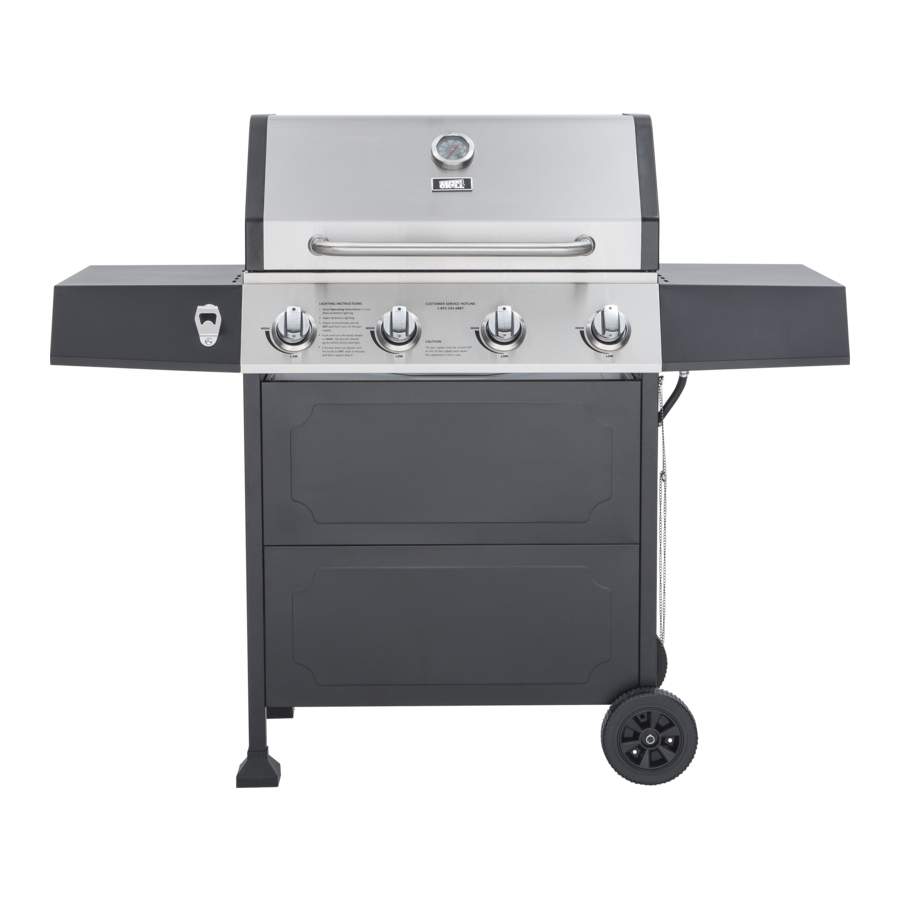
OUTDOOR 4 BURNER GAS GRILL
Vendor Stock NO.: XG1609603400
Call Customer Service Hotline
1‐855‐242‐6887
1
Model NO.:BG2824BP
Advertisement
Table of Contents

Related Manuals for EXPERT GRILL BG2824BP


Summary of Contents for EXPERT GRILL BG2824BP
-
Page 1: Cover
OUTDOOR 4 BURNER GAS GRILL Vendor Stock NO.: XG1609603400 WARNING For Outdoor Use Only (outside any enclosure) Model NO.:BG2824BP WARNING 1. Improper installation, adjustment, alteration, service or maintenance can cause injury or property damage. 2. Read this instruction manual thoroughly before installing or servicing this equipment. 3. Failure to follow these instructions could result in fire or explosion, which could cause property damage, personal injury or death. 4. This instruction manual contains important information necessary for proper assembly and safe use this appliance. WARNING 1. Do not store or use gasoline or other flammable vapors and liquids in the vicinity of this or any other appliance. 2. An LP tank not connected for use should not be stored in the vicinity of this or any other appliance. DANGER If you smell gas: 1. Shut off gas to the appliance. Call Customer Service Hotline 2. Extinguish any open flames. 3. Open the lid. 1‐855‐242‐6887 4. If the odor continues, keep away from the appliance and immediately call your gas supplier or fire department. DANGER Never operate this appliance unattended. Save these instructions for future reference. If you are assembling this unit for someone else, give this manual to him or her to read save for ... - Page 2 DANGER WARNING If you smell gas: 1. Do not store or use gasoline or other 1. Shut off gas to the appliance flammable liquids or vapors in the vicinity of 2. Extinguish any open flame this or any other appliance. 3. Open lid 4. If odor continues, keep away from the 2. An LP cylinder not connected for use should appliance and immediately call your gas supplier not be stored in the vicinity of this or any other or your fire department. appliance. Always read and understand the WARNINGS and INSTRUCTIONS that are contained in this manual before attempting to use this gas barbecue grill to prevent possible bodily injury or property damage. Always keep this manual for convenient future reference. Distributed by: Wal‐Mart Stores, Inc., Bentonville, AR 72716 Manufacturer: ...
-
Page 3: Table Of Contents
TABLE OF CONTENTS Cover …………….…………………………………….………...….………….………….….…………………..……..1 ... -
Page 4: Safety Information
SAFETY INFORMATION Please read and understand this entire manual before attempting to assemble, operate or install the ... - Page 5 SAFETY INFORMATION 16. The cylinder used must include a collar to protect the cylinder valve.
-
Page 6: Exploded View
EXPLODED VIEW ... -
Page 7: Parts List
PARTS LIST PART DESCRIPTION PART NO QTY ※Lid Assembly 1 2824BP01 1 ※Lid Axis 2 2411017 2 3 Lid Handle Bezel 5201176 2 4 Lid Handle 5210044 1 5 Temperature Gauge Bezel 5208127 1 6 Temperature Gauge 2411016 1 ※Lid Spacer 7 2100158 4 ※Firebox Assembly 8 5210047 1 9 ... - Page 8 PARTS LIST PART ...
-
Page 9: Hardware Contents
HARDWARE CONTENTS AA ... -
Page 10: Assembly Instructions
ASSEMBLY INSTRUCTIONS IMPORTANT: ASSEMBLE ON FLAT AND SOFT SURFACE TO AVOID SCRATCHING. ... - Page 11 ASSEMBLY INSTRUCTIONS 3. Assemble Right Side Cart Frame.
- Page 12 ASSEMBLY INSTRUCTIONS 5. Attach Rear Beam 5.1. Loosen 4pcs pre‐assembled M6X16mm Screws from Left Back Leg (27) and Right Back Leg (13), leave the screw heads protruding approximately 5mm. 5.2. Hang Rear Beam (12) onto Left & Right Back Leg on the screws and hand tighten only the screws on this point. 6. Assemble the front panel 6.1. Loosen 8pcs pre‐assembled M6X16mm Screws from Left Front Leg (25) and Right Front Leg (19), leave the screw heads protruding approximately 5mm. 6.2. Attach Front Panels (21) to the cart and fasten the screws as shown. Then fully tighten all the screws of rear beam this time. ...
- Page 13 ASSEMBLY INSTRUCTIONS 7. Attach Drip Tray (10) and Grease Cup (11) onto the cart as shown. ...
- Page 14 ASSEMBLY INSTRUCTIONS 9. Assemble Lid Handle and Temperature Gauge ...
- Page 15 ASSEMBLY INSTRUCTIONS 11. Repeat Step 10 for Right Side Shelf. AA M6X16 mm Black Screw M6X16 mm Black CC M6 Washer 12. Insert Heat Tent (41), Cooking Grates (42). ...
- Page 16 ASSEMBLY INSTRUCTIONS 13. Insert Warming Rack (43) and Control Knobs (30). ...
- Page 17 ASSEMBLY INSTRUCTIONS 15. Attach Gas Cylinder Hook (16) to Right Front Leg (19) and Right Back Leg (13). ...
- Page 18 OPERATING INSTRUCTIONS LIQUID PROPANE GAS TANK INSTALLATION ...
- Page 19 OPERATING INSTRUCTIONS 6. Open the tank valve fully (counterclockwise). Use a soapy water solution to check all connections for ...
- Page 20 OPERATING INSTRUCTIONS Disconnecting A Liquid Propane Gas (LP ...
- Page 21 OPERATING INSTRUCTIONS • Cylinders must be stored outdoors out of the reach of children and must not be stored in a building, ...
- Page 22 OPERATING INSTRUCTIONS Please refer to diagram for proper installation (see Fig. 8). Visually check the connection between ...
- Page 23 OPERATING INSTRUCTIONS Storage of an outdoor gas cooking appliance indoor is permissible only if the cylinder is disconnected ...
- Page 24 LIGHTING INSTRUCTIONS WARNING: ...
-
Page 25: Care And Maintenance
CARE AND MAINTENANCE However, there are steps you must take to prevent cracking of the burner's ceramic ignitor surfaces, ... - Page 26 CARE AND MAINTENANCE DRIP TRAY ...
-
Page 27: Troubleshooting
TROUBLE SHOOTING Many solutions given here can make your grilling experience safer and more enjoyable. You can also ... - Page 28 TROUBLESHOOTING PROBLEM ...
-
Page 29: Warranty
WARRANTY PROOF OF PURCHASE is required to access this warranty program, which is in effect from the date ...
Need help?
Do you have a question about the BG2824BP and is the answer not in the manual?
Questions and answers
Do you use any kind of mesquite chips or briquettes?
The EXPERT GRILL BG2824BP can use both mesquite chips and ceramic briquettes, as both are listed as compatible accessories.
This answer is automatically generated
I can't seem to get the firebox to fit on the frame
To properly fit the firebox on the frame of the EXPERT GRILL BG2824BP:
1. Use two people to lift and place the Firebox Assembly onto the cart.
2. Fasten it using 4 pieces of AA screws as shown in the instructions.
This answer is automatically generated
All of the screws for the grill are falling out and I’ve lost several. What size are those or can you send me some?
Hello! We purchased this grill from Walmart in September! We used it 4 different times now and it’s quite awful compared to our previous girl that we paid the same for from Home Depot. It cooks very very uneven. The food had to be on the grill a very long time to not be raw in the middle and the rest is dried out. We’ve tried everything. How can I go about returning this? I will also contract Walmart as I would like my money back so I can purchase the brand that I previously had. We grilled almost daily on it and everything was juicy and cooked very, very evenly. There may be a defect in the burners of this grill as well as it shows all flames but parts of the grill still has raw meat and parts are completely crisp on the outside already. We make sure all burners are evenly on medium at all times. Please let me know what my steps are to being able to get my money to buy a different brand. Thank you