Advertisement
SubliPro
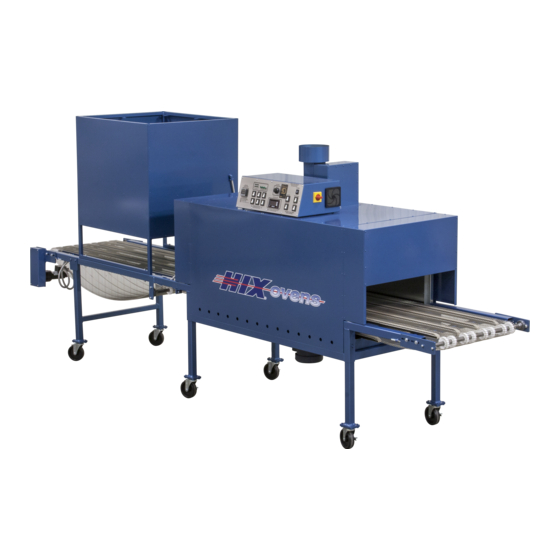
Sublimation Mug Oven with Cooler
OWNER'S MANUAL
SubliPro-2414
SubliPro-4827
For Customer Service, Call 1-800-835-0606
or Visit www.hixcorp.com
CONTENTS
Initial setup / installation ............................................................................2-7
Time & Temperature Control......................................................................... 8
Operation ...................................................................................................... 9
Using Hix Sublimation Wraps ................................................................ 10-11
Maintenance ............................................................................................... 14
Notes for Substrates ................................................................................... 15
Warranty ..................................................................................................... 16
BEFORE warranty repair you MUST get Prior Authorization:
70138 RV J_120220
Advertisement

Summary of Contents for Hix SubliPro
-
Page 1: Table Of Contents
Visit www.hixcorp.com CONTENTS Initial setup / installation ................2-7 Time & Temperature Control................. 8 Operation ...................... 9 Using Hix Sublimation Wraps ..............10-11 Maintenance ....................14 Notes for Substrates ................... 15 Warranty ..................... 16 BEFORE warranty repair you MUST get Prior Authorization:... -
Page 2: Initial Setup / Installation
INITIAL SETUP / INSTALLATION INSTALLATION AND SET UP INSTRUCTIONS 1. Leg Assembly A) Remove four nuts on inside of dryer frame that secures the dryer to crate bottom. B) Raise dryer from crate bottom with forklift to allow access to four corner posts. - Page 3 INITIAL SETUP / INSTALLATION 1. Both the oven and cooler crates have du- plex nails (pic 1) on all four sides which need to be removed. This allows the top to be removed at one time (either with four people or by using a fork lift). pic 1 2.
- Page 4 INITIAL SETUP / INSTALLATION Red/white arrow decals should point toward each other when the con- figuration is correct (pic 5b). Similarly numbered wires connect togeth- er with the orange wire nuts (also in pack)(pic 5c). pic 1 pic 1 6. The exhaust fan assembly attaches to the top with ten #14 x ½” hex head tap screws.
- Page 5 INITIAL SETUP / INSTALLATION 9. The 3626 model has two sets of legs on the exit side, both self-sup- porting once installed. The 4827 model has 3 sets of self-supporting legs. The telescope tubing (pic 9a) slides into the oven frame until it hits the metal stops (pic 9b and c).
- Page 6 INITIAL SETUP / INSTALLATION 12. To install the belt, place the rolled up belt under the cooler section on the floor. The belt’s front is marked (pic 12a). Start feeding the belt through the oven by guiding it first over the idler pulley(s) at the exit side, then over the bottom rails (pic 12b, c). When arrived at the front end of the oven, loop the belt up and back through the oven, all the way back to the exit end.
- Page 7 INITIAL SETUP / INSTALLATION Using needle-nose pliers and flathead screwdriver works best when weaving the link splices together (pic 13b, c and d). pic 1 pic 1 14. When hooking up the electric connection to the main rotary switch, be sure the wire connection is tight (pic 14a and b). Rotary switches fail when this connection is no longer secure.
-
Page 8: Time & Temperature Control
TIME & TEMPERATURE CONTROL TEMPERATURE CONTROL Not functional. Upper display shows cur- rent value of process (oven) temperature. Lower display shows set- point temperature. Pressing this function button once will allow “SP” to be displayed enabling the opera- Will decrease tor to change the setpoint by setpoint (SP) when pressing the “up”... -
Page 9: Operation
APPLYING THE TRANSFER With some wraps including the HIX tool-less “Snap” clasp wrap, you will be able to image virtually top to bottom and handle to handle. While full top to bottom and handle to handle imaging is possible it is not recommended until you have a firm understanding and experience with imaging mugs. -
Page 10: Using Hix Sublimation Wraps
USING HIX SUBLIMATION WRAPS least a ¼” away from the handle you should see consistent quality. As you become more experienced there are tips and tricks that will make full wrap imaging more successful; not fool proof but more consistent results can be achieved with proper preparation of the transfer. - Page 11 USING HIX SUBLIMATION WRAPS 5. REMOVE AND COOL: CAUTION: Wear heat protective gloves to handle the finished wraps and mugs. a) Remove mug from oven d) With one motion, press thumbs up and index fingers down. This will re- b) Press thumbs against the bottom lip lease the mug from the wrap. of the “loop end.”...
- Page 12 DIAGNOSTICS HEATER AND RELAY LIGHTS 1. Heater LED’s: Cycle On When Heaters Are On Small (1/8”) light-emitting diodes (LED’s) are driven by a current sensor (one for each heater in the dryer). They can, in conjunction with relay lights explained below, determine if heater(s) are burned out or if a relay is at fault.
- Page 13 Intended Use: HIX electric conveyor ovens may be used to cure or dry a number of inks, substrates or products such as textiles, wood, plastic, glass or any other similar substrates. The oven process temperature is to be set within the safe temperature limitations of the ink or substrate.
-
Page 14: Maintenance
MAINTENANCE MAINTENANCE SCHEDULE Every month: Remove and clean or replace filters located on each side of control box. Every 6 months: 1. Vacuum any lint/dust accumulation around air intake holes on both sides of oven and on fume hoods. 2. Check tension on the wire conveyor belt and tighten if necessary. Every Year: (Disconnect power at main panel) 1. -
Page 15: Notes For Substrates
NOTES FOR SUBSTRATES... -
Page 16: Warranty
In the event of a defect, HIX, at its option, will repair, replace or substitute the defective item at no cost during this warranty period subject to the limitations of insurance and shipping costs stated below (excludes labor).


Need help?
Do you have a question about the SubliPro and is the answer not in the manual?
Questions and answers