
Related Manuals for Capsa Healthcare Trio


Summary of Contents for Capsa Healthcare Trio
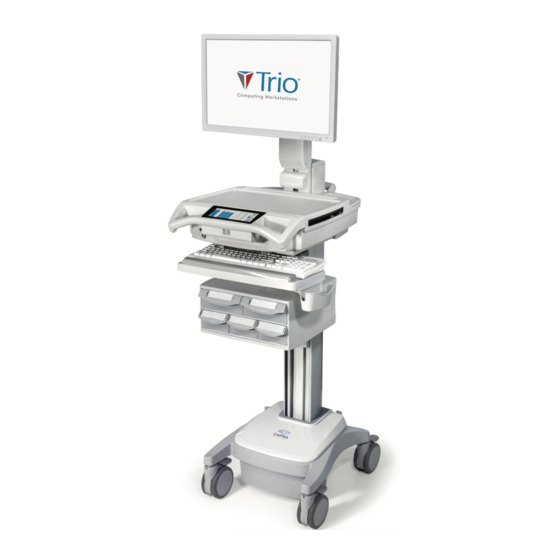
- Page 1 Trio™ Computer Carts Computing Workstations User Manual Elevating performance, every day.
-
Page 2: Warnings
Electric current may try to flow through you between the Trio™ system and the other point of contact as it seeks the easiest path to ground. - Page 3 Warnings WARNING: ELECTRICAL CORD CAN BE HAZARDOUS! The supplied power cord is rated for medical use. Connecting the cord to an outlet that is not medical grade (indicated with a green dot) will not ensure grounding protection. Where the integrity of the external PROTECTIVE EARTH GROUND CONDUCTOR arrangement is in doubt, the equipment shall be operated from its internal electrical power source (battery).
-
Page 4: Table Of Contents
Portable RF communications equipment, including antennas, can affect medical electrical equipment. Portable RF communications equipment can be used no closer than 30 cm (12 inches) to any part of the Trio™ Mobile Computer Cart, including cables specified by the manufacturer. - Page 5 Table of Contents Replace the Work Surface ............14 Adjust the Manual Work Surface Lift System ..... 15 Install the Monitor ............... 16 Adjust the Monitor Lift System ..........17 Disable Demonstration Mode ..........18 Connect Networks ..............19 Operation Quick Start Procedure ...............
-
Page 6: Introduction
• The Trio™ Mobile Computer Cart is a mobile computing workstation cart designed for safe use in general patient areas for the purpose of clinical data entry and retrieval and medication delivery •... -
Page 7: Box Contents
Introduction Box Contents Trio™ Cart Trio™ Cart Security Keys Security Keys Power Cord Power Cord Trio™ User Manual Trio™ User Manual Accessory Kit Accessory Kit Trio™ Computer Carts Computing Workstations User Manual Power Cord Clip Power Cord Clip Mouse/Keyboard Cord Clips Mouse/Keyboard Cord Clips Elevating performance, every day. -
Page 8: Overall View
Introduction Overall View Monitor (customer provided) Bi-directional Extending Work Surface Task Light Work Surface Work Surface (some models) Touchscreen Technology Box N-Stride™ Trigger Manual Height Handle Technology Box Lock (some models) Keyboard Task Light Mouse Holder Keyboard Drawer Modules (customer provided) Keyboard Tray Locking Caster Ground Task Light... -
Page 9: Mobile Cart Weight Capacities
Introduction Trio™ Mobile Cart Weight Capacities Monitor Mount 15.0 lbs 6.8 kg Accessory Bins Work Surface 2.5 lbs 1.13 kg 5.0 lbs (per bin) 2.26 kg Keyboard Tray Slideout Work 5.0 lbs Surface 2.26 kg 3.0 lbs 1.36 kg (per bin) Small Storage Bins 1.0 lbs... -
Page 10: Setup
Setup Install the Power Cord CAUTION: POTENTIAL CORD DAMAGE! DO NOT extend the cord beyond 6 feet (1.8 meters)! Stretching the cord any further may damage it! 1. Remove the power input protector by removing the slotted D-Ring screw that secures it. To remove the screw, flip up the D-Ring and turn counter-clockwise until removed. -
Page 11: Initial Battery Charge
Setup Install the Power Cord 4. Stow the plug in the cord holder. supplied power cord is rated for medical use. Be sure to connect the cord to an outlet that is medical grade (indicated with a green dot) to ensure grounding protection. -
Page 12: Power On The Cart
Note: Leave enough access space between the wall and equipment so it can be easily unplugged. To Power the Trio™ Cart Turn on the power switch In approximately 5 seconds the cart will power on Plug in the power cord (if the... -
Page 13: Remove The Work Surface
Setup Remove the Work Surface 1. Insert the security key into the work surface lock. 2. Turn the key counterclockwise to unlock the work surface. 3. Lift the front of the work surface, and pull it forward. -
Page 14: Replace The Work Surface
Setup Replace the Work Surface 1. Align the work surface rear pins with the openings on the brackets of the technology tray as shown. 2. Lower the front of the work surface and engage the latches at the front of the technology tray. -
Page 15: Adjust The Manual Work Surface Lift System
Setup Adjust the Manual Work Surface Lift System (Some Models) If the work surface seems difficult to raise, or seems to fall too easily, the work surface manual lift system may need to be adjusted. Note: This feature is not available on carts with the electronic work surface lift system. -
Page 16: Install The Monitor
Setup Install the Monitor For Pivoting Monitor Mount: 1. Pivot the mount head to allow access to the mounting holes. 2. Use the mounting screws provided with the monitor to attach the monitor to the mount faceplate. For Non-Pivoting Monitor Mounts: Use the mounting screws provided with the monitor to attach the monitor mount to the monitor. -
Page 17: Adjust The Monitor Lift System
Setup Adjust the Monitor Lift System If the monitor seems difficult to raise or creeps downward, the monitor lift system may need to be adjusted. 1. Using a 5mm hex wrench, insert it into the opening on the top of the column. -
Page 18: Disable Demonstration Mode
Setup Disable Demonstration Mode Trio™ is shipped in a Demo mode with a list of Demo PIN codes to show the full functionality of the cart. In order to remove the cart from Demo mode and remove the Demo PIN codes, N-Sight™ fleet management must be enabled for your facility, and the cart must be connected to the Internet to obtain your facility’s configuration. -
Page 19: Connect Networks
Setup Connect Networks Connecting Wi-Fi 1. Touch the Tools button display the tools features. 2. Touch the Network Settings button A user that is logged in as an IT or Admin user may have more tool options available. Find Available Wi-Fi Connections 1. - Page 20 Setup Connect Networks Internet Connection Sharing To share an internet connection from the Installed Technology Device to the cart: 1. Remove the Work Surface (see Remove the Work Surface procedure). 2. Connect the Yellow Cable into the Ethernet Port on the Device. 3.
-
Page 21: Operation
Operation Quick Start Procedure Good practice for starting the Trio™ cart is as follows: 1. Turn on the cart. 2. Note the condition of the battery (the cart may need to be plugged in). 3. Log In to the touchscreen (see Touchscreen Log In/Log Out). -
Page 22: Battery Charge Indicator
Operation Battery Charge Indicator The battery charge indicator is located to the right on the touchscreen. The indicator displays both a numeric listing and graphic representation of the remaining battery charge. When not plugged in, an estimate of the remaining battery time with the current power drain is provided. -
Page 23: External Battery (Optional)
Operation External Battery (Optional) The Trio™ carts have the option to add an external battery. The external battery is seated on the backside of the column near the base. The cart will use the optional external battery fi rst. When discharged, a red replace external battery icon will be displayed. - Page 24 Operation External Battery (Optional) To remove the external battery: 1. Grasp the handle on the top of the external battery, and pivot it outward from the column. Only pivot the battery enough so that the two securing pins do not engage the external battery.
-
Page 25: Using The Touchscreen
Operation Using the Touchscreen Keep the screen clean from foreign objects to achieve the best touch sensitivity. Avoid excessive material accumulation on all sides of the border of the screen. Refer to the Cleaning section for more information. Selecting Items on the Touchscreen Tap once on the desired selection. -
Page 26: Log In/Log Out
Operation Log In/Log Out To log in enter your PIN The touchscreen will validate the PIN entered If valid, the touchscreen will: • Show user name • Load your personal settings • Open the drawers • Activate advanced operation of the touchscreen If not valid, the touchscreen will display an error message and return to the main screen... -
Page 27: Drawer Modules
Operation Drawer Modules Drawer Locks The drawers are accessible when a valid PIN is entered into the touchscreen. A user may lock the drawers by either touching the Drawer Controls button , by waiting until the drawer lock timer counts down (go to the Preferences screen to set the drawer lock timer), or by touching the Log Out button The electronic drawer lock will not function when the battery is fully... - Page 28 Operation Drawer Modules Using the Manual Drawer Lock Override 1. Insert the lock override key into the lock located on the rear of the drawer module. The drawers are locked – the key may be removed from the lock. If there are two locks on the drawer module, then both keys may need to be turned to override the lock.
-
Page 29: Moving The Cart
Being sure that the path is clear of any obstructions, safely push the cart When pushing the cart, be sure the handles are at ideal height. The Trio™ cart is equipped with two contoured, ergonomic front handles and a rear handle The front handle/work surface height can be adjusted using the height adjustment lever (manual lift) or lift buttons (electronic). -
Page 30: Casters
Operation Casters To Operate Braking Casters 1. Lower the tab with your toe to lock a caster. 2. Lift the tab with your toe to unlock a caster. N-Stride™ N-Stride™ is designed to aid straight line movement of a loaded cart by locking the right front caster in position. -
Page 31: Positioning The Keyboard
Operation Positioning the Keyboard The Trio™ cart features a retractable keyboard tray, mousepad and optional bidirectional work surface. The retractable surfaces shrink the overall dimensions of the cart to allow passage through confined spaces. Pull the keyboard tray out to... -
Page 32: Extending The Mousepad And Work Surface
Operation Extending the Mousepad and Bidirectional Work Surface To Extend the Mousepad Pull the mouse holder in the desired direction. To Retract the Mousepad: Push the mouse holder toward the keyboard until the mousepad is centered to the keyboard tray. To Extend the Bidirectional Work Surface Pull the end of the bidirectional work surface in the desired direction. -
Page 33: Adjustable Lcd Mount
Operation Adjustable LCD Mount The adjustable LCD monitor mount is designed to allow height adjustment of the monitor and to allow the monitor to pivot 180 degrees. To Pivot the Monitor 1. Grasp the sides of the monitor, then twist the monitor to the desired position. -
Page 34: Lcd Monitor Rotation (Optional)
Operation LCD Monitor Rotation (Optional) If the feature is enabled, the LCD monitor may be rotated 90 degrees. Some configurations will only rotate 90 degrees clockwise or counter clockwise, not both. To Rotate the Monitor 1. Grasp the sides of the monitor 2. -
Page 35: Manual Work Surface Lift
Operation Manual Work Surface Lift (Some Models) To Raise or Lower the Work Surface 1. Position your hands to support the weight of the Work Surface. 2. Lift the height lever located beneath the right side of the handle. 3. Raise or lower the Work Surface to the desired height. -
Page 36: Electronic Work Surface Lift System
Operation Electronic Work Surface Lift System (Some Models) For Trio™ carts equipped with the electronic lift system, adjust the work surface height with the lift controls. To Adjust the Work Surface Upward 1. Touch and hold the Up Arrow button. -
Page 37: Electronic Work Surface Lift Height Presets
Individual users may set sitting and standing height presets to adjust the Trio™ cart for their personal comfort. 1. To set height presets, use the Up and Down Arrow keys to adjust the work surface to the desired height. -
Page 38: Task Lighting
Operation Task Lighting Task lighting is included to enhance cart usability in darkened patient areas. The Trio™ carts are equipped with ground, keyboard, and work surface lights. To operate, touch the desired task lighting button under Lights on the touchscreen. - Page 39 Operation Task Lighting The Surface button controls the light located beneath the LCD monitor The work surface light illuminates the work surface area and the inside of the technology tray when the work surface is removed The All button is used to operate all lights simultaneously.
-
Page 40: Charging Usb Port
Operation Charging USB Port (Some Models) Trio™ carts are confi gured with a charging USB Port on the side of the work surface task light. This USB Port is for charging external devices only. a charging USB port does not work, it may... -
Page 41: Outbound Messages
Operation Outbound Messages (Some Models) The Outbound Messages button is used to send messages from the cart. All messages sent from the cart can also be reviewed. NOT use the Outbound Messages System to transmit patient or HIPAA protected Make sure the information. - Page 42 Operation Outbound Messages 5. If it is necessary to add 12:34 PM User or Cart Name Messages 01/30/2020 additional information, touch Who should receive this? What needs attention? the Optional additional note Optional additional note? 9:39 window to display the Remaining on-screen keyboard.
- Page 43 Operation Outbound Messages 12:34 PM User or Cart Name Sent Messages 01/30/2020 4. To exit the message list, or an 12:34 PM User or Cart Name Sent Messages Sent Subject 01/30/2020 Sent Subject expanded message, touch the 01/20/2020 Group Name Useful info for you to have at your 01/20/2020 Group Name...
-
Page 44: Alerts
Operation Alerts 12:34 PM User or Cart Name The Alerts button Create Message is used to 01/30/2020 Start typing your message display a list of notifi cations sent to a cart user. There are two types of 9:39 Remaining notifi cations: Alerts are intended to be read immediately. - Page 45 Operation Alerts To Read an Alert or Notifi cation 12:34 PM User or Cart Name Alerts & Notifications 01/30/2020 1. Touch the specifi c alert or From 2 Alerts 30 Notifications 01/20/2020 Only fifty characters, spaces count Department 9:01am Name against total.
-
Page 46: Help Menu
Operation Help Help Help Menu Pressing the HEL The Help button is used to display to provide descr the help screens. Each help screen Notice you ca provides a small summary of a swiping your feature and how to use it. Pressing the HELP icon to provide description To access the help screen, touch the... -
Page 47: Calculator
Operation Calculator To Access the Trio™ Calculator Feature Touch the Calculator button 12:34 PM 12:34 PM The function of the calculator is User or Cart Name once signed-in User or Cart Name once signed-in User or Cart Name once signed-in... -
Page 48: Preferences / Settings
Operation Preferences (Optional) / Settings (Standard) The Cog button , located on the left of the touchscreen, is used to access both the Settings and Preferences screens. When a user is logged in, the Cog button will access the Preferences screen. If not logged in, the Cog button will access the Settings screen. - Page 49 Operation Preferences (Optional) / Settings (Standard) 4. When done, touch the Home button 12:34 PM to exit the features menu. User or Cart Name Preferences 01/30/2020 Preferences Lights Dimming Lighting Theme Surface North Wing Library 9:39 Keyboard Remaining Pharmacy Ground Lights Storage Room When a logged in user...
-
Page 50: Tools
Operation Tools The Tools button , located on the left side of the touchscreen, is used to access additional information and features of the cart. A user that is logged in may have more tool options available. To Access the Tools Features 1. - Page 51 Operation Tools To Power Off the Installed Technology Devices 1. Touch the Computer Power button 2. Touch the desired option. Note: It will take approximately 30 seconds to power off /power on the device. To Activate a Timer 1. Touch the Timer button 2.
-
Page 52: Turn Off The Cart
Operation Turn Off the Cart To turn off the cart, the Power switch can be simply flipped from on to off. The switch is located on the left-rear side of the Base. Turn off the Power switch located on the left-rear side of the Base Though shut down, the battery will charge if the cart is left... -
Page 53: Preventative Maintenance
Preventative Maintenance Inspection Checklist To protect optimal performance, Capsa Healthcare recommends a periodic inspection and preventative maintenance of your computing cart fleet. These simple steps can safeguard against breakdowns and help you realize uninterrupted workflow and cart availability. Items Action... -
Page 54: Service
Service Request Service Request Capsa Healthcare is committed to providing best-in class service. Our service d of technicians qualified to conduct all service repairs and has access to all comp Capsa Healthcare is committed to providing best-in class service. Our service d Capsa Healthcare is committed to providing best-in class service. -
Page 55: Troubleshooting
Troubleshooting Problem Solution Cart is Hard to Push Check that the caster locks are in the unlocked (up) position. Check casters for obstructions. Cart is Hard to Turn Check that N-Stride™ is active. Computer/Monitor Turn the power on to the installed Technology Devices. Tap Turn the power on to the installed Technology Devices. -
Page 56: Cleaning
Most common disinfectant wipes and diluted cleaning solutions that are safe to use in patient care environments are also acceptable to use for cleaning Capsa Healthcare products' exterior surfaces. -
Page 57: Cleaning Of High Touch Point Items
Cleaning Cleaning of High Touch Point Items • The work surface is fully removable to facilitate cleaning • The document protector is removable (pull up on the back corners). To refasten, press the nylon fastener into the hole in the work surface. This is a replaceable item. -
Page 58: Transport, Storage & Disposal
Transport, Storage & Disposal Transport CAUTION: HEAVY OBJECT! The shipping weight of the Trio™ cart is approximately 105 - 160 lbs (48 - 73 kg). Use lifting aids and proper lifting techniques to avoid muscle strain or back injury. CAUTION: PINCH POINT HAZARD! -
Page 59: Warranty
When Capsa Healthcare provides on-site services, the customer will provide access to the product with minimum wait time. The customer is required to return all parts at the request of Capsa Healthcare. -
Page 60: Standards Compliance
Warranty Service Details Consumable components are not covered under warranty and include: • Locks and keys • Document cover Other standard components will be replaced under the applicable warranty following a filed service request. Note: the above terms for replacement parts applies to facilities located in the United States. -
Page 61: Product Classification
Standards Compliance o Surge Immunity Test (IEC 61000-4-5) o Surges line to line per IEC 61000-4-5 at ±1kV o Surges line to ground per IEC 61000-4-5 at ±2kV o Conducted disturbances inducted by RF fields per IEC 61000-4-6 – 3 V, 0.15 MHz –... -
Page 62: Connectivity
Standards Compliance UPS Output 120 Vac 60Hz or 230Vac 50Hz Lithium Battery 12 Vdc 512 Wh Fuse (Battery Cable) ATO/ATC 32 VOLT 30 AMP LITTELFU, Breaking Capacity: 1 kA, Operating Speed: Medium Connectivity Cart Receiver: o Wi-Fi (802.11a, b, g, n, ac). 5GHz 20/40/80 MHz bandwidth. 2.4Ghz 20/40 MHz bandwidth. -
Page 63: Environmental Conditions
Standards Compliance Environmental Conditions Storage Temperature -15 to 45º C (5 to 113º F) Operating Temperature 0 to 40º C (32 to 104º F) Storage Altitude -200 to + 25,000 feet referenced to sea level Operating Altitude -200 to ± 10,000 feet referenced to sea level Storage Humidity 10% to 90% RH (non-condensing) - Page 64 800.437.6633 www.CapsaHealthcare.com 09/2020 Part # 810339 Trio User Manual Rev B © 2020 Capsa Solutions Portland, OR 97230...
Need help?
Do you have a question about the Trio and is the answer not in the manual?
Questions and answers
How do you turn this thing on?
To turn on the Capsa Healthcare Trio, follow these steps:
1. Turn on the cart.
2. Check the battery condition; plug in the cart if needed.
3. Log in.
This answer is automatically generated