Table of Contents
Advertisement
Available languages
Available languages
Quick Links
Advertisement
Table of Contents

Summary of Contents for La Boite Concept LP160
- Page 1 NOTICE / USER MANUAL...
- Page 4 FRANÇAIS p.5 à 26 ENGLISH p.27 à 48...
-
Page 5: Table Of Contents
LES INFORMATIONS DE SÉCURITÉ p.6-11 p.6-7 1.1. LES ÉTAPES À SUIVRE p.7-11 1.2. LES AVERTISSEMENTS GARANTIE p.11-13 p.11-13 2.1. GARANTIE LA BOITE CONCEPT OUVERTURE ET MONTAGE p.13-16 p.13 3.1. CONTENU DU CARTON p.14-15 3.2. INSTALLATION DES PIEDS p.16 3.3. INSTALLATION DU CACHE AVANT DEMARRAGE ET UTILISATION p.17-23... -
Page 6: Les Informations De Sécurité
1. LES INFORMATIONS DE SÉCURITÉ 1.1. LES ÉTAPES À SUIVRE Lisez les instructions Conservez les instructions Respectez les avertissements Suivez toutes les instructions N’utilisez pas cet appareil à côté d’un point d’eau Nettoyez uniquement l’appareil avec un linge sec Ne bloquez jamais les ouvertures. Procédez à l’installation en respectant les instructions du fabricant. -
Page 7: Les Avertissements
13 Débranchez l’appareil en cas d’orage ou si vous ne l’utilisez pas pendant une longue période. 14 Confiez tout les travaux de maintenance à du personnel spécialisé et qualifié. Des réparations sont nécessaires lorsque l’appareil a été endommagé : en cas de dégâts sur le cordon d’alimentation ou sur la prise, si du liquid ou un objet est tombé sur l’appareil si l’appareil a été exposé à la pluie ou à... - Page 8 Pour garantir une conformité prolongée, seul les accessoires de La Boite concept devraient être utilisés avec ce produit et les opérations de maintenance doivent être confiées à du personnel spécialisé et qualifié.
- Page 9 Les équipements sélectionnés par La Boite concept ont été créés et testés pour être conformes aux limites des appareils numériques de classe B, confor- mément à la partie 15 des règles FCC. Ces limites ont été définies pour four- nir une protection raisonnable contre les interférences dangereuses au sein d’une installation résidentielle. Ces équipements génèrent, utilisent et peuvent émettre des radiations de fréquence radio, s’il ne sont pas installés, ni utili- sés conformément aux instructions, et cela peut engendrer des interférences...
- Page 10 EMPLACEMENT Choisir avec précaution un endroit pour installer votre équipement. Eviter de le placer directement face aux rayons du soleil ou près d’une source de chaleur. Aucune source de feu, telle que des bougies allumées, ne doit être placée sur l’appareil. Eviter également toutes les sources qui pourraient occasionner des vibrations, de la poussière, de la fraîcheur ou de l’humidité. L’appareil peut être utilisé...
-
Page 11: Garantie
(exclusions possibles) et des pièces de rechange gratuites dans tout pays desservi par un distributeur agréé de La Boite concept. Cette garantie limitée est valable pendant une période de deux ans à dater de l’achat, si ce n’est que des exclusions sont d’application dans certains pays conformément à... - Page 12 Détériorations résultant de : accidents, foudre, eau, chaleur, guerre, troubles de l’ordre public ou autre cause ne relevant pas du contrôle raisonnable de La Boite concept ou de ses distributeurs agréés, e. Les produits dont le numéro de série a été modifié, effacé, éliminé...
-
Page 13: Ouverture Et Montage
obtenir les coordonnées de votre distributeur local. Afin de valider votre garantie, vous devez présenter l’original de la facture commerciale ou une autre preuve d’achat et de la date d’achat. 3. OUVERTURE ET MONTAGE 3.1. CONTENU DU CARTON Sortez tous les composants de leur emballage. Gardez à l’esprit que le LP/ AP 160 est lourd. -
Page 14: Installation Des Pieds
3.2. INSTALLATION DES PIEDS Sortez tous les composants de leur emballage. Conservez l’emballage d’origine au cas où vous devriez retourner l’appareil car la garantie limitée ne couvre pas les dégâts dus à l’expédition. Utilisez un tournevis pour fixer les pieds à l’enceinte en suivant le schéma ci- dessous. Ôter la feuille de carton protectrice ainsi mousses protectrices les côtés et au centre avant d’ouvrir l’enveloppe protection de l’enceinte... - Page 15 Avec l’aide d’une autre personne, retourner l’enceinte pour la poser sur ses pieds. FÉLICITATIONS ! IL NE VOUS RESTE PLU AVEC L'AIDE D'UNE AUTRE PERSONNE, PARTIES RESTANTES RETOURNER L'ENCEINTE POUR LA POSER SUR PROTECTION. SES PIEDS. ONGRATULATIONS ITH THE HELP OF SOMEBODY ELSE TURN THE SPEAKER SYSTEM EMOVE THE REMAINING PRO OVER TO STAND IT WELL ON ITS LEGS...
-
Page 16: Installation Du Cache Avant
INSTALLATION DU CACHE AVANT Sortez tous les composants de leur emballage. Conservez l’emballage d’origine au cas où vous devriez retourner l’appareil car la garantie limitée ne couvre pas les dégâts dus à l’expédition. - Pour le AP 160, un cache avant est mis à disposition dans la boîte des pieds si vous souhaitez le fixer sur votre AP 160. Sortez le cache avant de son emballage, positionnez le entre le panneau de contrôle et le panneau supérieur. -
Page 17: Demarrage Et Utilisation
DÉMARRAGE ET UTILISATION 4.1. LE POSITIONNEMENT IDÉAL DU LP/AP 160 DANS VOTRE PIÈCE Les enceintes acoustiques traditionnelles ont un champ d’écoute idéal restreint, aussi bien sur un plan latéral que longitudinal. Le LP/AP 160, de par son filtrage et la configuration de ses déflecteurs acoustiques ainsi que grâce au positionnement de ses haut-parleurs arrières, permet une écoute optimale en toutes circonstances. -
Page 18: Panneau Des Sources
4.2. PANNEAU DE SOURCES De haut en bas (numérotation correspondant aux commandes): Entrée Auxiliaire Entrée Analogique dédiée à votre Kit Sans-Fil Entrée Phono dédiée à brancher votre platine vinyle non pré-amplifiée Entrée pour câble Coaxial Entrée pour câble Optique Entrée pour le raccordement par câble Optique de votre Kit Sans-Fil 4.3. -
Page 19: Panneau De Contrôle : Sélection Des Sources
4.4. PANNEAU DE CONTRÔLE : SÉLECTION DES SOURCES Allumage et réglage: Bouton Marche / Mise en veille Bouton d’arrêt momentané du son 9-10 Réglage du Volume Réglage sonore du LP/AP 160 : Mode Loudness Bass Mode Naturel Sélection de la source sonore: Sélection de la source Optique Sélection de la source Coax Sélection de la source Auxiliaire... -
Page 20: Panneau Situé Sous Votre Lp/Ap 160
4.5 PANNEAU SITUÉ SOUS VOTRE LP/AP 160 : Entrée pour le câble d’ALIMENTATION 220v (ou 110v) qui permet de relier le câble électrique au secteur Fusible temporisé de protection principale Interrupteur général Avertissements de sécurité Numéro de Série Fusibles rapides de protection de l’amplificateur ATTENTION : Avant tout remplacement de fusible, il est indispensable de dé- brancher le câble d’alimentation (13) et de mettre l’interrupteur (15) en position OFF. -
Page 21: Allumer / Éteindre L'appareil
4.6. ALLUMER / ÉTEINDRE L’APPAREIL Branchez le cordon d’alimentation sur la prise (13) située sous votre LP/AP 160 Branchez le cordon d’alimentation sur la prise murale puis assurez vous que l’interrupteur (15) situé à proximité du cordon d’alimentation est en position ON. Pour mettre en marche l’amplificateur du LP/AP 160, appuyez sur la touche ON/OFF (7) situé sur le panneau de contrôle. L’indicateur LED correspondant au bouton allumé en blanc s’éteint. Si vous branchez le LP/AP 160 pour la première fois, la LED MUTE (8) est allumée. Appuyez plusieurs fois sur la touche VOL+ (9) jusqu’à... -
Page 22: Installation Et Utilisation De Votre Système Sans Fil
4.7. INSTALLATION ET UTILISATION DE VOTRE SYSTÈME SANS FIL Dans l’emballage de votre LP/AP 160 sont présents différents étuis en mousse. Ces étuis ont chacun une forme spécifique conçue pour maintenir différents modules sans-fil que nous conseillons pour l’utilisation avec le LP/AP 160 : Apple Airport Express Nuforce …... - Page 23 Connectez votre câble audio (optique ou analogique) sur le panneau de sources. Connectez votre câble audio (optique ou analogique) et votre câble d’alimentation sur le kit. Connectez votre câble d’alimentation sur l’adaptateur secteur présent dans le LP/AP 160. Placez votre module sans-fil dans sa mousse Placez l’ensemble dans son emplacement dédié (dans le fond gauche du tiroir de votre LP/AP 160) Arrangez les câbles dans la rainure prévue à cet effet.
-
Page 24: Comment Faire
COMMENT FAIRE POUR NETTOYER LE LP/AP 160 Débranchez l’appareil de la prise de courant alternatif avant de le nettoyer. Nettoyer uniquement l’appareil avec un linge sec. N’utilisez ni alco- ol de nettoyage, ni solvant pour nettoyer la surface de l’appareil car ils pourraient tous les deux endommager la laque et provoquer des pannes électriques et un incendie s’ils pénétraient dans l’électronique de l’appareil. -
Page 25: Il Y A Un Bruit De Fond Et Des Interférences Indésirables
5.5. IL Y A UN BRUIT DE FOND ET DES INTERFÉRENCES INDÉSIRABLES Ecartez l’appareil d’autres appareillages électriques qui peuvent provoquer des interférences. Au cas où les solutions ci-dessus ne remédient pas à votre problème, veuillez contacter un professionnel. Pour toute réparation, pendant ou après la garantie, veuillez contacter votre revendeur. -
Page 26: Recapitulatif Technique
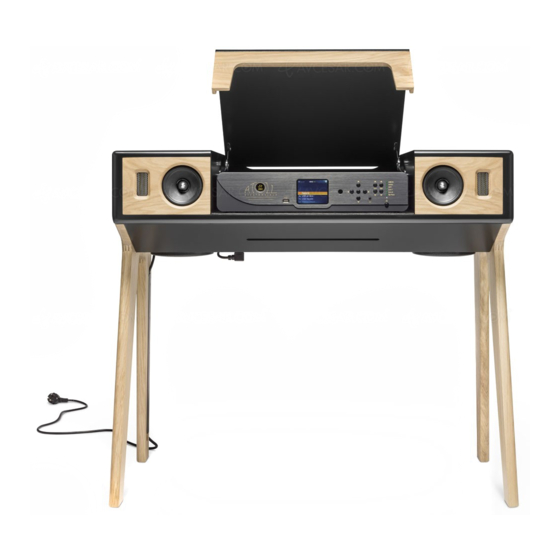
RÉCAPITULATIF TECHNIQUE Caractéristiques générales : Enceinte active Description : Système prêt à l’emploi. Une seule prise suffit pour faire fonc- tionner le LP / AP 160. Pieds de support latéraux et caches avant au choix (détachables pour le transport) Haut-parleurs exclusifs La Boite concept : - 2 x tweeters à ruban double cellules - 2 x haut-parleurs des médiums en fibre de cellulose 4’’ châssis en aluminium à longue excursion - 2 x haut-parleurs de graves en fibre de cellulose 6,5’’ châssis en aluminium à longue excursion -2 x haut-parleurs arrière large bande en fibre de cellulose et aluminium 2,75’’... - Page 29 SUMMARY SAFETY INFORMATION 1.1. STEP BY STEP 1.2. WARNINGS WARRANTY 2.1. WARRANTY BY LA BOITE CONCEPT LP/AP PRESENTATION 3.1. BOXES CONTENTS 3.2. LEGS SETUP 3.3. FRONT COVERS SETUP STARTING & USING 4.1. IDEAL POSITIONING OF THE LP/AP 160 IN YOUR ROOM 4.2.
- Page 30 1. SAFETY INFORMATION 1.1. STEP BY STEP Read the instructions Save the instructions Respect all the warnings Follow all the instructions Do not use this device nearby a water point Clean the device with dry clothes Do not obstruct openings. Follow the manufacturer’s instructions for the installation Do not install the device nearby a heat source such a radiator, a hot air outlet, a stove or any other device (including the audio amplifier) which generate heat. Respect the safety principle of the biased plug or an earth type plug. A biased plug is equipped with two pins, one larger than the other. An earth type plug has two pins and a third of the earth type. The large pin or the third pin are provided for your safety.
- Page 31 14 Have all maintenance work done by qualified, specialized personnel. Re pairs are required when the device has been damaged : power cord or plug damaged ; liquid spilled on the device or if an object has fallen on it ; if it rained on the device or if it’s moistened ; if the device not normally operating ; or if the device has fallen. 1.2. WARNINGS WARNING – To reduce the risk of fire or electric discharge, do not expose the unit to rain or wet sources. The unit is class 1 classified, and it must be connec- ted to the electrical wall power socket with an earth plug. The unit must be installed so that it can be removed from the electrical network by means of the earth plug (or with an adapted connector located on the rear side of the unit). If the power plug is used as a disconnection device, the unit must be available and easy to use. Only use the power cords supplied with the unit. We recom- mend not to place the device in a confined space. Do not place the unit on a rug, or on a smooth surface, and do not obstruct the air holes, the amplifier’s radiator (blades), or the output screens. The unit must not be used nearby water ; it must not be exposed to an eva- cuation source, or to splashing, or to any other types of liquids. No object filled with water such as vases, should be placed on the unit. The luminous indicator with the « arch in an equilateral triangle » symbol is intended to warn the user of the presence of a « dangerous current » not insula- ted in the product, and this current could be strong enough to cause en electric discharge on people.
- Page 32 DEEE Symbol The separate recycling of electrical and electronic devices. This product contains electrical and electronic equipments which can be reused, recycled or recovered, and therefore must not be discarded in your usual trash, which is not selectively sorted. Please return the unit or contact the authorized dealer who supplied you the product for more information. CE Mark This product is conformed to the European directives related to low voltage (2006/95/EC) and electromagnetic compatibility (89/336/EEC) when the unit is installed and used accordingly to the users manual instructions.
- Page 33 This equipment was created and tested in conformity with the limits of class B digital devices in accordance to FCC rules, part 15. These limits were defined to provide a reasonable protection against dangerous interferences inside a residential installation. The equipment generates, uses and may emits radio frequency radiation if it is not installed or used in conformity with the instructions, and this may cause dangerous interference for radio communications. However, it is impossible to guarantee that no interferences will appear in a specific installation. If this device generates interferences which disturbs the reception of radio or television emissions, which may be noted by activating or deactivating the device, we propose to the user to try to remedy such...
- Page 34 in sunlight or nearby a heat source. No fire source such as candles shall be placed on the device. Also, avoid any source which could cause vibration, dust, coolness or moisture. The device can be used at average temperatures. The unit must be installed on the two (2) LP/AP provided legs. Do not operate the central part without its sides bases. Do not install the equipment in a completely closed room or in a set of compartments.
- Page 35 2. WARRANTY 2.1. WARRANTY BY LA BOITE CONCEPT This product was designed and manufactured in accordance with the most rigorous quality standards. However, if a problem occurs, La Boite concept and its national distributors guarantee labour (exclusions possible) and spare parts free of charge in all countries served by a La Boite concept approved and certified distributor. This limited warranty is valid for a two years period from the date of purchase unless exclusions are applicable in some countries according to the national legislation. Contact La Boite concept’s distributor in your country for more information. Please make sure to subscribe to the warranty on La Boite concept website.
- Page 36 2 If the equipment is used in a country other than the country where it has been purchased, please contact the national La Boite concept distributor of the residence country, which will indicate you where you can have the equipment repaired. You can call La Boite concept in France or consult our website in order to obtain the address and the telephone/fax number of your local distributor. To validate your warranty, you should present the original copy of your purchase invoice or another form of proof of your purchase and the date of...
- Page 37 3 – STEP BY STEP 3.1. BOXES CONTENTS Remove all the components from their packaging. Do not forget that the LP/ AP 160 is heavy. Save the original packaging in case you should have to return the device because the limited warranty does not cover damages due to shipping. La Boite concept’s « return within 30 days » policy covers only products which are returned in their original packaging. Speaker packaging : The LP or AP acoustic speaker A RCA to RCA cable A RCA to Mini-Jack cable...
- Page 38 3.2. LEGS SETUP Remove all the components from their packaging. Save the original packaging in case you should have to return the device because the limited warranty does not cover damages due to shipping. La Boite concept’s « return within 30 days » policy covers only products which are returned in their original packaging. Use a screwdriver to fix the legs to the cabinet as described as on the following drawings. Remove the carton sheet and the 3 foam blocks before opening the safety envelope of the speaker system. OTER LA FEUILLE DE CARTON RÉCUPÉRER Collect the 4 screws that will PROTECTRICE AINSI QUE LES...
- Page 39 With the help of someone else, turn up the assembled speaker system over so it stands well on its legs. FÉLICITATIONS ! IL NE VOUS RESTE PLU AVEC L'AIDE D'UNE AUTRE PERSONNE, PARTIES RESTANTES RETOURNER L'ENCEINTE POUR LA POSER SUR PROTECTION. SES PIEDS. ONGRATULATIONS ITH THE HELP OF SOMEBODY ELSE TURN THE SPEAKER SYSTEM...
- Page 40 FRONT COVERS SETUP Remove all the components from their original packaging. Save the original packaging in case you should have to return the device because the limited warranty does not cover damages due to shipping. La Boite concept’s « return within 30 days » policy covers only products which are returned in their original packaging. For the AP 160, a front cover is provided and available in the legs box. We invite you to use it with your LP / AP 160. Take the front cover out of the box, put it in between the control panel and the upper panel. The magnets will have an auto- matic effect and the front cover will be automatically placed on the right spot. For the LP 160, the front cover has already been screwed to the cabinet. This front cover can be taken off at any moment with a screwdriver. Please refer to the step 3.2 : Legs set up...
- Page 41 STARTING & USING 4.1. IDEAL POSITIONING OF THE LP/AP 160 IN YOUR ROOM Traditional acoustic speakers have a restricted ideal listening field in both longitudinal and lateral planes. Thanks to its filtering and the pattern of its acoustic baffles, as well as the positioning of its rear loudspeakers, the LP/AP offers optimal listening wherever you are seated or moving. Thus, the LP/AP has been designed for both high fidelity listening at low levels, as well as for a group experience during a party at high levels. FILLING YOUR ROOM WITH SOUND. The spatialization of the « Wide Stereo Sound » (patented by La Boite concept) is the result of research aimed to obtain stereophonic sound rende- rings and homogeneous quality under all circumstances, whether the listener is alone or in a group, seated or standing, close to the speaker or further away.
- Page 42 4.2. INPUT SOURCES PANNEL From top to bottom (numbers corresponding to the control): Auxiliary Input Analog Input dedicated to your Wireless Kit Phono input dedicated to your pre-amplified turntable Coaxial input Optical input Optical input for connecting your Wireless Kit 4.3. CHOOSING AND PLUGING INPUTS On the LP/AP 160, you can select the source input on the control panel (part 4.4) by pressing the the pushbuttons on (1 to 6). Make sure to correctly plug the cables before selecting the source to play.
- Page 43 4.4. CONTROL PANEL : INPUT SELECTION Turning on the product and settings: Power switch AWAKE/SLEEPING MODES Momentary mute button 9-10 Adjusting Volume Sound settings of the LP/AP 160 Loudness Bass Mode Reset settings button Selecting the sound source : Selecting the Optical source Selecting the Coax source Selecting the Auxiliary source Selecting the Phono source...
- Page 44 4.5. BOTTOM PANEL Input for the 220v (or 110v) power cable which allows you to plug it to the power socket 14 Slow timer fuse for main protection 15 Master ON/OFF switch Safety Warnings Serial Number 18 Two fast fuses for the amplifier protection CAUTION: Before changing the fuse, it is essential to disconnect the power cable (13) and turn the Master ON/OFF switch (15) OFF. Only use the fuses specified on the panel located below your LP/AP 160 . Imperatively replace all protective covers before reactivating the LP/AP 160. Leave this maintenance operation to trained personnel.
- Page 45 4.6. SWITCH ON/OFF THE LP/AP 160 Plug the power cord into the socket (13) located under your LP/AP 160 Plug the power cord into the wall power socket and then make sure the Master ON/OFF switch (15) located near the power cord is turned ON. Turn on the LP/AP 160 amplifier by pressing the ON / OFF button (7) on the control panel. The white LED corresponding to the power button will be turned off. If you connect the LP/AP 160 for the first time, the MUTE LED (8) is ON. Repeatedly press the VOL + button (9) until the researched listening level. To turn OFF the LP/AP 160, press the ON/OFF button (7) located on the control panel. The corresponding LED indicator lights If you do not use your LP/AP 160 for an extended period, turn off the master ON/OFF switch (15) located under the bottom panel of the enclosure.
- Page 46 4.7. SETUP AND USING THE WIRELESS RECEIVER In the packaging of your LP/AP 160 various foam cases are provided. These cases each have a specific form designed to maintain different wireless mo- dules that we recommend you to use with your LP/AP 160 : - Apple Airport Express - NuForce ... - NuForce BTR100 Wireless Module International power plug (supplied) Bluetooth Kit Set of cables Choose the holster that fits your wireless system Remove the rear grid of your LP/AP 160. If you own the LP model, lift central panel up. Lift the flexible coating that lines the drawer of your LP/AP 160 Connect your audio cable (optical or analog) to the sources panel.
- Page 47 Connect it to your wireless device. Connect the power cable of your wireless device. Connect your power cable to the AC adapter available in the LP/AP 160. Place your wireless module in its dedicated foam Place the assembled kit and foam in its dedicated slot (in the left bottom drawer of your LP/AP 160) Arrange the cables in the groove provided for this purpose. 10 Put back the flexible coating that lines the drawer of your LP/AP 160, then close the center panel and put the rear grid back.
- Page 48 HOW TO ? CLEAN UP YOUR LP/AP 160 Before cleaning the device, disconnect it from the power socket. Clean the device only with a dry cloth. Do not use cleaning alcohol or solvent to clean the device’s surface. It could damage the lacquer and cause electrical failures and fire if it went into the electronic devices. Don’t try to clean inside your LP/ AP 160, except the drawer. NO POWER Make sure the power cable is correctly connected. Make sure that the plug is fully inserted in the power socket and that it is powered on. Check that the switch (15) located below the speaker and near the arrival of the power cable is switched on. Check the fuse state in the power plug (14) or the universal adapter.
- Page 49 5.5. BACKGROUND NOISES AND UNWANTED RADIO INTERFERENCES Separate the device from other electrical appliances which may be causing the interferences. If the above solutions do not solve your problem, please contact a professional. For any repairs during or after the warranty, please contact your dealer. 5.6. THERMAL PROTECTION OF THE POWER AMPLIFIER In case of high level extended uses, a rising temperature can alter the performance of the amplifier. Above 110°C, the highest level allowed to save optimal listening conditions is lowered until the amplifier cools down. LED 9 remains on as long as the thermal protection of the amplifier is not over.
- Page 50 TECHNICAL DESCRIPTION Main Features : Active speaker Description: All in one and ready to use system. A single power plug is suffi- cient to operate the LP/AP. Various legs and removable front cover available (removable for transport) Exclusive La Boite concept speakers : - 2 x double cells ribbon Tweeters - 2 x 4’’ Cellulose paper fiber cone, with long excursion aluminium chassis, Mid-range drivers - 2 x 6.5’’ Cellulose paper fiber cone, with long excursion aluminium chassis, Subwoofers -2 x 2.75’’ Aluminium and paper cone Full range drivers for Wide Sound on the rear of the cabinet (LaBoiteconcept pat.) Frequency Range: Atoll Amplifier - 2 x Stereo double-stages amplification...
- Page 52 269 chemin de Mentaberrikoborda, 64480 Ustaritz, France - +33 5 81 18 00 18 41 rue Sedaine, 75011 Paris , France - +33 14 372 5324 info@laboiteconcept.com...
Need help?
Do you have a question about the LP160 and is the answer not in the manual?
Questions and answers