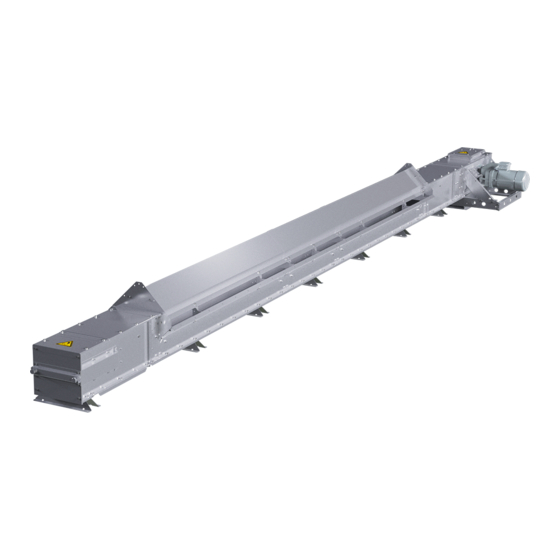
Skandia Elevator I Series Assembly Instructions Manual
Hide thumbs
Also See for I Series:
- Maintenance instructions manual (28 pages) ,
- Assembly instructions manual (24 pages) ,
- Assembly instructions manual (28 pages)
Table of Contents
Advertisement
Quick Links
Advertisement
Table of Contents

Summary of Contents for Skandia Elevator I Series
- Page 1 ASSEMBLY INSTRUCTIONS I-LINE KTIFg...
- Page 3 Warranty A 2-year factory warranty from the day of delivery applies to all models of Skandia Elevator AB machinery. A condition of the warranty and any subsequent compensation is that Skandia Elevator AB is contacted and an agreement reached between the customer and Skandia Elevator AB on how any faults should be rectified.
-
Page 5: Table Of Contents
Contents Thank you for choosing Skandia Elevator! Your conveyor system must be assembled correctly and maintained thoroughly if it is to operate satisfactorily. These assembly instructions and the separate maintenance instructions must be followed for the warranty to apply. We hope you will be pleased with your Skandia conveyor equipment for a long time. -
Page 6: Machine Overview
Machine overview DEK3030 DEK3070 DEK3030 Parts Pos. Tail end Trench intake section Intermediate section Drive Pop-up overloading flap Geared motor Outlet Safety decals X X X X SKANDIA ELEVATOR – KTIFg... -
Page 7: Safety Information
• Use protective gloves, helmet, steel-toed boots, ear defenders, protective goggles and high-vis vest when carrying out assembly, electrical connection, maintenance and operation of conveyor equipment. SKANDIA ELEVATOR – KTIFg... -
Page 8: Electrical Safety
Inadequate maintenance may lead to personal injury or damage to the conveyor equipment and/or other equipment. It can also cause malfunctions or a reduction in capacity. WARNING! Read the separate maintenance instructions before taking the machine into service. SKANDIA ELEVATOR – KTIFg... -
Page 9: Safety Decals
The machine is supplied with safety decals on delivery. They must not be removed or defaced. If a safety decal becomes damaged, you can order a new one free of charge from Skandia Elevator AB. Specify the part number of the decal. See the section below and the previous chapter Machine Overview. - Page 10 Warning for chain drive! DEK3040 SKANDIA ELEVATOR – DEK3040 DEK3050 Warning for belt drive! SKANDIA ELEVATOR – DEK3050 DEK3070 Warning for rotating conveyor drive shaft! SKANDIA ELEVATOR – DEK3070 Warning for rotating elevator drive shaft! DEK3080 SKANDIA ELEVATOR – DEK3080...
-
Page 11: Before Assembly
Install joining plates that have been removed in the same way and at the same end as the preassembled joining plates. Note! If an intermediate section/drive is installed on a trench intake section, specially adapted side joining plates are used. See the section "Assembling the machine." SKANDIA ELEVATOR – KTIFg... - Page 12 Lay out the machine parts in the order in which they are to be assembled. Remove the lid plates. Remove joining plates in trench intake sections to be assembled to the tail end/intermediate section. SKANDIA ELEVATOR – KTIFg...
-
Page 14: Connection Of The Machine
• The connection between the trench intake section and the intake pit must be permanently mounted and enclosed. • The intake pit must be installed with a permanent protective grating IMPORTANT! The full weight of the intake pit must never rest on the conveyor. SKANDIA ELEVATOR – KTIFg... -
Page 15: Connection To Following Machine
Connection to following machine Connect the conveyor to the following machine according to its assembly instructions. SKANDIA ELEVATOR – KTIFg... -
Page 16: Assembling The Machine
Note! Use lock nuts. Install the side bolts. IMPORTANT! Make sure the bottom joints are smooth. Assemble the side joints. IMPORTANT! When assembling outdoors, the seams in the side plates, lid, and inlet must be sealed with silicone. SKANDIA ELEVATOR – KTIFg... - Page 17 Install the chain return rollers in the intermediate sections. SKANDIA ELEVATOR – KTIFg...
- Page 18 Position the conveyor chain over the tail end's chain sprocket. Shorten it to the correct length if necessary, and then assemble it. IMPORTANT! Make sure that the conveyor chain is centered, runs freely, and does not foul the sides of the conveyor. SKANDIA ELEVATOR – KTIFg...
- Page 19 A new conveyor chain must be run for a period of time and then readjusted. IMPORTANT! Check the conveyor chain after 50 operating hours. See the separate maintenance instructions for information on maintenance. SKANDIA ELEVATOR – KTIFg...
- Page 20 • When assembling outdoors, the seams in the side plates, lid, and inlet must be sealed with silicone. WARNING! The rotating drive shaft is partially exposed between the gearbox motor and the drive if the weather cover is not used. SKANDIA ELEVATOR – KTIFg...
- Page 21 (and power shuts off) at actual overfill or deliberate opening. WARNING! • Ensure the safety switch for the pop up overloading flap is engaged during operation. • All electrical equipment must be connected by a qualified electrician. See separate connecting directions for electronics. SKANDIA ELEVATOR – KTIFg...
- Page 24 SKANDIA ELEVATOR AB KEDUMSVÄGEN 14, ARENTORP PHONE +46 (0)512 79 70 00 INFO@SKANDIAELEVATOR.COM S-534 94 VARA, SWEDEN FAX +46 (0)512 134 00 WWW.SKANDIAELEVATOR.COM...


Need help?
Do you have a question about the I Series and is the answer not in the manual?
Questions and answers