Table of Contents
Advertisement
Available languages
Available languages
Advertisement
Chapters
Table of Contents

Related Manuals for Enofrigo i.Am Series


Summary of Contents for Enofrigo i.Am Series
- Page 1 Bedienungsanweisung Weinlagerschrank WINE BLACK [Art. 436600100] 2019-11...
- Page 2 EINLEITUNG An unsere Kunden, Herzlichen Glückwunsch zum Kauf eines Enofrigo Geräts.. Sie haben sich mit dem Modell i.Am , das durch Leistungsstärke sowie fortschrittliche Konzeption und Technologie überzeugt, für ein Produkt höchster Zuverlässigkeit und Qualität entschieden. Bitte wenden Sie sich im Fall von Betriebsstörungen oder Wartungseingriffen an Fachpersonal Ihres Vertrauens, das bei jedem Bedarf über die erforderlichen Originalersatzteile verfügt.
-
Page 3: Table Of Contents
3.5.2 Abschaltung für längeren Zeitraum GARANTIE Das Produkt Enofrigo ist ab Kaufdatum von einer Vertragsgarantie gedeckt, deren Bestimmungen in den unter der Adresse www.enofrigo.com verfügbaren ALLGEMEINEN GESCHÄFTSBEDINGUNGEN festgelegt sind. WARNUNG – Die Garantie erlischt, falls das Gerät nicht entsprechend den Angaben dieser Anweisung verwendet wird. -
Page 4: Allgemeine Informationen
Allgemeine Hinweise und Sicherheitsregeln HINWEIS – Die vorliegende Anweisung ist Eigentum von Enofrigo . Jeder Nachdruck oder die Übermittlung der Inhalte dieser Unterlagen an Dritte sind verboten. Alle Rechte vorbehalten. Sie ist wesentlicher Bestandteil des Produkts und muss als solche immer zusammen mit dem Gerät aufbewahrt werden. -
Page 5: Verbote
Verbote VERBOTEN – Änderungen bzw. Reparaturversuche am Gerät. Jede Reparatur hat ausschließlich durch einen Fachtechniker zu erfolgen. – Lagern entflammbarer Materialien oder explosiver Substanzen (zum Beispiel Aerosolpackungen mit entflammbaren Treibmittel) im oder in der Nähe des Geräts. – Die Verwendung von Elektrogeräten in den Aufbewahrungsfächern der Getränke. –... -
Page 6: Beschreibung Des Geräts
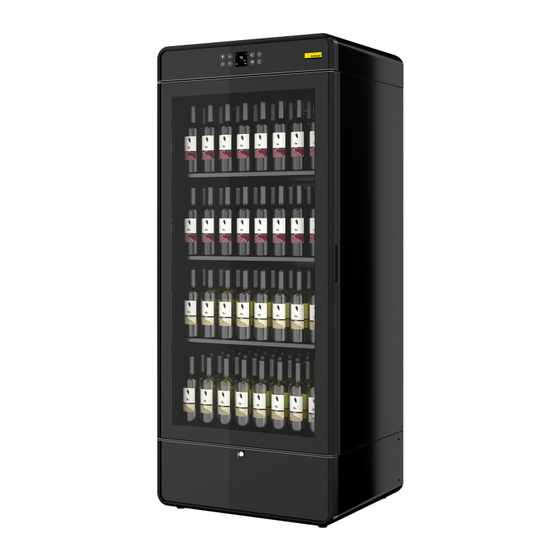
Beschreibung des Geräts Die Weintemperierer i.Am sind äußerst vielseitige Geräte mit einem vollkommen neuen Präsentationskonzept. Die in zahlreichen optischen Varianten oder zur Integration in eine vorhandene Einrichtung verfügbaren i.Am fügen sich stilvoll in jedes Ambiente ein und lassen der Kreativität des Wohndesigners freien Spielraum. Einmalig und bahnbrechend, die Weintemperierer i.Am zeichnen sich durch ein robustes Design und einen voll nutzbaren Innenraum aus. -
Page 7: Aufbau
Aufbau Dual Vent i.Am i.Am i.Am 1200 1600 2000 Tür Aufbau Roll-Bond Schutzplatte LED-Beleuchtung Glas Bedienfeld Schlüssel Stellfüße Schloss Kondensatschale Ventilatorschutz Stecker und Netzkabel Regale Motorschutz Ausziehbare Schubladen Oberes Fach (*) Roll-Bond Unteres Fach (*) Nur für DUAL VENT Modelle Abb. -
Page 8: Sicherheitsvorrichtungen
Sicherheitsvorrichtungen Die Weintemperierer i.Am beinhalten folgende Sicherheitsvorrichtungen: – Motorschutz – Ventilatorschutz Technische Eigenschaften i.Am BEZEICHNUNG H1200 H1600 H2000 Kapazität 295 (*) 460 (*) 600 (*) / 410 (**) Anz. Bordeaux-Flaschen (maximale Anzahl verstaute 170 (*) 272 (*) 358 (*) / 179 (**) Flaschen) UT 30°C - RF 55% °C... -
Page 9: Bedienfeld
Bedienfeld FUNKTIONSTASTEN DISPLAY BELEUCHTUNG ON / BELEUCHTUNG OFF: aktiviert/ Schloss deaktiviert die Beleuchtung des Temperierschranks. ON: Tastatursperre aktiviert. OFF: Tastatursperre deaktiviert. ON/STANDBY: längerem Druck Statuswechsel von ON auf STANDBY und umgekehrt Verdichter ON: ein. OFF: aus. Blinkend: Warten auf Einschaltung AUF: ruft die Programmierung des SOLLWERTS auf und vergrößert die Werte. -
Page 10: Installation
2 INSTALLATION Produktempfang Die Geräte i.Am werden als Transporteinheit in einem Schutzkarton mit Schrumpffolie auf einer Holzpalette angeliefert. Mit dem Produkt wird im Temperierschrank folgendes Material geliefert: – Installations, Betriebs und Wartungsanweisung – Schlüssel für Schloss Die Anweisung ist wesentlicher Bestandteil des Produkts. Sie muss vor dessen Installation und Inbetriebnahme gelesen und sorgfältig für künftigen Bedarf bzw. -
Page 11: Installationsraum
Installationsraum Der Installationsraum hat den technischen sowie gesundheitlichen Vorschriften und geltenden Bestimmungen zu entsprechen. Stellen Sie das Gerät an einem trockenen und ausreichend belüfteten Ort auf. Insbesondere: – Vermeiden Sie die Aufstellung des Geräts in der Nähe von Wärmequellen (Heizkörper, Backöfen, Herde usw.) oder Zugluft. –... - Page 12 VERBOTEN Situationen NEIN! NEIN! Zurück gegen die Wand Geschlossene Aussparung Abb. 6 Gewährt Situationen ✓ Abb. 7 Bezeichnung H1200 H1600 H2000 A (mm) B (mm) C (mm)
-
Page 13: Installation
Installation 2.4.1 Transport Packen Sie das Gerät folgendermaßen aus: – stellen Sie das Gerät in der Nähe des Installationsraums auf – führen Sie die Gabeln (1) des Handhubwagens ein und heben Sie das Gerät etwas an – lösen Sie die Schrauben (2) an jedem Sockel (3) und nehmen Sie sämtliche Sockel der Palette ab –... -
Page 14: Aufstellung Und Nivellierung
2.4.2 Aufstellung und Nivellierung – Ziehen Sie das Gerät mit kleinen Bewegungen auf den genauen Installationsstandort – neigen Sie das Gerät mit größter Vorsicht leicht seitlich und stellen Sie die Füße (8) ein – überprüfen Sie die einwandfreie Öffnung der vorderen Tür. Abb. -
Page 15: Bedienung
3 BEDIENUNG Grundlagen 3.1.1 Prüfungen Prüfen Sie vor Inbetriebnahme des Geräts, ob: – Die elektrische Anlage den einschlägigen Vorschriften entspricht und von Fachpersonal installiert wurde – die auf dem technischen Typenschild angegebene Gerätespannung der Netzspannung in der Steckdose entspricht – eine geeignete Erdung und ein 2-poliger Netzschalter mit Fehlerstromschutzschalter vorhanden sind –... -
Page 16: Inbetriebnahme
Inbetriebnahme Modus BOOST Beim Druck der Taste schaltet das Kühlaggregat auf den Nachdem Sie die Arbeitsgänge in Abschnitt "Grundlag en" abgeschlossen haben, können Sie das Gerät in Betrieb Modus BOOST (Symbol erleuchtet). Im Modus BOOST nehmen. erfolgt eine schnellere Kühlung des Temperierschranks, Hierzu: wobei weiterhin der Sollwert der vorherigen Einstellung –... -
Page 17: Tastatursperre
3.2.3 Tastatursperre Gehen Sie zum Ausbau der Schubladen folgendermaßen vor: – ziehen Sie die Schublade (3) heraus Zur Aktivierung der Tastatursperre: – lösen Befestigungsschrauben – drücken Sie einige Sekunden lang die Tastenkombination Schubladenschienen – nehmen Sie die Schienen (5) ab. –... -
Page 18: Abschaltung
Abschaltung 3.5.1 Vorübergehende Abschaltung Gehen Sie zur vorübergehenden Abschaltung des Geräts (Reinigung oder Wartung) folgendermaßen vor: – die Taste drücken. Kühlaggregat und Display schalten sich aus – betätigen Sie den zweipoligen Netzschalter des Geräts und ziehen Sie den Stecker (1) aus der Steckdose (2). Abb. -
Page 19: Wartung
4 WARTUNG Vorschriften (Häufigkeit) Reinigen Sie Innen- wie Außenseiten des Geräts regelmäßig. Damit stellen Sie einen einwandfreien Betrieb auf lange Zeit sicher. Außenreinigung Mit der täglichen Außenreinigung und Pflege der Türinnenseite werten Sie nicht nur die Optik des Geräts auf, sondern garantieren auch einen langfristig perfekten Erhaltungszustand. -
Page 20: Reinigung Des Innenraums
4.3.1 Reinigung des Innenraums Nachdem Sie das Gerät abgeschaltet und restlos entleert haben: – verwenden Sie zur Reinigung der Innenflächen und Regale ausschließlich ein mit lauwarmem Wasser und mildem Putzmittel angefeuchtetes Tuch – wischen Sie nach und trocknen Sie gründlich mit einem weichen Tuch –... -
Page 21: Regelmäßige Prüfungen
Regelmäßige Prüfungen Regelmäßige Prüfungen sind für den einwandfreien Betrieb des Geräts und zur Vorbeugung von Schäden entscheidend. Prüfung und Häufigkeit können Sie folgender Tabelle entnehmen. Prüfung Häufigkeit Vorsichtsmaßnahmen Vor Durchführung der Prüfung das im entsprechenden Abschnitt beschriebene Verfahren zum „Vorübergehenden Abschalten“ durchführen. Wenn Netzkabel Monatlich das Netzkabel beschädigt ist, darf es nur vom Hersteller... -
Page 22: Störungen - Ursachen - Abhilfen
Störungen - Ursachen - Abhilfen In folgender Tabelle sind die häufigsten Störungen mitsamt Abhilfen aufgelistet. Störung Ursache Abhilfe Der Stecker ist nicht richtig in der Steckdose Den Stecker richtig anschließen angeschlossen Das Gerät schaltet sich Den Zustand des Kabels überprüfen Fehlerhaftes Kabel Das Netzkabel ist beschädigt nicht ein durch einen Fachtechniker ersetzen lassen... -
Page 23: Kundendienst Und Ersatzteile
Störung Ursache Abhilfe Wasser im Die Ablassöffnung nach den Anweisungen in Abschnitt Die Ablassöffnung des Kondensats ist verstopft "Reinigung des Innenraums" auf Seite 20 reinigen Temperierschrank Geräusche und Die Stellfüße sind falsch eingestellt Richtig einstellen Vibrationen Den Temperierschrank nach den Anweisungen in Geruchsbildung im Abschnitt "Reinigung des Innenraums"... - Page 24 User Manual Refrigerated Wine Bottle Display Cabinet [Art. 436600100] 2019-11...
- Page 25 INTRODUCTION Dear Customer, Thank you for purchasing a product from Enofrigo i.Am model you have purchased is a high performance product characterised by advanced design and technology and excellent reliability and quality. We recommend that you entrust its maintenance and servicing to a qualified professional of your choice and insist on the use of original spare parts, if required.
- Page 26 Switching off for extended periods WARRANTY This Enofrigo product benefits from a conventional warranty , valid from the date of purchase. The terms of this warranty are specified in the GENERAL CONDITIONS OF SALE published on the website www.enofrigo.com. CAUTION! –...
-
Page 27: General
General warnings and safety precautions IMPORTANT! – This manual is the intellectual property of Enofrigo . Copying its contents or transmitting them to others is strictly forbidden. All rights reserved. This manual is an integral part of the appliance. It must accompany the appliance at all times, even if the appliance is sold or transferred to another owner, so that it can be consulted by the user or person responsible for servicing and repair. -
Page 28: Forbidden Actions
Forbidden actions STOP! – Do not modify or attempt to repair the appliance yourself. All repairs must be referred to a qualified technician. – Store flammable or explosive materials (e.g. aerosol cans containing flammable propellants) in or near the appliance. –... -
Page 29: Description Of The Appliance
Description of the appliance refrigerated cabinets are extremely versatile units that represent the latest development in wine display. They come in a i.Am wide range of external finishes and as units for integration in existing furnishings. i.Am refrigerated cabinets are easy to install in all environments and allow interior designers to express their creativity to the full. -
Page 30: Structure
Structure Dual Vent i.Am i.Am i.Am 1200 1600 2000 Door Structure Roll bond evaporator protection panel LED light Glass Control panel Adjustable feet Lock Condensate collection tank Fan protection grille Power cable and plug Shelves Motor protection grille Removable drawers Top compartment (*) Roll bond evaporator Bottom compartment (*) -
Page 31: Safety Devices
Safety devices refrigerated display cabinets are equipped with the following safety devices: i.Am – Motor protection grille – Fan protection grille Technical specifications i.Am DESCRIPTION H1200 H1600 H2000 Capacity 295 (*) 460 (*) 600 (*) / 410 (**) No. of Bordelaise bottles (max. quantity with stacked 170 (*) 272 (*) 358 (*) / 179 (**) -
Page 32: Control Panel
Control panel FUNCTION KEYS DISPLAY LIGHT ON / LIGHT OFF: switches cabinet lighting on/ Lock off. ON: keypad lock on. OFF: keypad lock off. ON/STAND BY: hold down for over 3s to switch from Compressor ON to STAND BY or vice-versa ON: on. -
Page 33: Installation
2 INSTALLATION Receiving the product cabinets are delivered in a single pack, wrapped in shrink-wrap film inside a cardboard box. i.Am The following material is also supplied, inside the cabinet: – Installation, operation and maintenance manual – Keys for the door lock This manual is an integral part of the appliance. -
Page 34: Place Of Installation
Place of installation The place of installation must conform to all applicable technical and health standards. Position the appliance in a dry, well ventilated place. In particular: – Do not position the appliance near sources of heat (radiators, ovens, cookers, etc.) or in draughts. –... - Page 35 FORBIDDEN positions Back against wall Narrow niche Fig. 6 PERMITTED positions ✓ Fig. 7 Description H1200 H1600 H2000 A (mm) B (mm) C (mm)
-
Page 36: Installation
Installation 2.4.1 Moving Proceed as follows to remove the packaging from the appliance – Move the appliance near the place of installation – Steer the forks (1) of the pallet transporter under the appliance and lift it just clear of the floor –... -
Page 37: Positioning And Levelling
2.4.2 Positioning and levelling – Move the appliance into its final installation position, proceeding in small steps at a time – Very carefully tilt the appliance and adjust the feet (8) – Make sure that the door of the cabinet opens properly. Fig. -
Page 38: Operation
3 OPERATION Preliminary steps 3.1.1 Checks Before switching the appliance on, perform the following checks: – Check that the electrical power supply has been installed by a qualified electrician in conformity to applicable standards – Check that the voltage of the appliance, as stated on the nameplate, corresponds to the voltage of the power socket –... -
Page 39: Putting Into Service
Putting into service BOOST mode Press the key to switch the refrigeration system to BOOST Once you have completed the operations listed in the section "Preliminary steps", the appliance can be put into service. mode (the symbol lights up). In BOOST mode, the cabinet Proceed as follows: cools more quickly, though the temperature setpoint remains –... -
Page 40: Keypad Lock
3.2.3 Keypad lock Proceed as follows to remove a drawer: – Pull out the drawer (3) To activate the keypad lock: – Unscrew the screws (4) holding the drawer runners in place – Press and hold the keys for a few seconds –... -
Page 41: Switching Off
Switching off 3.5.1 Switching off temporarily To switch the appliance off for a short time (e.g. for cleaning or maintenance) proceed as follows: – Press the key. The refrigeration system and the display switch off – Turn off the two pole power switch supplying power to the cabinet and pull out the plug (1) from the socket (2). Fig. -
Page 42: Maintenance
4 MAINTENANCE Good practice It is good practice to clean the outside and inside surfaces of the cabinet at regular intervals. This guarantees correct functioning and an extended working life. External cleaning Clean the outside of the cabinet and the inside of the door every day. Apart from keeping the cabinet looking attractive, this also helps to ensure an extended working life. -
Page 43: Cleaning The Interior Of The Cabinet
4.3.1 Cleaning the interior of the cabinet Switch off the refrigerated cabinet and remove all contents, then: – Clean all internal surfaces using only a cloth damped in a solution of warm water and neutral detergent – Rinse and dry thoroughly with a soft cloth –... -
Page 44: Regular Checks
Regular checks Regular checks are extremely important to keep your refrigerated cabinet fully efficient and to prevent malfunctions. See the table below for a list of checks and check frequencies. Type of check Frequency Precautions Before performing any checks, switch the appliance off as instructed in "Switching off temporarily". -
Page 45: Problems - Possible Causes - Solutions
Problems - Possible causes - Solutions The following table lists the most common problems and solutions. Problem Possible cause Solution The plug has not been correctly inserted in the power Insert the plug correctly socket Check the condition of the power cable. If the cable The appliance does not The power cable is damaged is damaged, contact a qualified electrician to have it... -
Page 46: Technical Assistance And Spare Parts
Problem Possible cause Solution Water inside the Clean the condensate drain as instructed in "Cleaning The condensate drain slot is blocked the interior of the cabinet" on page 20 refrigerated compartment Noise or vibration Feet badly adjusted Adjust the feet correctly Odours inside the Clean the refrigerated compartment as instructed in "... - Page 47 NordCap GmbH & Co. KG Thalenhorststraße 15 28307 Bremen Hauptsitz (Service, Finanzen & Personal, Lager, IT, Marketing) Telefon: +49 421 48557-0 Telefax: +49 421 488650 E-Mail: bremen@nordcap.de Die NordCap Verkaufsniederlassungen in Deutschland: Nord: Hamburg • Ost: Berlin • Süd: Ingelheim • West: Erkrath...
Need help?
Do you have a question about the i.Am Series and is the answer not in the manual?
Questions and answers