Enofrigo MIAMI B&R Instructions For Installation, Operation And Maintenance
Refrigerated wine bottle display cabinets
Hide thumbs
Also See for MIAMI B&R:
Table of Contents
Advertisement
MIAMI
Refrigerated wine bottle display
cabinets
MIAMI B&R
INSTRUCTIONS FOR INSTALLATION,
OPERATION AND MAINTENANCE
Read this manual carefully before installing and using the product. Keep this manual with the product for future reference.
International style
with Italian flavour
Code
MIAMI
MIAMI MEDIUM
EN (USA)
MIAMI MINI
Advertisement
Table of Contents

Related Manuals for Enofrigo MIAMI B&R


Summary of Contents for Enofrigo MIAMI B&R
- Page 1 MIAMI EN (USA) Refrigerated wine bottle display cabinets MIAMI B&R MIAMI MIAMI MEDIUM MIAMI MINI INSTRUCTIONS FOR INSTALLATION, OPERATION AND MAINTENANCE Read this manual carefully before installing and using the product. Keep this manual with the product for future reference. International style with Italian flavour Code...
- Page 2 INTRODUCTION Dear Customer, Thank you for purchasing a product from Enofrigo . The MIAMI model you have purchased is a high performance product characterised by advanced design and technology and excel- lent reliability and quality. We recommend that you entrust its maintenance and servicing to a qualified professional of your choice and insist on the use of original spare parts, if required.
-
Page 3: Table Of Contents
– The warranty is also invalidated if the customer modifies the product or has others modify it without the approval of the manufacturer or an authorised dealer or attempts to make repairs to the product himself. – The product must only be used for the purpose for which it has been expressly designed and made by Enofrigo . Enof- rigo cannot accept any responsibility, contractual or otherwise, for injury to persons or animals or damage to property deriving from incorrect installation, operation, settings or maintenance. -
Page 4: General
IMPORTANT! – This manual is the intellectual property of Enofrigo . Copying its contents or transmitting them to others is strictly for- bidden. All rights reserved. This manual is an integral part of the appliance. It must accompany the appliance at all times, even if the appliance is sold or transferred to another owner, so that it can be consulted by the user or person responsible for servicing or repair. -
Page 5: Description Of The Appliance
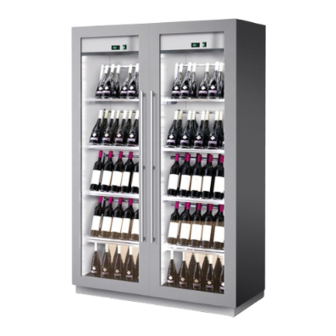
Description of the appliance MIAMI refrigerated cabinets are extremely versatile units that represent the latest development in wine display. Excellent internal illu- mination focuses attention on the bottles of wine stored inside. LED light units and a cleverly designed interior create an impression of depth and produce reflections of light that enhance the presentation of bottles of wine. -
Page 6: Structure
Structure 14 13 12 Door Handle Lock Glass Base LED light Evaporator panel Shelves Structure Fan switch (*) Fan cover Main switch Control panel Fan protection grille Condenser coil Adjustable flanged feet MIAMI MIAMI MIAMI MIAMI Power cable and plug B&R MEDIUM MINI... -
Page 7: Safety Devices
Safety devices MIAMI refrigerated display cabinets are equipped with the following safety devices: – Motor protection grille – Fan protection grille – Flanged feet for fixing to the floor Control panel MAIN SWITCH DISPLAY Compressor FUNCTION KEYS ON: on. OFF: off. Flashing: standby. Press for more than 5 s on power-up to access the pro- cedure for resetting default parameters. -
Page 8: Installation
2 INSTALLATION Receiving the product MIAMI appliances are delivered in a single pack, inside a cardboard box. The following material is also supplied, inside the cabinet: – Installation, operation and maintenance manual – Door handle and fixing screws – Keys for the door lock –... -
Page 9: Place Of Installation
Place of installation The place of installation must conform to all applicable technical and health standards. Position the appliance in a dry, well ventilated place. In particular: – Do not position the appliance near sources of heat (radiators, ovens, cookers, etc.) or in draughts. –... - Page 10 PERMITTED positions Fig. 7 Description MIAMI B&R MIAMI MIAMI MEDIUM MIAMI MINI A (in-mm) 8 - 200 8 - 200 8 - 200 8 - 200 B (in-mm) 6 - 150 6 - 150 6 - 150 6 - 150 C (in-mm) 8 - 200 8 - 200...
-
Page 11: Installation
Installation 2.4.1 Moving Once the appliance has been removed from its packing, proceed as follows to move it into position: – Move the appliance near the place of installation – Pull out the drip tray (1) from the rear of the appliance, taking care not to damage the cable (2) –... - Page 12 – Move the appliance away from its final installation position, proceeding in small steps at a time – Drill holes in the floor at the points marked and fit expansion bolts (8) (not supplied) Fig. 10 – Move the appliance into its final installation position, proceeding in small steps at a time, until the holes in the foot flanges line up with the holes drilled in the floor –...
-
Page 13: Fitting The Handle
– Fit the base (6) removed previously and fix it in place with the screws (5) – Seal any gaps between the base and the floor with silicone. Fig. 12 2.4.3 Fitting the handle – Open the front door – Position the handle (10) over the holes in the outside of the door –... -
Page 14: Operation
3 OPERATION Preliminary steps 3.1.1 Checks Before switching the appliance on, perform the following checks: – Check that the electrical power supply has been installed by a qualified electrician in conformity to applicable standards – Check that the voltage of the appliance, as stated on the nameplate, corresponds to the voltage of the power socket –... -
Page 15: Putting Into Service
Putting into service 3.2.2 Changing the temperature setpoint To change the SETPOINT "St" (default=32°F): Once you have completed the operations listed in the section " – Press Preliminary steps", the appliance can be put into service. for more than 1 s. The display reads out "Set" alter- To do so, proceed as follows: nating with the current value of "St"... -
Page 16: Restoring Default Settings
3.2.4 Restoring default settings – Press . The display reads out “Std” (after 2 s). To restore default (factory) settings: – Turn the main switch (1) to "0 - OFF" to switch off the elec- tronic controller – Press and hold while turning the main switch (1) to "I - ON"... -
Page 17: Alarm Codes And Resetting
Range Type Parameter Description Default U.M. min. max. Maximum time between consecutive defrosts hour/min 0 = no defrosting Sensor 2 end of defrosting temperature °C/°F Sensor 3 end of defrosting temperature (aux evaporator) °C/°F Sensor 4 end of defrosting temperature °C/°F Maximum defrost time min/s... -
Page 18: Cancelling Manual Reset Alarms
3.4.1 Cancelling manual reset alarms Interior equipment MIAMI If one or more alarms fails to reset automatically, active alarms refrigerated display cabinets are supplied with their inte- can be cancelled manually. To do so proceed as follows: rior equipment already installed. If certain compartments have –... -
Page 19: Switching Off
In ventilated mode, temperature is distributed uniformly throughout the cabinet. In static mode, natural temperature stratification occurs: the bottom section of the cabinet is cold- est, the top warmest. To use ventilated mode, switch on the fan using the switch (1) located inside the cabinet, at the top. -
Page 20: Maintenance
4 MAINTENANCE Good practice It is good practice to clean the outside and inside surfaces of the cabinet at regular intervals. This guarantees correct functioning and an extended working life. External cleaning Clean the outside of the cabinet and the inside of the door every day. Apart from keeping the cabinet looking attractive, this also helps to ensure an extended working life. -
Page 21: Cleaning The Interior Of The Cabinet
4.3.1 Cleaning the interior of the cabinet Switch off the refrigerated cabinet and remove all contents, then: – Clean all internal surfaces using only a cloth damped in a solution of warm water and neutral detergent – Rinse and dry thoroughly with a soft cloth –... -
Page 22: Problems - Possible Causes - Solutions
Problems - Possible causes - Solutions The following table lists the most common problems and solutions. Problem Possible cause Solution The plug has not been correctly inserted in the power Insert the plug correctly socket Check the condition of the power cable. If the cable The appliance does not The power cable is damaged is damaged, contact a qualified electrician to have it... -
Page 23: Technical Assistance And Spare Parts
Problem Possible cause Solution Close the door and check that nothing is preventing it from closing tightly The door is not hermetically closed Check the condition of the door seal. If it is worn, contact an authorised dealer to have it replaced Too much ice on the panel at the bottom of the refrig- The door is being kept open for too long... -
Page 24: Appendices
5 APPENDICES Functional electrical diagram MIAMI MINI... - Page 25 MIAMI MIAMI MEDIUM MIAMI B&R...
-
Page 26: Declaration Of Conformity
DICHIARAZIONE DI CONFORMITA’ GELIJKVORMIGHEIDS VERKLARING DECLARATION OF CONFORMITY OVERENSSTEMMELSESERKLÆRING KONFORMITÄTSERKLÄRUNG FÖRSÄKRAN OM ÖVERENSSTÄMMELSE DÉCLARATION DE CONFORMITÉ YHDENMUKAISUUSVAKUUTUS ∆ ∆ ∆ ∆ Η Η Η Η Λ Λ Λ Λ Ω Ω Ω Ω Σ Σ Σ Σ Η Η Η Η Σ Σ Σ Σ Υ Υ Υ Υ Μ Μ Μ Μ Μ Μ Μ Μ Ο Ο Ο Ο Ρ Ρ Ρ Ρ Φ Φ Φ Φ Ω Ω Ω Ω Σ Σ Σ Σ Η Η Η Η Σ Σ Σ Σ DECLARACION DE CONFORMIDAD DECLARACÃO DE CONFORMIDADE Rev 05 03/17... - Page 28 3705 William Richardson drive 46628 South Bend – Indiana, USA P : 001 574 2433672 F: 001 5742433672 info@enofrigoamerica.com www.enofrigoamerica.com Enofrigo reserves the right to make improvements to products at any time and without prior notice, without altering their essential characteristics.
Need help?
Do you have a question about the MIAMI B&R and is the answer not in the manual?
Questions and answers