
Related Manuals for DOREGRILL MAGFLAM Series


Summary of Contents for DOREGRILL MAGFLAM Series
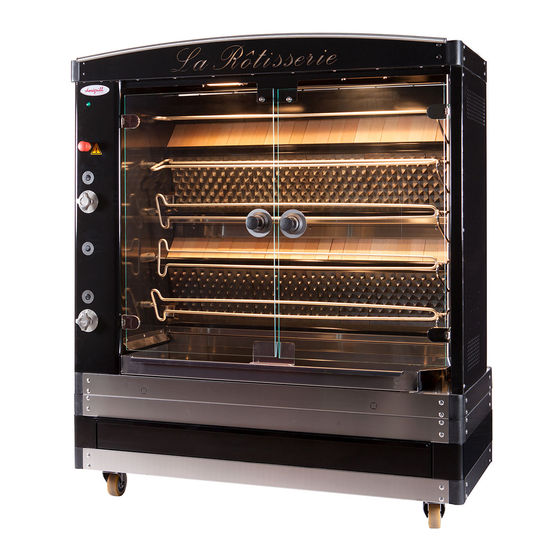
- Page 1 USER MANUAL PROFESSIONAL SPIT-ROAST ROTISSERIE OVEN MAGFLAM + MAGFLAM SHORT GAS series models: MAGFLAM 3 MAGFLAM 5 MAGFLAM 8 User manual for the MAGFLAM series gas rotisserie oven 2015...
- Page 2 DOREGRILL is always at the cutting edge in our field. We pour all our skills and experience into our ovens to ensure that we meet your expectations by striving to combine comfort and safety.
-
Page 3: Table Of Contents
10.2.1 Replacing a bulb........................... 34 10.2.2 Opening the technical cabinet ......................35 10.2.3 Changing the direction of a spit drive motor ..................35 10.2.4 Replacing the injector blocks ....................... 35 User manual for the MAGFLAM series gas rotisserie oven 2015... - Page 4 LECTRICAL PLAN FOR 11.2 MAGFLAM 5 ..........................40 LECTRICAL PLAN FOR 11.3 MAGFLAM 8 ..........................41 LECTRICAL PLAN FOR 11.4 ................................ 42 CERTIFICATION 11.5 .......................... 43 HE INFORMATION PANEL ON YOUR OVEN User manual for the MAGFLAM series gas rotisserie oven 2015...
- Page 5 INFORMATION FOR THE PRODUCT USER User manual for the MAGFLAM series gas rotisserie oven 2015...
- Page 6 This manual, valid for the MAGFLAM 3, MAGFLAM 5 and MAGFLAM 8 models, is an integral part of our rotisserie ovens, and must remain accessible to the operators. User manual for the MAGFLAM series gas rotisserie oven 2015...
- Page 7 “Gas” technician. 1.3. Reserved rights The reserved rights concerning this “MAGFLAM series gas rotisserie oven user manual” remain the property of the manufacturer. No part of the manual may be reproduced or distributed without prior written authorization by the manufacturer.
-
Page 8: Transport And Handling
On the base, a stainless steel fat tray fitted with a drainage tap (See “User information – Chapter 3 – Technical description” page 14, ref. 8-14) - Two tempered steel doors on hinges, with a 120° keep-open system. User manual for the MAGFLAM series gas rotisserie oven 2015... -
Page 9: Component Parts
The various components of the rotisserie oven are listed in Fig. 2 below, with details further down. 3.2.1 General exploded-view diagram Ceiling assembly ref: A Back assembly ref: D CI motor asembly ref: CI spit assembly ref: B FRONT VIEW Base assembly ref: C REAR VIEW User manual for the MAGFLAM series gas rotisserie oven 2015... - Page 10 Top side U Text window Ceiling Lighting system (plate on a domino support) Lighting system (plate on a Rounded front header domino support) Quartz lamp Rear rotisserie bar Joint Head guard User manual for the MAGFLAM series gas rotisserie oven 2015...
- Page 11 Information panel Screw-on magnet CE spit Klinger washer CI U reinforcement Strut Ø12 CI spit Klinger washer Hinge Stainless steel washer Window N°524 Fan washer User manual for the MAGFLAM series gas rotisserie oven Handle system Cap nut M6 2015...
- Page 12 Drainage tap base screw Trolley Drainage tap Trolley fixing screw Flat label safety panel Base Tray stop Window N°524 Collar Handle system Terminal support 80 mm bracket Bracket Drainage tap base screw User manual for the MAGFLAM series gas rotisserie oven 2015...
- Page 13 EXPLODED VIEW OF THE MAGFLAM 8 CEILING Components N° Name Number Name Number N° Lower base Upper base User manual for the MAGFLAM series gas rotisserie oven 2015...
- Page 14 EXPLODED VIEW OF THE MAGFLAM 5 CI MOTOR User manual for the MAGFLAM series gas rotisserie oven 2015...
- Page 15 Cast iron tube supports Ø 21 x 1200mm Indication for gas taps Emergency stop button Gas pressure regulator Gas inlet tap Indication switch 1/0 Gas manifold +1/4 turn valves Thermocouple User manual for the MAGFLAM series gas rotisserie oven 2015...
-
Page 16: Rotisserie Oven Dimensions
(safety). Next, turn it to in order to light the burner, then choose the strength with the large or small flame. Turn off the tap: turn the tap all the way to the right. User manual for the MAGFLAM series gas rotisserie oven 2015... - Page 17 Adjusting the spits on the support side: The spit support has, at each level, 3 notches. Position the round part of each spit into the desired notch. User manual for the MAGFLAM series gas rotisserie oven 2015...
-
Page 18: Start-Up
The PUSHGAZ name is the property of GIE GAZINOX. Cooking We recommend piercing your chickens before roasting them in order to improve their colour and texture. Insert each of the prepared spits according to the method above. User manual for the MAGFLAM series gas rotisserie oven 2015... -
Page 19: Maintenance
(after emptying it), the deflectors between the burners. Burner protector DECAGRILL, distributed by the DOREGRILL Company, is recommended to clean your rotisserie oven Weekly cleaning Clean the top of the rotisserie oven. Once dismantled, clean the removable grease filter used to trap greasy vapour from the extractor hood using a degreasing cleaning product. -
Page 20: End Of Season Cleaning (Or Half-Yearly)
Glass, whether tempered or not, is a fragile material which must be handled with care. It is sensitive to impact, and in no event can break by itself without one of the aforementioned causes. User manual for the MAGFLAM series gas rotisserie oven 2015... - Page 21 INFORMATION FOR THE PRODUCT INSTALLER User manual for the MAGFLAM series gas rotisserie oven 2015...
-
Page 22: Technical Characteristics
37 mbar 1,8 m³ 3,6 m³ 5,4m³ G 20 20 mbar 17,3 KW 34,6 KW 51,9 KW Nominal heat output 490 watts 550 watts 640 watts Total electricity consumption with lighting User manual for the MAGFLAM series gas rotisserie oven 2015... -
Page 23: Installation
IMPORTANT: Gas installation and modification operations must only be conducted by qualified “Gas” personnel. LHV: Lower Heating Value Burner usage pressure User manual for the MAGFLAM series gas rotisserie oven 2015... -
Page 24: Installation
IMPORTANT: A smoke extraction system with a roof ventilator is mandatory for all equipment in excess of 20kW. The DOREGRILL Company may provide, upon request and as an optional extra, an extractor fan which is suitable for your needs. The hood, which must be fitted with a removable grease filter, must be connected to the outside... - Page 25 The duct may be either vertical or horizontal, and must open out onto, respectively, a roof or a wall. It must have a backpressure damper. We recommend that the outlet connection be as direct as possible. Rotisserie in an alcove: User manual for the MAGFLAM series gas rotisserie oven 2015...
- Page 26 Corner extractor hood: Wall-mounted extractor hood: User manual for the MAGFLAM series gas rotisserie oven 2015...
-
Page 27: Static Or Mobile Connection, Natural Gas Or Propane
(you may require an adaptor). To ensure that the pipe is correctly assembled: You must install it between 90° elbow joints (see fig. 1) User manual for the MAGFLAM series gas rotisserie oven 2015... -
Page 28: Installation Of A Static Rotisserie Oven
In order to permanently connect the rotisserie oven to a gas pipe, use a flexible metal pipe which has been approved for use with gas and propane, such as TUBOGAZ or similar, and is covered by the NF D 36-123 standard (see fig. 01) User manual for the MAGFLAM series gas rotisserie oven 2015... -
Page 29: Installation Of A Mobile Rotisserie Oven
(see fig 04). This cable Indicated length, not including quick-connect connector R = Pipe curve radius User manual for the MAGFLAM series gas rotisserie oven 2015... -
Page 30: Natural Gas Supply
If this location is in the open air, the taps and other accessories at the cylinder station must be protected from impacts and bad weather by a hood or awning. User manual for the MAGFLAM series gas rotisserie oven 2015... - Page 31 The DOREGRILL Company may provide, as an optional extra, the full propane gas supply kit (loops, T- loops, inverter-pressure regulator, pressure regulator and flexible tubing). Figure 06 User manual for the MAGFLAM series gas rotisserie oven 2015...
- Page 32 MAINTENANCE User manual for the MAGFLAM series gas rotisserie oven 2015...
-
Page 33: 10 Maintenance / Customer Service
Several or all of the spits Call the installer are not turning -Defective electrical connection The spits are not turning -Defective electrical - Call the installer and the ambient lamps connection are off User manual for the MAGFLAM series gas rotisserie oven 2015... -
Page 34: Specific Repairs
Remove the glass screen. Remove the defective bulb and replace it with an identical, 300W max bulb. Never hold it in your bare hands; always use a paper or a clean cloth. The slightest fingerprint or trace of oil may render the bulb unusable. User manual for the MAGFLAM series gas rotisserie oven 2015... -
Page 35: Opening The Technical Cabinet
Before attempting any intervention to change the type of gas used on this oven, it is essential to contact the manufacturer (DOREGRILL). Additionally, any operation required to replace a defective injector or change the type of gas used, must be conducted by a qualified “Gas”... - Page 36 Reconnect the gas circuit and check, using foam, the seal on the entire circuit before closing the technical cabinet. Do not forget to replace the old information panel with the panel provided by the manufacturer with the new injector kit. User manual for the MAGFLAM series gas rotisserie oven 2015...
-
Page 37: Positioning The Magflam Burner Protector
POSITIONING THE MAGFLAM BURNER PROTECTOR 10.2.5 Déflecteur Retirer déflecteur en émail noir Positionnement du cache brûleur Cache brûleur User manual for the MAGFLAM series gas rotisserie oven 2015... - Page 38 APPENDICES User manual for the MAGFLAM series gas rotisserie oven 2015...
-
Page 39: 11 Appendices
11 APPENDICES 11.1 Electrical plan for MAGFLAM 3 User manual for the MAGFLAM series gas rotisserie oven 2015... -
Page 40: Electrical Plan For Magflam 5
11.2 Electrical plan for MAGFLAM 5 User manual for the MAGFLAM series gas rotisserie oven 2015... -
Page 41: Electrical Plan For Magflam 8
11.3 Electrical plan for MAGFLAM 8 User manual for the MAGFLAM series gas rotisserie oven 2015... -
Page 42: Gas Certification
GAS certification All of our gas rotisserie ovens have been awarded the CE, CERUG, Gaz De France and AFNOR certifications. They are regularly subjected to unexpected checks by these inspecting organisations. User manual for the MAGFLAM series gas rotisserie oven 2015... -
Page 43: The Information Panel On Your Oven
The MAGFLAM GAZ rotisserie oven which you have just purchased is prepared for use with the type of gas specified on the information panel below: Stick the label from the rotisserie oven information panel here User manual for the MAGFLAM series gas rotisserie oven 2015...
Need help?
Do you have a question about the MAGFLAM Series and is the answer not in the manual?
Questions and answers