Table of Contents
Advertisement
Quick Links
Advertisement
Table of Contents

Related Manuals for Asus PW191A


Summary of Contents for Asus PW191A
-
Page 1: User Guide
PW191 Series LCD Monitor User Guide... - Page 2 Product warranty or service will not be extended if: (1) the product is repaired, modified or altered, unless such repair, modification of alteration is authorized in writing by ASUS; or (2) the serial number of the product is defaced or missing.
-
Page 3: Table Of Contents
Table of contents Notices ... iv Safety information ... v Care & Cleaning ... vi Package contents ... viii Chapter 1: Chapter 1: Product introduction Product introduction Chapter 1: Chapter 1: Chapter 1: Product introduction Product introduction Product introduction Welcome! ... 1-2 Features ... -
Page 4: Notices
Notices Federal Communications Commission Statement Federal Communications Commission Statement Federal Communications Commission Statement Federal Communications Commission Statement Federal Communications Commission Statement This device complies with Part 15 of the FCC Rules. Operation is subject to the following two conditions: • This device may not cause harmful interference, and •... -
Page 5: Safety Information
Safety information • Before setting up the monitor, carefully read all the documentation that came with the package. • To prevent fire or shock hazard, never expose the monitor to rain or moisture. • Never try to open the monitor cabinet. The dangerous high voltages inside the monitor may result in serious physical injury. -
Page 6: Care & Cleaning
Care & Cleaning • Before you lift or reposition your monitor, it is better to disconnect the cables and power cord. Follow the correct lifting techniques when positioning the monitor. When lifting or carrying the monitor, grasp the edges of the monitor. Do not lift the display by the stand or the cord. •... -
Page 7: Where To Find More Information
A S U S w e b s i t e s A S U S w e b s i t e s The ASUS websites worldwide provide updated information on ASUS hardware and software products. Refer to http://www.asus.com 2 . -
Page 8: Package Contents
Support CD 1 x Power cord 1 x Power adapter 1 x VGA cable 1 x DVI cable (PW191/PW191A) 1 x Audio cable 1 x Rear connector cover If any of the above items is damaged or missing, contact your retailer immediately. - Page 9 Chapter 1 This chapter gives a general description of This chapter gives a g the ASUS LCD monitor PW191 Series. The chapter lists the monitor features including introduction on the front and rear panels.
-
Page 10: Chapter 1: Product Introduction
Welcome! Thank you for purchasing the ASUS The latest widescreen LCD monitor from ASUS provides a crisper, broader, and brighter display, plus a host of features that enhance your viewing experience. You can turn the ASUS counterclockwise for portrait orientation, giving you a full view of documents and web pages, and saving you the trouble of having to scroll the bar while you read or surf the Internet. -
Page 11: Monitor Introduction
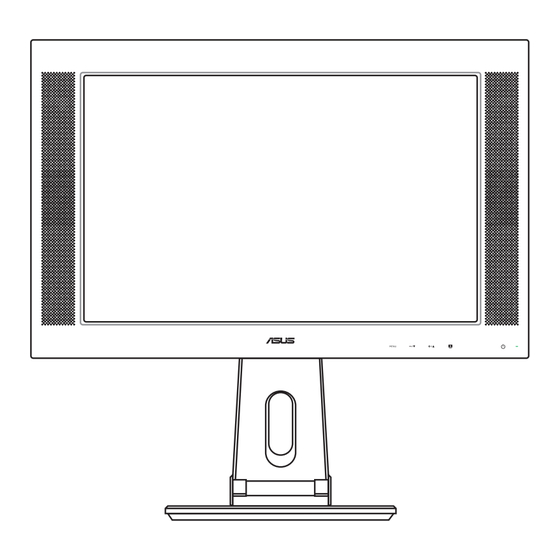
Monitor introduction Front of the LCD monitor Front of the LCD monitor Front of the LCD monitor Front of the LCD monitor Front of the LCD monitor Base 1 1 1 1 1 1 1 1 1 1 2 2 2 2 2 2 2 2 2 2 The touch sensors are sensitive. - Page 12 S e n s o r : S e n s o r : S e n s o r : S e n s o r : S e n s o r : • Use this hotkey to switch from five video preset modes (Game Mode, Night View Mode, Scenery Mode, Standard Mode, Theater Mode) with SPLENDID™...
-
Page 13: Rear Of The Lcd Monitor
D V I p o r t . D V I p o r t . digital signal connection. (PW191/PW191A) V G A p o r t . This 15-pin port is for PC VGA connection. V G A p o r t . - Page 14 1 - 6 1 - 6 1 - 6 1 - 6 1 - 6 C h a p t e r 1 : P r o d u c t i n t r o d u c t i o n C h a p t e r 1 : P r o d u c t i n t r o d u c t i o n C h a p t e r 1 : P r o d u c t i n t r o d u c t i o n C h a p t e r 1 : P r o d u c t i n t r o d u c t i o n...
- Page 15 Chapter 2 This chapter provides instructions on how to correctly connect cables and properly adjust the tilt of the LCD monitor.
-
Page 16: Unfolding The Monitor
Unfolding the monitor The monitor is folded in the package. To unfold the monitor, hold the stand with one hand and carefully tilt the monitor forward with the other hand. Stand Connecting the cables To connect the cables: Adjust the monitor to your desired height and tilt. -
Page 17: Turning The Monitor On
Connect the cables as shown: Power adapter VGA cable Audio cable To connect the audio cable: To connect the audio cable: • To connect the audio cable: To connect the audio cable: connect one end of the audio cable to To connect the audio cable: the monitor’s Audio-in port, and then connect the other end to the computer multi-media (or audio) card’s audio output. -
Page 18: Adjusting The Monitor
Adjusting the monitor You can adjust the monitor to several directions as shown below. • For optimal viewing, we recommend that you look at the full face of the monitor, then adjust the monitor to the angle that is most comfortable for you. -
Page 19: Detaching The Stand (For Vesa Wall Mount)
• The stand allows you to turn the monitor left/right up to 120º. 120º Detaching the stand (for VESA wall mount) The detachable stand of the PW191 monitor is specially designed for VESA wall mount. To detach the stand: Turn the VESA cover counterclockwise to open it. Remove the VESA cover from the stand. - Page 20 Use a screwdriver to remove the four screws on the stand of the monitor. The VESA wall mount (100 mm x 100 mm) is purchased separately. 2 - 6 2 - 6 2 - 6 2 - 6 2 - 6 C h a p t e r 2 : S e t u p C h a p t e r 2 : S e t u p C h a p t e r 2 : S e t u p...
- Page 21 Chapter 3 This chapter introduces the operating instruction, including how to use the OSD (On-Screen Display) menu and the Pivot ® Pro software.
-
Page 22: Chapter 3: General Instruction
OSD (On-Screen Display) menu 3.1.1 3.1.1 How to reconfigure How to reconfigure 3.1.1 3.1.1 3.1.1 How to reconfigure How to reconfigure How to reconfigure Touch the the OSD menu. Touch activate the desired function by touching the function selected has a sub-menu, touch navigate through the sub-menu functions. - Page 23 I m a g e I m a g e I m a g e I m a g e I m a g e You can adjust brightness, contrast, sharpness, saturation,position (VGA only), and focus (VGA only) from this main function. •...
-
Page 24: Osd Setup
S e l e c t In this function, you can select either VGA or DVI input source. (PW191/PW191A) S y s t e m S e t u p S y s t e m S e t u p... -
Page 25: Pivot Pro Software
® Pivot Pro Software • Pivot ® Pro is a software that is designed for rotatable monitors. With this software, you can rotate the image by 90º, 180º, and 270º to meet the orientation of the monitor. • Before starting to use this software, install Pivot •... -
Page 26: Troubleshooting (Faq)
Troubleshooting (FAQ) P r o b l e m P r o b l e m P r o b l e m P r o b l e m P r o b l e m Power LED is not ON The Power LED lights amber and there is no screen image... -
Page 27: Specification Summary
Specification summary (PW191) P a n e l T y p e P a n e l T y p e P a n e l T y p e P a n e l T y p e P a n e l T y p e P a n e l s i z e P a n e l s i z e P a n e l s i z e... - Page 28 Specification summary (PW191) P i v o t P i v o t P i v o t P i v o t P i v o t H e i g h t a d j u s t m e n t H e i g h t a d j u s t m e n t H e i g h t a d j u s t m e n t H e i g h t a d j u s t m e n t...
- Page 29 Specification summary (PW191A) P a n e l T y p e P a n e l T y p e P a n e l T y p e P a n e l T y p e P a n e l T y p e...
- Page 30 Specification summary (PW191A) P i v o t P i v o t P i v o t P i v o t P i v o t H e i g h t a d j u s t m e n t...
- Page 31 Specification summary (PW191S) P a n e l T y p e P a n e l T y p e P a n e l T y p e P a n e l T y p e P a n e l T y p e P a n e l s i z e P a n e l s i z e P a n e l s i z e...
- Page 32 Specification summary (PW191S) P i v o t P i v o t P i v o t P i v o t P i v o t H e i g h t a d j u s t m e n t H e i g h t a d j u s t m e n t H e i g h t a d j u s t m e n t H e i g h t a d j u s t m e n t...
-
Page 33: Supported Operating Modes
Supported operating modes S t a n d a r d S t a n d a r d S t a n d a r d S t a n d a r d S t a n d a r d R e s o l u t i o n R e s o l u t i o n R e s o l u t i o n... - Page 34 3 - 1 4 3 - 1 4 3 - 1 4 3 - 1 4 3 - 1 4 C h a p t e r 3 : G e n e r a l I n s t r u c t i o n C h a p t e r 3 : G e n e r a l I n s t r u c t i o n C h a p t e r 3 : G e n e r a l I n s t r u c t i o n C h a p t e r 3 : G e n e r a l I n s t r u c t i o n...
Need help?
Do you have a question about the PW191A and is the answer not in the manual?
Questions and answers