Table of Contents
Advertisement
Advertisement
Table of Contents

Related Manuals for Asus PW201


Summary of Contents for Asus PW201
-
Page 1: User Guide
PW201 LCD Monitor User Guide... - Page 2 Product warranty or service will not be extended if: (1) the product is repaired, modified or altered, unless such repair, modification of alteration is authorized in writing by ASUS; or (2) the serial number of the product is defaced or missing.
-
Page 3: Table Of Contents
Table of contents Notices ... iv Safety information ... v Care and Cleaning ... vi Package contents ... viii Chapter 1: Chapter 1: Product introduction Product introduction Chapter 1: Chapter 1: Chapter 1: Product introduction Product introduction Product introduction Welcome! ... 1-2 Features ... - Page 4 Setup - basic setup ... 3-14 3.4.9 Setup - capture format ... 3-15 3.4.10 Setup - capture mode ... 3-16 Troubleshooting (FAQ) ... 3-17 PW201 specification summary ... 3-18 Supported operating modes ... 3-20 i v i v i v i v i v...
-
Page 5: Notices
Notices Federal Communications Commission Statement Federal Communications Commission Statement Federal Communications Commission Statement Federal Communications Commission Statement Federal Communications Commission Statement This device complies with Part 15 of the FCC Rules. Operation is subject to the following two conditions: • This device may not cause harmful interference, and •... -
Page 6: Safety Information
Safety information • Before setting up the monitor, carefully read all the documentation that came with the package. • To prevent fire or shock hazard, never expose the monitor to rain or moisture. • Never try to open the monitor cabinet. The dangerous high voltages inside the monitor may result in serious physical injury. -
Page 7: Care And Cleaning
Care and Cleaning • Before you lift or reposition your monitor, it is better to disconnect the cables and power cord. Follow the correct lifting techniques when positioning the monitor. When lifting or carrying the monitor, grasp the edges of the monitor. Do not lift the display by the stand or the cord. •... -
Page 8: Where To Find More Information
A S U S w e b s i t e s A S U S w e b s i t e s The ASUS websites worldwide provide updated information on ASUS hardware and software products. Refer to http://www.asus.com 2 . -
Page 9: Package Contents
Package contents Check your PW201 LCD package for the following items: LCD monitor Quick Start Guide Support CD 1 x Power cord 1 x Power adapter 1 x VGA-Audio-USB 3-in-1 cable 1 x DVI cable 1 x RCA cable 1 x Rear connector cover If any of the above items is damaged or missing, contact your retailer immediately. - Page 10 x x x x x...
- Page 11 Chapter 1 This chapter gives a general description of the ASUS LCD monitor PW201. The chapter lists the monitor features including introduction on the front and rear panels as well as the side view.
-
Page 12: Chapter 1: Product Introduction
Internet. The PW201 also features a rotating swivel, adjustable tilt and height, and the glare panel that provides clearer and more vivid visual experience. -
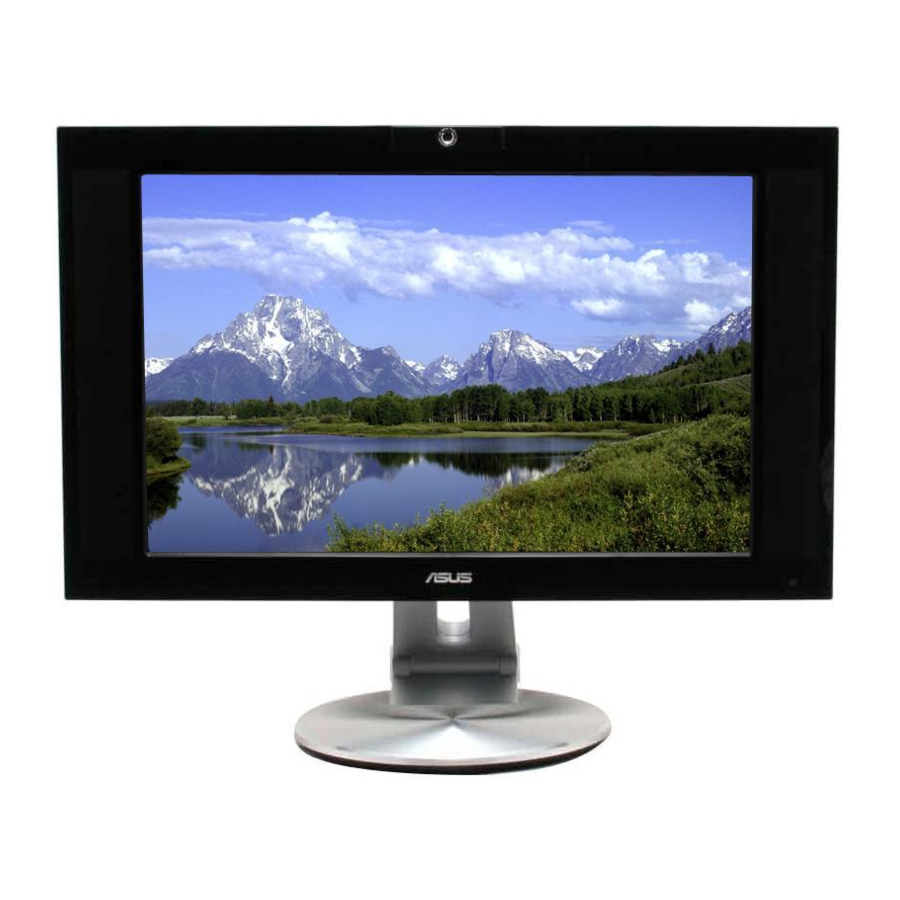
Page 13: Monitor Introduction
• VESA Display Data Channel DDC2B compliance • VESA wall mount compliance (100 x 100 mm) • EPA ENERGY STAR • Touch sensor buttons • RoHS compliance Monitor introduction Front view Front view Front view Front view Front view Stand 1 1 1 1 1 2 2 2 2 2 The touch sensors are sensitive. - Page 14 S e n s o r : S e n s o r : S e n s o r : S e n s o r : S e n s o r : • • • • • Touch this sensor to decrease the value of the function selected or move to the previous function.
-
Page 15: Kensington Lock
Rear view Rear view Rear view Rear view Rear view 3 3 3 3 3 1 1 1 1 1 2 2 2 2 2 D C - i n p o r t . This port connects the power connector from the D C - i n p o r t . -
Page 16: Side View
Side view Side view Side view Side view Side view U S B 2 . 0 p o r t s . U S B 2 . 0 p o r t s . These three Universal Serial Bus (USB) ports are U S B 2 . - Page 17 Chapter 2 This chapter provides instructions on how to correctly connect cables, properly adjust the LCD monitor, and install the VESA wall mount.
-
Page 18: Unfolding The Monitor
Unfolding the monitor The monitor is folded in the package. To unfold the monitor, hold the stand with one hand and carefully tilt the monitor forward with the other hand. Stand Connecting the cables To connect the cables: Adjust the monitor to your desired height and tilt. -
Page 19: Vga/Dvi Port
Connect the cables as shown. Refer to the succeeding sections for detailed instructions. Power adapter DVI cable VGA cable Component cable RCA cable PC Audio cable USB 2.0 cable Close the rear connector cover. Align the cover to the three slots near the ports and close the cover carefully. -
Page 20: Connecting The Power Adapter
2.2.2 2.2.2 Connecting a video equipment with Video Connecting a video equipment with Video 2.2.2 2.2.2 2.2.2 Connecting a video equipment with Video Connecting a video equipment with Video Connecting a video equipment with Video (composite) or S-Video output ports such as (composite) or S-Video output ports such as (composite) or S-Video output ports such as (composite) or S-Video output ports such as... -
Page 21: Adjusting The Monitor
Adjusting the monitor You can adjust the monitor to several directions as shown below. • For optimal viewing, we recommend that you look at the monitor, then adjust the monitor to the angle that is most comfortable for you. • Hold the stand to prevent the monitor from falling when you change its angle. -
Page 22: Detaching The Stand (For Vesa Wall Mount)
• The stand allows you to turn the monitor left/right up to 120º. Detaching the stand (for VESA wall mount) The detachable stand of the PW201 monitor is specially designed for VESA wall mount. To detach the stand: Turn the VESA cover counterclockwise to open it. - Page 23 Use a screwdriver to remove the four screws on the monitor stand. The VESA wall mount (100 mm x 100 mm) is purchased separately. A S U S L C D M o n i t o r P W 2 0 1 A S U S L C D M o n i t o r P W 2 0 1 A S U S L C D M o n i t o r P W 2 0 1 A S U S L C D M o n i t o r P W 2 0 1...
- Page 24 2 - 8 2 - 8 2 - 8 2 - 8 2 - 8 C h a p t e r 2 : S e t u p C h a p t e r 2 : S e t u p C h a p t e r 2 : S e t u p C h a p t e r 2 : S e t u p C h a p t e r 2 : S e t u p...
- Page 25 Chapter 3 This chapter introduces the operating instruction, including how to use the OSD (On-Screen Display) menu and activate the Pivot ® Pro and LifeFrame utilities.
-
Page 26: Osd (On-Screen Display) Menu
OSD (On-Screen Display) menu 3.1.1 3.1.1 3.1.1 3.1.1 3.1.1 Configuring the OSD Configuring the OSD Configuring the OSD Configuring the OSD Configuring the OSD Touch the the OSD menu. Touch activate the desired function by touching the function selected has a sub-menu, touch navigate through the sub-menu functions. - Page 27 I m a g e I m a g e I m a g e I m a g e I m a g e You can adjust brightness, contrast, sharpness, saturation, position (VGA only), and focus (VGA only) from this function.
-
Page 28: Front Bezel
In p u t S e l e c t n p u t S e l e c t n p u t S e l e c t n p u t S e l e c t n p u t S e l e c t •... - Page 29 S y s t e m S e t u p S y s t e m S e t u p S y s t e m S e t u p S y s t e m S e t u p S y s t e m S e t u p Allows you to adjust the system settings.
-
Page 30: Pivot Pro Software
® Pivot Pivot ® Pro is a software that is designed for rotatable monitors. With this software, you can rotate the image by 90º, 180º, and 270º to meet the orientation of the monitor. • Before starting to use this software, install Pivot •... -
Page 31: Using The Built-In Webcam
Using the built-in webcam This built-in webcam allows you to take photos and make videos; while talking to friends via Internet-based communication tools, you can use the webcam to show your vivid image. 3.3.1 3.3.1 Hardware Hardware 3.3.1 3.3.1 3.3.1 Hardware Hardware Hardware... -
Page 32: Lifeframe Software
• The LifeFrame software is bundled in the PW201 support CD. S y s t e m r e q u i r e m e n t s a r e a s f o l l o w s :... -
Page 33: Main Screen
3.4.2 3.4.2 Main screen Main screen 3.4.2 3.4.2 3.4.2 Main screen Main screen Main screen The main screen shows the following function areas: 1 1 1 1 1 3 3 3 3 3 2 2 2 2 2 3 3 3 3 3 C l i c k t h e t o p m i n i m i z e / m a x i m i z e b u t t o n t o s w i t c h m o d e s C l i c k t h e t o p m i n i m i z e / m a x i m i z e b u t t o n t o s w i t c h m o d e s C l i c k t h e t o p m i n i m i z e / m a x i m i z e b u t t o n t o s w i t c h m o d e s... -
Page 34: Preview Mode
S w i t c h m o d e S w i t c h m o d e- click to switch between playback/capture S w i t c h m o d e S w i t c h m o d e S w i t c h m o d e modes. -
Page 35: Operating Area
3.4.5 3.4.5 Operating area Operating area 3.4.5 3.4.5 3.4.5 Operating area Operating area Operating area Side section Side section Side section Side section Side section - Enhance - Effects - Setup Bottom section Bottom section Bottom section Bottom section Bottom section W h i l e W h i l e W h i l e... -
Page 36: Enhance
3 . 4 . 6 3 . 4 . 6 3 . 4 . 6 3 . 4 . 6 3 . 4 . 6 Enhance Enhance Enhance Enhance Enhance There are several options to enhance the quality of your captures. C h e c k o n e C h e c k o n e C h e c k o n e... -
Page 37: Effects
3.4.7 3.4.7 Effects Effects 3.4.7 3.4.7 3.4.7 Effects Effects Effects Enrich your images with special effects. P h o t o F r a m e . P h o t o F r a m e . P h o t o F r a m e . P h o t o F r a m e . -
Page 38: Setup - Basic Setup
C a m e r a S e l e c t i o n . C a m e r a S e l e c t i o n . The priority camera is set as ASUS USB2.0 webcam. -
Page 39: Setup - Capture Format
3.4.9 3.4.9 3.4.9 Setup - capture format Setup - capture format Setup - capture format 3.4.9 3.4.9 Setup - capture format Setup - capture format Many options for output size, image format/quality, and video format/quality. O u t p u t S i z e . O u t p u t S i z e . -
Page 40: Setup - Capture Mode
3.4.10 3.4.10 3.4.10 Setup - capture mode Setup - capture mode Setup - capture mode Setup - capture mode 3.4.10 3.4.10 Setup - capture mode You can adjust the capture mode with the following three items: recording time limited, auto capture sensitivity, and capture interval setting. -
Page 41: Troubleshooting (Faq)
Troubleshooting (FAQ) P r o b l e m P r o b l e m P r o b l e m P r o b l e m P r o b l e m Power LED is not ON •... -
Page 42: Pw201 Specification Summary
PW201 specification summary P a n e l T y p e P a n e l T y p e P a n e l T y p e P a n e l T y p e P a n e l T y p e... - Page 43 H e a d p h o n e p o r t H e a d p h o n e p o r t H e a d p h o n e p o r t H e a d p h o n e p o r t H e a d p h o n e p o r t C o l o r s C o l o r s...
-
Page 44: Supported Operating Modes
Supported operating modes S t a n d a r d S t a n d a r d S t a n d a r d R e s o l u t i o n R e s o l u t i o n R e s o l u t i o n S t a n d a r d S t a n d a r d...
Need help?
Do you have a question about the PW201 and is the answer not in the manual?
Questions and answers