
Subscribe to Our Youtube Channel
Related Manuals for Energie EcoTop Stainless 250i

Summary of Contents for Energie EcoTop Stainless 250i
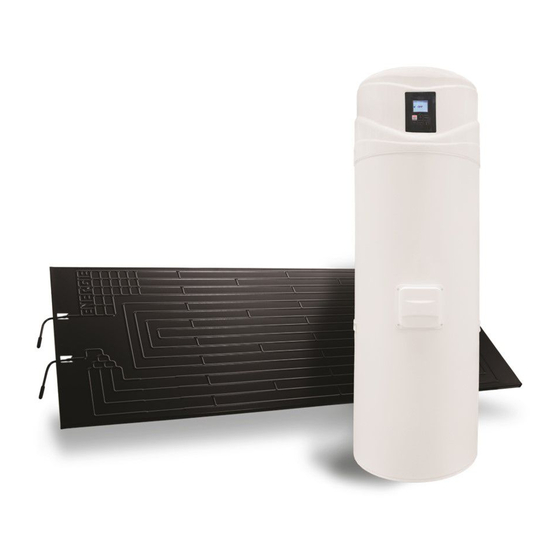
- Page 1 Owners Manual Thermodynamic Solar System EcoTop Stainless 250i/300i “Solar enhanced thermodynamic The smartest way to heat water” www.taec.co.nz...
- Page 2 The Energie Eco Solar Thermodynamic Systems Comply with the requirements of AS/NZS 2712:2007 As tested by Applied Research Services P.O. Box 867, Nelson, New Zealand. Report number 13-3627 Manual updated July 2020, version 1.4 The Alternative Energy Company Limited 03 540 3003 18 Warren Place, Mapua, Nelson, New Zealand 7005 info@taec.co.nz...
- Page 3 Very important! Please read the following instruction manual thoroughly before any installation works or operation of the solar system proceeds! Failure to install the equipment as detailed in this manual invalidates the warranty and could endanger people and damage property. The following safety warnings must be heeded: - This appliance must be installed to our installation instructions, AS/NZS 3500, and to the New Zealand Building Code G12 Water supplies.
-
Page 4: Table Of Contents
Empty the Hot Water Cylinder ....................23 Cleaning the strainer on the Pressure Reducing Valve ............24 Checking the control board fuses, and replacing the board ..........24 Electrical diagram .......................... 25 Energie Guarantee ........................26 TAEC EcoTop Owners Manual v1.4... -
Page 5: Introduction
1 Introduction 1.1 Refrigeration gas The refrigeration gas used in the Eco system is R134a. This is CFC free, is non-inflammable and does not harm the ozone layer; • The system comes preloaded with the required refrigerant gas. No additional gas should be required for the installation. -
Page 6: Dimensions Of Hot Water Cylinder
1.3 Dimensions of Hot Water Cylinder Note: The plumbing connections on the 250lt EcoTop cylinder are at an angle of 180° from the control panel. On the 300lt EcoTop cylinder they are at an angle 135° clockwise from the control panel. TAEC EcoTop Owners Manual v1.4... -
Page 7: Technical Features
1.4 Technical Features TAEC EcoTop Owners Manual v1.4... -
Page 8: Hot Water Cylinder
2 Hot Water Cylinder The EcoTop cylinder is made of stainless steel. The thermal insulation is of expanded polyurethane with a thickness of 45-50 mm. The hot water cylinder has a cold water inlet, hot water outlet, recirculation port and an outlet for the TPR valve. - Page 9 Thermodynamic block 1. Solenoid valve 2. Low pressure switch 3. Liquid tank 4. 2-way valve 5. 3-way valve 6. Filter dehumidifier 7. Unidirectional valve 8. Load/read valve 9. Compressor 10. Thermostatic expansion valve 11. Electronic circuit board Water Cylinder 12. Anode 13.
-
Page 10: Cylinder Labelling
2.1 Cylinder Labelling A. Model B. Production number C. Serial number D. Production date E. Volume F. Weight G. Downstream pressure of PRV H. Upstream maximum pressure of PRV I. Maximum pressure in hot water cylinder J. Maximum temperature in hot water cylinder K. -
Page 11: System Operation
3 System Operation 3.1 Start-up of the System Before starting the EcoTop system, check that the entire installation is set up according to the recommendations in the complete installation manual then you may plug your equipment to the power supply. You must not start the compressor if the installation has not been completed. -
Page 12: Control Panel
3.2 Control panel The control panel of the EcoTop is simple and intelligent. It allows you to configure several operating parameters according to the operating mode you select. It comprises six command keys (ON / OFF / CANCEL, MENU, COMP ▲, E-HEATER ▼, DISINFECT and OK / LOCK) which allow you to monitor and change settings. -
Page 13: Operating Modes
3.4 Operating Modes The Eco system is programmed to work in 3 running modes, ECO, AUTO and BOOST, which are summarized in this table: Note that the electrical heater is sometimes referred to as “Immersion heater”, or “Resistance” in the EcoTop system. ECO Operating Mode In ECO operating mode, the equipment runs only as a thermodynamic system to heat the water in the hot water cylinder maximising savings for the user. -
Page 14: Menu Parameters
The Eco comes set by default to work in the “ECO” operating mode. If the user wishes to alter the operating mode, he/she must follow these procedures: Once the panel is unlocked (press the OK button), the user can change the operating mode when he/she wishes;... -
Page 15: Parameters Description
3.6 Parameters Description Values Code Type Description Default Portuguese Language English English French Dutch Italian Spanish Clock Date and Time ON / OFF Chrono Chrono Chrono OFF ECO mode Mode A U T O m o d e BOOST mode Holidays Number of days 0 –... -
Page 16: Disinfect Function
Probes configuration 1 probe (S1) System Delete counters Anode ACI ON/OFF 3.7 Disinfect Function Eco’s electronic control features a Disinfect function, which consists of a water heating cycle increasing the temperature to a higher temperature for a period long enough to prevent the formation of germs inside the tank. -
Page 17: Tcc Function
If you set your equipment to Holiday mode DO NOT turn it off with the key ON/OFF, or the function will become inactive. If you do switch it OFF, or you come home early when you return from your holidays you must remember to switch on your equipment and cancel the days of holidays introduced (set the value to 0). -
Page 18: Crono (Sleep) Function
3.10 Crono (Sleep) Function The Crono, or Sleep function allows you to program the system to only operate only at the desired time. To set the hours of operation, perform the following procedure: 1. Enter the Menu and access the parameter F03- Crono 2. -
Page 19: Table Of Errors
3.11 Table of Errors The installation, assembly and repair of Eco must only be carried out by qualified technicians. Symbols Description Problem / Checking Anomaly detected in probe 1 Damaged probe – Measure internal resistance of probe which is Er01 – S1 approximately 10 KΩ... -
Page 20: Problem Solving
4 Problem Solving PROBLEM POSSIBLE CAUSES HOW TO PROCEED • Power supply failure Check the power supply No power • Check the main circuit breaker to control • Check the control boards fuses. board Cable damaged or disconnected Check the integrity of the electronic board’s electric circuit Equipment is switched off Press the key ON/OFF. - Page 21 PROBLEM POSSIBLE CAUSES HOW TO PROCEED Water is Problem with the probe Check error display on electronic board too hot / Problem with the thermostat Check correct running of thermostat steam present at Faulty control board Replace board Slow Outside air temperature is very The running of the equipment depends on running of weather conditions...
-
Page 22: System Maintenance
5 System Maintenance Before undertaking any maintenance operation on the equipment, make sure it is not plugged to the power supply! 5.1 General Inspection During the equipment’s useful life, the owner should carry out a general inspection of the equipment: •... -
Page 23: Safety Thermostat
5.3 Safety Thermostat There is a safety thermostat located next to the control panel. This is a safety system, designed to open at 80°C, or 16 amps current. If it activates you need to establish the reason that it deactivated so that you can address the problem. Note that there may be no indication on the control panel that this has been activated, so if you suspect that the electrical element is not working, may need to manually check this safety switch. -
Page 24: Cleaning The Strainer On The Pressure Reducing Valve
• Shut off the water supply valve and open a hot water tap • Open the system discharge valve 5.5 Cleaning the strainer on the Pressure Reducing Valve Periodically clean the filter of the pressure reducing valve: • Shut off the water supply. •... -
Page 25: Electrical Diagram
6 Electrical diagram Note: The exact position of the inputs on the board may vary TAEC EcoTop Owners Manual v1.4... -
Page 26: Energie Guarantee
7 Energie Guarantee This guarantee covers all defects to the goods supplied by Energie. It excludes the payment of any damage caused directly or indirectly by the supplied goods. The guarantee starts from the Installation of the goods. Solar Panel:... - Page 27 Thank you for choosing the Energie Solar Thermodynamic Hot Water system. We are always trying to improve our service and welcome feedback from our valued clients. Please contact us at The Alternative Energy Company with your comments. The Alternative Energy Company Limited...
Need help?
Do you have a question about the EcoTop Stainless 250i and is the answer not in the manual?
Questions and answers