Advertisement
Advertisement
Table of Contents

Summary of Contents for Rainbow Colour Changers PRO Series
- Page 1 SHORT REFERENCE PRO SERIES 6“, 8“, 12“, 15“ and 8-Lite R a i n b o w C o l o u r C h a n g e r s G m b H An der Talle 26-28 D-33102 Paderborn...
- Page 2 Frame length = Measure A Leader/Trailer length = Measure C Colour Changer Measurement A Measurement B Measurement C Measurement D 6” PRO 220 mm 168 mm 265 mm 71,5 mm 8” PRO 280 mm 228 mm 325 mm 101,5 mm 12”...
-
Page 3: Opening The Unit
Location of LED-display and DMX ports LED-Display and DMX ports Opening the unit Place the unit lying on its back on a table with the scroller front facing up and the display facing you. Open the lid of the unit by pressing the spring-loaded locking pins on each side and lifting the lid upwards as shown in the figure . R a i n b o w C o l o u r C h a n g e r s G m b H An der Talle 26-28 D-33102 Paderborn... - Page 4 Scroll load and power up the Scroller Loading the gel string: The gel string has to be cut exactly to the measurements for the scroller for proper operation. The delivered Gel Attachment Pins should be fixed at the beginning and the end. The heat resistant tape for connecting the single colour frames has to be on the side which turns away from the luminaire.
- Page 5 Slide the pin of the start gel leader into the slot of the left roll (B) and centre the colour string in the middle of the roll (C), so that the leaders at the side of the rolls do not have any touch with the colour string Fix the edges of the colour string with the help of the heat resistant tape.
- Page 6 Depending on the number of single frames, you have to tension the right roll: For 6“, 8“ and 12“ PRO Colour Changer: 2 – 21 colours = 6 full turns 21 – 25 colours = 7 full turns (for the 12“ PRO) 21 –...
- Page 7 Load the colour string (overall view): Step Key/Sequence Action Display Display/Action (?- for individual value) Alternating General adjustment of the not loaded Scroller Press Scroller is running to the start position When arriving at the start position Insert the gel string Press Gel string runs forward Press...
-
Page 8: Start Address
Start address Addressing: The start address always refers to the colour change. You can adjust the channels for fan- and motor-remote control individually. Key/Sequence Action Display Display/Action (?- for individual value) Press and hold until Flashing Press or hold Count downwards Press or hold Count upwards Press... -
Page 9: Fan Control
Fan control Adjustment of fan speed: Key/Sequence Action Display Display/Action (?- for individual value) Press in succession Mode Fan speed Different modes are possible Half Full Speed is adjustable via DMX Key/Sequence Action Display Display/Action (?- for individual value) Press Flashing Press Counts modes downwards... -
Page 10: Motor Control
Motor control Adjustment of motor speed / gel speed: Key/Sequence Action Display Display/Action (?- for individual value) Press in succession Mode Motor speed Different modes are possible Limited internal Speed is adjustable via DMX Key/Sequence Action Display Display/Action (?- for individual value) Press Flashing Press... - Page 11 Recalibration of the gel string Recalibration : The recalibration of the gel string should be used, when the lenght of the gel string has changed (e.g. heat). Key/Sequence Action Display Display/Action (?- for individual value) Press Press Flashing Press Confirm recalibration Gel string runs to start and end position Display shows the level of valid control adress...
-
Page 12: General Functions
General functions Key functions during powering up the scroller: Key/Sequence Action during the procedure of Display Display/Action power up (?- for individual value) Press and hold both keys while Reset to factory parameters incl. information powering up the scroller „no gel string is loaded“ Hold while powering up the scroller Locks the Scroller Hold while powering up the scroller... - Page 13 All Colour Changers of the PRO Range offer extensive functions with regard to configuration and special features, which are being operated via the integrated 4-figure LED display. An external power supply is required for operation. 6" PRO Colour Changer The extremely compact 6“ PRO Colour Changer suits all smaller luminaires with a front aperture of up to 127 mm, ecpecially the ETC Source 4. The Colour Changer is mounted to the luminaire via an adaptor plate with integrated heatshield (Rosco heatshield), which is available in 2 different sizes.
- Page 14 12“ PRO Colour Changer The 12“ PRO Colour Changer suits nearly all larger luminaires up to 2,5 KW with a front aperture of up to 266 mm. The Scroller is mounted via an universal adaptor that can be adjusted to a variety of standard sizes. The 12“ PRO can run up to 25 single colours, while the high resolution of the built-in electronics guarantees for extremely smooth colour changes and most precise positioning.
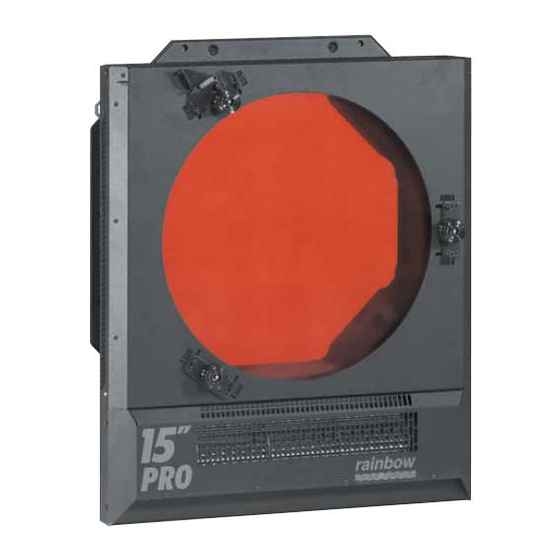
- Page 15 8-Lite PRO Colour Changer The 8-Lite PRO Colour Changer for 8-Lite Blinders corresponds with the other PRO Colour Changers in terms of operation, configuration and nearly all other functions. (Please find all details in our Operator´s manual.) You will find the only difference in tensioning the colour string –...
-
Page 16: Important Safety Requirements
Important safety requirements • Please read all instructions in our manual carefully. • Please also note the user instructions which are printed on the unit. • Cleanse the unit only with a moist duster and do never use solvents or aggressive cleaner. •...


Need help?
Do you have a question about the PRO Series and is the answer not in the manual?
Questions and answers