Advertisement
Quick Links
60 -(2-3/8") ALINEAR CON EL CANTO DE LA PUERTA - FOLD LINE ALONG DOOR EDGE - x fr xx
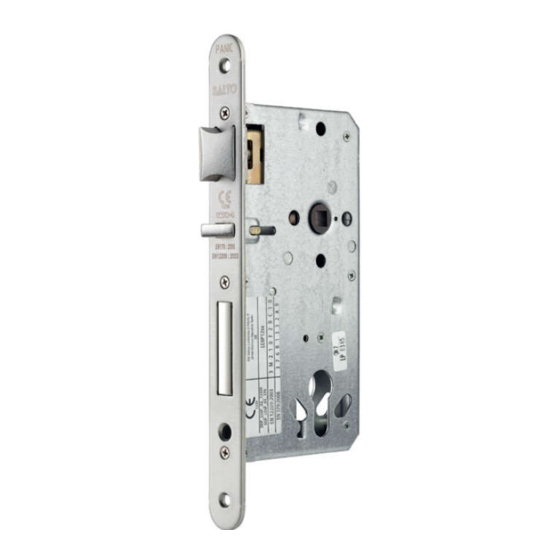
Mortise Lock: SALTO LE8Pxx....
Serrure: SALTO série LE8Pxx....
CE-EN 12209.2004 / CE-EN 179.2003* / EN 1634 EI
INSTALATIO N DE LA SE RRURE
F
PREPARATION DE LA PORTE
Note: si la gâche est existante sur l'encadrement de la porte,
positionnée la mortaise en l'utilisant comme référence.
(Voir la position de la gâche sur modèle)
1.
Marquez la ligne horizontale de chaque coté et bord de
la porte selon la hauteur à laquelle vous désirez situer
la poigné.
2.
Marquez une ligne verticale sur l'axe du champ de la
porte.
3.
Marquez une ligne verticale sur l'axe (entre le carré et
la têtière), de chaque côté de la porte pour l'alignement
du gabarit.
4.
Placez le gabarit sur le champ et bord de la porte.
Marquez seulement les trous supérieurs et inferieurs
de l'en-coffrage de la mortaise (A), sur le champ de la
porte (B), les trous latéraux pour les poignées (C), et le
trou pour le bouton de privacité (D) sur la façade
intérieure.
5.
Retirer le gabarit d'installation: situez la têtière de la
mortaise à plat contre le champ de la porte. Marquez la
découpe de la têtière pour son usinage.
EMPLACEMENT DE LA MORTAISE SUR LA PORTE
1.
Réalisez l'usinage du corps de la mortaise et de la
têtière suivant les instructions du gabarit.
INSTALATION DE LA MORTAISE
1.
Insérez la mortaise dans l'emplacement usiné.
2.
Marquez et percez les trous de la plaque frontale. Fixez
la têtière avec les vices dans son logement sur la porte.
INSTALATION DE LA GÂCHE
1.
Marquez la position de la gâche en suivant la référence
du gabarit.
2.
En utilisant la gâche comme référence, marquez le
contour et usinez. Perforez les trous des vis. Posez le
boitier de gâche et fixez la gâche avec les vis fournies.
Vérifications:
- Le pêne demi-tour et le pêne dormant passent par
leur logement de la têtière sans frotter.
- Espace entre la porte et l'encadrement entre 2 et 4mm
- Le recouvrement de la gâche doit dépasser au
minimum 2 mm, dans le cas contraire, contactez votre
distributeur pour voir la possibilité d'une gâche spéciale.
www.saltosystems.com
Dimension in millim etres (dimensi on in inches)
All contents current at time of publication.
SALTO Systems S.L. reserves the right to change availability of any
item in this catalogue, its design, construction, and/or materials.
70 -(2-3/4") ALINEAR CON EL CANTO DE LA PUERTA - FOLD LINE ALONG DOOR EDGE - x fr xx
22
85
(7/8")
(3-11/32")
145
(5-45/64")
60 Fire resistance
1
LOCK INSTALLATIO N
Eng
PREPARING THE DOOR
Note: if a strike is already fitted in the door frame, position the lock
using the strike as reference.
(See strike position on template)
1.
Draw a horizontal line on both sides and edge of the
door at the desired height of knob above floor.
2.
Draw a vertical centre line on door edge.
3.
Draw a vertical line on each side at the proper backset
to align the template.
4.
Position templates on edge and sides of door.
Mark ONLY top and bottom holes of mortise cavity (A)
and lock front (B) on door edge, and holes in the lateral
face of the door for handles (C) and turn piece (D) (only
needed in inside face). If SALTO electronic escutcheon
will be installed, mark the corresponding holes for its
fixing (E). The (E) holes can be done afterwards with
the template supplied using the electronic escutcheon.
5.
Remove template: Place lock face against door edge.
Trace outline of faceplate as guide for faceplate routing.
MORTISE THE DOOR
1.
Mortise door for lock body and faceplate as per
instructions on template.
INSTALLING THE LOCK BODY
1.
Insert the lock into the cavity.
2.
Mark & drill faceplate holes. Fasten with faceplate
screws to hold lock in place.
INSTALLING THE STRIKE
1.
Refer to latch to determine strike location on jamb.
2.
Using strike as template, mark and chisel recess.
Drill screw holes. Place dust box and strike and fasten
screws.
Please check thet:
- Deadbolt and latch fit the cavities of the strike
without touching it.
- Gap between door and jamb is between 2-4 mm.
- Strike flap should protrude a minimum 2mm, if it does
not, please ask your distributor for the availability of
special strikes.
Cerradura: SALTO serie LE8Pxx....
CE-EN 12209.2004 / CE-EN 179.2003* / EN 1634 EI
INSTALACI ON DE LA CE RRADURA
E
PREPARACION DE LA PUERTA
1.
Dibuje una línea horizontal en un lateral y borde de la
puerta, a la altura deseada de la manilla sobre suelo.
2.
Dibuje una línea vertical en el eje del canto de la puerta
(eje de la cerradura).
3.
Dibuje una línea vertical en el lateral de la puerta para fijar
la entrada y poder alinear la plantilla.
4.
Coloque la plantilla en el borde y lado de la puerta.
Marque solamente los agujeros superior e inferior de la
caja (A) y frente (B) de la cerradura en el borde de la
puerta, y los laterales para manilla (C) y cilindro (D) en la
cara lateral. Si instala escudo electrónico, marque los
correspondientes a su fijación (E). Los agujeros (E)
puede hacerlos posteriormente con la platilla suministrada
con el escudo electrónico.
5.
Quite la plantilla: coloque la cara de la cerradura contra el
borde de la puerta con referencia a las marcas (B).
Marque el contorno del frente para realizar el cajeado del
mismo.
CERRADURA DE EMBUTIR EN LA PUERTA
1.
Realice el cajeado del cuerpo de la cerradura y el frente
siguiendo las instrucciones de la plantilla.
INSTALACIÓN DE LA CERRADURA DE EMBUTIR
1.
Inserte la cerradura en la cavidad.
2.
Marque y perfore los agujeros del frente. Sujete con los
tornillos el frente de la cerradura en su alojamiento.
INSTALACIÓN DEL CERRADERO
1.
Tome la referencia con el picaporte, para determinar la
posición del cerradero.
2.
Usando el cerradero como plantilla, marcar su perfil,
cajear con el formón y perfore los agujeros. Coloque la
caja-cerradero y sujete el cerradero con los tornillos
suministrados.
Comprobar:
- El picaporte y la palanca entran en los huecos del
cerradero sin rozar.
- Holgura entre puerta y marco, entre 2 mm y 4 mm.
- La solapa del cerradero debe sobresalir mínimo 2 mm,
de lo contrario, consulte con su distribuidor, la
disponibilidad de cerraderos especiales.
www.saltosystems.com
Dimension in millim etres (dimensi on in inches)
All contents current at time of publication.
SALTO Systems S.L. reserves the right to change availability of any
item in this catalogue, its design, construction, and/or materials.
12 Agujeros / Holes / Trous
Profundidad / Depth / Profondeur 105 (4-9/64")
106
(4-11/64")
60 Fire resistance
1
Conjunto de esc udo eletrónico y cerradura
-Series Eix1x
-Series Ei4xx
-Series EiCD 0
(Rated up to 90 min.
in composite core
door)
MORTISE LOCK or
LISTED
LATCH FOR USE IN
W/N:14398
FIRE DOOR
SALTO
SEE INSTALLATION
SYSTEMS, S.L
INSTRUCTIONS
(Made in Spain)
(E)
OF
(B)
LEVER
C
L
(A)
OF
(C)
C
LEVER
L
(D)
(D)
(A)
(E)
(B)
C
C
L
L
OF
OF
BASKSET
DOOR
EDGE
LEP02xx
SALTO SYSTEMS, S.L.
Pol. Indust. Lanbarren, c/Arkotz, 9
20180, Oiartzun-Gipuzkoa. Spain
1239 -0802901/0802903
EN 12209: 2 004
3 M 2 1 0 F 2 B 0 1 0
EN 179: 2 003VC1
3
7
6
LEP12xx
SALTO SYSTEMS, S.L.
Pol. Indust. Lanbarren, c/Arkotz, 9
20180, Oiartzun-Gipuzkoa. Spain
1239 -0802902/0802903
EN 12209: 2 004
3 M 2 1 0 F 2 B C 1 0
EN 179: 2 003VC1
3
6
7
LEP22xx
SALTO SYSTEMS, S.L.
Pol. Indust. Lanbarren, c/Arkotz, 9
20180, Oiartzun-Gipuzkoa. Spain
1239 -0802902
EN 12209: 2 004
3 M 2 1 0 F 2 B C 1 0
201515 -
-ED.28/06/2010
08
B
1
3
3
2
A
B
08
B
1
3
2
A
B
3
08
Advertisement

Related Manuals for Salto LE8P Series


Summary of Contents for Salto LE8P Series
- Page 1 All contents current at time of publication. 201515 - -ED.28/06/2010 SALTO Systems S.L. reserves the right to change availability of any SALTO Systems S.L. reserves the right to change availability of any item in this catalogue, its design, construction, and/or materials.
- Page 2 Turn the lever to deactivate auxiliary latch. 1-7/8" * Pull the auxiliary latch forward and turn it 180º. *Otros espesores consultar a SALTO *For other thickness consult to SALTO CHANGEMENT DE MAIN *Pour d'autres épaisseurs consulter SALTO Opérez comme indiqué dans la figure: Poussez l’anti-carte pour projecter le pêne demi tour.
Need help?
Do you have a question about the LE8P Series and is the answer not in the manual?
Questions and answers