Ariston ASL 75 CXS NA Use And Installation Manual
Tumble dryer
Hide thumbs
Also See for ASL 75 CXS NA:
- Care, use and installation booklet (40 pages) ,
- Repair manual (18 pages) ,
- Datasheet (1 page)
Table of Contents
Advertisement
Available languages
Available languages
Quick Links
Care, Use and Installation booklet
EN
ES
English 1
Español, 14
ASL75CXS
service@aristonamerica.com
Contents
F
Français, 27
Start and Programs, 4-6
Table of programs
Laundry, 7-8
Troubleshooting, 10
Installation, 11-12
Warranties, 13
TUMBLE DRYER
1
EN
Advertisement
Chapters
Table of Contents

Related Manuals for Ariston ASL 75 CXS NA


Summary of Contents for Ariston ASL 75 CXS NA
-
Page 1: Table Of Contents
Care, Use and Installation booklet English 1 Español, 14 Français, 27 ASL75CXS service@aristonamerica.com TUMBLE DRYER Contents Warnings and Safety Instructions, 2 Important safety instructions Grounding instructions Dryer Descriptions, 3 To open door The features Control panel Start and Programs, 4-6 Choosing a program Table of programs The controls... -
Page 2: Warnings And Safety Instructions
Warnings and Safety Instructions ! The appliance has been designed and built according to international safety standards. These warnings are given for safety reasons and must be read carefully. Important safety instructions WARNING: To reduce the risk of fire, electric shock or injury to persons when using your appliance, follow the basic precautions, including the following: Read all instructions before using the appliance. -
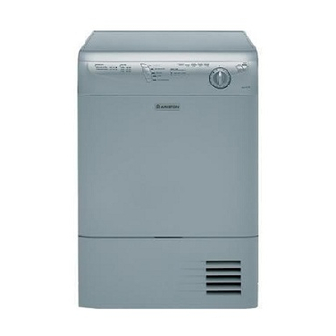
Page 3: Dryer Descriptions
Dryer Description To open the door Press and release the front panel in position shown Control panel OPTION Buttons Programs Guide The START/CANCEL button starts a selected program. When you press this button there will be one beep and the progress lights will flash to confirm the action. -
Page 4: Start And Programs
Start and Programs Choosing a program 1. Plug the dryer into the electrical socket. 2. Sort your laundry according to fabric type (see Laundry). 3. Open the door and make sure the filter is clean (see Maintenance). 4. Load the machine and make sure items are not in the way of the door seal. - Page 5 Start and Programs Programs ! If the On/Off light is not lit; Press the ON/OFF button and then select program. Program What it does... Sensor Dry Dries your clothes on HIGH heat setting, ready for putting away. Regular Cottons Cupboard dry Sensor Dry Dries your clothes on LOW Heat setting, ready for putting away.
-
Page 6: Start And Programs
Start and Programs The Controls PROGRAMS knob ! Warning, if after pressing the start button, the programs knob position is changed, the new position will NOT change the program selected. ! Position 0, turning the programs knob to position 0 resets and cancels a program. -
Page 7: Laundry
Laundry Sorting your laundry Check symbols on clothing labels to make sure that the articles can be tumble dried. Sort laundry by fabric type. Empty pockets and check buttons. Close zippers and hooks and tie loose belts and strings. Wring out each item in order to eliminate as much excess water as possible. -
Page 8: Special Clothing Items
Laundry Special clothing items Blankets and Bedspreads: acrylic items (Acilan, Courtelle, Orion, Dralon) must be dried with special care on LOW heat setting. Avoid drying for a long period of time. Pleated or creased garments: read the manufacturer’s drying instructions on the garment. Starched articles: do not dry these with non-starched items. -
Page 9: Maintenance And Care
Maintenance and Care When to switch off the electricity ! Unplug your dryer when not using it, when cleaning it and during maintenance activities. Clean the filter after each cycle The filter is an important part of your dryer: it accumulates lint and fluff that is formed while drying. When finished drying, clean the filter by rinsing it under running water or with your vacuum cleaner. -
Page 10: Troubleshooting
Troubleshooting Before you call our Customer Care Department, go through the following troubleshooting suggestions: Problem: The dryer won’t start. Drying cycle will not begin. Its taking a long time to dry. Programme finishes and clothes are damper than expected. The ON/OFF light flashes to indicate a fault. -
Page 11: Installation
Installation Instructions Read these instructions with care. These instructions are provided for use by qualified installers, in addition the installation must comply with: In the United States, in accordance with the National Electric Code ANSI/NFPA70 - latest edition and any State, Municipal or local codes. In Canada, in accordance with the Canadian Electric Code C22.1 - latest edition and any Provincial, Municipal or local codes. -
Page 12: Water Drain
(see above diagram). service@aristonamerica.com Stacking kit The dryer is provided with a stacking kit, which allows the dryer to be fitted to the top of an Ariston washing machine: Model AW125NA Model AW129NA Model AW149NA The kit contains all the necessary brackets and screws. -
Page 13: Warranties
STATEMENT OF ARISTON WARRANTY The warranties provided by (Ariston) in this statement of warranties apply only to Ariston appliances sold to the first using purchaser by Ariston or its authorized distributors, dealers, retailers or service centres in the United States or Canada. - Page 14 Folleto de cuidados, uso e instalación English 1 Español, 14 ASL75CXS service@aristonamerica.com Índice Advertencias e instrucciones de seguridad, 15 Français, 27 Instrucciones de seguridad importantes Instrucciones para la puesta a tierra Descripción de la secadora, 16 Para abrir la puerta La configuración Panel de control Puesta en marcha y programas, 17-19...
-
Page 15: Es Es
Advertencias e instrucciones de seguridad ! La secadora ha sido diseñada y fabricada de conformidad con las normas de seguridad internacionales. Estas advertencias se incluyen por motivos de seguridad, y deben leerse detenidamente. Instrucciones de seguridad importantes ADVERTENCIA: Para reducir el riesgo de incendios, descargas eléctricas o lesiones al utilizar la secadora, aténgase a las precauciones básicas, incluyendo las siguientes: Lea todas las instrucciones antes de utilizar la secadora. -
Page 16: Descripción De La Secadora
Descripción de la secadora Para abrir la puerta Pulse y suelte el panel frontal en la posición indicada Panel de control Guía de programas Con el botón INICIO/CANCELAR (START) se pone en marcha el programa seleccionado. Al pulsar este botón se oirá un pitido y los testigos de progresión se iluminarán para confirmar la operación. -
Page 17: Puesta En Marcha Y Programas
Puesta en marcha y programas Selección de un programa 1. Enchufe la secadora a la toma de corriente eléctrica. 2. Clasifique la colada en función del tipo de tejido (véase Colada). 3. Abra la puerta y asegúrese de que el filtro esté limpio y bien colocado (véase Mantenimiento). - Page 18 Puesta en marcha y programas Programas ! Si no se enciende el testigo Encendido/Apagado (On/Off): pulse el botón ENCENDIDO/APAGADO (ON/OFF) y, a continuación, seleccione un programa. Programa Qué hace... Secado por sensor Seca las prendas con el ajuste ALTA TEMPERATURA y las deja listas para usar.
-
Page 19: Los Mandos
Puesta en marcha y programas Los mandos Mando PROGRAMAS ! Advertencia, Si después de pulsar el botón inicio (START) la posición del mando PROGRAMAS ha cambiado, la nueva posición NO cambiará el programa seleccionado. ! Posición 0: al situar el mando en la posición 0, el enteras programa se cancela. -
Page 20: Colada
Colada Selección de la colada Observe los símbolos de las etiquetas de las prendas para asegurarse de que los artículos pueden secarse con esta secadora. Clasifique la colada por tipo de fibra. Vacíe los bolsillos y compruebe los botones. Cierre cremalleras y ganchos, y ate cintas y cinturones. -
Page 21: Prendas Especiales
Colada Prendas especiales Mantas y colchas: los artículos de fibras acrílicas (Acilan, Courtelle, Orion, Dralon) deben secarse con especial cuidado con el ajuste de BAJA temperatura. Evite secarlas durante períodos prolongados. Prendas plisadas o telas arrugadas: lea las instrucciones del fabricante de la prenda. Artículos almidonados: no los seque conjuntamente con prendas no almidonadas. -
Page 22: Mantenimiento Y Cuidados
Mantenimiento y cuidados Cuándo desconectar la electricidad Desenchufe la secadora cuando no la esté utilizando, cuando la esté limpiando y durante las actividades de mantenimiento. Limpieza del filtro después de cada ciclo El filtro es una pieza importante de la secadora: allí... -
Page 23: Solución De Problemas
Solución de problemas Antes de llamar al Departamento de Atención al cliente, siga estas sugerencias para resolver problemas : Problema: Posibles causas / Solución: La secadora no se pone en marcha. El ciclo de secado no se inicia. El proceso de secado tarda demasiado tiempo. -
Page 24: Instalación
Instrucciones de instalación Lea detenidamente estas instrucciones. Las instrucciones están previstas para los instaladores cualificados. Asimismo, para la instalación se estará a lo dispuesto por: En Estados Unidos, la última edición del Código Eléctrico Nacional ANSI/NFPA70, así como por los reglamentos estatales o locales pertinentes. -
Page 25: Drenaje De Agua
(véase el diagrama precedente). service@aristonamerica.com Kit de apilado La secadora incluye un kit de apilado, que permite colocarla encima de una lavadora Ariston: Modelo AW125NA Modelo AW129NA Modelo AW149NA El kit incluye todas las abrazaderas y tornillos necesarios. - Page 26 ENUNCIADO DE LA GARANTÍA DE ARISTON La garantía otorgada por (Ariston) en este enunciado de garantías se aplica solamente a los aparatos Ariston vendidos al primer comprador por Ariston o sus distribuidores autorizados, vendedores, revendedores y centros de asistencia en los Estados Unidos y Canadá. Las garantías aquí incluidas nos son transferibles.
- Page 27 Livret d’entretien, d’utilisation et d’installation English 1 Español, 14 Français, 27 ASL75CXS service@aristonamerica.com Contenu Instructions de mise en garde et de sécurité, 28 Importantes instructions de sécurité Instructions de mise à la terre Description de la sécheuse, 29 Pour ouvrir la porte Caractéristiques Le panneau de contrôle Démarrage et programmes, 30-32...
-
Page 28: Instructions De Mise En Garde Et De Sécurité
Instructions de mise en garde et de sécurité ! Cet appareil a été conçu et fabriqué conformément aux normes internationales de sécurité. Ces mises en garde vous sont données pour des raisons de sécurité et doivent être lues attentivement. Importantes instructions de sécurité MISE EN GARDE: Afin de réduire les risques d’incendie, de chocs électriques ou de blessures aux personnes qui utilisent cet appareil,... -
Page 29: Description De La Sécheuse
Description de la sécheuse Pour ouvrir la porte Appuyez et relâchez le panneau avant selon la position illustrée Le panneau de contrôle Boutons OPTION Voyants lumineux Guide des programmes Le bouton DÉMARRER/ANNULER (START/CANCEL) démarre un programme sélectionné. Lorsque vous appuyez sur ce bouton, vous entendez un bip sonore et les voyants lumineux de progrès continueront à... -
Page 30: Démarrage Et Programmes
Démarrage et programmes Choisir un programme 1. Branchez la sécheuse dans la prise électrique. 2. Triez votre lessive selon le type de tissus (voir Lessive). 3. Ouvrez la porte et assurez-vous que le filtre est en place et propre (voir Entretien). 4. - Page 31 Démarrage et programmes Programmes ! Si le témoin Marche/Arrêt (On/Off) n’est pas allumé, appuyez sur le bouton MARCHE/ARRÊT (ON/OFF) puis sélectionnez un programme. Programme Ce qu’il fait… Capteur de èche vos vêtements à séchage chaleur ÉLEVÉE, ils sont prêts à ranger. otons réguliers échage pour armoire...
-
Page 32: Les Commandes
Démarrage et programmes Les Commandes Bouton PROGRAMMES ! Attention, si après avoir appuyé sur , la p osition du bouton des DÉMARRER (START) programmes a changé, la nouvelle position NE changera PAS le programme sélectionné. ! Position 0, en tournant le bouton à la position 0 réinitialise et annule un programme. -
Page 33: Lessive
Lessive Trier votre lessive Vérifiez les symboles sur les étiquettes de vêtements pour vous assurez que vos articles peuvent être séchés à la machine. Triez votre lessive par type de tissus. Videz les poches et vérifiez les boutons. Fermez les fermetures éclair et les crochets et attachez les ceintures et cordons. -
Page 34: Temps De Séchage
Lessive êtements Spéciaux Couvertures et couvre-lits : articles en acrylique (Acilan, Courtelle, Orion, Dralon) doivent être séchés avec une attention particulière au réglage à chaleur basse température (LOW). Évitez de sécher ces vêtements trop longtemps. Vêtements plissés ou froissés : lisez les instructions du fabricant sur le vêtement. -
Page 35: Entretien Et Soins
Entretien et soins Quand vous devez déconnecter l’électricité Débranchez la sécheuse lorsque vous ne l’utilisez pas, lorsque vous la nettoyez et durant l’entretien. Nettoyez le filtre après chaque cycle Le filtre constitue une pièce importante de votre sécheuse: il accumule la peluche qui se forme lors du séchage. Les petits articles peuvent également se trouver emprisonnés dans le filtre. -
Page 36: Dépannage
Dépannage A vant de contacter notre service d'assistance à la clientèle, examinez les suggestions de dépannage suivantes Problème: La sécheuse ne démarre pas. Le cycle de séchage ne démarre pas. Il sèche très lentement. Le programme se termine et les vêtements sont plus humides que prévu. -
Page 37: Installation
Instructions d’installation Lisez avec soin ces instructions. Ces instructions vous sont fournies pour être utilisées par un installateur qualifié, et cette installation doit être conforme à: Au États-Unis : le National Electric Code ANSI/NFPA70 – dernière édition de même qu'à tout code local, municipal ou d'état. -
Page 38: Drain D'eau
(voir schéma ci-dessus). service@aristonamerica.com Trousse de superposition La sécheuse est dotée d’une trousse de superposition, qui permet qu’on l’adapte par-dessus une laveuse Ariston: Modèle AW125NA Modèle AW129NA Modèle AW149NA La trousse contient tous les crochets et vis nécessaires. -
Page 39: Durée De La Garantie
La durée de la garantie est limitée à une année à compter de la date d’achat. Ariston se chargera de réparer ou de remplacer gratuitement toute pièce ou partie devenue défectueuse dans des conditions d’usage domestique normal. Les frais d’expédition et de main-d’oeuvre sont inclus. La réparation sous garantie doit être effectuée par un Centre de service après-vente autorisé... - Page 40 1 9 5 0 5 2 7 8 9 . 0 2 02/2008 - SIMLEX . Four Ashes, Wolverhampton...
Need help?
Do you have a question about the ASL 75 CXS NA and is the answer not in the manual?
Questions and answers