Ariston ASL75CXS NA Repair Manual
Condensation dryer
Hide thumbs
Also See for ASL75CXS NA:
- Use and installation manual (40 pages) ,
- Care, use and installation booklet (40 pages) ,
- Datasheet (1 page)
Table of Contents

Related Manuals for Ariston ASL75CXS NA


Summary of Contents for Ariston ASL75CXS NA
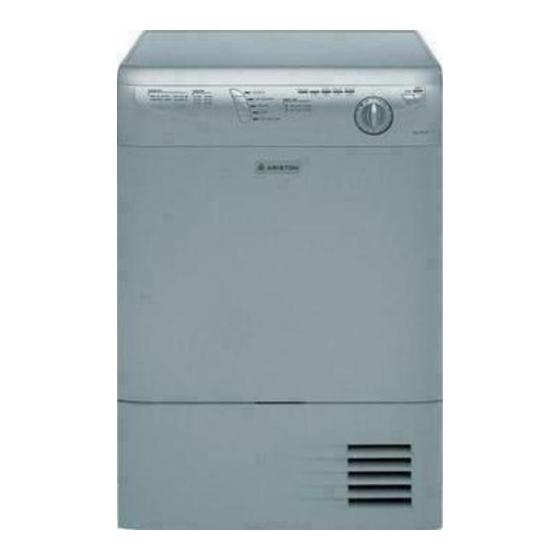
- Page 1 REPAIR MANUAL PRODUCT: CONDENSATION DRYER MODEL: ASL75CXS NA The information included in this Ariston Repair Manual may change without notice. Please see our web site Pages: www.usservicenet.com for updates, corrections or additions. 1 - 18...
- Page 2 Repair Manual. If you have any questions regarding the proper diagnosis, repair or operation of any Ariston Appliance, please contact the Ariston Customer Care Center or your Service Representative at 888-426-0825.
-
Page 3: Table Of Contents
REPAIR MANUAL ASL75CXS NA TABLE OF CONTENTS Page 1. Control Panel ASL75CXS....................... 1 2. Model / Serial Number Location ..................... 2 3. Top Panel ............................3 4. Control Panel..........................4 5. Control Panel Program Board......................4 6. Door Switch ............................ 5 7. -
Page 4: Control Panel Asl75Cxs
REPAIR MANUAL ASL75CXS NA 1. CONTROL PANEL ASL75CXS Page: 1... -
Page 5: Model / Serial Number Location
• The Model and Serial Number Tag is located on the front of the Dryer behind the door (Fig. 2-1). Fig. 2-1 • The Model number is ASL75CXS NA with a nine (9) digit Serial Number (Fig. 2-2). Fig. 2-2 Page: 2... -
Page 6: Top Panel
REPAIR MANUAL ASL75CXS NA 3. TOP PANEL Fig. 3-1 Fig. 3-2 Fig. 3-3 • To remove the Top Panel, first remove the two Phillips screws located at the rear corners of the panel (Fig. 3-1). With the two screws removed slide the Rear Panel back and off the unit (Fig. 3-2). When reinstalling the Top Panel, Slide the Top Panel Clips under the Control Panel and then replace the two Phillips Screws (Fig. -
Page 7: Control Panel
REPAIR MANUAL ASL75CXS NA 4. CONTROL PANEL • To remove the Control Panel, first remove the two Phillips screws located on the top left and right corners (Fig. 4-1). • The Control Panel will then lift up and off the four cut outs located on the inner frame (Fig. -
Page 8: Door Switch
REPAIR MANUAL ASL75CXS NA 6. DOOR SWITCH • To remove the Door Switch (Fig. 6-1), first remove the Control Panel (see Section 4, page 4). • Then push down on the locking tab and lift the door switch from the frame cut out (Fig. -
Page 9: Heater Assembly
REPAIR MANUAL ASL75CXS NA 8. HEATER ASSEMBLY • To access the Heater Assembly and Rear Thermostats, remove the nine Heater Housing Phillips Screws (Fig. 8-1). • The Heater Housing will come clear of the Rear Panel, but it will still be attached to the wire harness (Fig. 8-2). -
Page 10: Thermistor And High Limit Thermostat
REPAIR MANUAL ASL75CXS NA 9. THERMISTOR & HIGH LIMIT - REAR HIGH LIMIT THERMISTER Fig. 9-2 Fig. 9-1 • There are two temperature sensing devises located on the Heating Element Assembly Figures 9-1 and 9-2. • HIGH LIMIT: The High Limit Thermostat (white) is a One-Shot Cut Out (143˚f) Non-resetable. -
Page 11: Right Side Panel And Components
REPAIR MANUAL ASL75CXS NA 10. RIGHT SIDE PANEL & COMPONENTS Fig. 10-1 Fig. 10-2 • To remove the Right Side Panel, first remove the Top Panel (see Section 4, page 4), then remove the five Phillips screws, one on top, and four along the back edge (Fig. 10-1). The Side Panel will then slide back and off the unit (Fig. 10-2). -
Page 12: Control Board And Eeprom
REPAIR MANUAL ASL75CXS NA 11. CONTROL BOARD & EEPROM • To remove the Control Panel (Fig. 11-1), first remove the Right Side Panel (see Section 10, page 8). • Next, open the Front Lower Access Door and remove the two Control Board mounting Phillips screws (Fig.11-2 &... -
Page 13: Motor Replacement And Installation
REPAIR MANUAL ASL75CXS NA 12. MOTOR REPLACEMENT • To remove the Motor (Fig. 12-1), first remove the Right Side Panel (see Section 10, page 8) and the Control Board (see Section 11, Page 9, Fig 11-2 & 11-3). TECH NOTE: Only the Control Board mounting screws need to be... - Page 14 REPAIR MANUAL ASL75CXS NA 12. MOTOR REPLACEMENT Cont. Fig. 12-7 Fig. 12-6 Fig. 12-8 • Next remove the rear Fan Blade by first removing the nine Phillips screws attaching the Heater Housing to the Rear Panel (Fig. 12-6). Then remove the Fan Blade Clamp and slide the Rear Fan Blade from the Motor Shaft (Fig.12-7). Now remove the four 8mm Motor Mounting Bolts and the Motor can be removed and replaced.
-
Page 15: Drum Belt And Bearing Block
REPAIR MANUAL ASL75CXS NA 13. DRUM BELT & BEARING BLOCK • To remove Drum Belt (Fig. 13-1), first remove the Top Panel (see Section 3, page 3) and the Right Side Panel (see Section 10, page 8). • Then remove the two Phillips screws that attach the Bearing Block Cover to the Rear Panel (Fig. -
Page 16: Drain Motor
REPAIR MANUAL ASL75CXS NA 14. DRAIN MOTOR Fig. 14-2 Fig. 14-1 Fig. 14-3 • The Drain Motor and Float Switch are located under the Drain Housing Cover (Fig. 14-1). • To open the Drain Housing Cover insert a flat blade screwdriver behind each clip and unhook each latch (Fig. 14-2). -
Page 17: Fault Codes
REPAIR MANUAL ASL75CXS NA 15. FAULT CODES ASL75CXS NA Page: 14... -
Page 18: Schematic
REPAIR MANUAL ASL75CXS NA 16. SCHEMATIC ASL75CXS NA Page: 15...
Need help?
Do you have a question about the ASL75CXS NA and is the answer not in the manual?
Questions and answers