Advertisement
Available languages
Available languages
Table of Contents
MONTAGEANLEITUNG
MOUNTING INSTRUCTIONS
INSTRUCTIONS DE MONTAGE
INSTRUCCIONES DE MONTAJE
GUIDA AL MONTAGGIO
KAWASAKI Z1000 2014-
[Spoilerscreen]
© by MRA-Klement GmbH – 10/2015 4025066147199
MRA-Klement GmbH Siemensstr. 6 D-79331 Teningen Tel.: +49 7663 93890 Email: info@mra.de
1
Advertisement
Table of Contents

Related Manuals for MRA 4025066144686


Summary of Contents for MRA 4025066144686
- Page 1 MONTAGEANLEITUNG MOUNTING INSTRUCTIONS INSTRUCTIONS DE MONTAGE INSTRUCCIONES DE MONTAJE GUIDA AL MONTAGGIO KAWASAKI Z1000 2014- [Spoilerscreen] © by MRA-Klement GmbH – 10/2015 4025066147199 MRA-Klement GmbH Siemensstr. 6 D-79331 Teningen Tel.: +49 7663 93890 Email: info@mra.de...
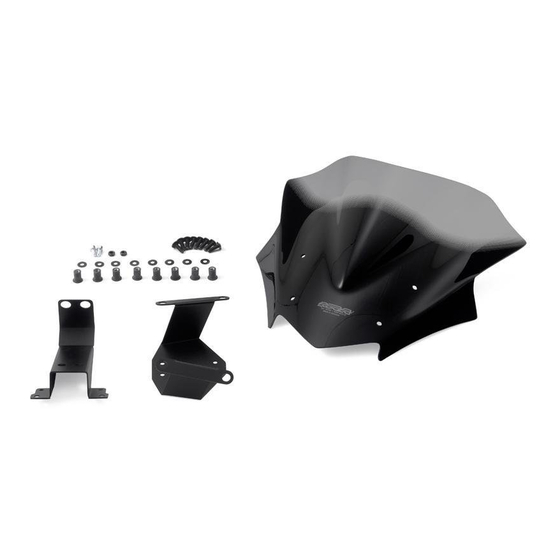
- Page 2 3. Drehen Sie die Schrauben (P2) heraus und befestigen Sie das Halteblech mit denselben Schrauben jedoch ohne Unterlegscheiben (P3). 4. Setzen Sie die Gummimuttern ein, bringen Sie die MRA-Spoilerscheibe in Position und befestigen Sie sie vorne mit den Schrauben M 5 x 20, den Kunststoff- Unterlegscheiben und den Gummi-Distanzscheiben.
- Page 3 3. Undo the screws (P2) and secure the bracket with the same screws, but without the washers (P3). 4. Insert the rubber nuts, position your MRA spoiler screen and secure it at the front using the M5x20 screws, plastic washers, and rubber spacers; use the M5x16 screws and plastic washers (P4) to mount the rear part of the screen.
- Page 4 IN S TR UC T ION S DE MON TA GE Kawasaki Z1000 2014- Merci d’avoir acheté un pare-brise MRA. Veuillez lire attentivement ces instructions de montage et vérifier la liste des pièces. Nous vous recommandons de confier le montage à un revendeur spécialisé.
- Page 5 3. Sfilare le viti (P2) e fissare il supporto con le stesse; senza, però, le rondelle (P3). 4. Inserire i dati in gomma, mettere il cupolino MRA in posizione e fissarlo anteriormente con le viti M5x20, le rondelle in plastica e i distanziali in gomma. Posteriormente il cupolino viene fissato con le viti M5x16 e le rondelle in plastica (P4).
- Page 6 3. Afloje los tornillos (P2) y fije el soporte con los mismos tornillos; pero sin arandelas (P3). 4. Coloque las tuercas de goma, los parabrisas MRA, y fije las arandelas plásticas y las arandelas distanciadoras de goma con los tornillos M5 x 20 en la parte delantera.
Need help?
Do you have a question about the 4025066144686 and is the answer not in the manual?
Questions and answers