Advertisement
Quick Links
Low Battery
Low battery:
Low battery report in firmware. Calculate
battery capacity used. 80% is the limit to
A
show a low battery alert.
The customer should at least be able to use
the seal for 3 months after the first low
battery warning. This depends on the amount
of opening
Indication low battery:
Blink red led every 6 second and with
every activation of the Seal. Blink a number
of times and show text "lobat ".
Battery
• LI/SOCI2 Lithium Xtra Tadiran , 3,6 volt,
temp range – 55 to + 85 C
• UL recognition under file MH 12827.
• Electrical components: high quality, PCB encapsulated
in epoxy
• Working temperatures from – 30 to + 70 C
Warnings
Apply and use Unisto e‐Guard as described in this manual.
Do not try to recharge battery, or expose to heat above 100 C, risk for fire,
explosion and severe burn hazard.
Wrong connection of the battery pack connector will ruin the electronics!
Moist in the battery compartment could ruin the electronics!
A qualified person only should replace the battery, the cable and do the
intialisation!
Do not pressure wash.
Do not drill holes or hammer the product.
Only certified original cables can be used.
Only the special battery pack from Unisto can be used.
Unisto e‐Guard Manual
A
Scope of delivery
Each package contains:
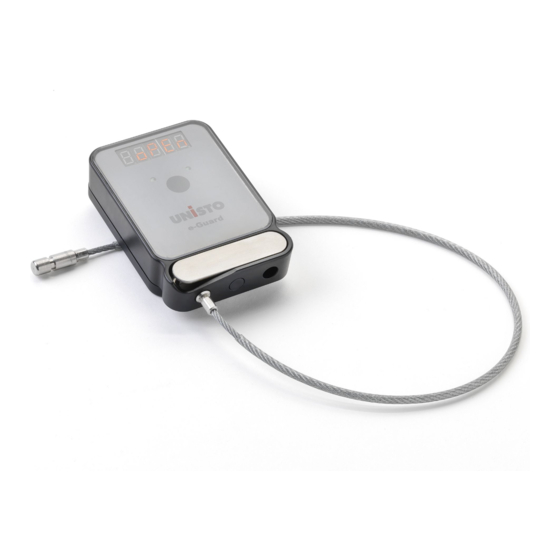
Unisto e‐Guard
Metal Cradle
Hasp
Fixing‐Set
Positioning and fitting instructions
2
A
1
B
(one screw ) to the door, insert the e‐Guard and then mount the
B
Lit and place the second screw . Important: Do not mount the Unisto
3
e‐Guard upside down to prevent extra dirt accumulating in the cable
mechanism.
Cable Replacement
A
A
The cable can be replaced by removing the plastic "bridge" and the
B
pin
with a small screwdriver. Now the metal lock plate and the
D
cable can be removed from the housing. Attention: Calibration is
necessary when reinserting a cable.
www.unisto.com
(mounted and calibrated, 500 mm)
2 Screws
2 rings and 2 nuts
Use the cradle to
1
3
determine the correct
place of drilling the 2
holes in the
A B
trailer door. Cut off
the remaining length
of the bolts after
mounting inside the
trailer. First mount
the back of the cradle
2
A
D
C
B
A
C
1
Advertisement

Summary of Contents for Unisto e-Guard
- Page 1 Unisto e‐Guard Manual Low Battery Scope of delivery Each package contains: Low battery: Unisto e‐Guard Low battery report in firmware. Calculate Metal Cradle battery capacity used. 80% is the limit to Hasp show a low battery alert. (mounted and calibrated, 500 mm) Fixing‐Set 2 Screws The customer should at least be able to use 2 rings and 2 nuts the seal for 3 months after the first low battery warning. This depends on the amount of opening Positioning and fitting instructions Use the cradle to Indication low battery: determine the correct Blink red led every 6 second and with place of drilling the 2 every activation of the Seal. Blink a number holes in the of times and show text “lobat “.
- Page 2 Initial operation Battery change When the unit is started up, SLEEP appears on the display. To activate the device you have to press the button 5 times within 2 seconds. After that the display shows StArt for a short time. Now the seal is ready and creates sealing numbers. How it works Unscrew the 4 bolts by using a Torx number 8. Open the cover and remove the rubber rings (1 large and 4 small ones). Take out the battery pack by carefully pulling the wire to unplug the battery pack. Plug‐in the new battery pack and reassemble the cover in reverse order. Cable Calibration When the Unisto e‐Guard is mounted on a trailer door, close the seal by pressing the left side of the metal bar, place the cable end and a random 4 digit number is generated . Write down the 4 digit unique First remove the cable completely Press the button until CAL appears sealing number on the freight documentation and close the lit of the on the display. Now press button OPEN appears. Press button again. Two metal cradle . The number disappears automatically; to see it again, different randomly generated 5‐digit code appear in the display . CLOSE press the round button . appears. Now the two ends of the cable can be placed into the housing . Press button. Two different randomly generated 5‐digit code appear in the display . Then DONE appears. After that press the button . If the display shows a 4‐digit seal number , the calibration process is finished. Lift cover at point of arrival. Press the round button to check if the ...


Need help?
Do you have a question about the e-Guard and is the answer not in the manual?
Questions and answers