Table of Contents
Advertisement
Quick Links
Advertisement
Table of Contents

Subscribe to Our Youtube Channel
Related Manuals for Unisto Manta


Summary of Contents for Unisto Manta
- Page 1 Unisto Manta User guide EP-0016A-500Ac-en...
- Page 2 Manufacturer’s address Unisto AG Seestrasse 7 CH-9326 Horn Switzerland Tel. +41 71 844 24 24 Fax +41 71 844 25 25 www.unisto.com...
-
Page 3: Table Of Contents
Unisto Manta user guide Table of contents EP-0016A-500Ac-en Manufacturer’s address Table of contents Package content Product overview Preparation Positioning and fitting instructions Fitting instructions for various lock types Special applications Added security Usage instructions The event memory Device functions Maintenance... -
Page 4: Package Content
Package content Standard packaging Unisto Manta Electronic seal Gasket rear Security hasp Mudflap User guide Fixing kit including Allen Key size 2 Unisto Manta User guide Ref. AA 39 E... - Page 5 Package content...
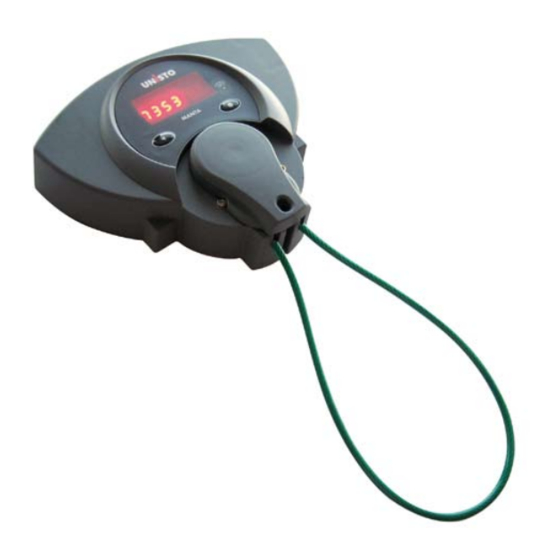
- Page 6 Product overview Manta front view Display for seal number, date and time IrDA Interface Select button/ Back track button Display button Locking handle in open position Locking screw to prevent “false openings” Reinforcer plate with cable retention slider...
-
Page 7: Product Overview
Product overview Manta rear view Product label fixing points... -
Page 8: Preparation
Preparation Manta Hasp Fitting – fixed end One end of the wire hasp must be per- manently fixed into the reinforcer plate of Unisto Manta. First remove the two locking screws on the Remove the screw and slide over the retain- left and right side of the locking handle. - Page 9 Preparation Manta Hasp Fitting – fixed end (cont.) Pull the hasp downward. Secure the position of the retaining cover with the socket head screw. Slide the retaining cover over the inserted hasp.
- Page 10 Preparation Manta Preferred opening You may choose from the opening posi- tion on either the right or left side. Hasp fixed end Hasp fixed end on the right side on the left side...
-
Page 11: Positioning And Fitting Instructions
2) Position the Unisto Manta and make sure any way. the door latch cannot be opened. 3) Mark the requested position on the door. - Page 12 ”) to drill the holes in the Slip the rubber gasket over the studs. doors (or shutter). Screw the two 6 mm stud bolts into the Slip the mudflap over the studs as shown threaded holes of Unisto Manta by hand. above. HAND TIGHTEN ONLY!
- Page 13 Fitting instructions Introduce the studs into the prepared holes. Check how much of the stud bolts are pro- truding on the inside of the door and remove excess with a hacksaw. Once the excess is removed, it is advisable to remove any sharp edges with a file.
- Page 14 The diagrams shown here are only in- tended as a guide; door/locking mechanisms vary from vehicle to vehicle. Container locks Barn door Roller shutter Staple door latches Fix the Unisto Manta to the “door” placed to open first.
- Page 15 Fitting instructions for various lock types Henderson/TODCO Type latches...
- Page 16 Whiting Type Catches Note for Whiting type catches: With some types of catch it is necessary to mount the Unisto Manta slightly to the left of the handle (see diagram), to make sure the door cannot be opened.
-
Page 17: Fitting Instructions For Various Lock Types
Fitting instructions for various lock types Whiting Type Catches Note for handles (Whiting 77 Type): The Unisto Manta must be mounted in a suitable position, where it does not hinder the travel of the handle. -
Page 18: Special Applications
The hasp has to be fed through each buckle in the side curtain, then the hasp ends can be introduced into the cavities of the Unisto Manta as de- scribed before. Alternatively, the hasp loop can be used in conjunction with TIR cables. The TIR cable terminals must first be flattened slightly with a hammer or pliers. -
Page 19: Added Security
Added security Padlock (6 mm shank) Optional for added security. - Page 20 (see diagrams in installa- the door latch... tion instructions)..and insert into the open cavity of the Unisto Press the DISPLAY button, a random seal Manta. number appears in the display for 3 seconds.
-
Page 21: Usage Instructions
Usage instructions On arrival (1-3) On arrival at the vehicle’s destination press To open turn the locking handle left or right. the DISPLAY button again and compare the Take the end of the hasp out of the open cav- displayed seal number with the number in ity by pulling it upwards and pulling the end the transport documents. -
Page 22: The Event Memory
Event Memory The Unisto Manta security seal has a memory that will store the last 100 seal events. A seal event is a seal number with time and date. These are identified by event numbers. Event 00 is the most recent event;... -
Page 23: Device Functions
Device functions Accessing seal number Press the DISPLAY button. Press the SELECT button while the display is illuminated. The current seal-/event num- bers will be displayed together. Select button/ Back track button Display button Pressing SELECT again will step back through the SEAL NUMBER memory. - Page 24 After an interval of 3 seconds, the informa- hold down the SELECT button to fast tion will automatically switch over to: scroll. (5) TIME SEALED The Manta display switches off auto- (6) DATE SEALED matically. (7) TIME OPENED (8) DATE OPENED...
- Page 25 Device functions Time and date settings For security reasons the time and date settings can only be changed when the seal is open. Open the locking handle. Press and hold down the DISPLAY button. PLEASE NOTE! Then press the DISPLAY button – OPEN will Additionally press the SELECT button then.
- Page 26 Device functions Time and date settings (Cont. from page 25) Press SELECT and the HOURS will flash. Press SELECT again, the MONTH will flash. Press the DISPLAY button to step the hours Set the correct month as described before. to the right time. For US format, program as described in next step (7).
- Page 27 Device functions Time and date settings (Cont. from page 26) Press SELECT again, the YEAR will flash, step The newly recorded time is recorded here. as before. It is also assigned an event number. info Select button/ Back track button Display button Press SELECT and the display will end as the Holding down the DISPLAY button fast steps...
-
Page 28: Maintenance
As soon as the batteries run low, use, it would never be broken. A bro- Unisto Manta will not step up data from the display shows LOW BATTERY. ken actuator knob will indicate misuse event 00 into event 01 if more than... -
Page 29: Fcc Rules
FCC Rules Warning This equipment has been tested and The unit must be mounted in accord- found to comply with the limits for a ance with our instructions. Accidental class B digital device, pursuant to Part damage or damage due to improper fit- 15 of the FCC Rules. -
Page 30: Warranty
Unisto site. Unisto Electronic Seals Repair procedure is according to current easy repair Repairs may only be carried out at the Unisto site. process. Our aim is to repair or replace faulty units within 10 No carriage is included. -
Page 31: Recommended Assembly/Recommended Cleaning
Recommended assembly/ Recommended cleaning The unit is rated IP 69k Clean only by hand... - Page 32 Unisto Manta User guide EP-0016A-500Ac-en © Unisto AG, CH-9326 Horn www.unisto.com 23.07.2010...
Need help?
Do you have a question about the Manta and is the answer not in the manual?
Questions and answers