Table of Contents
Advertisement
Quick Links
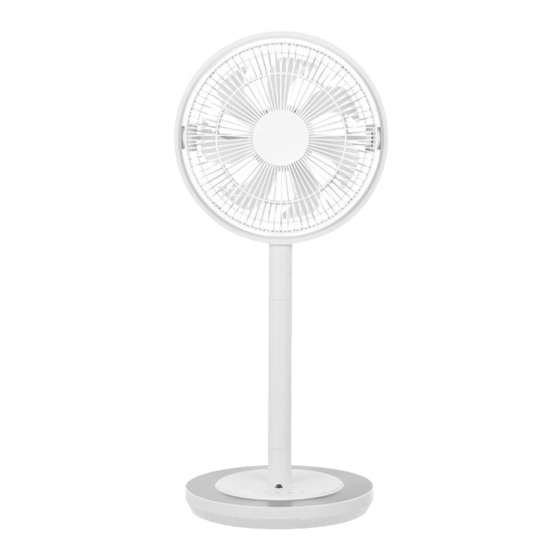
Kamome FKLS-281D/SLKF-281D
Thank you for purchasing the Kamome FKLS-2810/SLKF-281D.
Before use, be sure to carefully read this information on safety to
ensure that you use this product correctly. After reading this manual,
keep it in a safe place for future reference.
*This product is designed to be assembled by customers themselves.
kamomefan̲FKLS-281D̲En.indd 1
kamomefan̲FKLS-281D̲En.indd 1
FKLS-281D/SLKF-281D
User's Manual
English
2019/12/24 19:23:12
2019/12/24 19:23:12
Advertisement
Table of Contents

Related Manuals for DOSHISHA Kamome FKLS-281D


Summary of Contents for DOSHISHA Kamome FKLS-281D
- Page 1 FKLS-281D/SLKF-281D Kamome FKLS-281D/SLKF-281D User’s Manual Thank you for purchasing the Kamome FKLS-2810/SLKF-281D. Before use, be sure to carefully read this information on safety to ensure that you use this product correctly. After reading this manual, keep it in a safe place for future reference.
- Page 2 English Safety Information This section presents important safety information. Always follow these instructions when using the product. IMPORTANT SAFETY INSTRUCTIONS When using electrical appliances, basic precautions should always be followed to reduce the risk of fire, electric shock, and injury to persons, including the following: Read all instructions before using this product.
- Page 3 English • Do not allow children to use this product by themselves, and keep the product and power cords out of the reach of small children. • Do not plug in or unplug the product while your hands are wet. •...
-
Page 4: Names Of Parts And Their Functions
English Names of Parts and Their Functions Front Ring Front Grille Center mark shell (aroma circle disk) Blade Middle pole part Remote control receiver Base Rear Handle Rear grille Motor unit Lock button DC jack Remote control unit storage box Cable hook Dedicated AC adapter Power Plug... -
Page 5: Remote Control
English Control panel of main unit Remote control Left: Air volume lamp Center: Off timer lamp ⑦ Right: Natural/Sleep wind lamp ① ⑥ ② ③ ④ ⑤ ① ② ③ ④ ⑤ ① Power button Start/stop operating. ②... -
Page 6: Adjust The Angle
English Adjust the Angle Support the handle, push the top or bottom of the front guard, and slowly move the fan up or down. The angle can be adjusted up to 90 degrees upward or 30 degrees downward. Ring Ring 90º... -
Page 7: Installation And Setup
English Installation and Setup Accessories included in box After purchasing, please confi rm that the items below are included in the box. Base ....................1 Head (aroma circle disk installed)............1 Middle pole ..................1 Dedicated AC adapter ................1 Remote Control (installed in the base) ............ Coin lithium battery ................1 Replacement felt (1 in aroma circle disk)..........4 Manual (including Warranty Card) ............1... - Page 8 English 1. Assembly of base, middle pole and head The middle pole can be removed or installed, and the height can be adjusted. Enlarged View Confi rm the rod and hole size of Connection fi rst, and insert the rods into the holes at the same time.
- Page 9 English 2. Connect the dedicated AC adapter Please insert the DC plug of the AC adapter into the DC jack on the back of the base. In order to avoid tripping over the cord, hook it to the base. (The base of the main unit) DC cord Cable hook DC plug DC jack...
-
Page 10: Preparation Before Use
English Correct Use of the Fan Preparation before Use 1. Place the main unit on a stable horizontal surface Make sure the main unit is assembled properly. 2. Install the battery into the remote control Remote Control Removal/Storage ③ ① ②... -
Page 11: Start/Stop Operation
English ③ Re-Insert the battery holder into the main unit of the remote control until you hear a click sound. ③ Range • About 5 m front of the main unit. • About 30° to the left and right sides in front of the main unit. •... - Page 12 English 3. Start Natural/Sleep wind function Press the Natural/Sleep wind button of the main unit or the remote control during operating to switch between the functions. * The lamp for Natural/Sleep wind lights up, blinks, or turns off to indicate which function is set.
-
Page 13: Dimmer Mode
English 5. Timer Setting - Off timer Press the off timer button of the main unit or the remote control during operating to enable the off timer setting (the Off timer lamp will light up). The off timer can be set for up to 8 hours. * To cancel the off timer setting, press the Off timer button repeatedly until the Off timer lamp turns off. - Page 14 English Use of aroma oil 1. Remove the center mark shell (aroma circle disk) from the center of front grille. ① ② Center mark shell (aroma circle disk) ①②: Turn the center mark shell to the left to unfasten it. 2.
- Page 15 English 3. Install the felt cover, and put the aroma circle disk back into place. When installing the felt cover, place it in the center mark shell and turn to right. Then put the center mark shell back on the front grille and turn to right. 4.
- Page 16 English * In addition to the felt tab inside the disk we also provide 3 replacement felt tabs. The felt tab cannot be reused even washed. * Install the felt tab under the buckles of the felt compartment in the center mark shell. When replacing the felt tab, install it under the buckles.
-
Page 17: Cleaning And Storage
English Cleaning and Storage CAUTION Do not flush the main unit or AC adapter with water. Maintenance When the main unit is dirty, soak a soft cloth in warm water or neutral detergent (excluding citrus series), wring it thoroughly, wipe the dirt, and then wipe with a dry cloth. -
Page 18: Removal Of Front Grille
English 1. Install the blades. ①Align the blade notch with the notch at the tip of the motor shaft and attach the blades. ②Align the hole on the blade-mount spinner with the tip of the motor shaft. Hold the blades and turn the blade-mount spinner counterclockwise to tighten the blades firmly. -
Page 19: Troubleshooting
English Troubleshooting This product can be disassembled and repaired by qualified repair technicians only. Please check if the product has any of the following symptoms before sending it for repair. Problem Primary Cause Solution Blades won’t turn • The blades are not Install blades and grilles properly correctly installed. -
Page 20: Specifications
• Power cord, plug or AC adapter heats up abnormally. Please turn off the power, unplug • The power connects and then the power cord and contact the disconnects repeatedly. service department at Doshisha. • Buring smell. Specifications Product name Kamome Model... - Page 21 English kamomefan̲FKLS-281D̲En.indd 21 kamomefan̲FKLS-281D̲En.indd 21 2019/12/24 19:23:13 2019/12/24 19:23:13...
- Page 22 Imported and distributed by XXXXX kamomefan̲FKLS-281D̲En.indd 22 kamomefan̲FKLS-281D̲En.indd 22 2019/12/24 19:23:13 2019/12/24 19:23:13...
Need help?
Do you have a question about the Kamome FKLS-281D and is the answer not in the manual?
Questions and answers