
Related Manuals for Spektrum AS3000 AS3X

Summary of Contents for Spektrum AS3000 AS3X
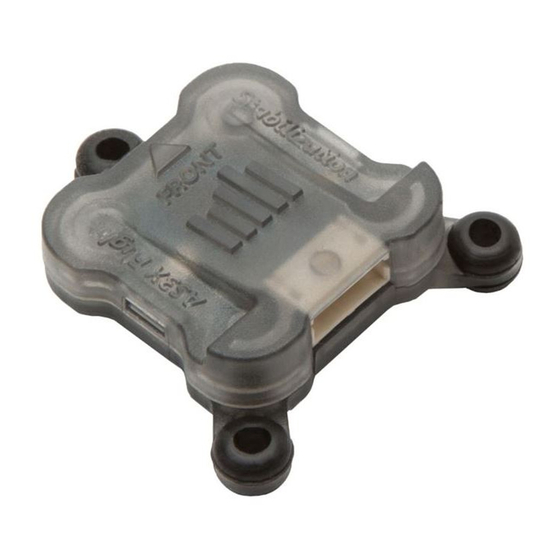
- Page 1 AS3000 AS3X Flight Stabilization Module AS3000 AS3X Flugstabilisierungsmodul Module de stabilisation de vol AS3000 AS3X Modulo di stabilizzazione volo AS3000 AS3X...
- Page 2 WARNING AGAINST COUNTERFEIT PRODUCTS Always purchase from a Horizon Hobby, LLC authorized dealer to ensure authentic high-quality Spektrum product. Horizon Hobby, LLC disclaims all support and warranty with regards, but not limited to, compatibility and performance of counterfeit products or products claiming compatibility with DSM or Spektrum technology.
-
Page 3: Specifications
AS3000 AS3X Flight Stabilization Module The Spektrum™ AS3000 AS3X Flight Stabilization Module is designed to ® provide the benefits of AS3X technology to Spektrum AR9140T, AR12310T and AR20310T PowerSafe™ telemetry receivers Features • Add AS3X technology to PowerSafe telemetry receivers. -
Page 4: Installation
Connect the cable from the Sensor port on the receiver to the port on the rear of the AS3000. IMPORTANT: Update your Spektrum transmitter with the latest Spektrum AirWare™ software to take advantage of Forward Programming. See the transmitter manual for updating instructions. -
Page 5: First Time Setup
AS3000 and Forward Programming Setup Instructions First Time Setup Enter the Function list in the transmitter, and roll to and select Forward Programming. In the Forward Programming menu, press the roller to enter Integrated Stabilization. Roll to and select First Time Setup. Before proceeding with setup, read each of the 2 information screens that appear, select NEXT at the bottom of each page to continue. - Page 6 Gain Channel At the Gain Channel Select option, press the roller to select the input to adjust the gain settings. TIP: Use Channel Input Config inside the Channel Assign Menu to select the input for the channel you wish to use for gain adjustment. Roll to the Airframe Type option.
-
Page 7: Gyro Settings
Gyro Settings Select Gyro Settings to reset the maximum gain values appropriate for the model type. Manually adjusted Roll, Pitch, and Yaw maximum gains as desired. Press next to adjust Stick Priority. Stick Priority Stick priority reduces the amount of gyro gain as you move the control stick away from center. -
Page 8: System Setup
Heading Heading is Off by default. Heading can be turned on independently for each axis. With Heading On, the stabilization system will keep the model on the last heading of the axis selected until disturbed by the user by stick inputs. When heading is enabled, a negative channel input is required on the gain adjustment channel for heading to take effect (Positive = gyro, negative = heading). - Page 9 Orientation Select this menu to adjust orientation of the AS3000 if it was changed after First Time Setup. The same 8 orientation options remain. Gain Channel Select Change the Gain channel that was assigned in the First Time Setup. The gain channel can be split into separate channels for Roll, Pitch and Yaw.
- Page 10 Nose-wheel Select the Axis On or Off for the nose-wheel to activate or disable nose- wheel gain Select the nose-wheel servo channel. Select the retract channel used, when the gear is retracted the gain will be turned off. Retract Position displays the current retract position based on the channel and switch selected.
- Page 11 Nose-wheel -Continued- Gain channel can be used to select a channel to independently control the gain for the nose-wheel. This can be he same channel used for the primary flight control gains, or an independent channel. Heading can be turned On or Off. Heading Window % is used to change the range of heading travel on the nose-wheel.
-
Page 12: Receiver Settings
Receiver Settings Telemetry In the Receiver Settings menu, select Telemetry to activate or reset the mAh counter. When the voltage meets this charged voltage, the mAh counter will be reset. Failsafe... -
Page 13: Factory Reset
Output- The failsafe can be controlled during bind (SmartSafe + hold last or Preset) or custom. Bind Plug- Binding will set the failsafe behavior as described in the receiver manual. Custom- Each output can be selected to Hold Last or Preset. When selected to Hold Last, the selected output will hold the last position in the event of a failsafe. -
Page 14: As3X Control Direction Test
AS3X Control Direction Test Power up the aircraft. Perform the AS3X Control Direction test by lifting or tipping the aircraft as shown. Ensure the AS3X technology moves the control surfaces in their proper direction. If the control surfaces do not respond as shown, go to the Setup Mode section on the previous pages for gain reversing instructions. - Page 15 1-YEAR LIMITED WARRANTY What this Warranty Covers - Horizon Hobby, LLC, (Horizon) warrants to the original purchaser that the product purchased (the “Product”) will be free from defects in materials and workmanship for a period of 1 year from the date of purchase. ...
- Page 16 the event that you may need any assistance. For questions or assistance, please visit our website at www.horizonhobby.com, submit a Product Support Inquiry at https://horizonhobby.quickbase.com/db/bghj7ey8c?a=GenNewRecord, or call the toll free telephone number referenced in the Warranty and Service Contact Information section to speak with a Product Support representative. Inspection or Services - If this Product needs to be inspected or serviced and is compliant in the country you live and use the Product in, please use the Horizon Online Service Request submission process found on our website or call...
-
Page 17: Warranty And Service Contact Information
Warranty and Service Contact Information Country of Horizon Hobby Contact Information Address Purchase Horizon Service Center servicecenter.horizonhobby. (Repairs and Repair com/RequestForm/ Requests) 4105 Fieldstone Rd United States of productsupport@horizonhobby. Champaign, Illinois, Horizon Product America com. 61822 USA Support (Product Technical 877-504-0233 Assistance) websales@horizonhobby.com... -
Page 18: Compliance Information For The European Union
Compliance Information for the European Union Horizon Hobby, LLC hereby declares that this product is in compliance with the essential requirements and other relevant provisions of the EMC Directive. A copy of the EU Declaration of Conformity is available online at: http://www.horizonhobby.com/content/support-render-compliance. - Page 19 © 2018 Horizon Hobby, LLC. DSM, DSM2, DSMX, SmartSafe, PowerSafe, AS3X, X-Plus, E-flite, Hangar 9 , Spektrum AirWare and the Horizon Hobby logo are trademarks or registered trademarks of Horizon Hobby, LLC. The Spektrum trademark is used with permission of Bachmann Industries, Inc.
Need help?
Do you have a question about the AS3000 AS3X and is the answer not in the manual?
Questions and answers