
Subscribe to Our Youtube Channel
Related Manuals for Eaton VICKERS DG3V-10 Series


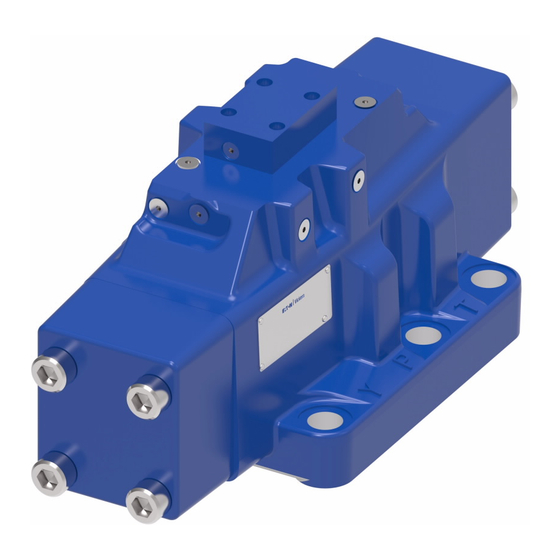
Summary of Contents for Eaton VICKERS DG3V-10 Series
- Page 1 ® VICKERS Overhaul Manual Directional Control Valves DG3V-10/DG5V-10 Solenoid Pilot Operated 5007.01/EN/1099/M...
-
Page 2: Table Of Contents
Contents ................. . . Section I. -
Page 3: Section I. Introduction
Section I. - Introduction A. Purpose of Manual C. Model Codes Variations within each basic model series are covered in the This manual describes operational characteristics, model code. See Table 2. Each unit has a model code maintenance requirements, and overhaul information for stamped into the main stage nameplate. -
Page 4: Model Code Breakdown
Model Code Breakdown Model Code Stroke adjusters on cylinder ‘A’ end Special Seals 33 - Closed P, open A&B to T over tapers only (available on AL, C & Blank 52 - Closed center, regen. by sol. ‘A’ (Omit if not required) (no spring) models) 521 - Closed center, regen. - Page 5 Model Code 16 17 20 21 22 23 Special Seals Fast Response Closed P&B, open A to T (Omit if not required) Tandem P to T, closed crossover X - (Omit for standard internal pilot Closed P only, open A&B to T F3 - Seals for fire resistant fluids.
-
Page 6: Section Ii. Description
Section II. - Description A. General flow is directed from one port to another within the body and out of a port to the work Directional valves are devices used to change the flow C. Two Stage Directional Valve Construction direction of fluid within a hydraulic circuit. -
Page 7: Section Iii. Valve Operation
Section III. - Valve Operation A. General B. Type ‘1’ spool is designed with ports (P), (A) and (T) interconnected. Port (B) is blocked in center position. Directional valve operation is determined by four factors: spool type, spool positioning, method of control, and special features. - Page 8 B. Type ‘3’ spool is designed with ports (A) and (T) F. Type ‘52’ spool interconnected and ports (P) and (B) blocked in the center position. Closed Center, Regen. by Solenoid ‘A’ G. Type ‘521’ spool Pressure and ‘‘B’’ Closed - ‘‘A’’ Open to Tank C.
- Page 9 A. Type ‘4’ spool allows oil to circulate freely from port (P) to port (T) in the center position. Ports (A) and (B) are blocked to the workload. Closed Crossover, Pressure to ‘‘T’’ A P B with ‘‘A’’ & ‘‘B’’ Blocked Solenoid ‘‘A’’...
- Page 10 3. Spring Offset: Single stage spring offset models use one spring to return the spool to an offset position. In two-stage models, the spring and washer is removed from the main stage and offset action is obtained from the pilot valve. Offset pilots have a solenoid removed from the spring end of Shoulder the valve.
- Page 11 Detent models are indicated by the letter ‘N’ stamped into 2. Pilot Choke Option (Fig. 9): A pilot choke increases the the unit nameplate. Figure 7 illustrates the spool/spring amount of time it takes to shift the main stage spool from arrangement on detent models.
- Page 12 3. Reducer Module (Fig 10): The reducer module is stage body. When the orifice plug is removed, larger volumes required for Air Gap and Wet Armature piloted models when of fluid will enter the pilot valve section. When the pilot valve pilot pressure exceeds 210 bar (3000 psi).
-
Page 13: Section Iv. Pilot Valve Section
Figure 11. DG5V10 with DG4S4-01 Pilot Section IV - Pilot Valve Section A. Spool Type - Pilot Valve Section The detent(s) hold the pilot spool in the last position attained until the opposite solenoid is energized. As in the offset To maintain proper control, closed center pilot spools are valve, solenoid power is reduced by the sacrifice of the normally used in two stage valves. - Page 14 B. Wet Armature Type Solenoids: Wet armature solenoids are standard on DG4V-3, DG4S4-01-60, and DG4V4-01 pilot valves only. Wet armature solenoids have many design advantages over other types of solenoids. Some advantages include cooler operation, static sealing arrangements, immunity to moisture and greater burn-out resistance.DG4V-3 and DG4S4-01* wet armature solenoids are not serviced with individual parts.
-
Page 15: Section V. Internal Valve Functions
5. Accessories for Electrical Type Solenoids: The model Wiring Note code (Table 2) indicates the type of accessories used on Connect white wires to ‘‘A’’ solenoid and black wires to directional valves. Obtain a parts and service drawing for the ‘‘B’’ solenoid. Refer to parts drawing (Table 1) for your particular model (see Table 1). -
Page 16: Section Vi. Installation
3. Pilot Pressure Conversions: If it is necessary to convert 2. External Drain (Standard): External drain models are your unit from external pilot pressure to internal pilot recommended if pressure surges in the tank line CAN pressure or vice versa, internal plug(s) must be removed or overcome pilot pressure. - Page 17 Note C. Piping and Tubing 1. All pipes and tubing must be thoroughly cleaned before Make sure the ‘‘Y’’ drain port is piped directly to the tank. installation. Recommended cleaning methods are Back pressure cannot be tolerated at this valve port. sandblasting, wire brushing and pickling.
-
Page 18: Section Vii. Service, Inspection & Maintenance
Section VII - Service, Inspection & Maintenance A. Service Tools D. Adjustments No special tools are required to service this valve series. No periodic adjustments are required other than normal system maintenance, B. Inspection E. Replacement Parts Periodic inspection of the fluid condition and tube or piping connections can save time consuming breakdown and Reliable operation throughout the specified operating range unnecessary parts replacement. -
Page 19: Section Viii. Overhaul
Section VIII - Overhaul WARNING C. Pilot Valve and Module Removal Before breaking a circuit connection, ensure (Refer to Figure 15) system power is off and system pressure has 1. Remove four screws (1) and pilot valve (2), pilot choke (3), been relieved. - Page 20 Note E. Pressure Centered Main Stage Disassembly The following step pertains to integral check valve models (Refer to Figure 17) only. DO NOT remove check valve parts unless inspection 1. Remove four screws (1) and name plate (2) from or unit operation indicates a check valve problem. If crossover plate (4).
- Page 21 F. High/Standard Performance Pilot Valve 4. Remove knob (8) and ‘‘O’’ Ring (9) from core tube S/A (20). Remove coil (11) from body (5) and discard gasket Disassembly (Refer to Figure 18) (14) and ‘‘O’’ Ring (9). Remove plug (12) from coil. Note The following steps describe the disassembly sequence 5.
- Page 22 If the spool does not move freely, the spool is sticking inside the Voltage Coil Resistance body bore. Remove the spool and recheck the spool and body 6 DC 1.5 Ohms bore for scratches and/or burrs. remove any minor scratches or burrs with India stone or crocus cloth.
- Page 23 6. Lubricate spool lands with clean system fluid and then 8. Install ‘‘O’’ ring (9) in cover and install cover on body with carefully install spool (15) into main body bore. Make four screws (7). Torque the screws to the value noted in sure the spool moves freely inside the body bore and is parts drawing.
- Page 24 N. Wet Armature Pilot Valve Assembly 5. Install ‘‘O’’ ring (9) on core tube S/A (20). (Refer to Figure 19) 6. Install gasket (14) and coil (10) on body (5) and secure to 1.. Install ‘‘O’’ rings (26) and (28) on plugs (25) and (27). core tube S/A (20) with knob (8).
-
Page 25: Dg5V-8-S/H-*(C)-10
DG5V-10-S/H-*(C)-10 Item Nomenclature Quantity Item Nomenclature Quantity Screw ‘‘O’’ Ring Pilot Valve Seat Pilot Choke Poppet Reducer Spring Body Sleeve ‘‘O’’ Ring Plug Screw ‘‘O’’ Ring Adapter Plate Plug Plug ‘‘O’’ Ring Screw ‘‘O’’ Ring Cover ‘‘O’’ Ring ‘‘O’’ Ring Rest Pin Spring Rivet... -
Page 26: Dg3V-8-*(D) (2/8 / 28)-10
DG3V-10-*(D)-10 Item Nomenclature Quantity Item Nomenclature Quantity Screw ‘‘O’’ Ring Name Plate Screw Screw Cover Cover Plate ‘‘O’’ Ring ‘‘O’’ Ring Spring Body Washer Screw ‘‘O’’ Ring Cover ‘‘O’’ Ring ‘‘O’’ Ring Plug Spring ‘‘O’’ Ring Sleeve Plug Piston Rivet Spool I.D. -
Page 27: Dg4V-3(S)-*A(L)/B(L)-Fj
DG4V-3(S)-*A(L)/B(L)-FJ/FW-60 Item Nomenclature Item Nomenclature Screw Coil Nameplate ‘‘O’’ Ring Cover ‘‘O’’ Ring Gasket Push Pin Terminal Box Spring Gasket Washer (DC models) Screw Washer (AC models) Strap Core Tube S/A Screw Spool Body Plug Screw Plug Knob ‘‘O’’ Ring ‘‘O’’... -
Page 28: Dg4S4-01*B/C
DG4S4-01*B/C-(U)-*-60 Item Nomenclature Quantity Item Nomenclature Quantity Screw Stop Name Plate Spring Gasket & Wire S/A Push Pin Screw ‘‘O’’ Ring Body Core Tube S/A Rivet Spool Diagram Plate Plug Knob ‘‘O’’ Ring ‘‘O’’ Ring Plug Coil (Type A) Plug DIN Coil ‘‘O’’...
Need help?
Do you have a question about the VICKERS DG3V-10 Series and is the answer not in the manual?
Questions and answers