Philips 32PFL4765/F8 Manual

Philips 32PFL4765/F8 Manual

Hide thumbs Also See for 32PFL4765/F8:
Table of Contents

Advertisement

Quick Links

Televisions
32PFL4765/F8
43PFL5765/F8
50PFL5765/F8
55PFL5765/F8
6
5PFL5765/F8
75PFL4864/F8
Register your product and get support at
www.philips.com/welcome
EN User manual
ES Manual del usuario
LEA CUIDADOSAMENTE ESTE INSTRUCTIVO ANTES DE USAR SU APARATO
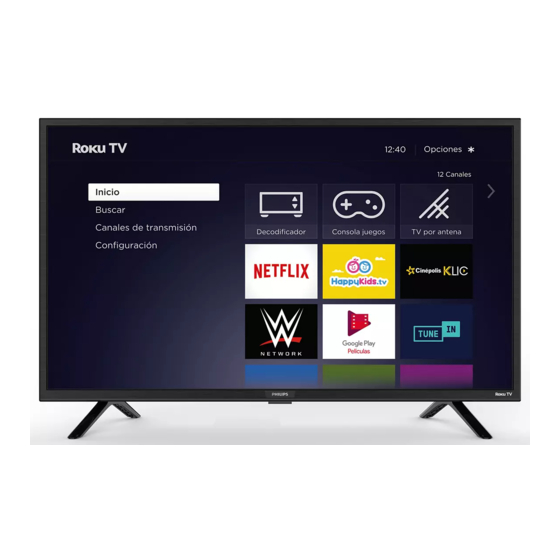
User Interface may vary.
(es) La Interfaz del usuario puede variar.
EN For further assistance, call the customer support service in
your country.
To obtain assistance, contact Philips customer care center;
Mexico city and metropolitan area;
Interior de la republica; (800) 839 19 89
ES Para obtener más información, llame al centro de atención
a clientes de su país.
Para obtener asistencia, póngase en contacto con el
CENTRO DE INFORMACION AL CLIENTE,
CDMX y Area metropolitana;
Interior de la republica;
(55)
58 87 97 36
(55)
58 87 97 36
(800) 839 19 89

Advertisement

Table of Contents
loading

Summary of Contents for Philips 32PFL4765/F8

  • Page 1 EN User manual EN For further assistance, call the customer support service in your country. • To obtain assistance, contact Philips customer care center; ES Manual del usuario Mexico city and metropolitan area; (55) 58 87 97 36 Interior de la republica; (800) 839 19 89 ES Para obtener más información, llame al centro de atención...
  • Page 5 PARA SU USO EN MEXICO: La operación de este equipo está sujeta a las siguientes dos condiciones; 1. Es posible qué éste equipo ó dispositivo no cause interferencia prejudicial. 2. Este equipo ó dispositivo debe aceptar cualquier interferencia, incluyendo la que pueda causar su operación no deseada.
  • Page 10 32PFL4765/F8 80.01cm 32’’(81.28cm) 120V~60Hz 45W 43PFL5765/F8 43’’(109.22cm) 107.9cm 120V~60Hz 95W 50PFL5765/F8 120V~60Hz 120W 55PFL5765/F8 120V~60Hz 135W 65PFL5765/F8 120V~60Hz 140W 75PFL4864/F8 75”(190.50cm) 189.30cm 120V~60Hz 340W IMPORTADOR: COMERCIALIZADORA MEXICO AMERICANA S. De R.L. De C.V. AV. NEXTENGO No.78, COL. SANTA CRUZ ACAYUCAN, AZCAPOTZALCO, CD DE MEXICO, MEXICO CP.
  • Page 11 Copyright © 2020 Roku, Inc. All rights reserved. ROKU, the ROKU Logo, and “NOW THIS IS TV” are trademarks and/or registered trademarks of Roku, Inc. Material in this User Manual is the property of Roku, Inc., and is protected under US and International copyright and/or other intellectual property laws.
  • Page 12: Table Of Contents

    Contents Welcome ..............................1 The new standard in Smart TVs ..........................1 Get the most out of your new TV ..........................1 Connections and setup ........................5 Connecting an antenna, cable, or satellite box ....................5 Connecting external equipment with a composite AV video cable ............6 Connecting external equipment with an HDMI cable ..................
  • Page 13 Setting up Antenna TV ........................35 How do I set up the TV tuner? ..........................36 Using your TV ............................ 40 Status indicator ................................40 Standby mode energy savings..........................41 Watching Antenna TV channels ..........................41 Changing channels..............................41 Favorite Channels ............................... 42 Viewing program information ..........................
  • Page 14 Microphone ................................... 70 Searching for something to watch................... 72 How do I search? ................................72 Keyboard search using the remote ........................72 Searching from the Roku mobile app ......................73 I found a show, now what? ............................73 Recent Searches ................................74 Using the Roku Channel Store ....................
  • Page 15 Turning off the TV screen while listening to music ................105 Controlling other devices through CEC ......................105 Restart the TV ................................. 108 Reset the TV ..................................108 Reset audio/video settings ..........................108 Factory reset everything ............................108 What if I can’t access the Factory Reset option? ..................109 Network connection reset ............................
  • Page 16: Welcome

    Welcome Congratulations on the purchase of your new Roku TV! Discover the joy of endless entertainment. After it’s set up, you’ll be able to access a world of streaming content channels that may include paid subscription channels like Netflix or free channels like YouTube, Crackle, CNET and literally thousands more.
  • Page 17 subscription services, and convenient ways to rent or buy a favorite film or show with. • Pick your favorite streaming channels • Find the entertainment you love. From the latest blockbuster movies to your favorite TV shows, with tons of live sports, a broad selection of music streaming channels, popular programming in a dozen international languages, 24x7 live news and so much more, your new Roku TV has your sweet spot.
  • Page 18 closed captions on or off, and to replay the last few seconds of a movie or TV show. • Set sleep timers with your voice. For example, say “Turn the TV off in 30 minutes”, or “Go to sleep at 11 p.m.” •...
  • Page 19 limited due to your geographic location or because of restrictions imposed by the network host. Go to support.roku.com for device compatibility information. Let’s get started.
  • Page 20: Connections And Setup

    Connections and setup Refer to your TV’s Quick Start Guide or other provided documentation to for model- specific information about attaching the base or a wall mount and making connections to AC power and to your other audio/video devices. The following information applies to all Roku TV models.
  • Page 21: Connecting External Equipment With A Composite Av Video Cable

    Connecting external equipment with a composite AV video cable If the best connection available on your device is AV or composite video output, connect it to the TV using a composite AV cable (not provided). Composite AV cables typically have three RCA-type plugs on each end, color coded as follows: •...
  • Page 22: Connecting Headphones Or Analog Sound Bar

    Connecting headphones or analog sound bar You can connect headphones or an analog sound bar (not provided) to the TV’s headphone jack. Tip: Inserting a plug in the headphone jack disables the sound from the TV’s built-in speakers. Loud noise can damage your hearing. When using headphones, use the Warning: lowest volume setting on your headphones that still lets you hear the sound.
  • Page 23: Ac Power

    The TV supports only its internal wireless network adapter—it does not support Note: the use of a USB network adapter. Select 4K models have wired in addition to wireless network connectivity. To use the wired network connection, connect an RJ-45 Ethernet cable (not provided) from the jack on the back of your TV to your network router or switch.
  • Page 24 Certain remote buttons and features vary by model. Your remote might not Note: have all buttons or features listed. If your remote has a microphone button just below the purple pad, then you have a Roku Voice Remote. BUTTON FUNCTION DESCRIPTION Turns TV on and off.
  • Page 25 BUTTON FUNCTION DESCRIPTION Only on select models with Roku voice remotes , hold VOICE SEARCH VOICE and say COMMANDS • The name of a movie, TV show, actor, director, or game name. • Search for special genres “free” and “4K”. •...
  • Page 26 BUTTON FUNCTION DESCRIPTION Rewind, pause, play, and fast forward streaming content MEDIA PLAYBACK CONTROLS and Antenna TV channels (if Live TV Pause is enabled). Press REWIND or FAST FORWARD one, two, or three times to control the speed of the operation. REWIND and FAST FORWARD also jump...
  • Page 27: Panel Buttons

    Panel buttons Your TV has a set of panel buttons that perform simple control functions. The TV panel buttons are not a substitute for the remote, as they do not give you access to all TV functions. Depending on model, your TV model has one of several different panel button designs.
  • Page 28: Three Buttons

    Three buttons If your TV has this style of panel buttons, you can perform the following functions: • Turn TV on: middle button, short or long press. • Volume up: right button when Input List is not active. • Volume down: left button when Input List is not active. •...
  • Page 29: Five Buttons (With Mute)

    Five buttons (with mute) If your TV has this style of panel buttons, you can perform the following functions. Note that the order of the buttons might vary from model to model. Examine the panel button labels to determine your TV model’s layout. •...
  • Page 30: Seven Buttons

    Seven buttons If your TV has this style of panel buttons, you can perform the following functions. Note that the order of the buttons might vary from model to model. Examine the panel button labels to determine your TV model’s layout. •...
  • Page 31: Guided Setup

    Guided Setup With the preliminaries out of the way, it’s time to turn on your TV. As the TV starts for the first time, it leads you through Guided Setup, which configures the TV before you start to use it. During Guided Setup, you’ll: •...
  • Page 32: Completing Guided Setup

    Completing Guided Setup Follow these steps to complete Guided Setup. At this point, you should be seeing the Language [Idioma] screen. Only on models that have a Roku voice remote : A few moments after the Let’s get started screen appears, Guided Setup starts the pairing process for the voice remote.
  • Page 33 Some models have a country selection screen : If you don’t see this screen, skip ahead to the next step. If you see this screen, select your country. Note: If you enabled the Audio Guide, choosing any country other than United States disables it.
  • Page 34: Network Connection

    Store mode configures the TV for retail display and is not recommended Note: for any other use. In store mode, some features of the TV are missing or limited. To switch from one mode to the other, you have to perform a factory reset as explained in Factory reset everything, and then repeat Guided Setup.
  • Page 35 attempts to connect to your wired network, your local network, and then the Internet. Go to Step 9 to continue with Guided Setup. • Connect to the Internet later [Conectar a Internet más tarde] – If you don’t want to connect to the Internet right now, you can skip this step and use the TV to watch Antenna TV channels, and to play games and watch DVDs through the devices you connect to it.
  • Page 36 you through the connection process using your compatible smartphone or tablet to provide the needed information. For more information, see Using your TV in a hotel or dorm room. Other options • Connect to the Internet later [Conectar a Internet más tarde] – If you don’t want to connect to the Internet right now, you can skip this step and use the TV to watch Antenna TV channels, and to play games and watch DVDs through the devices you connect to it.
  • Page 37 • Private network [Red privada] – If your wireless network name is hidden, it won’t appear in the list. Select Private network [Red privada] to display an on-screen keyboard, and use it to enter your network name. Unless you changed the factory-set network name, you can find the name (also called SSID) on a label on the router.
  • Page 38 Only if your TV cannot get the correct time zone and current time from your network service provider : Use the UP and DOWN arrows to highlight your time zone, and then press OK. Your TV needs to know the local time zone so that it can correctly display Tip: information about the program you are currently watching.
  • Page 39: Activation

    Activation After the TV restarts, it displays the [Activar su TV screen: 10. Using a compatible computer, tablet, or smartphone with an Internet connection, go to the web address displayed on the screen and enter the code that appears on your screen. Why do I need a Roku account? You need a Roku account for several reasons: •...
  • Page 40: Connect Your Devices

    After you log in or create your Roku account, the link page suggests that you select some streaming channels. After you confirm your selections, the TV gets an acknowledgement, and then adds your preexisting and newly-selected streaming channels to your Roku TV. This process is automatic and takes a few moments—a little longer if you already have a lot of streaming channels to add.
  • Page 41 11. Press OK or the RIGHT arrow to proceed: 12. Connect all the devices you plan to use with your TV, turn them all on, and then select Everything is plugged in and turned on [Todo está conectado y activado]. The TV now takes you step by step through each of its inputs and asks what kind of device you have connected.
  • Page 42 14. While setting up your devices, rather than using the predefined names and icons, you can set a custom name and icon. To do so, scroll up or down to highlight Set custom name & icon [Nombre personalizado... ( abbrev. to fit )], and then press OK.
  • Page 43: Home Screen

    Home screen The following illustrations show typical Home screens, which vary depending on location, connected mode, selected theme, number of TV inputs enabled, and streaming channels and apps added. Note: A paid subscription or other payments may be required for some channel content.
  • Page 44: Personalize Your Home Screen

    Typical non-connected Home screen Home screen menu—shows options available to you when you are on the Home screen. Highlighted option—press OK on the remote to select. TV input tiles—select an input to watch the connected device. Direct access tiles – shortcuts to often used features. Options hint—press ...
  • Page 45 • Move a tile by highlighting it and pressing . Then highlight Move input [Mover entrada] or Move channel [Mover canal] and press OK. Use the arrows to move the tile, and then press OK to lock it in its new location. Move the shortcut tiles within the shortcut area only.
  • Page 46: Benefits Of Connecting

    Benefits of connecting Connecting brings out your TV’s full potential! Make any night a movie night Thousands of movies to choose from, across all major streaming movie channels You’ll never run out of something new to watch. Get in the groove Stream endless hours of music from free and subscription-based channels.
  • Page 47: What Is Streaming

    Automatic account linking keeps track of supported streaming subscriptions on other Roku devices, so that you won’t have to re-enter your user name and password when adding the same channel on your newly-activated Roku TV. Live TV Pause lets you connect a USB drive (not provided) and pause live TV for up to 90 minutes.
  • Page 48: What If I Didn't Connect My Tv

    Many streaming channels are free. Some streaming channels let you purchase or rent the latest movie releases or popular TV series. Some channels charge a monthly subscription fee and others are available at no additional cost if you subscribe to a companion service through your cable or satellite provider.
  • Page 49 through Guided Setup again. This time, choose your home network when prompted.
  • Page 50: Setting Up Antenna Tv

    Setting up Antenna TV In addition to the other entertainment possibilities of your Roku TV, you may also want to watch broadcast channels from an antenna or cable TV service connected to the ANT input. On your Roku TV, you watch broadcast TV in much the same way you watch other entertainment choices.
  • Page 51: How Do I Set Up The Tv Tuner

    How do I set up the TV tuner? Make sure your antenna (not provided) or TV cable is connected to the TV’s ANT/CABLE input. 2. On the Home screen, select the Antenna TV [TV por antenna] tile. 3. Read the simple on-screen instructions, and then select Start finding channels [Comenzar a buscar canals].
  • Page 52 Why does the TV need my time zone? The TV needs to know your time zone so that it can correctly display time information about the program you are currently watching. 5. When prompted, select whether to add analog channels 3 and 4. These channels enable you to connect older set top boxes, VCRs, or game consoles.
  • Page 53 … and then cable TV channels. Scanning for channels can take several minutes. If you use a set-top box to receive cable TV channels (and don’t have your Tip: cable connected directly to the TV’s ANT input), you can save time by skipping the cable TV portion of the channel scan.
  • Page 54 want to set up Live TV Pause, or if this option is not available to you, select Done to start watching Live TV. Repeat the channel scan from time to time to make sure you are receiving all Tip: of the latest channels. Broadcasters add and remove channels, move channels to different parts of the spectrum, and change the power levels of their channels periodically.
  • Page 55: Using Your Tv

    Using your TV This section provides information on using the day-to-day features of your TV. Status indicator Your TV has a single status indicator. It goes on and off and blinks in different ways depending on the status of the TV, as shown in the following table: TV CONDITION STATUS INDICATOR MEANING...
  • Page 56: Standby Mode Energy Savings

    Standby mode energy savings When you turn off your TV, it remains in a higher power mode for a few minutes, after which it goes into a very low power standby mode. If you turn on the TV again before it has entered the very low power mode, it turns on immediately.
  • Page 57: Favorite Channels

    Favorite Channels You can quickly change from surfing among all channels or only your favorite channels. First, you have to mark one or more channels as your favorites. Mark your favorite channels You can make any channel a favorite whenever you’re watching Antenna TV channels. Press the LEFT arrow to display the channel list.
  • Page 58 Note that when you press OK to view the program information banner while watching a show, a symbol appears below the channel number. Surf all channels again You can switch back to all channels whenever you’re watching Antenna TV channels. Press the LEFT arrow to display the channel list.
  • Page 59: Viewing Program Information

    Viewing program information To view information about the current program, press OK. The TV displays a banner at the bottom of the screen with as much information as is available in the program data stream. The following illustration shows the information that is available: Program information banner Program information might include any or all of the following, depending on availability within the broadcast information:...
  • Page 60: Adjusting Settings While Watching A Show

    • Program description. If the entire description does not fit, press OK to expand the size of the banner and see the entire description. If you’ve set up Live TV Pause and you’re watching Antenna TV, you’ll also see a Tip: progress bar showing the current playback position within the rolling 90-minute pause time.
  • Page 61: Enabling Live Tv Pause

    After warning you and giving you a chance to cancel Live TV Pause Important: setup, all existing content on your USB drive is erased when you enable this feature. 3. Connect your USB drive to the TV’s USB port. Important: Some TV models have more than one USB port.
  • Page 62 • After pausing or rewinding, press FAST FORWARD to jump ahead up to the point where you are once again watching the live TV program. • Press FAST FORWARD or REWIND repeatedly to cycle through 1x, 2x, and 3x skip speeds. Press REPLAY to play back the last several seconds of the program.
  • Page 63: Notes About Live Tv Pause

    The progress bar also displays tick marks at each half hour point, to help you locate the boundaries where one show ends and a new one begins. Notes about Live TV Pause • You can use Live TV Pause only with digital broadcast and cable channels received through the TV’s ANT input (ATSC and Clear QAM channels).
  • Page 64: Playing Content From Usb Storage Devices

    Playing content from USB storage devices Only in connected mode , your Home screen has the Roku Media Player [Reproductor de medios Roku] tile. Otherwise, the Home screen has the USB Media Player [Reproductor de medios USB] tile. You can play personal music, video, and photo files from a personal USB flash drive or hard disk connected to the TV’s USB port.
  • Page 65: Playing Content From Local Network Media Servers

    o Off [Apagado] – Never launch the Roku Media Player automatically. • Launch channel [Iniciar canal] – Choose the app you want to use to play back media files. Playing content from local network media servers Only in connected mode , your TV can play personal video, music, and photo files from a media server on your local network.
  • Page 66: Using Your Tv In A Hotel Or Dorm Room

    Using your TV in a hotel or dorm room Hotels, school dorms, conference facilities, and similar locations with public wireless Internet access often require you to interact with a web page to authenticate your restricted public networks access. These types or networks are called .
  • Page 67 that you are connecting to a restricted network and displays the following prompt: Your TV can connect to a restricted network only if Enable ‘Device Tip: connect’ [Habilite ‘Conectar dispositivo’] is selected in Settings [Configuración] > System [Sistema] > Advanced system settings [Configuración avanzada].
  • Page 68 2. After selecting the correct network, highlight I am at a hotel or college dorm [Estoy en un hotel o una residencia], and then press OK. The TV prompts you to use your smartphone, tablet, or laptop to complete the connection. 3.
  • Page 69: Roku Voice Remotes (Select Models Only)

    number to proceed. The information requested depends on the organization that controls the wireless connection. 7. After you enter the requested information, the TV automatically proceeds to complete its connection and resumes normal operation. 8. If the TV prompts you to link to your Roku account, use your smartphone, tablet, or computer to complete the pairing operation and activate your Roku Roku voice remotes (select models only) Only on TVs with the Roku voice remotes...
  • Page 70: Checking The Roku Voice Remote Battery Level

    Checking the Roku voice remote battery level You can check the condition of the batteries in your Roku voice remote at any time by navigating to Settings > Remotes & devices, and then pressing OK to select your remote below My paired devices. With your remote selected, navigate right to About >...
  • Page 71: Adjusting Tv Settings

    Adjusting TV settings You can adjust most picture and sound settings while you are watching a program by pressing  to open the Options [Opciones] menu. There are some additional picture and sound settings in the Settings [Configuración] menu. In most cases, the changes you make apply only to the input you are using. Antenna TV, the separate HDMI ®...
  • Page 72: Options Menu

    This setting does not affect the HDR or Dolby Vision notification that Note: always appears in the program information banner. Press OK while watching a show to open the program information banner. • Settings per input [Configuración por entrada] – Lists each TV input. Select an input, and then press ...
  • Page 73: Options Menu Settings

    setting. You’ll see the changes you make right away in picture appearance or audio quality. When you highlight a setting, the header text explains the effect of its current Tip: value. When you begin to adjust a setting, the other options are hidden so you can see more of the screen.
  • Page 74 • Closed captioning [Subtítulos] – Controls when you see captions. This setting is only offered for Antenna TV, the AV input, and streaming videos. Any set value remains in effect across only these inputs. o Antenna TV [TV por antenna] – Set captions to off, always on, on only when the TV sound is muted, or on only during instant replay (when Live TV Pause has been enabled).
  • Page 75: Picture Settings

    Picture settings The Picture settings [Config. de imagen] menu for each TV input provides settings for fine tuning the appearance of the picture. All of the settings in this menu apply only to the currently-selected input. To use the Picture settings [Config. de imagen] menu, first press  to display the Options [Opciones] menu.
  • Page 76 Sharpness [Nitidez]—these settings are saved for the current input current picture mode. In this way, you can set HDMI 1 input’s Movie [Película] picture mode to use different settings than the HDMI 2 input’s Movie [Película] picture mode and Antenna TV’s Movie [Película] picture mode. Use Reset picture settings [Restablecer config.
  • Page 77 setting results in more smoothing, but can cause undesirable picture artifacts in . Each Picture mode [Modo de imagen] has a different certain types of content default setting. • (This is not a UI term – translate as appropriate) Only on select Film mode [ ] –...
  • Page 78: Sound Settings

    • Reset picture settings [Restablecer config. de imagen] – Returns all picture settings for the input’s currently-selected Picture mode [Modo de imagen] to their original values. To dismiss the Picture settings [Config. de imagen] menu, just wait a few Tip: seconds without pressing any buttons.
  • Page 79: Volume Modes [Modos De Volume] (Select Models Only)

    Volume modes [Modos de volume] (select models only) To access Volume modes, first press  to display the Options [Opciones] menu, then select Sound settings [Config. de sonido] Sound settings [Config. de sonido] menu for models with Volume modes [Modos de volume] Some streaming channels assign the ...
  • Page 80: Sound Settings - Dolby Audio Processing (Select Models Only)

    ® Sound settings – Dolby Audio Processing (select models only) Each TV input has separate settings for fine tuning sound quality. All of the settings in this menu apply only to the currently-selected input. To access the DAP settings, first press ...
  • Page 81: Sound Settings - Dts ® Trusurround / Dts ® Studio Sound (Select Models Only)

    • Reset audio settings [Restablecer config. de audio] – Returns Virtual surround [Sonido envolvente virtual] and Dialog enhancer [Potenciador de diálogo] settings to their default settings for the selected Sound mode [Modo de sonido]. Sound settings – DTS ® TruSurround / DTS ®...
  • Page 82: Sound Settings - Sonic Emotion Premium (Select Models Only)

    Sometimes, the effect interferes with dialog clarity. Use the Dialog Clarity option to compensate. • Dialog Clarity [ (Do not translate) ] – Available only when DTS TruSurround is On [Activado]. Choose among Low [Bajo , Medium [Media], and High [Alto settings to improve the clarity of dialog when you are using the TruSurround feature.
  • Page 83: Sonic Emotion Settings

    Sound settings menu options – Sonic Emotion Premium • Sound mode [Modo de sonido] – Select from among various preset audio modes to improve speech, make music sound its best, boost bass or treble, or simulate a theater. Use Reset audio settings [Restablecer config. de audio], described below, to return the input’s current settings to their original values.
  • Page 84: Expert Picture Settings (4K Models Only)

    • Absolute 3D Sound [Sonido Absolute 3D] – Simulates sound from multiple speakers that would otherwise require installation of a surround sound audio system. Expert Picture Settings (4K models only) 4K (UHD) TV models have additional picture settings for demanding home theater enthusiasts.
  • Page 85: Microphone

    3. Press OK to reset the advertising identifier, and then press OK again to dismiss the verification message. Limit ad tracking You can limit Roku’s tracking of your usage behavior by limiting ad tracking. When you do, your TV will display ads that are not personalized based on your TV’s advertising identifier.
  • Page 86 From the Home screen menu, navigate to Settings [Configuración] > Privacy [Privacidad] > Microphone. 2. Select Channel microphone access [Acceso de micrófono]. 3. Choose one of the following settings: • Prompt [Indicación] – Display a notification the first time a streaming channel requests the use of the microphone.
  • Page 87: Searching For Something To Watch

    Searching for something to watch Searching for movies and shows across multiple streaming channels is one of the unique features of your Roku TV. Within a single search operation, you can search by: • Movie name • TV show name •...
  • Page 88: Searching From The Roku Mobile App

    3. When you see the show you are searching for, press the RIGHT arrow to highlight it. Continue pressing the RIGHT arrow to see more details about how to watch the show. Searching from the Roku mobile app Use the free Roku mobile app on your compatible smartphone or tablet to make searching even faster.
  • Page 89: Recent Searches

    • The streaming channel logo appears to the left of each result. • means that the content is available in high-definition. If your search result was a game or a streaming channel, you’ll see detailed information, images, and available actions, such as a list of streaming channels and the cost of getting the item or channel.
  • Page 90: Using The Roku Channel Store

    Using the Roku Channel Store Only in connected mode , the Streaming Channels [Canales de transmission] menu option takes you to the Roku Channel store, where you can add new subscription based and free streaming channels to your TV. To make it easier to find what you want, the streaming channels in the Roku Channel Store are categorized by topic.
  • Page 91 If you don’t remember your PIN, or if you want to change whether you need to Note: use a PIN to make purchases on your Roku account, see Roku account PIN.
  • Page 92: Customizing Your Tv

    Customizing your TV There are several things you can do to personalize your TV. Add TV inputs As you use your TV, you might find that you need to add a TV input tile that you did not add during Guided Setup. To add a TV input: From the Home screen menu, navigate to Settings [Configuración] >...
  • Page 93: Rename Inputs

    Rename inputs Rather than trying to remember that your Blu-ray™ player is connected to HDMI 1 and your game console is connected to HDMI 3, you can rename the TV inputs to match the connected device. Note: Renaming an input also changes the icon associated with it. To rename an input, you can either: •...
  • Page 94: Remove Unwanted Tiles

    Remove unwanted tiles It’s easy to remove unused TV inputs and unwanted channel or app tiles. For example, if you never use the HDMI 3 input, or if you don’t like the weather app you added from the Roku Channel Store, you can remove them from your Home screen. You also can remove the Antenna TV [TV por antenna] tile if you never use the Note: TV tuner.
  • Page 95: Rearrange Tiles

    Rearrange tiles When you add a TV input tile, it’s added at the top of your Home screen. When you add a new streaming channel, it’s added at the bottom of your Home screen. You can easily rearrange the order of the tiles on the Home screen to suit your viewing preferences.
  • Page 96: Change Themes

    6. Repeat these steps to move other tiles until you have arranged your Home screen to your liking. Change themes Only in connected mode , another way to customize your TV is to change its theme. The theme establishes the look and feel of the TV through colors, designs, and fonts. Some themes require payment.
  • Page 97: Edit Antenna Tv Channel Lineup

    • In the My Screensavers [Mis salvapantallas] section, highlight one of your screensavers, and then press OK to switch to that preview, change settings, rate, and select that screensaver. • In the All Screensavers [Todos los salvapantallas] section, highlight a new screensaver, and then press OK to add it.
  • Page 98: Change Menu Volume

    If you need to see or hear the highlighted channel, wait a couple of seconds for Tip: the TV to start playing the channel’s picture and sound. Also note that if you’ve enabled parental controls and the program on the current channel is blocked, you won’t see a picture or hear sound while editing the channel lineup.
  • Page 99: Configure Power Settings

    Configure power settings Power settings let you configure features related to how your TV’s power settings work. Power on settings Power on settings tell the TV what to do when you turn on the power. To configure the power on settings, from the Home screen, navigate to Settings [Configuración] > System [Sistema] >...
  • Page 100: Standby Led On/Off

    • Reduce power after 15 minutes [Reducir energía después de 15 min.] – If no video or audio activity and no user interaction occur for 15 minutes, the TV automatically turns off the screen and sound. • Turn off after 4 hours [Apagar después de 4 horas] – If no video or audio activity and no user interaction occur for 4 hours, the TV goes into standby mode.
  • Page 101: Changing Caption Settings

    Changing caption settings You can find caption settings under Settings [Configuración] > Captions [Subtítulos]. • Off [Apagado] – No captions appear. • On [Activado] – Captions appear whenever they are available from the program source. • On replay [En repetición] – Captions appear only when you use the replay option, and only when you are watching a streaming program that supports instant replay.
  • Page 102 Other caption settings • Text style [Tipo de texto] – Choose from a list of fonts. As you move the highlight to each font, you can see a sample of the result in an adjacent panel. • Text edge effect [Borde de texto] – Choose from a list of edge effect styles, such as raised, depressed, and various shadows.
  • Page 103: Customize The Home Screen

    • Window opacity [Opacidad de Ventana] - Choose from a list of opacity settings for the window rectangle surrounding the entire caption. This setting determines how much the area behind the caption window shows through the window. A value of 100% blocks all of the content behind the window. As you move the highlight to each setting, you can see a sample of the result in an adjacent panel.
  • Page 104: Blocking Broadcast Tv Shows

    To create a new parental control PIN, from the Home screen menu navigate to Settings [Configuración] > Parental controls [Control parental]. The screen displays a numeric keypad. Use the arrow keys and then press OK to enter a four-digit code. Then repeat the process to enter the same PIN again, just to make sure you correctly entered the PIN you want to use.
  • Page 105 3. Make sure the check box next to Enable parental controls [Activar el control parental] is checked. If not, highlight it and press OK. Blocking based on US TV ratings Most broadcast US TV shows—other than movies—contain rating data that enables parental controls to block shows that parents don’t want others to view.
  • Page 106 • Individual content types [ (Not a UI item – translate as appropriate) ] – Highlight the rating that contains the content type you want to block, and then select the content types you want to block from among those listed. Remember that blocking a content type in one rating blocks the equivalent content type in all higher rating levels.
  • Page 107 Blocking based on Other ratings Your TV can block programs having ratings that had not been defined when the TV was manufactured. It does this by detecting a new Rating Region Table in a program and then downloading the new table and displaying its rating in the Parental controls. When the TV downloads a new Rating Region Table, it adds a new option to the list of rating types: Other ratings [Otras clasificaciones].
  • Page 108 2. In the Parental controls [Control parental] screen, navigate to TV tuner [Sintonizador] > Canadian English ratings [Sistema canadiense inglés]. 3. Select the rating level you want to block. You need only select one rating level, and all higher levels are automatically blocked. Blocking based on Canadian French ratings Canadian-French language programs that are broadcast in Canada are rated by Québec’s Ministry of Culture and Communications.
  • Page 109 From the Home screen menu, navigate to Settings [Configuración] > Parental controls [Control parental], and then enter your parental control PIN. 2. In the Parental controls [Control parental] screen, navigate to TV tuner [Sintonizador] > Block all unrated programs [Bloquear todos sin clasificación].
  • Page 110: What Happens When A Tv Show Is Blocked

    What happens when a TV show is blocked? After you’ve set up parental controls, TV shows and movies can be blocked: • When you change channels and the new channel is playing a program whose rating exceeds your settings. • When a new show comes on the channel you are watching and its rating exceeds your settings.
  • Page 111: Changing The Parental Control Pin

    To watch the blocked program, you need to know the PIN code defined when you enabled parental controls, as explained in Creating a parental control PIN. Press OK to select Unblock [Desbloquear] and display a PIN pad. 2. Use the arrow keys to enter your parental control PIN code, and then press OK to select Unblock everything [Desbloquear todo].
  • Page 112: Resetting Parental Controls

    Resetting parental controls So now your kids have grown up and gone away to college, and you no longer want to deal with blocked programs. To erase all parental control settings: From the Home screen menu, navigate to Settings [Configuración] > Parental controls [Control parental], and then enter your parental control PIN.
  • Page 113: More Settings

    More settings This section describes the features and settings of the TV that were not covered in the other parts of this guide. Guest Mode Only in connected mode , when you enable Guest Mode, your guests can sign in to subscription channels using their own account credentials instead of using yours.
  • Page 114: Network Settings

    Store to find and add channels they watch at home with confidence that they automatically will be removed on their sign-out date. For more information about the experience your guests will have when Guest Mode is enabled, see: https://support.roku.com/article/360015612834--how-do-i-set-up-auto-sign-out- mode-for-my-guests- To disable Guest Mode: Press the Home button to return to the Home screen menu.
  • Page 115: Time Settings

    This information is often useful when contacting customer support with connection issues. • Check connection [Compruebe la conexión] – Select your existing network connection type, and then press OK to start checking the network connection. The TV uses your current network information to reconfirm the wireless or wired network connection to the local network and the Internet connection.
  • Page 116: Scan Again For Antenna Tv Channels

    • Clock format [Formato de reloj] – Select whether to display time in a 12-hour This setting is available only on or 24-hour format, or to turn off time display. TVs that are connected to the Internet. Non-connected TVs do not display the time.
  • Page 117: Control By Mobile Apps

    HDMI ® input. Next, select HDMI mode [Modo HDMI] and then select one of the following settings: • Auto [Automático] – Let the TV determine the best setting. Use this option unless your HDMI ® device does not correctly communicate its HDMI ®...
  • Page 118: Home Theater Configuration

    addresses on your home network. This setting is suitable for most cases, including use of the Roku mobile app on your smartphone. • Permissive [Permisivo] – Devices can connect under all conditions, but accept commands only from private network addresses or the same subnetwork within your home network.
  • Page 119: Setting Up A Digital Audio Connection

    Setting up a digital audio connection To take advantage of your TV’s advanced audio capabilities, connect it to an external amplifier, receiver, or sound bar by using either of these two digital audio connections: • HDMI ARC [ (This is a physical panel label – do not translate) ] –...
  • Page 120: Turning Off The Tv Screen While Listening To Music

    Turning off the TV screen while listening to music Certain music channels enable you to turn off the TV screen while streaming music to your TV speakers, sound bar, home theater receiver, or Roku wireless speakers. To turn off the TV screen on supported channels: Press ...
  • Page 121 3. On the TV’s Home screen menu, navigate to Settings [Configuración] > System [Sistema] > Control other devices (CEC) [Control de otros dispositivos (CEC)] and then select Search for CEC devices [Buscar dispositivos CEC]. Press OK to repeat the discovery process, if necessary. When finished, the TV displays a list of CEC devices that are connected to each ®...
  • Page 122 • ® The CEC-compatible amplifier’s HDMI ARC connector is connected to the TV’s HDMI ARC connector with a suitable HDMI ® cable. When the CEC-compatible amplifier is off, the TV automatically turns on its speakers (unless you have turned them off as described in Turning off the speakers) and resumes local control of volume and mute state.
  • Page 123: Restart The Tv

    Restart the TV You can restart the TV when necessary. Restarting has the same effect as unplugging the TV power and then plugging it in again. To restart the TV, navigate to Settings [Configuración] > System [Sistema] > Power [Energía], and then select System restart [Reinicio del Sistema]. Highlight Restart [Reiniciar], and then press OK to confirm restart.
  • Page 124: What If I Can't Access The Factory Reset Option

    Factory reset is the recommended choice if you want to transfer the TV to another owner, and it is the only choice if you want to switch from Store mode to Home mode (if you inadvertently selected Store mode during Guided Setup). To perform a factory reset, navigate to Settings [Configuración] >...
  • Page 125: Network Connection Reset

    3. When you see the startup screen appear on the TV, release the buttons. 4. Turn on the TV and proceed through Guided Setup. See Guided Setup. Network connection reset If you want to remove your network connection information without disturbing other settings, navigate from the Home screen to Settings [Configuración] >...
  • Page 126: Update The Tv

    Under PIN preference [Preferencia de PIN], click Update [Actualizar] to open the Choose your PIN preferences [Elegir tus preferencias de PIN] page. 2. Skip this step if you just want to change your PIN. Otherwise, choose the option you prefer from among those listed: •...
  • Page 127: Checking For Updates On A Connected Tv

    Checking for updates on a connected TV If you’re one of those people who has to have the latest, most up-to-date features the moment they are available, you can check for updates as often as you want. To check for updates, navigate to Settings [Configuración] > System [Sistema] > System update, and then select Check now.
  • Page 128 select Connect to the Internet [Conectar a Internet] and follow the instructions in What if I didn’t connect my TV?. Otherwise, if you can’t connect to the Internet, select I can’t connect [No puedo conectarme], and then follow the instructions on the screen. Here’s a summary: On an Internet-connected computer, go to the web site displayed on the System update [Actualización del Sistema] screen.
  • Page 129 12- and 6-digit codes The USB update process uses a pair of codes to validate that you are authorized to install an update, and to ensure you are not attempting to install an old, unsupported version of the system software. 8.
  • Page 130: Other Devices

    Other devices Mirror your phone or tablet Only in connected mode , your TV has a feature called screen mirroring that lets you mirror your compatible smartphone or tablet on your TV. Share videos, photos, web pages, and more from compatible devices. By default, your TV’s screen mirroring mode is set to Prompt [Indicación].
  • Page 131: Roku Mobile App

    • If you prefer to never allow screen mirroring from any device, change the Screen mirroring mode [Modo de reflejo de pantalla] to Never allow [No permitir nunca]. For information on which devices may work with screen mirroring and instructions on how to use it, go to the following link on the Roku web site: go.roku.com/screenmirroring Roku mobile app...
  • Page 132: Universal Remotes

    Universal remotes In many cases, you can program your cable or satellite universal remote to also control your TV. You will need to have instructions for programming the remote handy. Check with your cable or satellite provider for instructions. For details on how to set up the TV to work with universal remotes, go to the following link on the Roku web site: go.roku.com/universalremote...
  • Page 133: Faq

    For the latest answers to Frequently Asked Questions, visit the Roku support website: go.roku.com/support...
  • Page 134 Legal statement Please note—Use of the Roku TV is governed by the Roku TV End User Agreement (see below). In addition, an end user online profile and billing account with Roku, Inc. (“Roku”) on Roku’s website (“Roku Account”) is required to stream content via the Internet using your Roku TV.
  • Page 135 almacenados en el Televisor. Para obtener instrucciones acerca de cómo restablecer la configuración original de su Televisor, visite www.roku.com/support. En este ALUF, “Canal” significa una aplicación de la Tienda del Canal Roku; “Contenido” significa películas, programas de televisión, música y otro tipo de entretenimiento o materiales de audio y video; “Proveedor de contenido” significa cualquier proveedor de Contenido;...
  • Page 136 Código con licencia separada Determinados componentes del Software se suministran con términos de licencia separada de terceros ( “Código con licencia separada”) y su derecho a usar dichos componentes está regido por dichos términos de licencia. Visite para obtener más información. https://www.roku.com/separatelylicensedcode Servicios de voz Puede utilizar su voz para controlar su Televisor (p.
  • Page 137 cualquier principio relacionado con un conflicto de leyes que pueda estipular la aplicación de la ley de otra jurisdicción; y Usted y Roku acuerdan estar sujetos a los procedimientos establecidos a continuación para la resolución de cualquier reclamación entre usted y Roku que surja de o esté relacionada con cualquier aspecto del presente ALUF, ya sea que se base en un contrato, agravio, estatuto, fraude, declaración falsa o cualquier teoría jurídica, lo cual incluye, sin carácter limitativo, las reclamaciones entre usted y Roku relacionadas con el Televisor y el Software.
  • Page 138 Disposiciones generales Roku podrá transferir sus derechos y obligaciones en virtud del presente ALUF a otra organización. Usted solo podrá transferir sus derechos u obligaciones en virtud del presente ALUF a otra persona previa aceptación por escrito de Roku. Este ALUF se constituye entre usted y Roku. Ninguna otra persona tendrá derecho a hacer cumplir estos términos.
  • Page 141 P&F Mexicana, S.A. de C.V., and P&F Mexicana, S.A. de C.V. is the warrantor in relation to this product. The Philips trademark and the Philips Shield Emblem are registered trademarks of Koninklijke Philips N.V. used under license.

Table of Contents