
Related Manuals for Inalto IUM52


Summary of Contents for Inalto IUM52
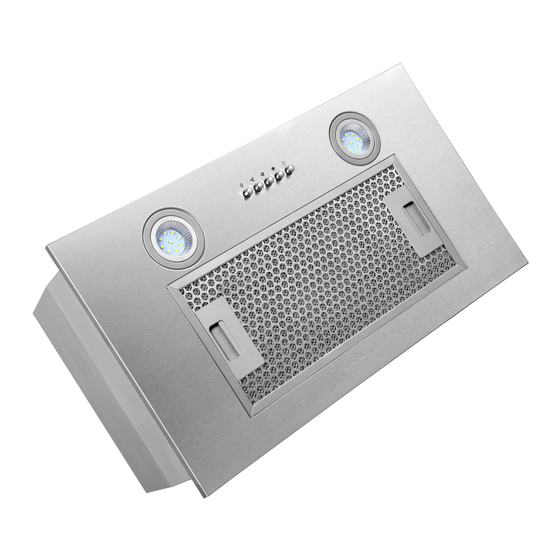
- Page 1 U S E R M A N U A L I N A L T O . H O U S E 52cm/75cm/90cm Undermount Rangehoods — M O D E L C O D E / S I U M 5 2 I U M 7 5 I U M 9 0 A H I G H E R L E V E L O F C O O K I N G...
-
Page 2: Welcome
It is important that you read through the following use and care manual thoroughly to familiarise yourself with the installation and operation requirements of your appliance to ensure optimum performance. Again, thank you for choosing an InAlto appliance and we look forward to being of service to you. -
Page 3: Table Of Contents
16 Warranty Information Customer Care InAlto recommends the use of original spare parts. When contacting our customer service team on 1300 11 4357, please ensure that you have the following information at hand (which can be found on your appliances’ rating plate). -
Page 4: Safety Information
The following statements you will see in this This manual explains the proper use of your booklet have these meanings: new InAlto rangehood. Please read this manual carefully before using the product. WARNING: Indicating information concerning This manual should be kept in a safe place your personal safety. - Page 5 • Ensure the cooker hood is switched off before carrying out maintenance, to avoid any possibility of electric shock. • Never carry out flambé cooking under the cooker hood. • This cooker hood is not suitable for use over barbecues. •...
- Page 6 Safety Instructions (Continued) ELECTRICAL CONNECTION SAFETY WARNINGS – FOR THE INSTALLER Check that the mains voltage matches with When installing the cooker hood, make sure you the voltage on the data plate inside the cooker adhere to the minimum and maximum distances hood.
- Page 7 UNPACKING DISPOSAL OF THE APPLIANCE During transportation, protective packaging Old appliances should not simply be disposed was used to protect the appliance against any of with normal household waste and should be damage. After unpacking, please dispose of delivered to a collection and recycling centre all elements of packaging in a way that will not for electric and electronic equipment.
-
Page 8: Your Inalto Rangehood
Your InAlto Rangehood YOUR RANGEHOOD SPECIFICATIONS MODEL IUM52 IUM75 IUM90 Dimensions 520mm × 280mm × 283mm 750mm × 280mm × 283mm 900mm × 280mm × 283mm (W × D × H) Cut-out Dimensions 490mm × 250mm 715mm × 250mm 865mm × 250mm (W ×... - Page 9 RANGEHOOD COMPONENTS Your InAlto Undermount Rangehood is supplied with: • 1 × Rangehood • 1 × Pack of screws • 1 × User Manual • 1 × Quick Start Guide • 1 × User Manual ADDITIONAL ITEMS REQUIRED FOR INSTALLATION •...
-
Page 10: Installation Instructions
Installation Instructions WARNING: Before starting the installation, DUCTED INSTALLATION please refer to the Safety Information section. Before beginning the installation of your rangehood, consider your ducting method. • Always switch the power off prior to This rangehood has been supplied with beginning the installation. - Page 11 IMPORTANT: The height of the rangehood • Where using flexible ducting, always install the ducting pulled taut to minimize pressure underside must be a minimum of 600mm* to a loss, and cut any excess ducting off. maximum 800mm from the top of your cooktop •...
-
Page 12: Using Your Rangehood
E R AT I N G YO U R R A N G E H O O D Using Your Rangehood CONTROLS Y our Esatto Canopy Rangehood features push button controls. Your Undermount Rangehood features push button controls (Figure 6) with three speed levels of extraction. -
Page 13: Maintenance & Cleaning
Maintenance & Cleaning CAUTION: STAINLESS STEEL SURFACES • Before maintenance or cleaning is carried Clean stainless steel surfaces using non-abrasive out, the rangehood should be disconnected cleaning products that are specifically for use from the main power supply. Ensure that the on stainless steel. -
Page 14: Troubleshooting
Troubleshooting OPERATION IN CASE OF EMERGENCY In the event of an emergency you should: • Switch off all rangehood controls. • Switch the rangehood off at the power outlet and immediately unplug. • Call After Sales Support. Some minor faults can be fixed by referring to the instructions given in the table below. IMPORTANT: If your appliance appears to be operating incorrectly, then you should disconnect it from your electrical supply and then contact After Sales Support. -
Page 15: Purchase Details
Purchase Details For future reference, please record the following information in the form below. The product details can be found on the rating plate (located within the rangehood, behind the aluminium grease filter), installation details and purchase details which can be found on your sales invoice. STORE DETAILS STORE NAME ADDRESS... -
Page 16: Warranty Information
Warranty Information AUSTRALIAN WARRANTY TERMS & CONDITIONS This warranty only applies to Appliances RANGEHOOD APPLIANCES purchased and used in Australia and is in addition to (and does not exclude, restrict, or This document sets out the terms and conditions modify in any way) any non-excludable statutory of the product warranties for Residentia Group warranties in Australia. - Page 17 (a) the Appliance is damaged by: failure. The benefits to you given by this warranty accident are in addition to your other rights and remedies (ii) misuse or abuse, including failure to properly under a law in relation to the Appliances or services to which the warranty relates.
- Page 18 THIS PAGE IS INTENTIONALLY LEF T BL ANK...
- Page 19 Simply visit the below website, or ask your retailer 24 months on the microwave magnetron; Waste for help: www.inalto.co.nz/register disposers have a 12 month warranty. The provision of service under this warranty is...
- Page 20 A H I G H E R L E V E L O F C O O K I N G — W W W . I N A L T O . H O U S E —...
Need help?
Do you have a question about the IUM52 and is the answer not in the manual?
Questions and answers