
Related Manuals for aFe Power 77-84013


Summary of Contents for aFe Power 77-84013
- Page 1 Instruction Manual P/N: 77-84013 SCORCHER BLUE POWER MODULE Make: Chevrolet Model: Silverado 1500 Year: 19-20 Engine: I4-2.7L(t) Make: GMC Model: Sierra 1500 Year: 19-20 Engine: I4-2.7L(t)
- Page 2 DISCLAIMER OF WARRANTY AND LIMITATION OF LIABILITY: Advanced FLOW Engineering, Inc. (also known as aFe or aFe POWER) and its successors, distributors, jobbers, and dealers (hereafter “SELLER”) shall in no way be responsible for the product’s improper use and service. It is the installer’s responsibility to check for proper installation and if in doubt, contact the manufacturer.
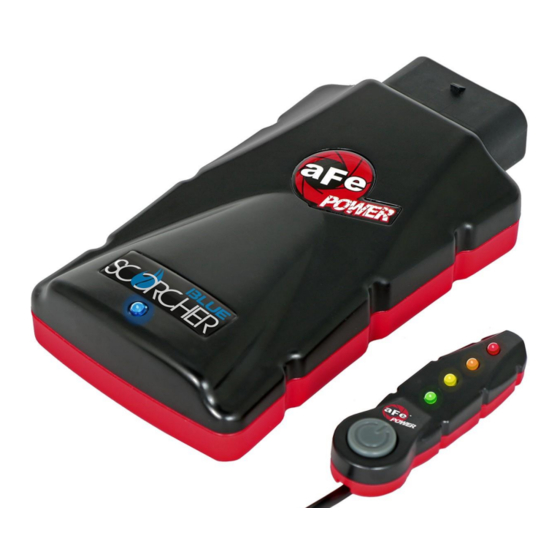
- Page 3 Label Qty. Description Part Number Module R77-84013 LED Switch 05-70029 Bypass Plug 05-70017 Harness AFE-10-248 Velcro (2” Inches) 05-01244 Cable Ties 05-60167 Double Sided Tape 07-90001 Page 3...
- Page 4 Figure A Refer to Figure A for Step 1 Step 1: Before installing your aFe POWER module, you will have to place your vehicle’s ECU in sleep mode. In order to do this, you will need to do the following: •...
- Page 5 REMOVAL Figure B Refer to Figure B for Steps 2-3 Step 2: Remove the front dust cover to gain access to the T-MAP sensor. This cover can be removed by pulling up on the plastic push-clips and removing the hood latch. The cover can now be lifted up and placed to the side.
-
Page 6: T-Map Sensor
Step 5: Locate the T-MAP sensor jumper harness on the aFe POWER harness. It is identified with a white label. Plug the female connector of the aFe POWER harness into the T-MAP sensor, then take the male connector of the aFe POWER harness and connect to the female connector of the engine harness. - Page 7 INSTALL Figure D Refer to Figure D for Step 6 Step 6: Re-install the dust cover while making sure that the wire loom exits the cover through the slot on the side of the cover. Re-install the plastic push clips and the hood latch. Page 7...
- Page 8 Step 8: Locate the MAP sensor jumper harness on the aFe POWER harness. It is labeled T-MAP. This is the harness with four wires in each connector. Plug the female connector of the aFe POWER harness into the MAP sensor, then the male connector of the aFe POWER harness into the female connector of the engine harness.
- Page 9 INSTALL Figure F Refer to Figure F for Step 9 Step 9: Check with the pictures to make sure the connectors are correctly connected. Make sure that the connections are fully engaged. Usually, connectors make a snapping sound when fully engaged. Page 9...
- Page 10 Step 10: Connect the red wire from the aFe POWER harness to the positive post on the battery terminal. Step 11: Connect the black wire from the aFe POWER harness to the grounding post on the frame of the vehicle.
- Page 11 Step 12: Secure the Scorcher module on top of the driver side fender, next to the air filter housing. Secure the module using the supplied Velcro. Step 13: Connect the harness from the aFe POWER harness to the Scorcher Blue Module. Use the provided cable ties to secure the harness away from any moving parts.
- Page 12 INSTALL Figure I Refer to Figure I for Step 14-15 (Optional) Step 14: Locate the grommet for the hood release cable inside of the cabin’s driver side footwell and slightly pull it to the side in order to route the LED switch. Step 15: Route the connector for the LED switch out to the engine bay using this hole.
- Page 13 Step 17: Mount the switch on an open, flat surface using the included double-sided tape. Step 18: Connect the LED switch to the aFe POWER harness in the engine compartment. The installation of the module itself is now complete. Keep reading the installation instruction to learn how to use all of its features.
- Page 14 Figure K Refer to Figure K (Picture is for reference) The blue LED light will start flashing once the module is connected to the car and the ECU is on. The blue LED will become solid if the module gets connected through Bluetooth to a device Page 14...
- Page 15 Figure L Refer to Figure L (LED Switch) When turning on the vehicle, each LED will flash, and it will stop at its last setting. The LED on the switch represents the different level of power. • Green LED: Stock •...
- Page 16 Figure M Refer to Figure M* (app connection-iOS) For iOS devices, download the app from the apps store. Make sure the Bluetooth is activated on your device. Open the app and it will automatically connect through Bluetooth to the SCORCHER BLUE module when both the vehicle and module are on. When connected, the vehicle description will appear on top of the screen and the gauges will show current data.
- Page 17 Figure N Refer to Figure N* (app connection-Android) For Android devices, download the app from the play store. For the initial connection, go to the Bluetooth settings of your device, turn on Bluetooth and scan for available devices. Select “aFe SCOR” and pair with device. The vehicle needs to be on and the module connected.
- Page 18 Figure O Refer to Figure O (Custom Tuning) The aFe POWER SCORCHER BLUE app offers the capability to custom tune the different modes. Go to the menu on the top right corner and select “Tune”. Select the mode you would like to custom tune and adjust the sliders at low, medium, and high load.
- Page 19 Use the aFe POWER SCORCHER BLUE app responsibly. Always drive safely and obey traffic laws. aFe POWER is not responsible for any accidents, injuries, or property damage that may occur during its use.
- Page 20 Figure Q Refer to Figure Q (Bypass Plug) A bypass plug is included in the kit. The plug can be connected to the harness instead of the module. Once the bypass plug is connected, the vehicle will run in factory settings. Make sure the plug is fully engaged when connected to the harness.
- Page 21 Page left blank intentionally. Page 21...
- Page 22 Twisted Steel Down-Pipe (Street) Pro GUARD HD Oil Filter Momentum GT Cold Air Intake System Sprint Booster P/N: 48-34138-YC P/N: 44-LF047 P/N: 50-70042R P/N: 77-14009 Blue Squeeze Restore Kit Magnum FLOW Pro 5R Air Filter Apollo GT Series Cat-Back Vulcan Series Exhaust System P/N: 90-50501 P/N: 30-10292 P/N: 49-44108-P...
-
Page 23: Warranty
Warranty General Terms: • aFe warrants their products to be free from manufacturer’s defects due to workmanship and material. • This warranty applies only to the original purchaser of the product and is non-transferrable. • Proof of purchase of the aFe product is required for all warranty claims. •... - Page 24 252 Granite Street Corona, CA 92879 TEL: 951.493.7100 • TECH: 951.493.7185 E-Mail:Tech@aFepower.com P/N: 06-81221...
Need help?
Do you have a question about the 77-84013 and is the answer not in the manual?
Questions and answers