Advertisement
Available languages
Available languages
Quick Links
JS PRODUCTS | 6445 MONTESSOURI STREET, LAS VEGAS, NV 89113
(APR18)
Part No. 41545
Copyright © 2018 D
D
WALT
and the D
WALT Logo are trademarks of the D
®
E
E
and are used under license. The yellow/black color scheme is a trademark for D
Definitions: Safety Guidelines and Words
This instruction manuals use the following safety alert symbols and words to alert you
to hazardous situations and your risk of personal injuery or property damage.
WARNING:
Indicates a potentially hazardous situation which, if not avoided, could
result in death or serious injury.
CAUTION:
Indicates a potentially hazardous situation which, if not avoided, may
result in minor or moderate injury.
(Used without word) Indicates a safety related message.
NOTICE:
Indicates a practice not related to personal injury which, if not avoided,
may result in property damage.
IF YOU HAVE ANY QUESTIONS OR COMMENTS ABOUT THIS OR ANY D
CALL US TOLL FREE AT: 1-844-377-8451
WARNING! Read and understand all instructions.
important safety and operating instructions.
before assembling this storage rack and save it for reference.
SAVE THESE INSTRUCTIONS
TECHNICAL SPECIFICATIONS
Technical Specifications
Total Capacity
Capacity per Shelf
Height
Width
Depth
GENERAL SAFETY
•
Keep work area clean and dry.
•
Use correct/recommended tools for the job.
•
Never leave tools unattended.
•
Never force a part into place.
•
Wear safety apparel.
•
Wear safety glasses/goggles.
•
Never crawl, sit, stand, or climb on a rack.
•
Keep small parts away from children. Never leave a small child unattended while assembling.
•
Always use common sense – your personal safety is your responsibility.
SPECIFIC SAFETY FOR WALL MOUNT BRACKET
WARNING:
Serious or fatal crushing injuries can occur from shelving tipping over. To prevent this, the rack
must be secured to a wall, especially in earthquake-prone environments, where surfaces are uneven, and where
children and/or pets are present.
Different wall materials require different types of fasteners. Use fasteners suitable for your specific type of wall.
If you are uncertain about what type of fasteners to use, then please contact your local hardware store.
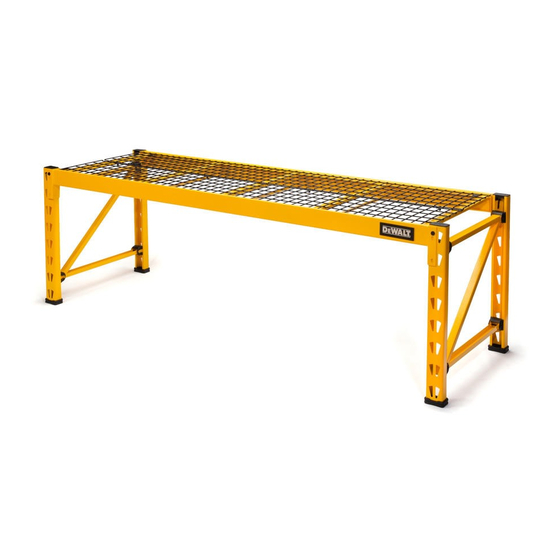
DXST10000EXT
Copyright © 2018, D
WALT
E
WALT.
E
WALT Industrial Tool Co., or an affiliate thereof
E
WALT power tools
E
& accessories.
WALT TOOL,
E
This manual contains
Please read this manual carefully
2,500 lb (1,133.9 kg)
*when weight is evenly distributed
2,500 lb (1,133.9 kg)
*when weight is evenly distributed
24" (61 cm)
77" (195 cm)
24" (61 cm)
WARNING:
DO NOT EXCEED THE FOLLOWING WEIGHT LIMITS FOR
THIS RACK
•
Maximum load for each shelf: Up to 2,500 lb (1,133.9 kg) when weight is evenly distributed. It is recommended that
the heaviest load be placed on the bottom shelf of the existing DXST10000 if you are stacking the unit on top.
Parts List
No.
Description
1
Vertical Beam
2
Pre-Bolted Vertical Assembly
3
Vertical Assembly Bolt
4
Crossbeam
5
Shelf Support Strap
6
Safety Strap With Weld Nut
7
Safety Strap Bolt
8
Wire Grid
9
Stacking Plate
10
Locking Shelf Pin
11
Locking Grid Clip
12
Carriage Bolt
13
10 mm Nut
14
10 mm Wrench
15
4 mm Hex Key
16
4 mm Hex Bit
17
Wall Mount Bracket Assembly
18
Upright Bracket Sleeve
19
Grid Joining Clip Assembly
3
5
6
7
9
10
11
12
Tools Required for Rack Assembly: 4 mm Hex Key (included) OR 4 mm Hex Bit (included), 10 mm Wrench
(included), Rubber Mallet (not included), and Flat-Head Screwdriver (not included).
NOTE: DXST10000 4-Shelf Industrial Rack not included with this Extension Kit.
READ ALL INSTRUCTIONS
BEFORE YOU BEGIN:
•
Read all instructions thoroughly.
•
Remove all components from the box, and lay them on the floor in an orderly fashion.
•
Wear eye protection.
•
Be cautious of sharp edges.
•
Keep this information for further reference.
Expandable Upright Frame Instructions (Fig. 1-3)
NOTE: For ease of assembly, two (2) vertical beams feature pre-bolted horizontal and diagonal beams.
1. Place one (1) vertical beam and one (1) pre-bolted vertical beam on the floor, parallel to one another (about
24"/61 cm apart). The widest part of the teardrop-shaped hole pattern on each beam should be facing upward
(or away from you).
2. Place cover (18) over the U-shaped upright bracket. (There are 2 style covers, be sure to match the orientation
shown in Fig. 1.)
3. Take the free end of the diagonal beam and insert it into the free end of the top horizontal beam. Align the
holes. Insert both beams into the U-shaped bracket at the top of the opposing vertical beam, and align the
holes. Using the included hex key or hex bit, thread a vertical assembly bolt through the holes and into the
weld nut that is attached to the U-shaped bracket. Do not fully tighten the bolt. (Fig. 1)
4. Swing out the bottom horizontal beam, and insert it into the U-shaped bracket at the bottom of the opposing
vertical beam. Thread a vertical assembly bolt through the holes and into the weld nut that is attached to the
U-shaped bracket. Do not fully tighten the bolt. (Fig. 2)
5. Repeat Steps 1-3 to assemble the second upright frame. Once both are assembled, fully tighten the bolts
on all four corners. Be careful not to over-tighten the bolts; there should be no deformation of the U-shaped
brackets and/or horizontal beams. (Fig. 3)
FIG. 1
FIG. 2
Qty.
4
2
2
4
2
5
1
3
6
2
4
12
4
2
2
1
1
1
1
4
4
13
14
15
16
17
18
19
FIG. 3
TOP HORIZONTAL BEAM
24"
(60.9 CM)
DIAGONAL
BEAM
BOTTOM HORIZONTAL BEAM
8
2
x 4
x 4
Advertisement

Related Manuals for DeWalt DXST10000EXT


Summary of Contents for DeWalt DXST10000EXT
- Page 1 Wall Mount Bracket Assembly Upright Bracket Sleeve Grid Joining Clip Assembly JS PRODUCTS | 6445 MONTESSOURI STREET, LAS VEGAS, NV 89113 (APR18) Part No. 41545 DXST10000EXT Copyright © 2018, D WALT Copyright © 2018 D WALT. WALT and the D WALT Logo are trademarks of the D WALT Industrial Tool Co., or an affiliate thereof...
- Page 2 Stacking Instructions (Fig. 13-15) NOTE: Every DXST10000EXT Extension Kit comes with four (4) stacking plates. In order to safely stack an Extension Kit on top another Extension Kit or on top a DXST10000, you MUST use four (4) of these plates. These steps instruct how to stack an Extension Kit onto the DXST10000 Industrial Rack.
- Page 3 WALT WALT et le logo D WALT sont des marques de commerce de DEWALT Industrial Tool Co. ou d’une ® société affiliée à cette dernière et sont utilisés sous licence. L’agencement de couleurs jaune et noir est une marque de commerce des outlils électriques et accessorires D WALT.
- Page 4 2. À l’aide d’un tournevis et d’un maillet en caoutchouc, retirez les quatre pattes au bas des châssis verticaux nouvellement assemblés. Il s’agit désormais de l’étagère supérieure. Retirez les quatre capuchons noirs du haut de la seconde étagère DXST10000EXT ou DXST10000 entièrement assemblée. Il s’agit désormais de la tablette inférieure.
-
Page 5: Definiciones: Normas De Seguridad
Web afin d’obtenir les renseignements relatifs à la garantie. JS PRODUCTS | 6445 MONTESSOURI STREET, LAS VEGAS, NV 89113 (APR18) Part No. 41545 DXST10000EXT Copyright © 2018, D WALT WALT ®... - Page 6 Instrucciones de apilamiento (Fig. 13-15) NOTA: Cada kit de extensión DXST10000EXT viene con cuatro (4) placas para apilar. Para apilar de forma segura un Kit de extensión en la parte superior de otro Kit de extensión o en la parte superior de un DXST10000, DEBE usar cuatro (4) de estas placas.
Need help?
Do you have a question about the DXST10000EXT and is the answer not in the manual?
Questions and answers