Table of Contents
Advertisement
Advertisement
Table of Contents

Subscribe to Our Youtube Channel
Related Manuals for Sturtevant Richmont Global 400mp


Summary of Contents for Sturtevant Richmont Global 400mp
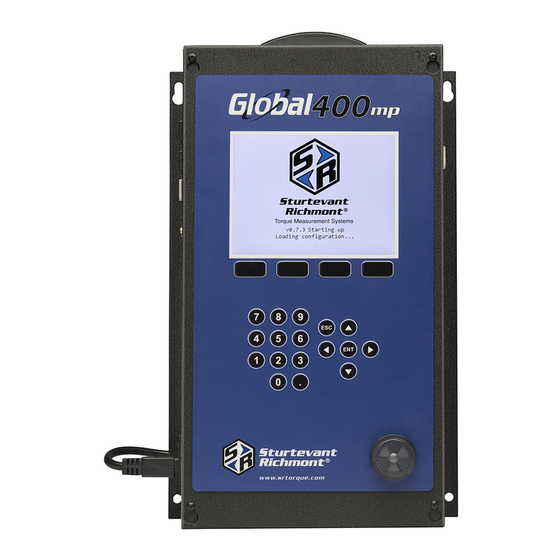
- Page 1 Global 400mp User Manual v4.0 17 August 2016...
-
Page 2: Table Of Contents
Jobs ............................33 Network Setup .......................... 35 Unit Setup ..........................36 Events ............................42 Network Log ..........................43 Chapter 4: Serial communications ....................44 Introduction ..........................45 Barcode ............................. 45 Global 400mp User Manual 2 of 72 v4.0 17 August 2016... - Page 3 Download data to USB ......................67 Upload USB file to device ......................68 Chapter 9: Firmware Updates ....................... 69 Chapter 10: Product Specifications ....................71 Dimensions ..........................72 Radio Information ........................72 Global 400mp User Manual 3 of 72 v4.0 17 August 2016...
-
Page 4: Quick Start
Quick Start Global 400mp User Manual 4 of 72 v4.0 Quick Start 17 August 2016... - Page 5 SR Distributor, or call Sturtevant Richmont at +1-847-455-8677. Email is customerservice@srtorque.com. To use a tool with the Global 400mp, you must first “learn” (connect the radios) in the tool and the Global 400mp. To do so, press the button below MENU.
- Page 6 In the tools menu, press ENT to go to the main tools page. If the tool you are going to learn to the Global 400mp has previously been used with another unit, make sure the tool has been “forgotten” (radio disconnected) from that unit before continuing.
- Page 7 Then press ENT to go to the Select Interface screen. By default, tools learn into interface 1. Press ENT to select interface 1 and go to the Choose Parameter or Job screen. Global 400mp User Manual 7 of 72 v4.0...
- Page 8 You will be returned to the Run screen, now with Parameter 1 selected. You can now perform tightenings with Tool 1 that will be monitored, stored, and reported by the Global 400mp. Global 400mp User Manual 8 of 72 v4.0 Quick Start...
-
Page 9: Chapter 1: Overview
Chapter 1: Overview Global 400mp User Manual 9 of 72 v4.0 Chapter 1: Overview 17 August 2016... -
Page 10: Warnings
• Before performing any maintenance on the unit, make sure to turn it off and remove the power plugs. • There are no user serviceable parts inside the main enclosure of the unit. Global 400mp User Manual 10 of 72 v4.0... -
Page 11: Unit Overview
(See the Unit Setup section in the next chapter.) The Global 400mp has two RJ-45 Ethernet ports to allow it to be used in a chain or ring network configuration. The USB-A connector is used to provide firmware updates via a standard USB drive. -
Page 12: Chapter 2: Using The Unit
Chapter 2: Using the unit Global 400mp User Manual 12 of 72 v4.0 Chapter 1: Overview 17 August 2016... -
Page 13: Concepts
To use a tool with the Global 400mp, you must first “learn” (connect the radio) the tool to the Global 400mp. The process to do this is described in the Quick Start. Tools are not activated directly by the unit. Instead, they are activated when a parameter that uses the tool is running. -
Page 14: Run Screen
If an interface is suspended by multiple sources, only one will be shown. 14. Inactive parameter – When an interface has no active parameter, the interface slot will be grayed out. Global 400mp User Manual 14 of 72 v4.0... - Page 15 • Yellow – An accepted or rejected tightening occurred that completed a batch. This color will only occur when the Global 400mp NOKs setting is set to Count and one or more rejected tightenings were counted towards the current batch.
-
Page 16: History
• Id – The tightening id number. This screen shows only the last 4 digits of the id number; additional digits may be present in the network commands. Global 400mp User Manual 16 of 72 v4.0 Chapter 1: Overview... -
Page 17: Unit Status
Figure 5: Rundown Graph screen Function keys 1. EDIT – Go to the Parameter Edit screen for the running parameter. This will require the password to be entered. Global 400mp User Manual 17 of 72 v4.0 Chapter 1: Overview 17 August 2016... -
Page 18: Network Status
MID received or which EtherNet/IP connection points are being used. Global 400mp User Manual 18 of 72 v4.0 Chapter 1: Overview... -
Page 19: Tool Status
(changed from the Unit Setup screen). • White – The Global 400mp has not received a packet from the tool since it started up. For battery level, the charge remaining is shown. Not all tools report their current battery level. -
Page 20: I/O State
The I/O State screen shows the status of the defined I/O devices. If an input or output is active, its box will be shaded in green. Inactive inputs and outputs will be shown in yellow. See the GIM400 User Manual for more information about the available I/O options. Global 400mp User Manual 20 of 72 v4.0... -
Page 21: Chapter 3: Configuring The Unit
Chapter 3: Configuring the unit Global 400mp User Manual 21 of 72 v4.0 Chapter 3: Configuring the unit 17 August 2016... -
Page 22: Introduction
Introduction Most of the features of the Global 400mp can be configured directly on the unit. The configuration, along with parameter and job selection is available from the unit menu. The menu is available from the Run screen by pressing function key 4 or ENT. -
Page 23: Main Menu
Main Menu Figure 10: Main menu The Global 400mp menu provides the entry point to configure and control the unit. You must enter the box password before entering the menu from the Run screen. If you cannot remember the password, you may reset it to the factory default (0104) by entering the sequence “6853.48”... -
Page 24: Tools
Holding tools cannot perform a tightening themselves and are only used along with a primary tool. The Global 400mp allows you to learn up to 16 primary tools and 8 holding tools. While each set of tools gets a separate screen, the processes for learning and editing them is similar. - Page 25 Radio Info The radio info shows the radio address and the firmware version used by the radio to communicate with the Global 400mp. This field cannot be edited. Serial Number The tool serial number can be up to 14 numbers, letters, or decimal points.
- Page 26 For other tools, this field must be updated manually when the tool is calibrated. The date can be set to the current time in the Global 400mp by selecting Set Now at the end of the Next Calibration row and pressing the ENT key. This can be helpful when the recalibration period is a full month because you will only need to update the month (and year when at the end of the year).
- Page 27 Forgetting Tools (breaking/erasing the radio connection) Each tool can only be associated with a single Global 400mp at a time, but learning a tool to another Global 400mp does not automatically remove it from the previous Global 400mp. If you have changed or are planning to change a tool from a Global 400mp to another Global 400mp, you should erase (the forget function) the radio connection in the tool with the Global 400mp.
-
Page 28: Parameters
• The assigned tool is assigned to another interface • The parameter configuration is invalid Configuration Options The configuration options for a parameter depend on the type of tool selected for the parameter. Global 400mp User Manual 28 of 72 v4.0 Chapter 3: Configuring the unit... - Page 29 These settings determine which socket is used with the tool for a parameter. If set to 0, no socket is defined for the tool. The socket settings are only relevant when combined with the Verify Global 400mp User Manual 29 of 72 v4.0...
- Page 30 This setting determines if the unit will lock or restart the parameter when a batch is completed. When set to yes, the Global 400mp will stop when a batch is completed and transition to a no active parameter state. When set to no, the Global 400mp will restart the parameter when a batch is completed.
- Page 31 This setting controls the mode the tool uses to determine the torque. Direction Default: Positive Values: Positive, Negative, Both This setting controls the allowed torque directions for the parameter. Global 400mp User Manual 31 of 72 v4.0 Chapter 3: Configuring the unit 17 August 2016...
- Page 32 Range: 0 to 99.9 psi This setting controls the pressure at which the transducer will start monitoring a tightening. Threshold 2 Range: 0 to 99.9 psi Global 400mp User Manual 32 of 72 v4.0 Chapter 3: Configuring the unit 17 August 2016...
-
Page 33: Jobs
If an assigned parameter is unable to be selected, the job cannot be selected. Configuration Options Figure 30: Job Edit screen Global 400mp User Manual 33 of 72 v4.0 Chapter 3: Configuring the unit... - Page 34 This setting determines if the unit will lock or restart the job when the job is completed. When set to yes, the Global 400mp will stop when the job completes and transition to a no active parameter state. When set to no, the Global 400mp will restart the job when it completes.
-
Page 35: Network Setup
4. CANCEL [ESC] – Discards changes to the general Network Setup and returns to the Network Setup menu Changes to these settings only apply after the Global 400mp is restarted. The settings in this page apply to all interfaces. See the protocol specific chapters for information about the configuration options for each protocol. -
Page 36: Unit Setup
Page 1 Global 400mp Name The Global 400mp name can be up to 25 numbers, letters, or decimal points. The Global 400mp name is sent to the network in the Controller Name field of various commands. Password The password can be up to 10 numbers. The “password” shown on this screen is a placeholder and does not necessarily represent the length of the actual password. - Page 37 Default: 1 Range: 1 to 12 This setting controls which channel is used by the Global 400mp radio. All tools learned to the Global 400mp will be set to this channel automatically as part of the learn process. In general, this setting does not have to be changed, but if tool communication is not working reliably, changing this setting may improve communication.
- Page 38 This setting controls how long the on-screen indication of an accepted tightening that was not the last in a batch will be shown. When set to 0, the indication will remain until another tightening is received or the Global 400mp changes or stops the currently running operation. Partial seconds may be entered for this setting.
- Page 39 Clear VIN on batch setting. If the VIN is cleared while an operation is running and this setting is set to yes, the Global 400mp will immediately suspend that interface until a new VIN is entered for the interface. There is only one copy of this setting for the entire Global 400mp, but each interface has its own VIN and is suspended and resumed separately when this setting is enabled.
- Page 40 This setting determines how the Exacta 1200 will behave when it loses communication with the Global 400mp. If set to Batch, the Exacta 1200 will record tightenings up to the completion of a full batch before disabling. If set to Single, the Exacta 1200 will disable after each result until it receives confirmation that the result was received by the Global 400mp.
- Page 41 If the XBEE channel was changed from the default, the unit will go to the Channel Change screen to update the tools back to the default XBEE channel when resetting the default Global 400mp settings. Global 400mp User Manual 41 of 72 v4.0...
-
Page 42: Events
Events Figure 42: Main menu – Logs Figure 43: Logs Menu screen – Events Figure 44: Events screen Function keys 1. No function Global 400mp User Manual 42 of 72 v4.0 Chapter 3: Configuring the unit 17 August 2016... -
Page 43: Network Log
The current time is shown at the bottom of the screen for comparison. • Source – The remote IP address for this event. • Packet – Information about the packet sent or received or network connection start/stop. Global 400mp User Manual 43 of 72 v4.0... -
Page 44: Chapter 4: Serial Communications
Chapter 4: Serial communications Global 400mp User Manual 44 of 72 v4.0 Chapter 4: 17 August 2016... -
Page 45: Introduction
The Global 400mp has a DSUB-9 serial port that provides bar code reading and serial printing functionality. As the same connector is used for both functions, you will need a special Y-style cable if you want to attach both a barcode reader and a serial printer to the Global 400mp at the same time. - Page 46 This command sets the Identifier part 2 (VIN characters 26-50) reported by the unit in tightening result messages and the ACOP MID 0152 Multiple identifier and result parts notifications. Data: up to 25 characters Example: *%06%B23FJ9S3%* Global 400mp User Manual 46 of 72 v4.0 Chapter 4: 17 August 2016...
- Page 47 *%13%%* 30. Reset parameter batch count This command resets the count of the specified parameter. If the specified parameter is not running, this bar code is ignored. Global 400mp User Manual 47 of 72 v4.0 Chapter 4: 17 August 2016...
-
Page 48: Serial Printer
This bar code would select interface 2 to receive the next barcode. Serial Printer The Global 400mp provides serial printer output in two formats, line and CSV. The Global 400mp will print tightenings based on the format selected on the second page of the Unit Setup menu. - Page 49 • Torque Min • Torque Max • Torque Units • Torque Mode • Torque Status • Angle • Angle Min • Angle Max • Angle Status Global 400mp User Manual 49 of 72 v4.0 Chapter 4: 17 August 2016...
-
Page 50: Chapter 5: Atlas Copco Open Protocol
Chapter 5: Atlas Copco Open Protocol Global 400mp User Manual 50 of 72 v4.0 Chapter 5: Atlas Copco Open Protocol 17 August 2016... -
Page 51: Introduction
Range: 0 to 3600 seconds Default: 10 seconds This setting controls how long the Global 400mp will wait for a response from the client when sending a subscription notification packet, such as MID 0015 or MID 0061. If no response is received within the specified ack timeout, the Global 400mp will try again, up to the specified number of retries. - Page 52 If set to no, only accepts will be sent to the network, both cycles and batch completes. This setting does not affect if rejects are logged to the unit storage and has no effect if the Global 400mp NOKs setting is not set to Report or Count. Port...
- Page 53 • 0157 Reset All Identifiers Protocol Mode Default: 1 This setting determines the mode used by the Global 400mp for Open Protocol connections. This setting should be left on the default unless specifically advised otherwise by the factory. Global 400mp User Manual 53 of 72 v4.0...
-
Page 54: Supported Commands
Multiple identifier and result parts (subscribe/acknowledge/unsubscribe) 0156 Reset latest Identifier 0157 Reset all Identifiers 0270 Controller reboot request 0420-0423 Open Protocol commands disabled (subscribe/acknowledge/unsubscribe) 9999 Keep alive message Global 400mp User Manual 54 of 72 v4.0 Chapter 5: Atlas Copco Open Protocol 17 August 2016... -
Page 55: Unsupported Commands
User data (subscribe/acknowledge/unsubscribe) 0250-0253 Selector socket info (subscribe/acknowledge/unsubscribe) 0254 Selector control green lights 0255 Selector control red lights 0260 Tool tag ID request Global 400mp User Manual 55 of 72 v4.0 Chapter 5: Atlas Copco Open Protocol 17 August 2016... - Page 56 Revisions Command 0300,0301 Histogram upload request/reply 0261-0264 Tool tag ID (subscribe/acknowledge/unsubscribe) 0400-0403 Automatic/Manual mode (subscribe/acknowledge/unsubscribe) 0410,0411 AutoDisable settings request/reply Global 400mp User Manual 56 of 72 v4.0 Chapter 5: Atlas Copco Open Protocol 17 August 2016...
-
Page 57: Chapter 6: Toolsnet
Chapter 6: ToolsNet Global 400mp User Manual 57 of 72 v4.0 Chapter 6: ToolsNet 17 August 2016... -
Page 58: Introduction
PIM server port Default: 6575 Range: 0 to 65535 This setting controls the port the Global 400mp will use to establish a ToolsNet connection at the PIM server address. PIM retry interval Default: 60 seconds Range: 0 to 3600 seconds This setting controls how long the Global 400mp will wait after a failed attempt to establish a ToolsNet connection before it tries again. - Page 59 Range: 0 to 3600 seconds This setting controls how often the Global 400mp will send a keep alive packet to the ToolsNet server if no other packets are being sent. When set to 0, the Global 400mp does not send keep alive packets.
- Page 60 This setting controls the station number the Global 400mp reports to the ToolsNet server in identification and tightening packets. The same System number will be used for connections from all interfaces. Global 400mp User Manual 60 of 72 v4.0 Chapter 6: ToolsNet...
-
Page 61: Chapter 7: Ethernet/Ip
Chapter 7: EtherNet/IP Global 400mp User Manual 61 of 72 v4.0 Chapter 7: EtherNet/IPTM 17 August 2016... - Page 62 1, the next set to interface 2, and so on. Output (O->T) Connection Points The following connection points are used by the Global 400mp to take input data from the network. These connection points allow you to control the running operation of the Global 400mp.
- Page 63 Input (T->O) Connection Points This section defines the connection points are used by Global 400mp to send output data to the network. The connection points are in the range 110-129 and are grouped by their content. • 51x: Last tightening data •...
- Page 64 Current status for each of the 4 interfaces. Each array entry corresponds to an STRUCT of: interface. Parameter Number USINT Parameter number (0 means parameter not running.) Job Number USINT Job number. (0 means job not running) Suspend BOOL Global 400mp User Manual 64 of 72 v4.0 Chapter 7: EtherNet/IPTM 17 August 2016...
- Page 65 Angle of the last tightening performed by the parameter Last Tightening ID UDINT ID number of the last tightening performed by the parameter Total size: 80 bytes Global 400mp User Manual 65 of 72 v4.0 Chapter 7: EtherNet/IPTM 17 August 2016...
-
Page 66: Chapter 8: Data Management
Chapter 8: Data Management Global 400mp User Manual 66 of 72 v4.0 Chapter 8: Data Management 17 August 2016... -
Page 67: Download Data To Usb
The Global 400mp can download configuration data, results and event logs to and upload configuration data and firmware from a USB drive. When a USB drive is plugged into the unit, it will switch from whatever screen it is on to the USB Menu. -
Page 68: Upload Usb File To Device
Configuration files have the extension “.g4m”. If a file is found, the unit must validate the file before uploading it. These files can be created by downloading from a Global 400mp or by saving a configuration file from the PC application. This file contains all the configuration settings for the unit, including tools, parameters, jobs, and Global 400mp and network settings. -
Page 69: Chapter 9: Firmware Updates
Chapter 9: Firmware Updates Global 400mp User Manual 69 of 72 v4.0 Chapter 9: Firmware Updates 17 August 2016... - Page 70 UPLOAD to start the upload. 7. When the upload is complete, the unit will restart. At this point, you may remove the USB drive. Global 400mp User Manual 70 of 72 v4.0...
-
Page 71: Chapter 10: Product Specifications
Chapter 10: Product Specifications Global 400mp User Manual 71 of 72 v4.0 Chapter 10: Product Specifications 17 August 2016... -
Page 72: Global 400Mp User Manual 2 Of
Channel Frequencies Channel Frequency (GHz) 2.410 2.415 2.420 2.425 2.430 2.435 2.440 2.445 2.450 2.455 2.460 2.465 Global 400mp User Manual 72 of 72 v4.0 Chapter 10: Product Specifications 17 August 2016... - Page 73 TEMPLATE GLOBAL 400...
Need help?
Do you have a question about the Global 400mp and is the answer not in the manual?
Questions and answers