Table of Contents
Advertisement
• OWNER'S MANUAL
• MODE D'EMPLOI
• MANUAL DE OPERACIÓN
ALPINE ELECTRONICS, INC.
Tokyo office: 1-1-8 Nishi Gotanda,
Shinagawa-ku,
Tokyo 141-8501, Japan
Tel.: (03) 3494-1101
ALPINE ELECTRONICS OF AMERICA, INC.
19145 Gramercy Place, Torrance,
California 90501, U.S.A.
Tel.: 1-800-ALPINE-1 (1-800-257-4631)
ALPINE ELECTRONICS OF CANADA, INC.
Suite 203, 7300 Warden Ave. Markham,
Ontario L3R 9Z6, Canada
Tel.: 1-800-ALPINE-1 (1-800-257-4631)
Yamagata Printing Co., Ltd.
2-6-34, Takashima, Nishi-ku, Yokohama,
Kanagawa, Japan
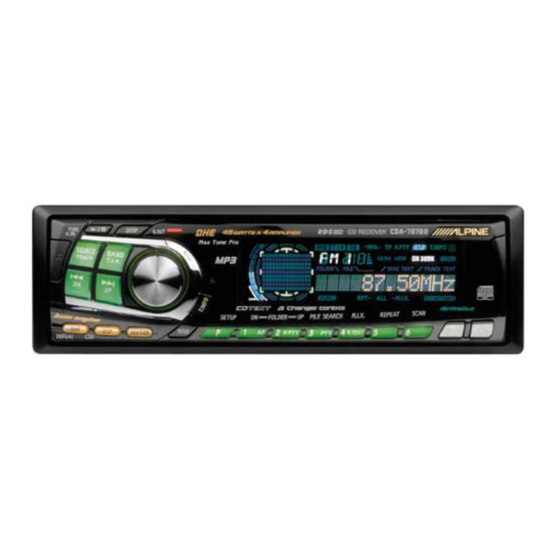
CDA-7878
FM/AM CD Receiver
Please read before using this equipment.
Veuillez lire avant d'utiliser cet appareil.
Léalo antes de utilizar este equipo.
ALPINE ELECTRONICS OF AUSTRALIA PTY. LTD.
6-8 Fiveways Boulevarde Keysborough,
Victoria 3173, Australia
Tel.: (03) 9769-0000
ALPINE ELECTRONICS GmbH
Kreuzerkamp 7-11 40878 Ratingen, Germany
Tel.: 02102-45 50
ALPINE ITALIA S.p.A.
Via C. Colombo 8, 20090 Trezzano Sul Naviglio
Tel.: 02-48 47 81
B.P. 50016 F-95945, Roissy, Charles De Gaulle
13 Tanners Drive, Blakelands, Milton Keynes
MI, Italy
R
ALPINE ELECTRONICS FRANCE S.A.R.L.
(RCS PONTOISE B 338 101 280)
98, Rue De La Belle Etoile, Z.I. Paris Nord Il
Cedex, France
Tel.: 01-48 63 89 89
ALPINE ELECTRONICS OF U.K., LTD.
MK14 5BU, U.K.
Tel.: 01908-61 15 56
ALPINE ELECTRONICS DE ESPAÑA, S.A.
Portal De Gamarra 36, Pabellón 32
01013 Vitoria (Alava)-Apdo. 133, Spain
Tel.: 34-45-283588
Designed by ALPINE Japan
Printed in Japan (Y)
68P41262Y55-O
EN
FR
ES
ES
IT
SE
Advertisement
Table of Contents

Related Manuals for Alpine CDA-7878


Summary of Contents for Alpine CDA-7878
- Page 1 Ontario L3R 9Z6, Canada Tel.: 1-800-ALPINE-1 (1-800-257-4631) Yamagata Printing Co., Ltd. 2-6-34, Takashima, Nishi-ku, Yokohama, Kanagawa, Japan ALPINE ELECTRONICS OF AUSTRALIA PTY. LTD. 6-8 Fiveways Boulevarde Keysborough, Victoria 3173, Australia Tel.: (03) 9769-0000 ALPINE ELECTRONICS GmbH Kreuzerkamp 7-11 40878 Ratingen, Germany Tel.: 02102-45 50...
- Page 2 More musical selections, more versatility, more convenience. An Alpine CD Changer adds more musical choices to your sound system. All models except CHM-S620 can be controlled from Alpine head units and deliver excellent sound quality. The CHA-S624 is a high- performance 6-disc changer with a new M DAC, Ai-NET compatibility, Optical Digital Output, 150 Disc Title Memory and CD TEXT.
-
Page 3: Table Of Contents
Contents Operating Instructions WARNING WARNING ... 2 CAUTION ... 2 PRECAUTIONS ... 2 Basic Operation Detaching the Front Panel ... 4 Attaching the Front Panel ... 4 Initial System Start-Up ... 4 Turning Power On and Off ... 5 Display Angle Adjustment ... 5 Adjusting Volume/Balance (Between Left and Right)/Fader (Between Front and Rear) ... -
Page 4: Warning
HALT USE IMMEDIATELY IF A PROBLEM APPEARS. Failure to do so may cause personal injury or damage to the product. Return it to your authorized Alpine dealer or the nearest Alpine Service Center for repairing. DO NOT MIX NEW BATTERIES WITH OLD BATTERIES. - Page 5 Use of special shape discs may cause damage to the mechanism. Installation Location Make sure the CDA-7878 will not be installed in a location subjected to: • Direct sun and heat • High humidity and water •...
-
Page 6: Basic Operation
Basic Operation POWER MODE/Audio Control Detaching the Front Panel Press and hold the POWER button for at least 2 seconds to turn off the power. Press the (Release) button at upper left side until the front panel pops out. Grasp the left side of the front panel and pull it out. -
Page 7: Turning Power On And Off
Turning Power On and Off Press the POWER button to turn on the unit. NOTE The unit can be turned on by pressing any other button except the c or CLK/TITLE button. The volume level gradually increases to the previous level you were listening to before the unit was turned off. -
Page 8: Displaying Time
Basic Operation TUNE g DN Displaying Time Press the CLK (clock) button repeatedly until the time is displayed. Each press changes the modes as follows: Radio mode Clock priority → → → Radio frequency mode CD Player/Changer modes Playing time Clock priority →... -
Page 9: Adjusting Display Contrast
Adjusting Display Contrast You can adjust the display contrast for better visibility. Press and hold the SETUP button for at least 2 seconds. Press the f UP button repeatedly to select “CONTRAST.” Each press of the f UP button changes the modes as shown: SUB-W (switching phase) ∗... -
Page 10: Switching The Phase Of The Subwoofer Output
Basic Operation g DN Switching the Phase of the Subwoofer Output You can switch the phase of the subwoofer output to NORMAL 0˚ or REVERSE 180˚. To select the desired phase. Press and hold the SETUP button for at least 2 seconds. -
Page 11: Sound (Beep) Guide Function
Sound (Beep) Guide Function This function will give audible feedback with varying tones depending upon the button pressed. Press and hold the SETUP button for at least 2 seconds. Press the f UP button repeatedly to select “BEEP.” Each press of the f UP button changes the modes as shown: SUB-W (switching phase) ∗... -
Page 12: Scroll Setting
Basic Operation SOURCE g DN f UP Scroll Setting This CD player can scroll the disc and track names recorded on CD-TEXT discs, as well as the text information of MP3 files, folder names, and ID3 tags. Press and hold the SETUP button for at least 2 seconds. -
Page 13: Setting The Aux Mode (V-Link)
Setting the AUX Mode (V-Link) You can input TV/video sound by connecting an optional Ai-NET/RCA Interface cable (KCA-121B) or Versatile Link Terminal (KCA-410C) to this component. Press and hold the SETUP button for at least 2 seconds. Press the f UP button repeatedly to select “AUX.”... -
Page 14: Defeat
To cancel Defeat, press and hold the DEFEAT button again for at least 2 seconds. Switching the Tuner Mode The CDA-7878 incorporates the MAX TUNE SQ for the highest quality tuner audio. Moreover, you can choose between 3 settings to suit your own personal sound preferences and usage. -
Page 15: Blackout Mode On And Off
Blackout Mode On and Off When the Blackout mode is turned on, the display will turn off to reduce power consumption. This additional power enhances the sound quality. Press and hold the B.OUT button for at least 2 seconds to start the blackout mode. By doing so the display will turn off. -
Page 16: Displaying The Title/Text
Basic Operation g DN Displaying the Title/Text It is possible to display the CD/Station title if the title has been previously inputted. For details, see “Titling Disc/Stations” (page 15). Text information, such as the disc name and the track name, will be displayed if playing a CD text compatible disc. -
Page 17: Titling Discs/Stations
Titling Discs/Stations It is possible to title your favorite CD's or radio stations. Press the TITLE button and select the title display mode. For details, see “Displaying the Title/Text” (page 14). Press and hold the TITLE button for at least 2 seconds. -
Page 18: Radio Operation
Radio Operation SOURCE TUNE/A.ME g DN Manual Tuning Press the SOURCE button until a radio frequency appears in the display. Press the BAND button repeatedly until the desired radio band is displayed. Each press changes the band: → FM1 → FM2 → AM Press the TUNE button repeatedly until “DX SEEK”... -
Page 19: Manual Storing Of Station Presets
Manual Storing of Station Presets Select the radio band and tune in a desired radio station you wish to store in the preset memory. Press and hold any one of the Preset buttons (1 through 6) for at least 2 seconds until the station frequency on the display blinks. -
Page 20: Cd Player Operation
CD Player Operation SOURCE g DN f UP Opening and Closing the Movable display Press the c button. The movable display will open. To close the movable display, press the c button again. The movable display will close. NOTES • Do not apply shock to the movable display when it is open as it may result in malfunction of the unit. -
Page 21: Music Sensor (Skip)
About the usable discs. We recommend using only compact discs containing the marks shown below. You can play CD-Rs (CD-Recordable)/CD-RWs (CD-ReWritable) for audio use on this unit. You can also play CD-Rs/CD-RWs containing MP3 formatted audio files. • Some of the following CDs may not play on this unit: Flawed CDs, CDs with fingerprints, CDs exposed to extreme temperatures or sunlight... -
Page 22: M.i.x. (Random Play)
CD Player Operation SOURCE M.I.X. (Random Play) Press the M.I.X. button in the play or pause mode. The tracks on the disc will be played back in a random sequence. After all the tracks on the disc have been played back once, the player will begin a new random sequence play until the M.I.X. -
Page 23: Controlling Cd Changer (Optional)
See the Multi-Changer Selection section on page 21 for selecting the CD Changers. NOTES • The controls on the CDA-7878 for CD Changer operation are operative only when a CD Changer is connected. • The “changer” indicator illuminates in the CD Changer mode. -
Page 24: Mp3 Operation
MP3 Operation SOURCE g DN f UP FOLDER DN Playing MP3 Files You can play CD-ROMs, CD-Rs, and CD-RWs containing MP3 files on this unit. Use the format compliant with ISO 9660 level 1 or level 2. For further information about playing or storing MP3 files, refer to pages 24 - 25 before using the unit. -
Page 25: M.i.x. (Random Play)
Fast Forward and Backward Press and hold the g DN or f UP button to quickly move backward or forward until you reach the desired section of the file. Note There is no audio output during fast forward/backward for MP3 files. Selecting Folders Press the FOLDER DN or FOLDER UP button to select the folder. -
Page 26: Setting The Range Of Mp3 File Selection
MP3 Operation TUNE g DN Setting the Range of MP3 File Selection You can set the range of MP3 file selection to “entire disc contents” or “folder contents only.” Press and hold the SETUP button for at least 2 seconds. Press the f UP button repeatedly to select DISC/FOLDER (track selection range). - Page 27 • Supported playback sampling rates and bit rates Sampling rates: 8 kHz - 44.1 kHz, bit rates: 8 - 320 kbps Note that for sampling rates such as 11,025 kHz, this device’s frame display (Page 14) may not display correctly. •...
-
Page 28: Adjusting The Sound Operation
Adjusting the Sound Operation g DN f UP Selecting DHE Mode Using digital signal processing technology, DHE (Digital Harmonics Enhancer) operates on harmonic components which determine tone and coloration of the musical instruments. The process operates independently on individual frequency bands, so each instrument or vocal will be distinct. -
Page 29: Adjusting And Storing The Equalizer Curve
Adjusting and Storing the Equalizer Curve You can modify the Equalizer settings to create a response curve more appealing to your personal taste. Select the equalizer characteristic to adjust. See "Equalizer Presets" (on page 26). Press the MODE button. The Frequency band indication in the display flashes. -
Page 30: The Crossover/Time Correction
Adjustments should be made according to the reproduction characteristics of the speakers. Depending on the speakers, a passive network may not be necessary. If you are unsure about this point, please consult your authorized Alpine dealer. 3 way mode Slope Level... -
Page 31: Time Correction
This is caused by the time delay between the sound reaching the listener’s right versus the left ear. To correct this, the CDA-7878 is able to delay the audio signal to the speakers closest to the listener. This effectively creates a perception of increased distance for those speakers. -
Page 32: Adjusting And Storing The Crossover/Time Correction
Adjusting the Sound Operation g DN f UP Adjusting and Storing the Crossover/ Time Correction Before performing the following procedures, refer to “Crossover” (page 28) and “Time Correction” (page 29). Press and hold the DIVIDER button for at least 2 seconds. -
Page 33: Recalling The Stored Crossover/Time Correction Settings
Adjusting the Time Correction Press the BAND button to select the channel to be adjusted. 2 way system → → range (L) range (R) Rear high∗ Rear high ← ← range (R) range (L) 3 way system Low range Low range →... -
Page 34: Customized Sound Database
Rotate the Audio Control knob to select the front speaker type, then press the MODE button. → 10cm ← → 13 cm ← → 16 cm ← (DDDrive is an Alpine product) Set the separate tweeter Rotate the Audio Control knob to select whether the unit has a separate tweeter or not, then press the MODE button. -
Page 35: Xm Radio Operation
XM’s website at www.xmradio.com or call 1-877-XMRADIO. An optional XM Satellite Radio Receiver (TUA- T020XM) may be connected to the CDA-7878 if it is Ai-NET compatible. With an XM Receiver connected to the Ai-NET input of the CDA-7878, the XM Receiver will be controllable from the CDA-7878. -
Page 36: Checking The Xm Radio Id Number
XM Radio Operation TUNE/CAT g DN f UP Checking the XM Radio ID Number You need to provide XM with the unique XM Radio ID number for your XM Radio Receiver in order to subscribe to XM's programming. This number is an 8 character alphanumeric number that is printed on a label directly on the XM Receiver. -
Page 37: Receiving Stored Xm Channels
Receiving Stored XM Channels Press the BAND button to select the desired band (XM1 or XM2). → FM1 → FM2 → XM1 → XM2 → AM Press the channel Preset button that has your desired satellite channel in memory. Category Search Category Search functionality allows you to search for a specific channel by the category of programming it offers, or to surf within a given... -
Page 38: Remote Control Operation
Remote Control Operation Controls on Remote Control 1 Power Button Press the button to turn the power on/off. 2 Source Button Press to select the audio source. 3 -/J Button Press the button to switch between the Play and Pause modes for CD. 4 ANGLE 89 Buttons Press the button to adjust the angle of the movable display. -
Page 39: Battery Replacement
Battery Replacement Applicable battery: Use two “AAA” sized dry batteries or equivalent. Opening the battery cover Slide out the battery cover while firmly pressing the direction of arrow. Replacing the battery Put the batteries in the case observing the polarities as illustrated. Closing the cover Push the cover as illustrated until a click is heard. -
Page 40: Operating The Audio Processor
Remote Control Operation Operating the Audio Processor Steps Press the A.PROC Normal → → button to mode select the mode. Press the 8 or 9 button to select the mode. Adjusting/Storing the EQ curve Adjusting Perform the procedure above to select the desired equalizer characteristics. -
Page 41: Storing The Settings
Adjusting/Storing the CROSSOVER/TIME CORRECTION Adjusting Select the Crossover mode from the table above. Press the ENTER button to activate the Adjusting mode. Press the BAND button to select the channel (LPF/HPF) that you want to adjust. Press the g DN or f UP button to select the cut-off frequency. -
Page 42: Information
This guide will help you isolate the problem if the unit is at fault. Otherwise, make sure the rest of your system is properly connected or consult your authorized Alpine dealer. Basic No function or display. • Vehicle's ignition is off. -
Page 43: Indication For Cd Changer
ERROR - 01 • Malfunction in the CD Changer. - Consult your Alpine dealer. Press the magazine eject button and pull out the magazine. Check the indication. Insert the magazine again. If the magazine cannot be pulled out, consult your Alpine dealer. - Page 44 Information Indication for XM Radio Mode ANTENNA • The XM antenna is not connected to the XM radio module. - Check whether the XM antenna cable is attached securely to the XM radio module. UPDATING • Radio is being updated with latest encryption code. - Wait until encryption code is being updated.
-
Page 45: Specifications
Specifications FM TUNER SECTION Tuning Range 87.7 – 107.9 MHz Mono Usable Sensitivity 9.3 dBf (0.8 µV/75 ohms) 50 dB Quieting Sensitivity 13.5 dBf (1.3 µV/75 ohms) Alternate Channel Selectivity 80 dB Signal-to-Noise Ratio 80 dB Stereo Separation 45 dB Capture Ratio 2.0 dB AM TUNER SECTION... -
Page 46: Installation And Connections
(e.g. on-board computer). Do not tap into these leads to provide power for this unit. When connecting the CDA-7878 to the fuse box, make sure the fuse for the intended circuit of the CDA-7878 has the appropriate amperage. -
Page 47: Installation
Connect each input lead coming from an amplifier or equalizer to the corresponding output lead coming from the left rear of the CDA-7878. Connect all other leads of the CDA-7878 according to details described in the CONNECTlONS section. -
Page 48: Connections
• Connect the ground lead securely to a bare metal spot (remove any paint, dirt or grease if necessary) of the car chassis. • If you add an optional noise suppressor, connect it as far away from the unit as possible. Your Alpine dealer carries various noise suppressors, contact them for further information. - Page 49 1 Antenna Receptacle 2 Power Antenna Lead (Blue) Connect this lead to the +B terminal of your power antenna, if applicable. NOTE This lead should be used only for controlling the vehicle's power antenna. Do not use this lead to turn on an amplifier or a signal processor, etc.
Need help?
Do you have a question about the CDA-7878 and is the answer not in the manual?
Questions and answers